Introduction
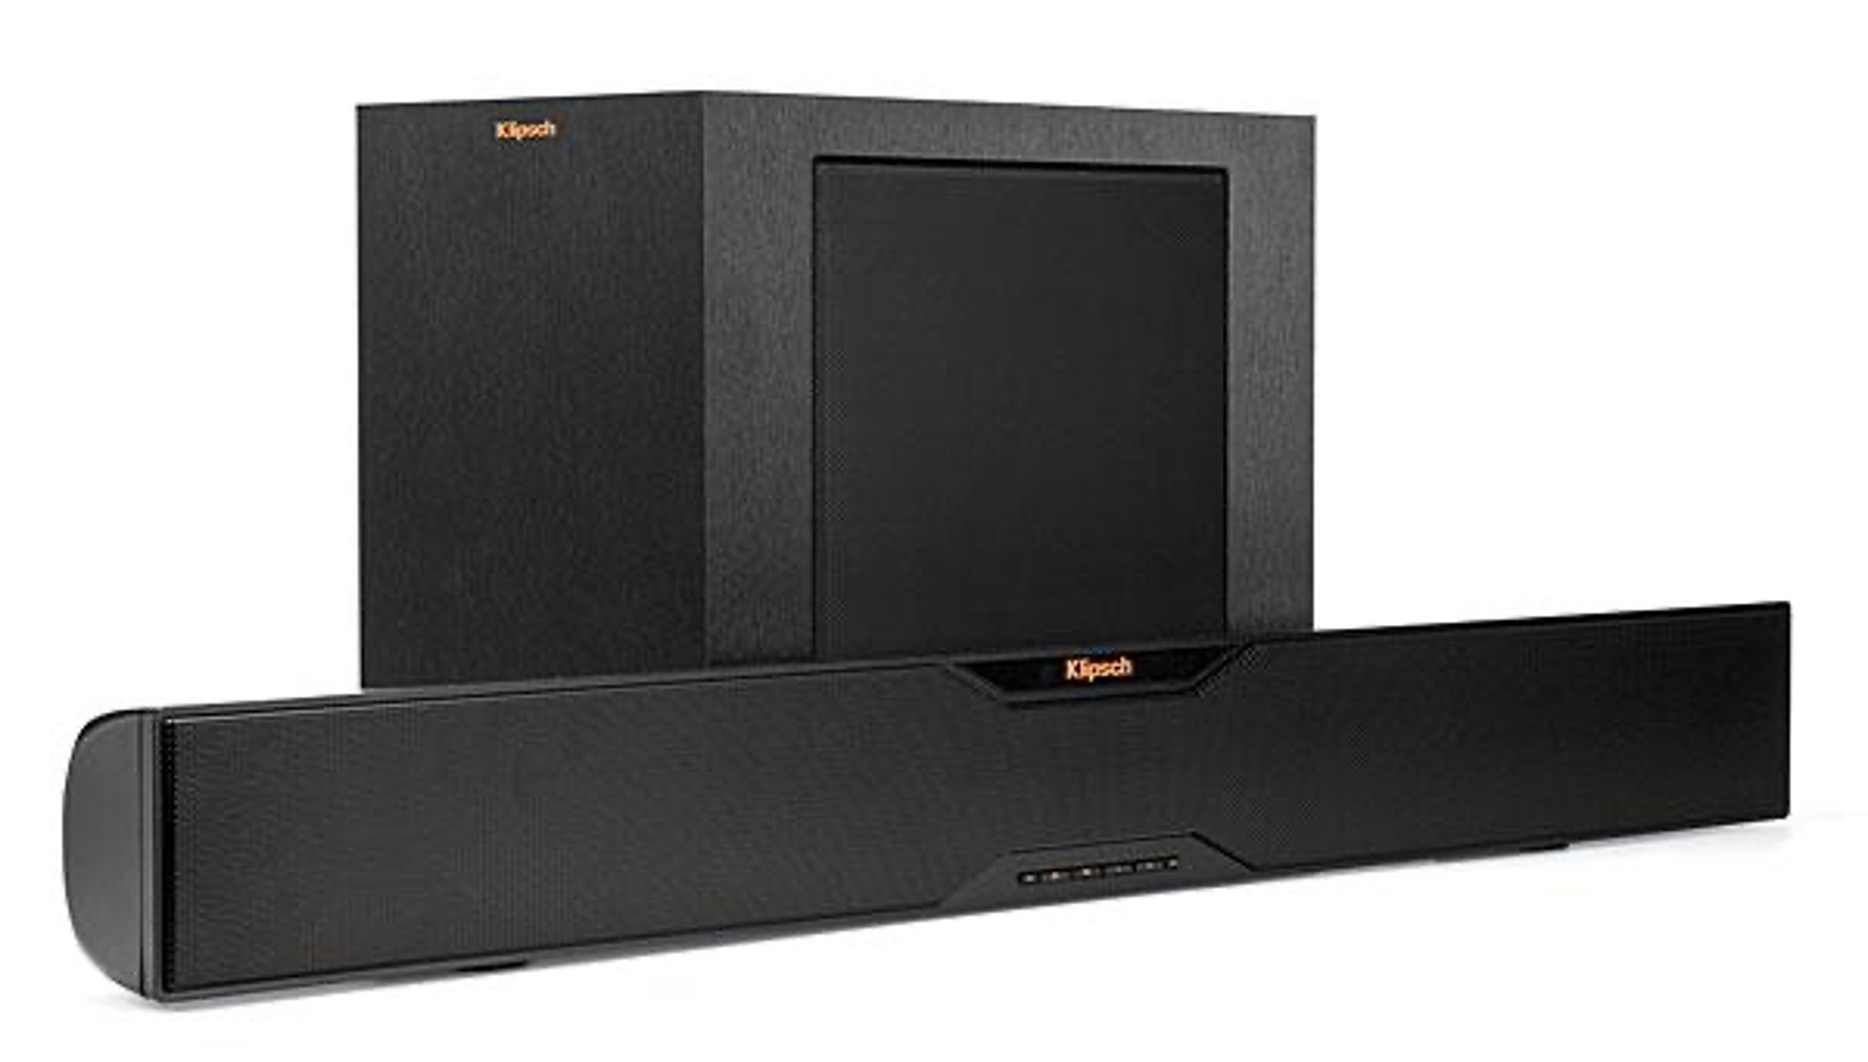
Welcome to our guide on how to connect a Klipsch subwoofer to a soundbar. Soundbars have become popular choices for enhancing the audio experience of TVs, providing better sound quality and immersive movie or music experiences. However, if you feel that your soundbar is lacking in the bass department, a subwoofer can be a valuable addition. Klipsch is a renowned audio brand, known for their high-quality subwoofers that can complement any soundbar setup.
Connecting a subwoofer to a soundbar may seem like a daunting task, especially if you’re not familiar with audio equipment or cabling. But fear not, we’re here to guide you through the process step by step, making it easy for you to enjoy deep bass and impactful sound.
In this guide, we’ll provide you with simple and straightforward instructions on how to connect your Klipsch subwoofer to your soundbar. We’ll walk you through each step, from gathering the necessary equipment to adjusting the settings for optimal performance. Whether you’re a novice or an experienced audio enthusiast, this guide will help you achieve the desired outcome.
Please note that the specific steps and connections may vary depending on the model of your Klipsch subwoofer and soundbar. However, the general principles and concepts outlined in this guide should apply to most setups.
So let’s dive in and explore how to bring your soundbar and Klipsch subwoofer together in perfect harmony.
Step 1: Gather the necessary equipment
Before diving into the process of connecting your Klipsch subwoofer to your soundbar, it’s essential to gather all the necessary equipment. Having everything you need at hand will ensure a smooth and hassle-free setup. Here’s a list of the equipment you’ll need:
1. Klipsch subwoofer: You’ll need a Klipsch subwoofer that’s compatible with your soundbar. Ensure that the subwoofer is in good working condition and has all the required cables and power supply.
2. Soundbar: Make sure you have a compatible soundbar that supports the connection of an external subwoofer. Consult your soundbar’s user manual to verify its compatibility.
3. Audio cable: You’ll need an audio cable to connect the subwoofer to the soundbar. The type of cable you’ll require depends on the available ports on both the subwoofer and the soundbar. Common options include RCA cables, 3.5mm AUX cables, or HDMI cables. Verify the input and output ports of the subwoofer and soundbar to determine the appropriate cable type.
4. Power supply: Ensure you have access to power outlets near both the soundbar and the subwoofer. Most subwoofers require their own power source, so make sure you have an available power outlet for the subwoofer’s power supply.
5. User manuals: Keep the user manuals for both the soundbar and the subwoofer handy. They contain valuable information specific to your models, such as port locations, settings configurations, and troubleshooting tips.
By having all the necessary equipment ready, you’ll be well-prepared to proceed with the setup process. Gathering the required items in advance will save you time and prevent any unnecessary interruptions during the connection process.
In the next step, we’ll discuss the importance of checking the compatibility between your soundbar and Klipsch subwoofer.
Step 2: Check the compatibility of the soundbar and subwoofer
Before proceeding with the connection process, it’s crucial to ensure that your soundbar and Klipsch subwoofer are compatible with each other. This will help you avoid any compatibility issues and ensure a successful connection. Here’s what you need to do:
1. Consult the user manuals: Refer to the user manuals of both your soundbar and subwoofer to determine their compatibility. Look for specific information regarding subwoofer connectivity options and supported models. Pay close attention to the types of audio cables that are recommended for connecting the subwoofer to the soundbar.
2. Check the subwoofer output port: Examine the back or underside of your soundbar to locate the subwoofer output port. It is typically labeled as “Sub Out” or “LFE Out.” Ensure that your soundbar has this dedicated output port for connecting the subwoofer.
3. Verify the subwoofer input port: Check the back of your subwoofer for the input port. It is usually labeled as “Sub In” or “LFE In.” Make sure that your subwoofer has this corresponding input port that matches the output port on your soundbar.
4. Review the specifications: Take a look at the technical specifications of your soundbar and subwoofer. Verify that they are compatible in terms of power requirements, impedance, and frequency response. Mismatched specifications can result in audio distortion or damage to the equipment.
By confirming the compatibility between your soundbar and Klipsch subwoofer, you can proceed confidently to the next step of the connection process. If you find any inconsistencies or realize that your equipment is not compatible, consider seeking alternative solutions, such as investing in a different subwoofer or exploring compatibility options through additional adapters or converters.
Now that you’ve ensured the compatibility of your soundbar and subwoofer, let’s move on to locating the subwoofer output port on your soundbar in the next step.
Step 3: Locate the subwoofer output port on the soundbar
In this step, we will focus on locating the subwoofer output port on your soundbar. This is an important step as it will help you identify the specific connection point for the subwoofer. Here’s what you need to do:
1. Check the user manual: Refer to the user manual of your soundbar to locate a diagram or description of the ports available. Look for any labels or indications of a dedicated subwoofer output port. This information will help you locate the correct port on your soundbar.
2. Examine the soundbar: Inspect the back or underside of your soundbar for any visible ports. The subwoofer output port is often labeled as “Sub Out” or “LFE Out.” It may also be color-coded or have a distinctive shape to indicate its purpose. Take your time to carefully examine all the ports to find the one specifically designed for the subwoofer.
3. Consider additional connection options: Some soundbars may offer multiple subwoofer output ports or alternative connectivity options, such as wireless connectivity or proprietary ports. If you have multiple subwoofer output ports, choose the one that suits your setup preferences.
4. Make note of the port location: Once you have located the subwoofer output port on your soundbar, make a mental note or mark its position for easier access during the connection process. This will save you time and eliminate any confusion when connecting the subwoofer.
By successfully identifying the subwoofer output port on your soundbar, you are now ready to move on to the next step of connecting the subwoofer to the soundbar using an audio cable. It is important to ensure that you have a compatible cable and understand the appropriate connection method, which will be covered in the upcoming step.
Now that you’ve located the subwoofer output port on your soundbar, let’s proceed to the next step of connecting the subwoofer using an audio cable.
Step 4: Connect the subwoofer to the soundbar using an audio cable
Now that you’ve located the subwoofer output port on your soundbar, it’s time to connect your Klipsch subwoofer to the soundbar using an audio cable. This step is crucial as it establishes the physical connection between the two components and allows the subwoofer to receive audio signals from the soundbar. Follow these steps to make the connection:
1. Select the appropriate audio cable: Based on the available ports on your soundbar and subwoofer, choose the right audio cable. Common options include RCA cables, 3.5mm AUX cables, or HDMI cables. Ensure that the cable you choose is compatible with both the soundbar’s subwoofer output port and the subwoofer’s input port.
2. Connect one end of the cable to the subwoofer: Take one end of the selected audio cable and plug it into the subwoofer’s input port. Make sure to align the connectors properly and secure the connection.
3. Connect the other end of the cable to the soundbar: Take the other end of the audio cable and connect it to the subwoofer output port on your soundbar. Again, ensure a secure and proper alignment of the connectors.
4. Check the cable connections: Once the cable is connected to both the subwoofer and soundbar, give the cable a slight tug to ensure that it’s securely in place. Loose connections can lead to audio interruptions or degraded sound quality.
5. Position the subwoofer: Place the subwoofer in the desired location near your soundbar. Keep in mind that the subwoofer is primarily responsible for producing low-frequency sounds, so it’s best to position it on the floor or near a wall for enhanced bass response.
By completing these steps, you have successfully connected your Klipsch subwoofer to your soundbar using an audio cable. However, the connection is not complete without powering on both the subwoofer and the soundbar, which we will cover in the next step.
Now that your subwoofer is connected to your soundbar, it’s time to power on both devices and fine-tune the settings to optimize your audio experience.
Step 5: Power on the subwoofer and soundbar
After connecting the subwoofer to the soundbar, it’s time to power on both devices to activate the audio connection. This step is crucial as it allows the subwoofer and soundbar to synchronize and work together seamlessly. Follow these steps to power on your subwoofer and soundbar:
1. Locate the power buttons: Find the power buttons on both the subwoofer and the soundbar. Typically, the power button can be found on the front or side of the devices. Familiarize yourself with the power buttons before proceeding.
2. Power on the subwoofer: Press the power button on the subwoofer to turn it on. Some subwoofers may have a standby mode, in which case you may need to press the power button twice or hold it down for a few seconds to activate it.
3. Power on the soundbar: Press the power button on the soundbar to turn it on. The soundbar may have indicator lights or a display that shows that it is powered on.
4. Verify the connection: Once both devices are powered on, check for any LED indicators or display notifications on the subwoofer and soundbar to confirm that they are connected and working correctly. Some soundbars may have a specific indicator light to signify a successful subwoofer connection.
5. Adjust the volume: Set the volume level of the soundbar to a moderate level to begin with. You can later fine-tune the balance between the soundbar and the subwoofer to suit your preferences.
By powering on both the subwoofer and soundbar, you have completed the connection process and enabled the audio output from your soundbar to be properly routed to the subwoofer. However, to optimize the audio performance, it is essential to fine-tune the settings on both devices, which we will cover in the next step.
Now that your subwoofer and soundbar are powered on, let’s move on to adjusting the settings to ensure optimal audio quality and performance.
Step 6: Adjust the settings on the soundbar and subwoofer
To achieve the best audio experience with your Klipsch subwoofer and soundbar setup, it’s important to fine-tune the settings on both devices. By adjusting the settings, you can optimize the audio balance, volume levels, and other audio-specific preferences. Follow these steps to adjust the settings:
1. Access the soundbar settings: Refer to the user manual of your soundbar to understand how to access and navigate its settings menu. This can typically be done using the soundbar’s remote control or by buttons on the soundbar itself. Explore the settings menu to adjust parameters such as equalizer settings, audio modes, and volume levels.
2. Configure subwoofer settings: Many soundbars offer specific settings for subwoofer adjustment. Navigate to the subwoofer settings in the soundbar menu and adjust the subwoofer volume level to your desired preference. This will help ensure that the bass produced by the subwoofer is balanced with the overall sound output.
3. Experiment with audio modes: Some soundbars provide various audio modes, such as movie, music, or gaming modes. Try out these different modes to find the one that suits your content consumption the best. Each mode may have its own preset equalizer settings, enhancing specific frequencies and providing an optimized audio output.
4. Fine-tune bass and treble levels: If your soundbar allows individual adjustment of bass and treble levels, experiment with these settings to get the ideal audio balance. Increasing bass levels can enhance the subwoofer’s impact, while adjusting treble levels can enhance clarity in higher frequencies.
5. Test different audio sources: Play various audio sources, such as movies, music, or games, to ensure that the settings you’ve adjusted apply to different content types. Make note of any adjustments you may need to make on specific content to achieve the desired audio quality.
Remember that the optimal audio settings may vary based on personal preferences and the environment in which you are using your soundbar and subwoofer. Take your time to explore and experiment with the settings until you find the best configuration that suits your audio needs.
In the final step, we’ll test the connection between the subwoofer and soundbar to ensure everything is functioning as expected.
Now that you’ve adjusted the settings on your soundbar and subwoofer, we’re ready to test the connection and optimize the audio settings for your specific preferences.
Step 7: Test the connection and adjust the audio settings if needed
Now that you’ve connected your Klipsch subwoofer to your soundbar and adjusted the settings, it’s time to test the connection and fine-tune the audio settings if necessary. Testing the connection will ensure that both the subwoofer and soundbar are working together harmoniously. Follow these steps to test the connection and make any further adjustments:
1. Play audio content: Start by playing your favorite audio content, such as a movie, music, or a video game, that contains deep bass elements. This will help you evaluate the performance of your subwoofer and soundbar setup.
2. Listen for clarity and impact: Pay attention to the audio output and assess how the subwoofer enhances the overall sound experience. Listen for clarity in mid and high frequencies as well as the impact and depth of the bass produced by the subwoofer.
3. Adjust the subwoofer volume: If you feel that the subwoofer’s volume is too low or overpowering, adjust the subwoofer volume level accordingly. A balanced subwoofer volume will ensure that the bass complements the other audio frequencies without overpowering them.
4. Fine-tune the soundbar settings: While listening to the audio content, you may find the need to fine-tune the soundbar settings further. Make adjustments to the equalizer, audio modes, or individual bass and treble levels to enhance the audio experience to your liking.
5. Re-test the connection: After making any adjustments, re-test the connection by playing different audio content. Assess the overall audio quality, the impact of the subwoofer, and ensure that the settings adjustments have improved the audio balance.
6. Repeat the adjustment process if necessary: If you’re still not satisfied with the audio performance, repeat the adjustment process and experiment with different settings until you achieve your desired audio experience.
Remember, the goal is to have a well-balanced sound that enhances the audio experience without overpowering other frequencies. Take your time to fine-tune the settings to match your personal preferences and the specific audio content you consume.
By testing the connection and adjusting the audio settings as needed, you can fully optimize your Klipsch subwoofer and soundbar setup to deliver a rich and immersive audio experience.
Congratulations! You’ve successfully connected and configured your Klipsch subwoofer with your soundbar. Enjoy your enhanced audio experience!
Conclusion
Congratulations on successfully connecting your Klipsch subwoofer to your soundbar! By following the steps outlined in this guide, you have unlocked the potential for a more immersive audio experience, with deep and impactful bass.
We started by gathering the necessary equipment and verifying the compatibility of your soundbar and subwoofer. Then, we located the subwoofer output port on the soundbar and connected the two devices using an audio cable. After powering on both the subwoofer and soundbar, we adjusted the settings to fine-tune the audio output.
By testing the connection and making any necessary adjustments, you can customize the audio experience to your preferences. Take the time to explore different audio sources and content types to truly appreciate the enhanced sound quality brought by your Klipsch subwoofer.
Remember, every room and listener is unique, so don’t hesitate to experiment with the settings to achieve the perfect balance between the soundbar and subwoofer. Whether you’re enjoying movies, listening to music, or playing games, the added depth and richness provided by the subwoofer will elevate your audio experience to new heights.
If you encounter any issues during the setup process or have specific questions about your Klipsch subwoofer or soundbar, consult the user manuals or reach out to the Klipsch customer support team for assistance.
Thank you for choosing Klipsch and investing in a superior audio experience. We hope this guide has been helpful in connecting your Klipsch subwoofer to your soundbar, and we’re confident that you’ll enjoy the immersive sound that awaits you.


