Introduction
Welcome to the world of smart thermostats! As technology continues to advance, our homes are becoming smarter and more connected than ever before. Among the many smart home devices available, smart thermostats have gained popularity due to their ability to optimize energy usage and enhance comfort.
In this article, we will guide you through the process of installing a smart thermostat in your home. Whether you are upgrading from a traditional thermostat or simply looking to embrace the convenience and energy-saving benefits of smart technology, we’ve got you covered.
Installing a smart thermostat may seem daunting at first, but with a little bit of guidance and the right tools, you’ll be able to enjoy the benefits in no time. Before we delve into the installation process, let’s understand what exactly a smart thermostat is and why you might want to consider installing one.
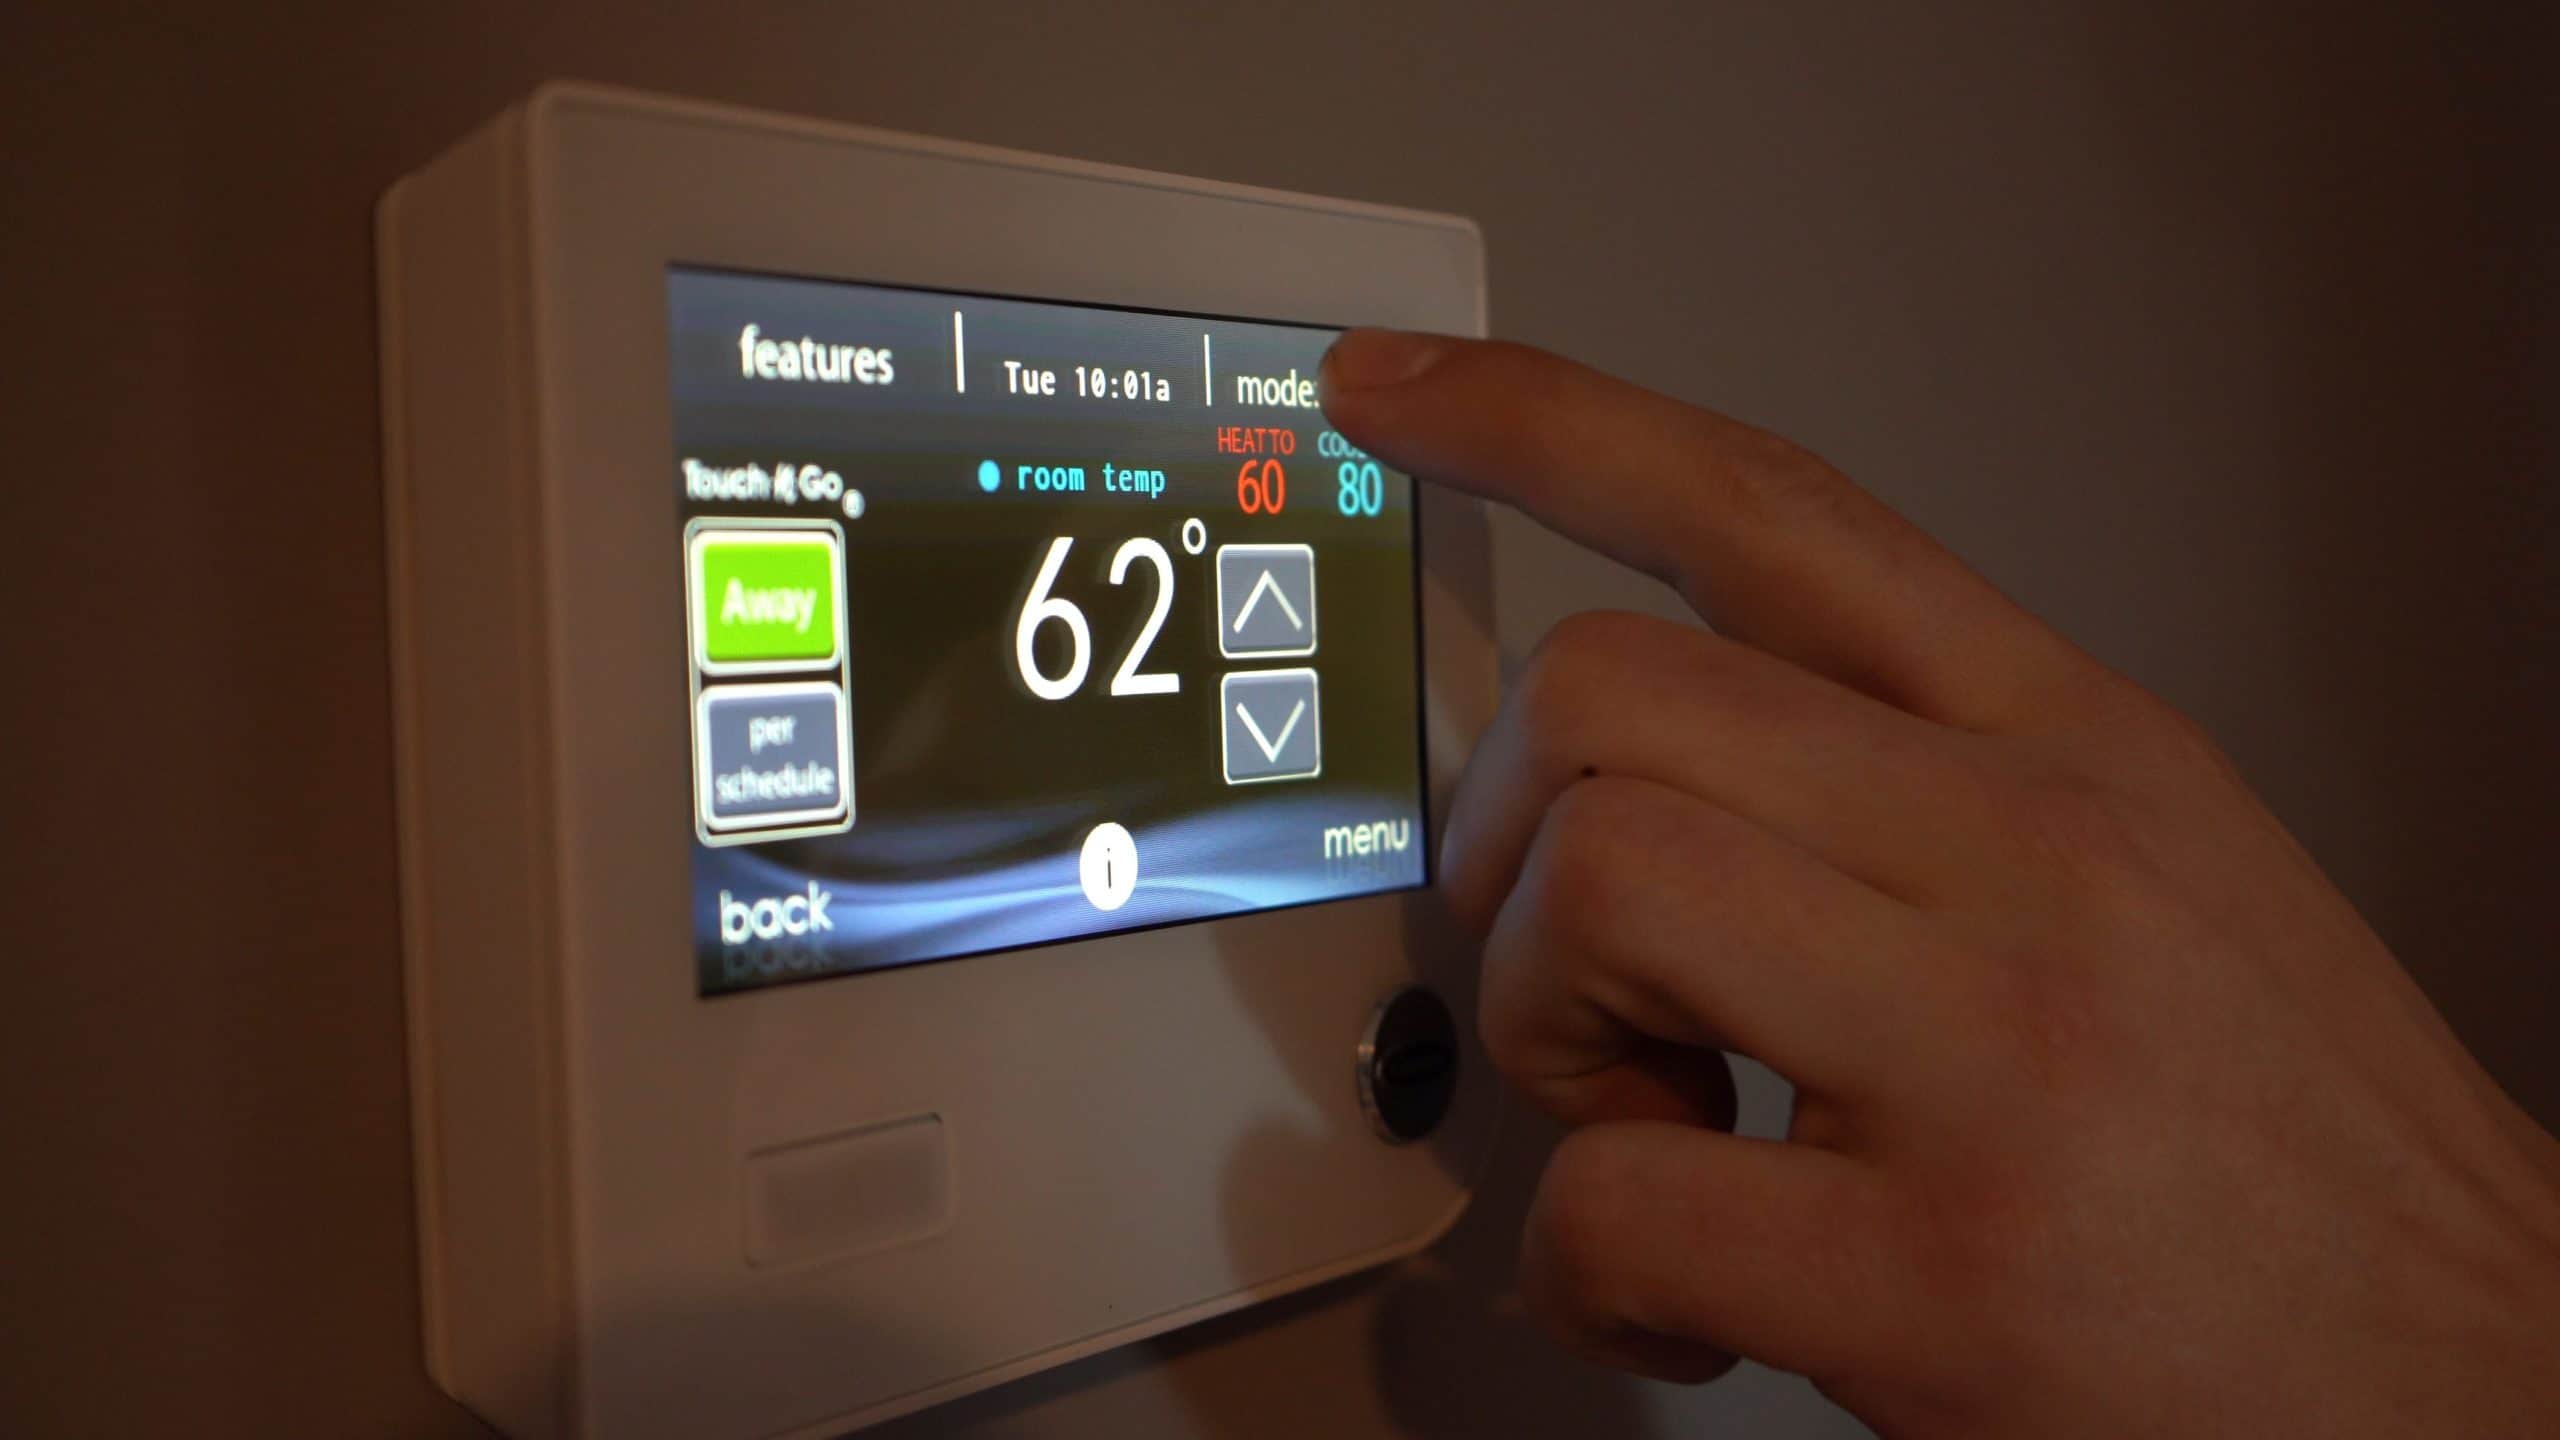
A smart thermostat is a device that allows you to control and monitor the temperature of your home remotely using your smartphone or other internet-connected devices. With the built-in sensors and advanced algorithms, smart thermostats can learn your daily schedule, adjust temperature settings based on occupancy, and even provide energy usage reports.
Now, you might be wondering, why should I install a smart thermostat? The answer lies in the energy and cost savings it can bring. By intelligently managing your heating and cooling system, a smart thermostat can optimize your energy usage, resulting in lower utility bills. Additionally, it allows you to have more control over your home’s comfort, with the flexibility to adjust settings from anywhere at any time.
Another advantage of smart thermostats is their compatibility with other smart home devices. Integration with voice assistants, such as Amazon Alexa or Google Assistant, allows you to control your thermostat using voice commands, creating a truly connected and convenient home environment.
In the following sections, we will walk you through the step-by-step process of installing your new smart thermostat. From choosing the right thermostat for your home to troubleshooting common installation issues, we’ve got you covered. So, let’s get started on this exciting journey to a smarter, more energy-efficient home!
Choosing the Right Smart Thermostat for Your Home
Choosing the right smart thermostat for your home is an essential first step in the installation process. With so many options available on the market, it’s important to consider your specific needs and requirements. Here are some factors to consider when selecting a smart thermostat:
- Compatibility: Before making a purchase, ensure that the smart thermostat you choose is compatible with your heating and cooling system. Some thermostats may not work with older or unique systems, so it’s crucial to check compatibility.
- Features: Different smart thermostats offer various features and functionalities. Consider the features that are important to you, such as scheduling options, learning capabilities, energy usage reports, and compatibility with voice assistants or other smart home devices.
- User Interface: Take into account the user interface of the smart thermostat. Look for a device that has an intuitive and easy-to-navigate interface, both on the thermostat itself and on the accompanying mobile app.
- Design and Compatibility: Consider the design and compatibility of the smart thermostat with your home decor. Some thermostats offer interchangeable faceplates or sleek designs that blend seamlessly with your home’s aesthetics.
- Budget: Determine your budget for a smart thermostat and choose one that fits within your price range. Remember that while some thermostats may have a higher upfront cost, they can provide long-term energy savings that offset the initial investment.
It’s also worth researching and reading reviews about different smart thermostat brands and models. Look for trusted manufacturers that offer reliable products with positive customer feedback.
Once you have considered these factors and narrowed down your options, you will be ready to make an informed decision about which smart thermostat to purchase. Remember, choosing the right smart thermostat will ensure that it meets your needs and provides the desired functionality for your home.
Checking Compatibility with Your Heating and Cooling System
Once you have chosen the right smart thermostat for your home, the next step is to check its compatibility with your existing heating and cooling system. Not all smart thermostats are compatible with every HVAC system, so it’s crucial to ensure compatibility before proceeding with the installation. Here’s how you can check:
- Research: Start by consulting the compatibility information provided by the smart thermostat manufacturer. Visit their website or product documentation to find out which heating and cooling systems the thermostat is designed to work with. Look for any specific requirements or limitations mentioned by the manufacturer.
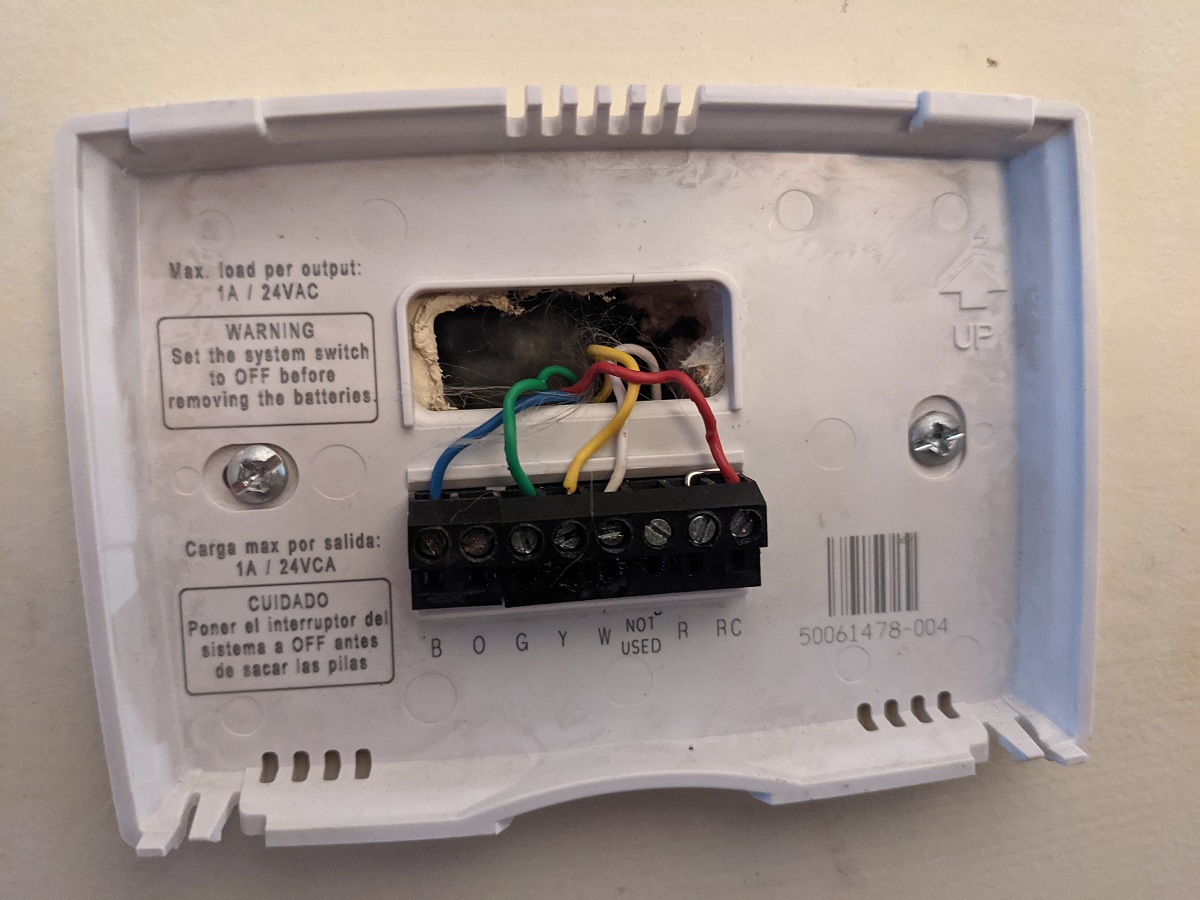
- Check Wiring Compatibility: Take a look at the wiring of your current thermostat. Smart thermostats typically require a C-wire (common wire) to function properly. If your existing thermostat doesn’t have a C-wire, check if your HVAC system has an unused wire that can be repurposed as a C-wire. If not, you may need to consider alternative options such as using a power adapter or seeking professional assistance to install a C-wire.
- Voltage Compatibility: Verify that the voltage requirements of the smart thermostat match those of your heating and cooling system. Most HVAC systems operate on 24-volt systems, but it’s important to double-check to ensure compatibility.
- Special Systems: If you have a specialized heating or cooling system, such as a heat pump or multi-zone system, ensure that the smart thermostat you have chosen supports these specific configurations. Some smart thermostats are designed to work with these systems, while others may not be compatible.
If you’re unsure about the compatibility or have any questions, don’t hesitate to reach out to the smart thermostat manufacturer or consult a professional HVAC technician. They can provide valuable guidance and help you determine if the smart thermostat is compatible with your heating and cooling system.
Ensuring compatibility between your HVAC system and the smart thermostat is essential to ensure a successful installation and optimal performance. Taking the time to check compatibility beforehand will save you from any potential issues or setbacks during the installation process.
Gathering the Necessary Tools and Supplies
Before you begin the installation of your smart thermostat, it’s important to gather all the necessary tools and supplies. Having everything ready beforehand will make the installation process smoother and more efficient. Here’s a list of the tools and supplies you’ll likely need:
- Screwdriver: A screwdriver is essential for removing the cover plates and loosening or tightening screws during the installation process. Depending on the type of screws used, you may need both a flathead and a Phillips head screwdriver.
- Wire Labels: It’s a good idea to use wire labels to mark the wiring connections before removing the old thermostat. This will make it easier to identify and reconnect the wires correctly later on.
- Wire Strippers: Wire strippers are useful for removing the insulation from the wires, exposing the bare copper ends. This will allow you to connect the wires securely to the terminals on the new smart thermostat.
- Level: To ensure that your new thermostat is mounted straight and level on the wall, a small level or a leveling app on your smartphone can come in handy.
- Drill and Drill Bits: If you need to mount the smart thermostat on a wall surface that requires pre-drilling holes, make sure you have a drill and the appropriate drill bits available.
- Electrical Tape: Electrical tape can be used to secure any loose or exposed wires and prevent them from coming into contact with other wires or metal surfaces.
- Wire Nuts: If you need to extend or join wires, wire nuts can be used to securely connect them together. Make sure you choose wire nuts that are suitable for the gauge of your wires.
- Screws and Anchors: If the mounting location for your smart thermostat requires screws and anchors, make sure you have the appropriate size and type available.
- Wi-Fi Network Information: You’ll need the name (SSID) and password of your home Wi-Fi network to connect your smart thermostat to the internet and enable remote control through the associated mobile app.
It’s a good idea to gather all these tools and supplies in one place before you start the installation process. This will save you time and prevent any interruptions or delays during the installation.
Remember, it’s always better to be prepared with all the necessary tools and supplies than to encounter an unexpected obstacle during the installation process. By having everything ready, you’ll be able to complete the installation smoothly and efficiently.
Turning Off the Power to Your HVAC System
Before you begin the installation process of your smart thermostat, it is essential to turn off the power to your HVAC (heating, ventilation, and air conditioning) system. This step is crucial to ensure your safety and avoid any electrical mishaps during the installation. Here’s how you can turn off the power:
- Locate the Circuit Breaker: The circuit breaker panel is typically located in the basement, utility room, or garage. It houses the individual circuit breakers for various electrical circuits in your home, including the one that controls your HVAC system.
- Identify the HVAC Circuit Breaker: Look for the circuit breaker that is labeled for your heating and cooling system. It may be marked as “HVAC,” “Furnace,” or something similar.
- Switch Off the Circuit Breaker: Once you have identified the correct circuit breaker, switch it to the “Off” position. This will cut off the power supply to your HVAC system.
- Confirm Power Disconnection: To ensure that the power is completely off, go to your thermostat and verify that it is no longer functioning. The display should be blank, and there should be no power to the thermostat or the heating/cooling equipment.
- Optional: Double-Check with a Voltage Tester: If you want to be extra cautious, you can use a voltage tester to verify that there is no electricity flowing to the wires connected to your current thermostat. Follow the instructions provided with the voltage tester to ensure safe usage.
It is crucial to follow this step to avoid the risk of electrical shock while working on your HVAC system. Turning off the power ensures that you can safely handle the wiring and make the necessary connections with your smart thermostat.
Remember, safety should always be your top priority when working with any electrical components in your home. If you are unsure about turning off the power or have any concerns, it is advisable to seek assistance from a qualified professional.
Once you have turned off the power and confirmed that the electricity is disconnected, you are ready to proceed with removing the old thermostat and installing your new smart thermostat.
Removing the Old Thermostat
Now that you have turned off the power to your HVAC system, it’s time to remove the old thermostat. Follow these steps to safely remove the old thermostat:
- Remove the Cover Plate: Gently remove the cover plate of the thermostat by either unscrewing it or carefully prying it off, depending on the type of thermostat you have. Be cautious not to damage any wires that may be behind the cover.
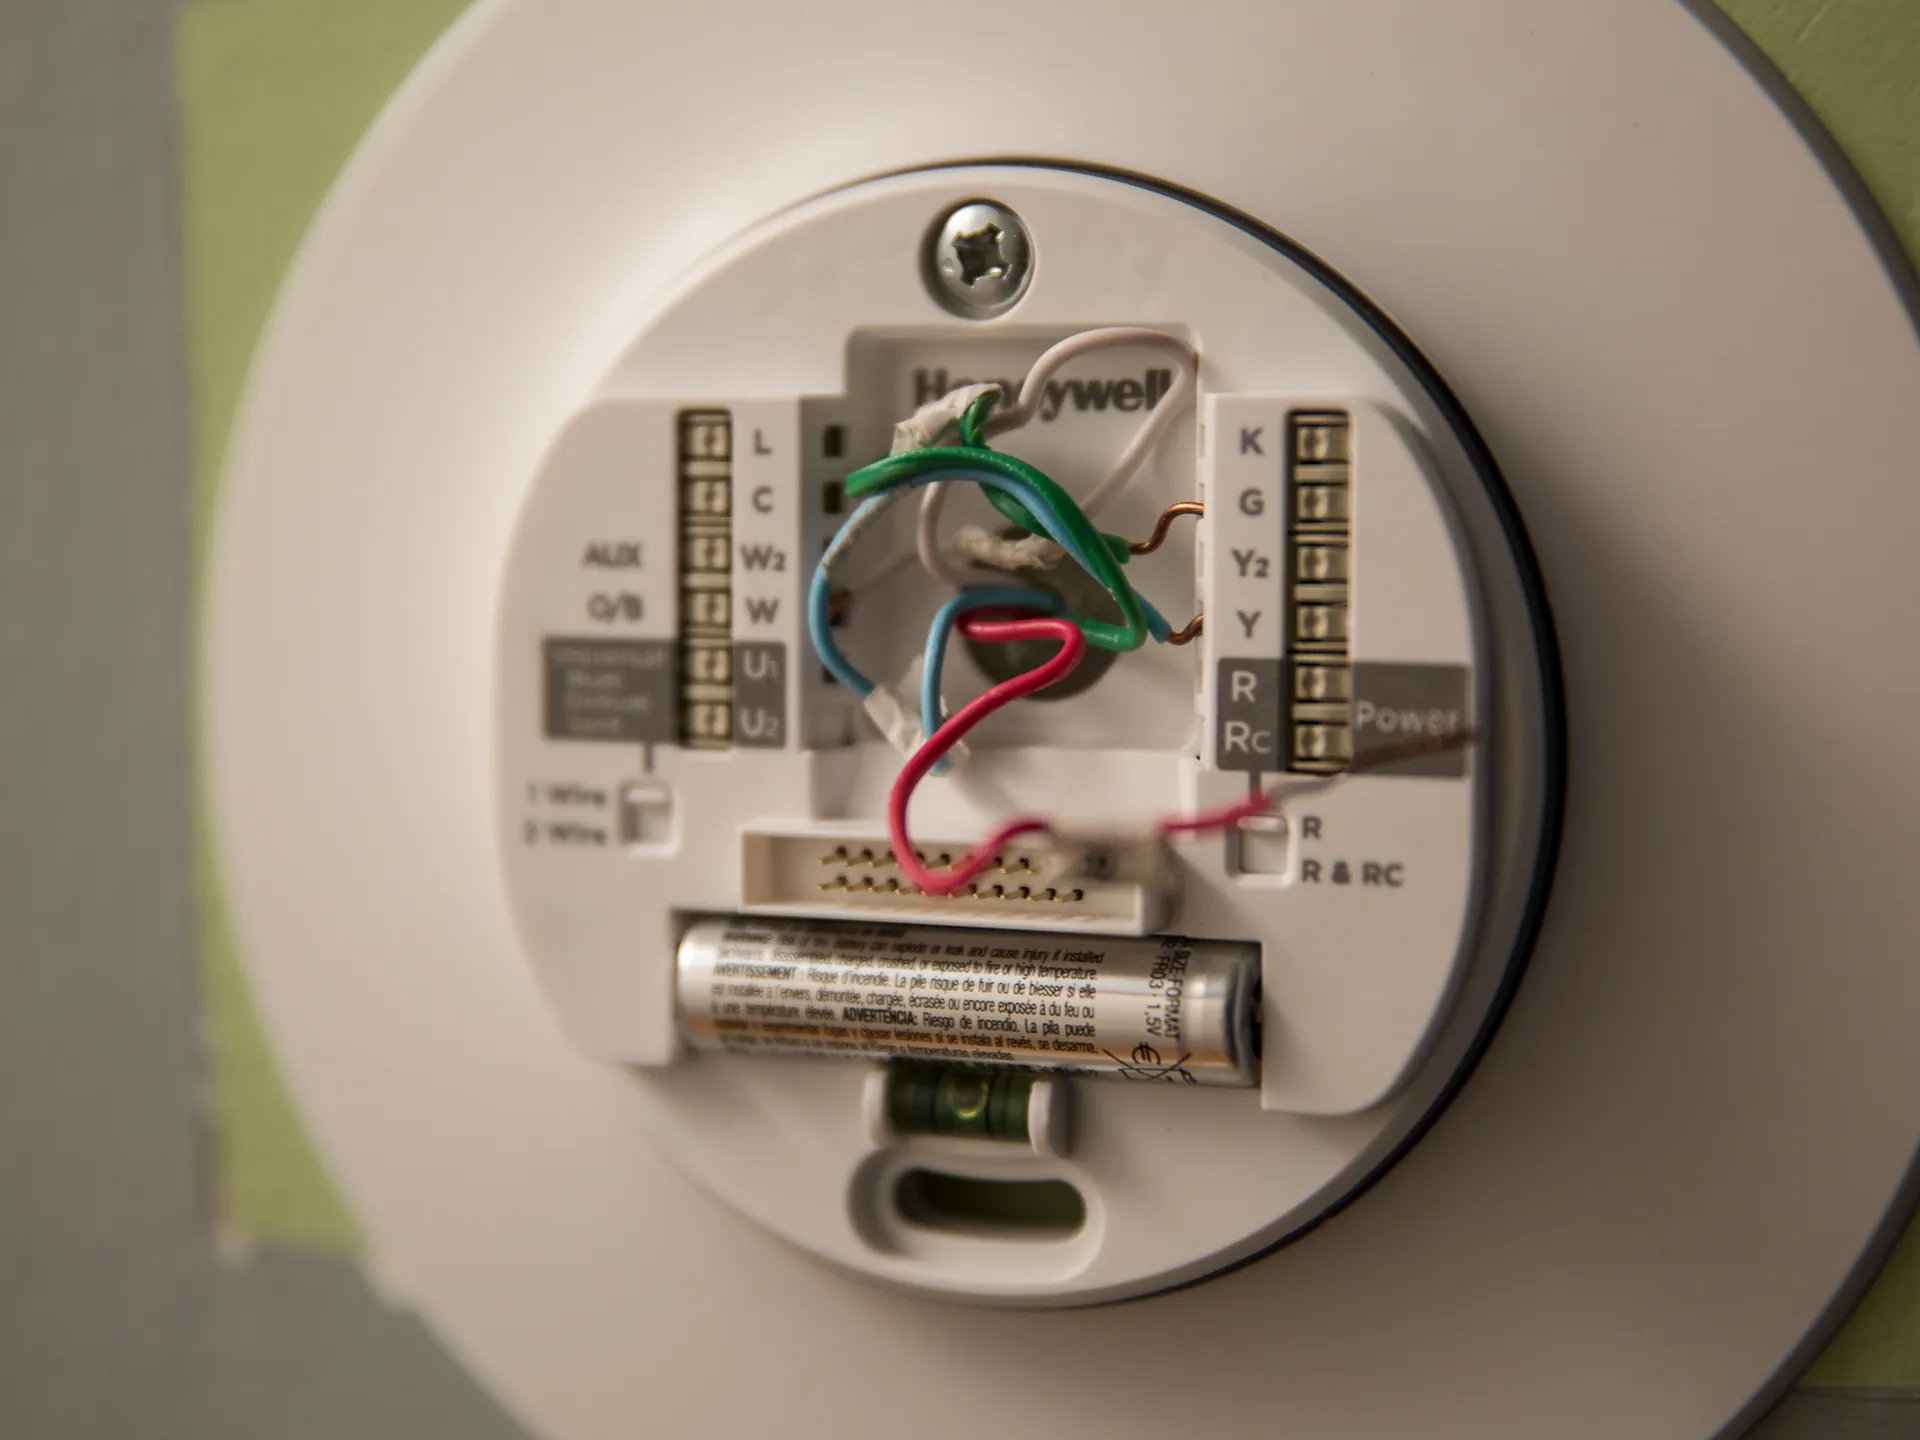
- Take a Photo or Make a Note: Before disconnecting any wires, it’s a good idea to take a photo of the wiring configuration or make a note of the wire colors and the terminals they are connected to. This will be helpful when installing the new smart thermostat.
- Disconnect the Wires: Loosen the screws or terminal connectors holding the wires in place and carefully disconnect them from their respective terminals. Each wire should be labeled with a letter designation (e.g., R, C, Y, W), which corresponds to a specific function.
- Secure the Wires: After disconnecting the wires, use wire labels or tape to secure them and prevent them from falling back into the wall. This will make it easier to identify and reconnect the wires later on.
- Remove the Mounting Plate: Once the wires are disconnected and secured, remove the mounting plate of the old thermostat from the wall. You may need to unscrew it or gently pry it away from the wall, depending on how it is attached.
- Inspect the Wiring: Take a moment to inspect the wiring and ensure that there are no loose or damaged wires. If you notice any issues, it may be necessary to address them before proceeding with the installation of the new smart thermostat.
Keep in mind that the removal process may vary slightly depending on the type and model of the thermostat you have. If you encounter any difficulties or are unsure about any steps, refer to the manufacturer’s installation instructions or consult a professional if needed.
With the old thermostat successfully removed, you are now ready to proceed with wiring the new smart thermostat in the next step of the installation process.
Wiring the New Smart Thermostat
Now that you have removed the old thermostat, it’s time to wire the new smart thermostat. Follow these steps to ensure a proper and secure wiring connection:
- Refer to the Manufacturer’s Instructions: Before proceeding, carefully read the manufacturer’s instructions that came with your new smart thermostat. Each thermostat may have specific wiring instructions that you need to follow.
- Identify the Wires: Take a look at the wires that were connected to the old thermostat. Identify each wire and its corresponding terminal. Common wire colors include red (R), green (G), yellow (Y), white (W), and sometimes blue (C).
- Match the Wires: Match the wires from the old thermostat to the corresponding terminals on the new smart thermostat. If needed, refer to the photo or notes you took earlier during the removal process.
- Connect the Wires: Loosen the screws or terminal connectors on the new thermostat and insert the wires into their respective terminals. Ensure that the connection is secure by tightening the screws or terminal connectors.
- Attach the Backplate: Align the backplate of the smart thermostat with the mounting holes on the wall. Use the provided screws or other mounting hardware to securely attach the backplate to the wall.
- Double-Check the Wiring: Before proceeding, double-check that all the wires are properly connected to their respective terminals on the new smart thermostat. Make sure there are no loose or exposed wires.
It’s crucial to follow the wiring instructions provided by the manufacturer to ensure proper functionality and avoid any potential damage to your HVAC system or the new thermostat. If you have any doubts or questions, consult the manufacturer’s instructions or seek professional assistance.
Once the wiring is complete and double-checked, you can proceed to the next step of mounting and installing the new smart thermostat.
Mounting and Installing the New Thermostat
With the wiring complete, it’s time to mount and install your new smart thermostat. Follow these steps to ensure a secure and proper installation:
- Attach the Thermostat to the Backplate: Align the new smart thermostat with the backplate and gently push it into place. Make sure it sits securely without any wobbling or movement.
- Tighten Mounting Screws: Once the thermostat is properly aligned, use the provided screws to secure it to the backplate. Be careful not to overtighten the screws, as this can damage the thermostat or the backplate.
- Level the Thermostat: Use a small level or the leveling feature of your smart thermostat (if available) to ensure that it is mounted straight and level on the wall. This will give it a professional and aesthetically pleasing appearance.
- Connect to Power: Once the thermostat is securely mounted, follow the manufacturer’s instructions to connect it to power. This typically involves either twisting the thermostat onto the backplate or plugging it into a power source.
- Turn on the Power: Go back to the circuit breaker panel and switch on the circuit breaker that controls your HVAC system. This will restore the power to your system and allow the thermostat to function.
- Follow Initial Setup Instructions: Most smart thermostats require an initial setup process. Follow the on-screen instructions or the instructions provided in the manufacturer’s manual to set up your new thermostat. This may involve connecting it to your home Wi-Fi network and configuring the basic settings such as time, date, and preferred temperature.
It’s important to carefully follow the manufacturer’s instructions during the installation process to ensure that your new smart thermostat is installed correctly.
Once the thermostat is securely mounted and powered on, you can proceed to the next step of connecting it to your home Wi-Fi network and downloading the associated smart thermostat app.
Connecting the Thermostat to Your Home Wi-Fi Network
One of the key features of a smart thermostat is its ability to connect to your home Wi-Fi network, allowing you to control it remotely through a dedicated mobile app. Follow these steps to connect your thermostat to your Wi-Fi network:
- Ensure Power and Display: Make sure your thermostat is properly powered on and its display is active.
- Access Wi-Fi Setup: Go to the thermostat’s menu or settings and look for the Wi-Fi setup option. This may be under a “Network” or “Wireless” section.
- Select Network: Select your home Wi-Fi network from the list of available networks. If your network doesn’t appear, make sure it is within range and check for any network connectivity issues on other devices.
- Enter Network Details: If required, enter the Wi-Fi network password or security key to authenticate and connect to the network. Follow any on-screen instructions provided by the thermostat or app.
- Wait for Connection: After entering the network details, give the thermostat some time to establish a connection with your Wi-Fi network. This step may take a few seconds to a minute.
- Successful Connection: Once the thermostat successfully connects to your Wi-Fi network, it may display a confirmation message or indicator on the screen. This indicates that the thermostat is now connected and ready for remote control.
It’s essential to ensure that you enter the correct Wi-Fi network name (SSID) and password during the setup process. Double-check the details before proceeding to ensure a successful connection.
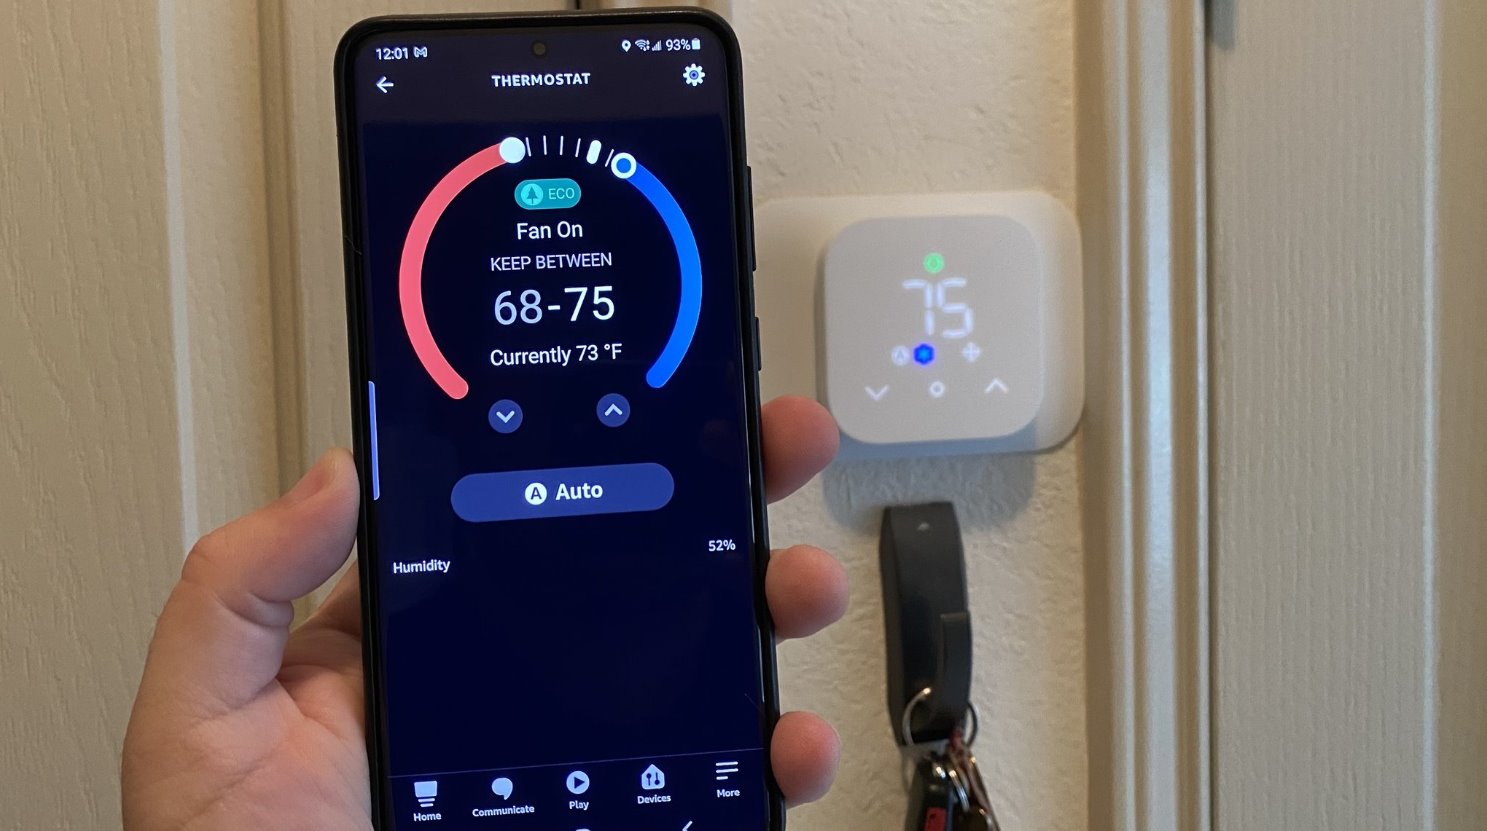
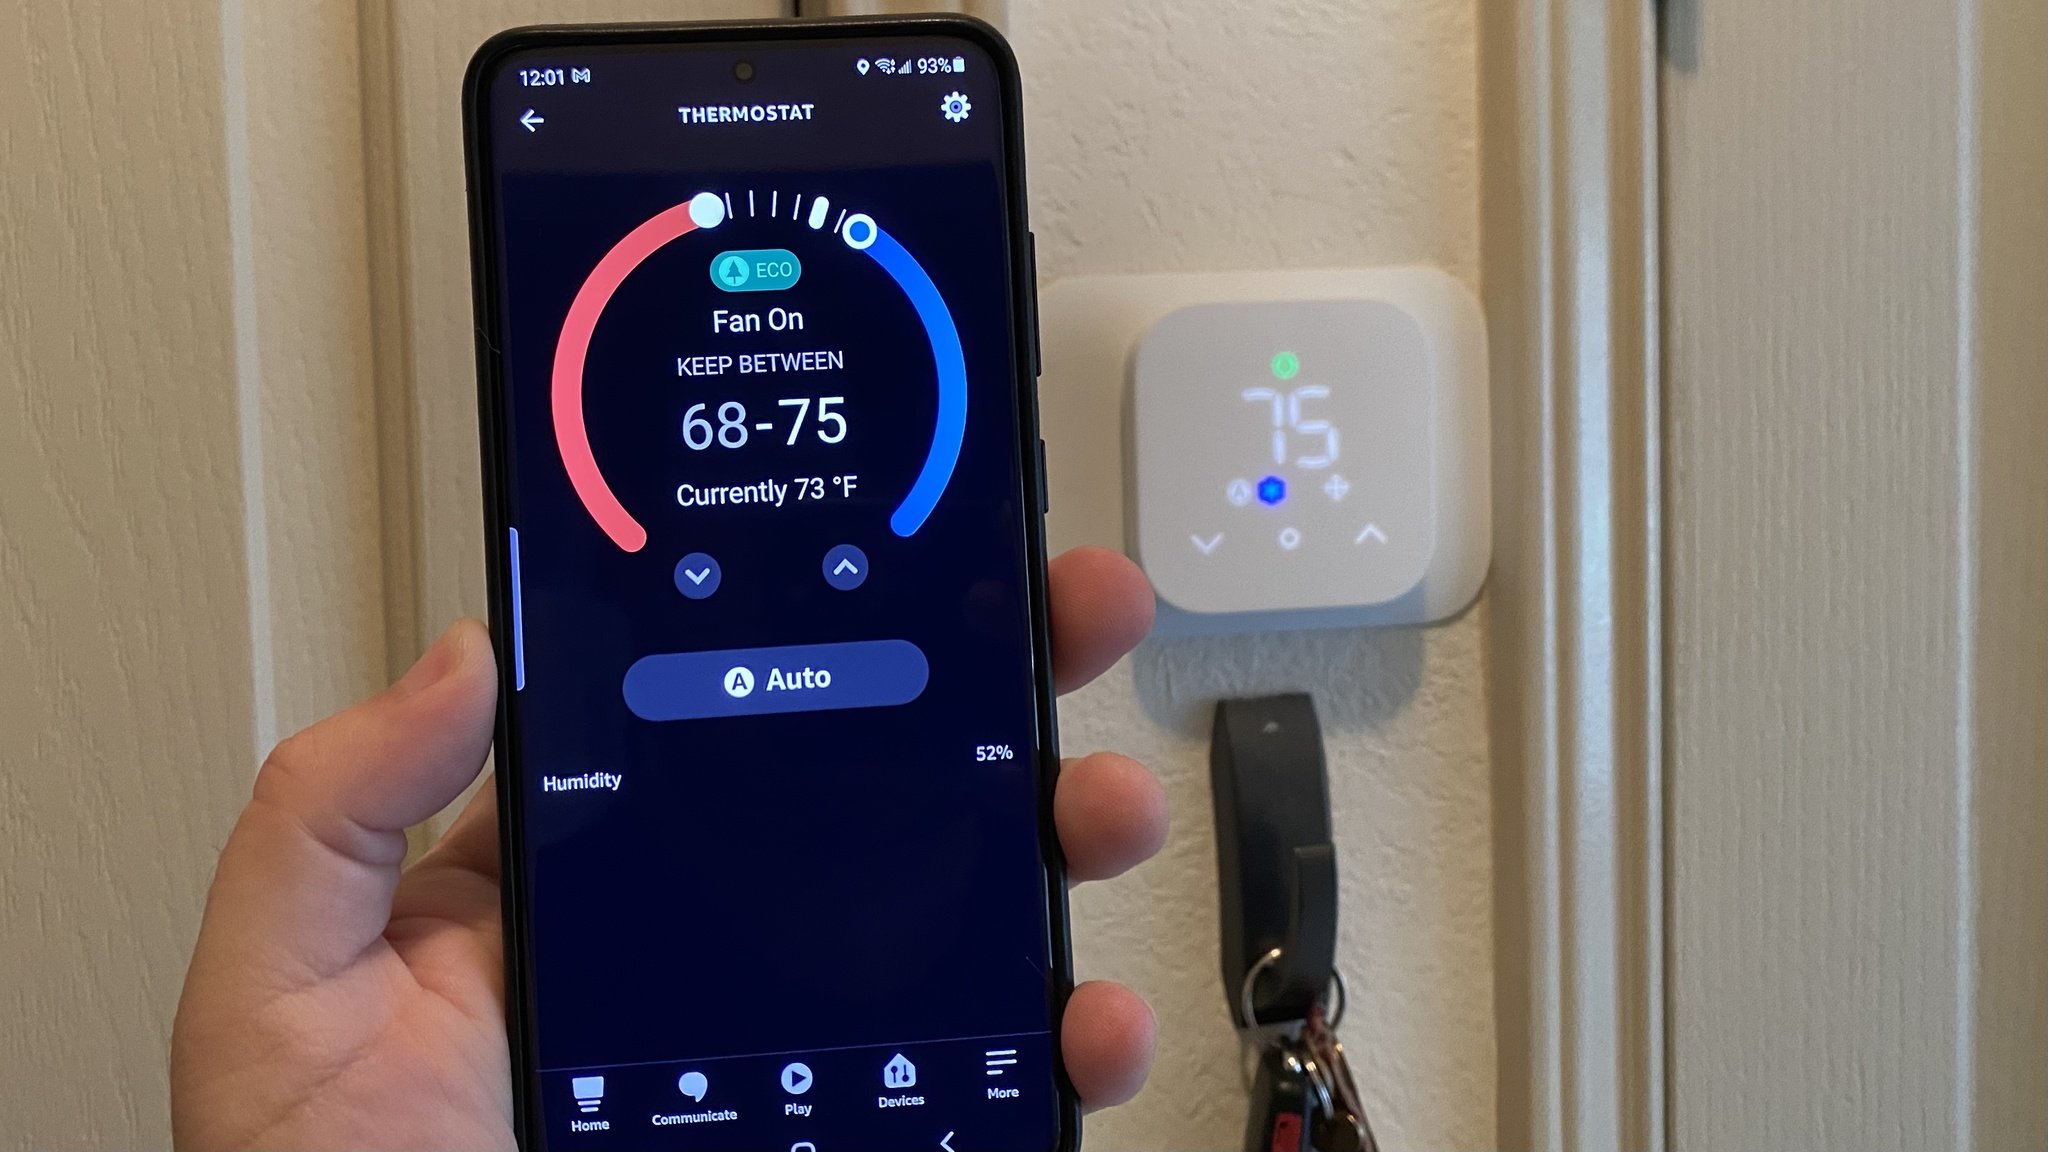
Connecting your thermostat to your home Wi-Fi network allows you to access its features remotely through the associated mobile app. You can adjust temperature settings, create custom schedules, and monitor energy usage, all from the convenience of your smartphone or other connected devices.
Once you have successfully connected your thermostat to your Wi-Fi network, you can proceed to download and set up the smart thermostat app on your mobile device, which will further enhance the control and functionality of your smart thermostat.
Downloading and Setting Up the Smart Thermostat App
To fully utilize the features of your smart thermostat, you’ll need to download and set up the accompanying mobile app. Follow these steps to download and set up the smart thermostat app:
- Identify the App: Visit the app store on your smartphone or tablet and search for the app associated with your specific smart thermostat brand. It is usually available for both iOS and Android devices.
- Download the App: Once you’ve located the app, tap on the download button to initiate the installation. Wait for the app to download and install on your device.
- Open the App: Locate the app on your device’s home screen or in the app drawer and tap on it to open it.
- Create an Account: Some smart thermostat apps require you to create an account. Follow the on-screen instructions to create an account using your email address and choosing a secure password.
- Log In: If you already have an account, simply log in using your credentials. Some apps may also offer the option to log in with your Google or Facebook account for convenience.
- Add Your Thermostat: Once you’re logged in, the app will prompt you to add your smart thermostat. Follow the instructions provided by the app to pair your thermostat with the app using either Bluetooth or Wi-Fi connectivity.
- Configure Settings: After successfully pairing, you can configure various settings within the app. This may include setting up your preferred temperature settings, creating custom schedules, and enabling any additional features specific to your smart thermostat model.
- Explore App Features: Take some time to explore the features and functionalities of the app. Familiarize yourself with how to adjust temperature settings, view energy usage reports, and remotely control your thermostat from anywhere using your smartphone or tablet.
The smart thermostat app serves as a centralized control hub for your smart thermostat, providing you with convenient access to its various features and allowing you to monitor and control your home’s temperature and energy usage with ease.
By downloading and setting up the smart thermostat app, you will unlock the full potential of your smart thermostat and gain the ability to manage and optimize your home’s comfort and energy efficiency from the palm of your hand.
Testing and Calibrating the Smart Thermostat
Once you have installed the smart thermostat and set up the app, it is important to test and calibrate the thermostat to ensure accurate temperature control and optimal performance. Follow these steps to test and calibrate your smart thermostat:
- Verify Temperature Accuracy: Use a separate thermometer to verify the temperature accuracy of your smart thermostat. Place the thermometer near the thermostat and compare the readings to ensure they are within a reasonable range.
- Run Heating and Cooling Cycles: Activate your heating system and set the desired temperature slightly higher than the current room temperature. Allow the system to run for several minutes and ensure that warm air is coming out. Repeat the process with the cooling system, setting the temperature lower than the room temperature to ensure cool air is being generated.
- Observe Temperature Setbacks: Set the thermostat to go into energy-saving setbacks during periods when your home is typically unoccupied. Verify that the thermostat correctly adjusts the temperature according to your schedule.
- Test Remote Control: Use the app to control the thermostat remotely from outside your home. Ensure that the commands are accurately received and applied by the thermostat.
- Monitor Energy Usage: Use the app’s energy usage tracking feature to monitor the energy consumption of your HVAC system. Compare the usage data to your previous energy bills to determine the effectiveness of your energy-saving settings.
- Adjust Settings as Needed: If you notice any discrepancies or unsatisfactory performance during testing, make any necessary adjustments to the thermostat settings. This may include temperature differentials, setback schedules, or other advanced settings.
- Repeat Testing: It is recommended to repeat the testing and calibration process periodically, especially after making any changes to your HVAC system or home insulation. This will ensure that the thermostat remains accurate and continues to provide optimal control.
By testing and calibrating your smart thermostat, you can ensure precise temperature control, energy efficiency, and overall comfort in your home. Keep in mind that the specific testing process may vary depending on the features and capabilities of your smart thermostat. Consult the manufacturer’s instructions for any additional recommended tests or calibration procedures.
If you encounter any issues or inconsistencies during testing, refer to the troubleshooting section of the thermostat’s manual or contact the manufacturer’s customer support for assistance. With proper testing and calibration, your smart thermostat will provide efficient heating and cooling while saving energy and enhancing your overall comfort.
Troubleshooting Common Installation Issues
During the installation process of your smart thermostat, you may encounter some common issues. Here are a few troubleshooting tips to help you resolve them:
- No Power to the Thermostat: If your smart thermostat doesn’t have power or isn’t turning on, ensure that the circuit breaker for your HVAC system is turned on. Double-check the wiring connections and make sure they are secure.
- Incompatible Wiring: If you’re having trouble wiring your new smart thermostat, confirm that it is compatible with your heating and cooling system. Check the wiring instructions provided by the manufacturer and make sure you have matched the wires correctly.
- C-Wire Issues: Some smart thermostats require a C-wire (common wire) for proper power supply. If your HVAC system doesn’t have a C-wire, consider using a power adapter or consult a professional electrician for assistance in installing a C-wire.
- Wi-Fi Connectivity Problems: If you’re unable to connect your smart thermostat to your Wi-Fi network, check your network settings and ensure that you have entered the correct network name (SSID) and password. Make sure your router is within range and functioning properly.
- App Connectivity Issues: If you’re experiencing difficulties with the app connection, ensure that your smartphone or tablet is connected to a stable internet connection. Update the app to the latest version and restart your device if necessary.
- Temperature Reading Inaccuracy: If you suspect that your smart thermostat is displaying inaccurate temperature readings, verify the temperature with a separate thermometer for comparison. You may need to adjust the thermostat’s calibration settings if necessary.
- Compatibility with HVAC System: If your smart thermostat is not functioning properly or causing issues with your HVAC system, it’s possible that there might be compatibility issues. Consult the manufacturer’s documentation or contact their customer support for assistance.
- Professional Assistance: If you’ve exhausted all troubleshooting options and are still experiencing difficulties, it may be best to seek professional assistance. Contact a licensed HVAC technician or the manufacturer’s customer support for further guidance and support.
Remember, troubleshooting may vary depending on the specific make and model of your smart thermostat. Consult the manufacturer’s instructions, online resources, or customer support for detailed troubleshooting steps tailored to your thermostat.
By addressing common installation issues promptly and following the manufacturer’s instructions, you can ensure a successful and fully functional smart thermostat installation.
Conclusion
Installing a smart thermostat in your home can bring numerous benefits, including enhanced comfort, energy savings, and remote control convenience. By following the steps outlined in this guide, you can successfully install a smart thermostat and enjoy its features to the fullest.
First, it’s important to choose the right smart thermostat for your home, considering compatibility, features, user interface, design, and budget. Checking compatibility with your heating and cooling system is also crucial to ensure a seamless installation process.
Gathering the necessary tools and supplies beforehand will make the installation smoother. Remember to turn off the power to your HVAC system before removing the old thermostat to ensure your safety.
During the installation, carefully wire the new smart thermostat, ensuring the correct connection of each wire to its corresponding terminal. Mount and install the thermostat securely on the wall, ensuring it is level and properly aligned.
Connecting the thermostat to your home Wi-Fi network allows you to access its features remotely through the smart thermostat app. Download the app, create an account, and pair your thermostat with the app to unlock its full potential.
After installation, it’s crucial to test and calibrate the smart thermostat, verifying temperature accuracy, running heating and cooling cycles, and monitoring energy usage. This helps ensure optimal functionality and performance.
In the event of any common installation issues, troubleshoot accordingly. Check for problems such as power supply, wiring compatibility, Wi-Fi connectivity, and temperature reading accuracy. Seek professional assistance if needed.
With proper installation and calibration, your smart thermostat will provide you with greater control over your home’s temperature and energy usage. Enjoy the convenience, comfort, and energy savings that come with having a smart home!