Introduction
Inserting a SIM card into your Samsung Galaxy S7 is a fundamental step in setting up your device for communication and connectivity. The SIM card, which stands for Subscriber Identity Module, is a small, essential component that enables your phone to connect to your mobile network and make calls, send text messages, and access mobile data. Whether you're activating a new phone or replacing an old SIM card, understanding how to properly insert the SIM card into your Samsung Galaxy S7 is crucial for seamless functionality.
In this comprehensive guide, you will learn the step-by-step process of inserting a SIM card into your Samsung Galaxy S7. By following these instructions, you can ensure that your device is ready to make and receive calls, send messages, and access the internet using your mobile network. Let's delve into the process of locating the SIM card tray, removing and inserting the SIM card, and reinserting the tray to complete the setup.
The Samsung Galaxy S7 is a sleek and powerful device that offers a range of features and capabilities, and the SIM card is the key to unlocking its full potential. Whether you're a new user or upgrading to the Galaxy S7, understanding how to handle the SIM card with care and precision is essential for a smooth and hassle-free experience. So, let's embark on this journey to seamlessly integrate the SIM card into your Samsung Galaxy S7 and unleash the full potential of your device.
Step 1: Locate the SIM card tray
Locating the SIM card tray on your Samsung Galaxy S7 is the first step towards inserting your SIM card. The SIM card tray is a small, discreet slot on the side of your device that houses the SIM card and ensures a secure connection to your mobile network. To begin the process, you'll need to identify the precise location of the SIM card tray on your Galaxy S7.
-
Device Orientation: Start by holding your Galaxy S7 in a comfortable position, ensuring that the screen is facing you. The SIM card tray is typically located on the upper edge of the device, adjacent to the power button. Look for a small pinhole or a tiny slot that indicates the presence of the SIM card tray.
-
Ejector Tool: Samsung devices are designed with a convenient ejector tool that facilitates the removal of the SIM card tray. This tool is often included in the original packaging of your Galaxy S7. If you have the ejector tool, locate it and keep it handy for the next steps.
-
Visual Inspection: Take a close look at the edges of your device, focusing on the upper edge to spot the SIM card tray. The tray may be flush with the device's frame, making it discreet and seamlessly integrated into the sleek design of the Galaxy S7. Once you've identified the location of the SIM card tray, you're ready to proceed to the next step.
Locating the SIM card tray sets the stage for the subsequent steps in the process of inserting your SIM card into the Samsung Galaxy S7. By familiarizing yourself with the physical layout of the device and identifying the precise location of the SIM card tray, you're laying the groundwork for a smooth and successful insertion process. With the SIM card tray in sight, you're ready to move on to the next step of removing the tray to access the slot for your SIM card.
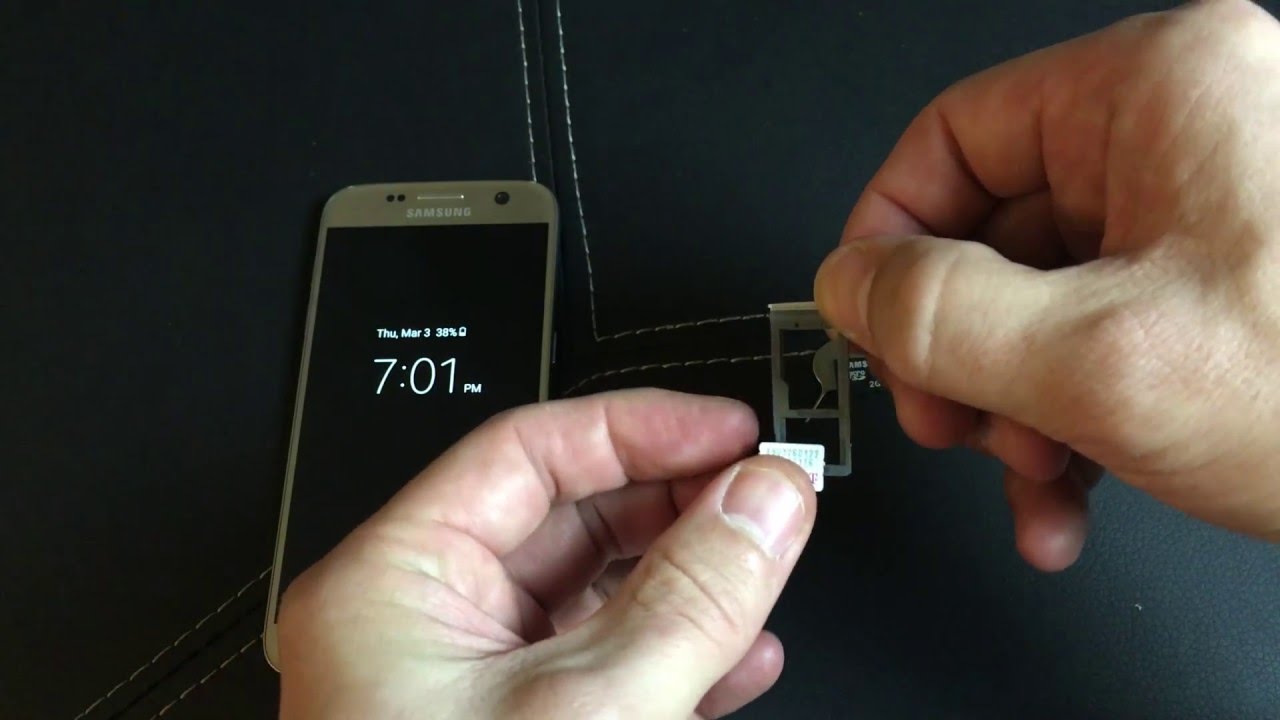
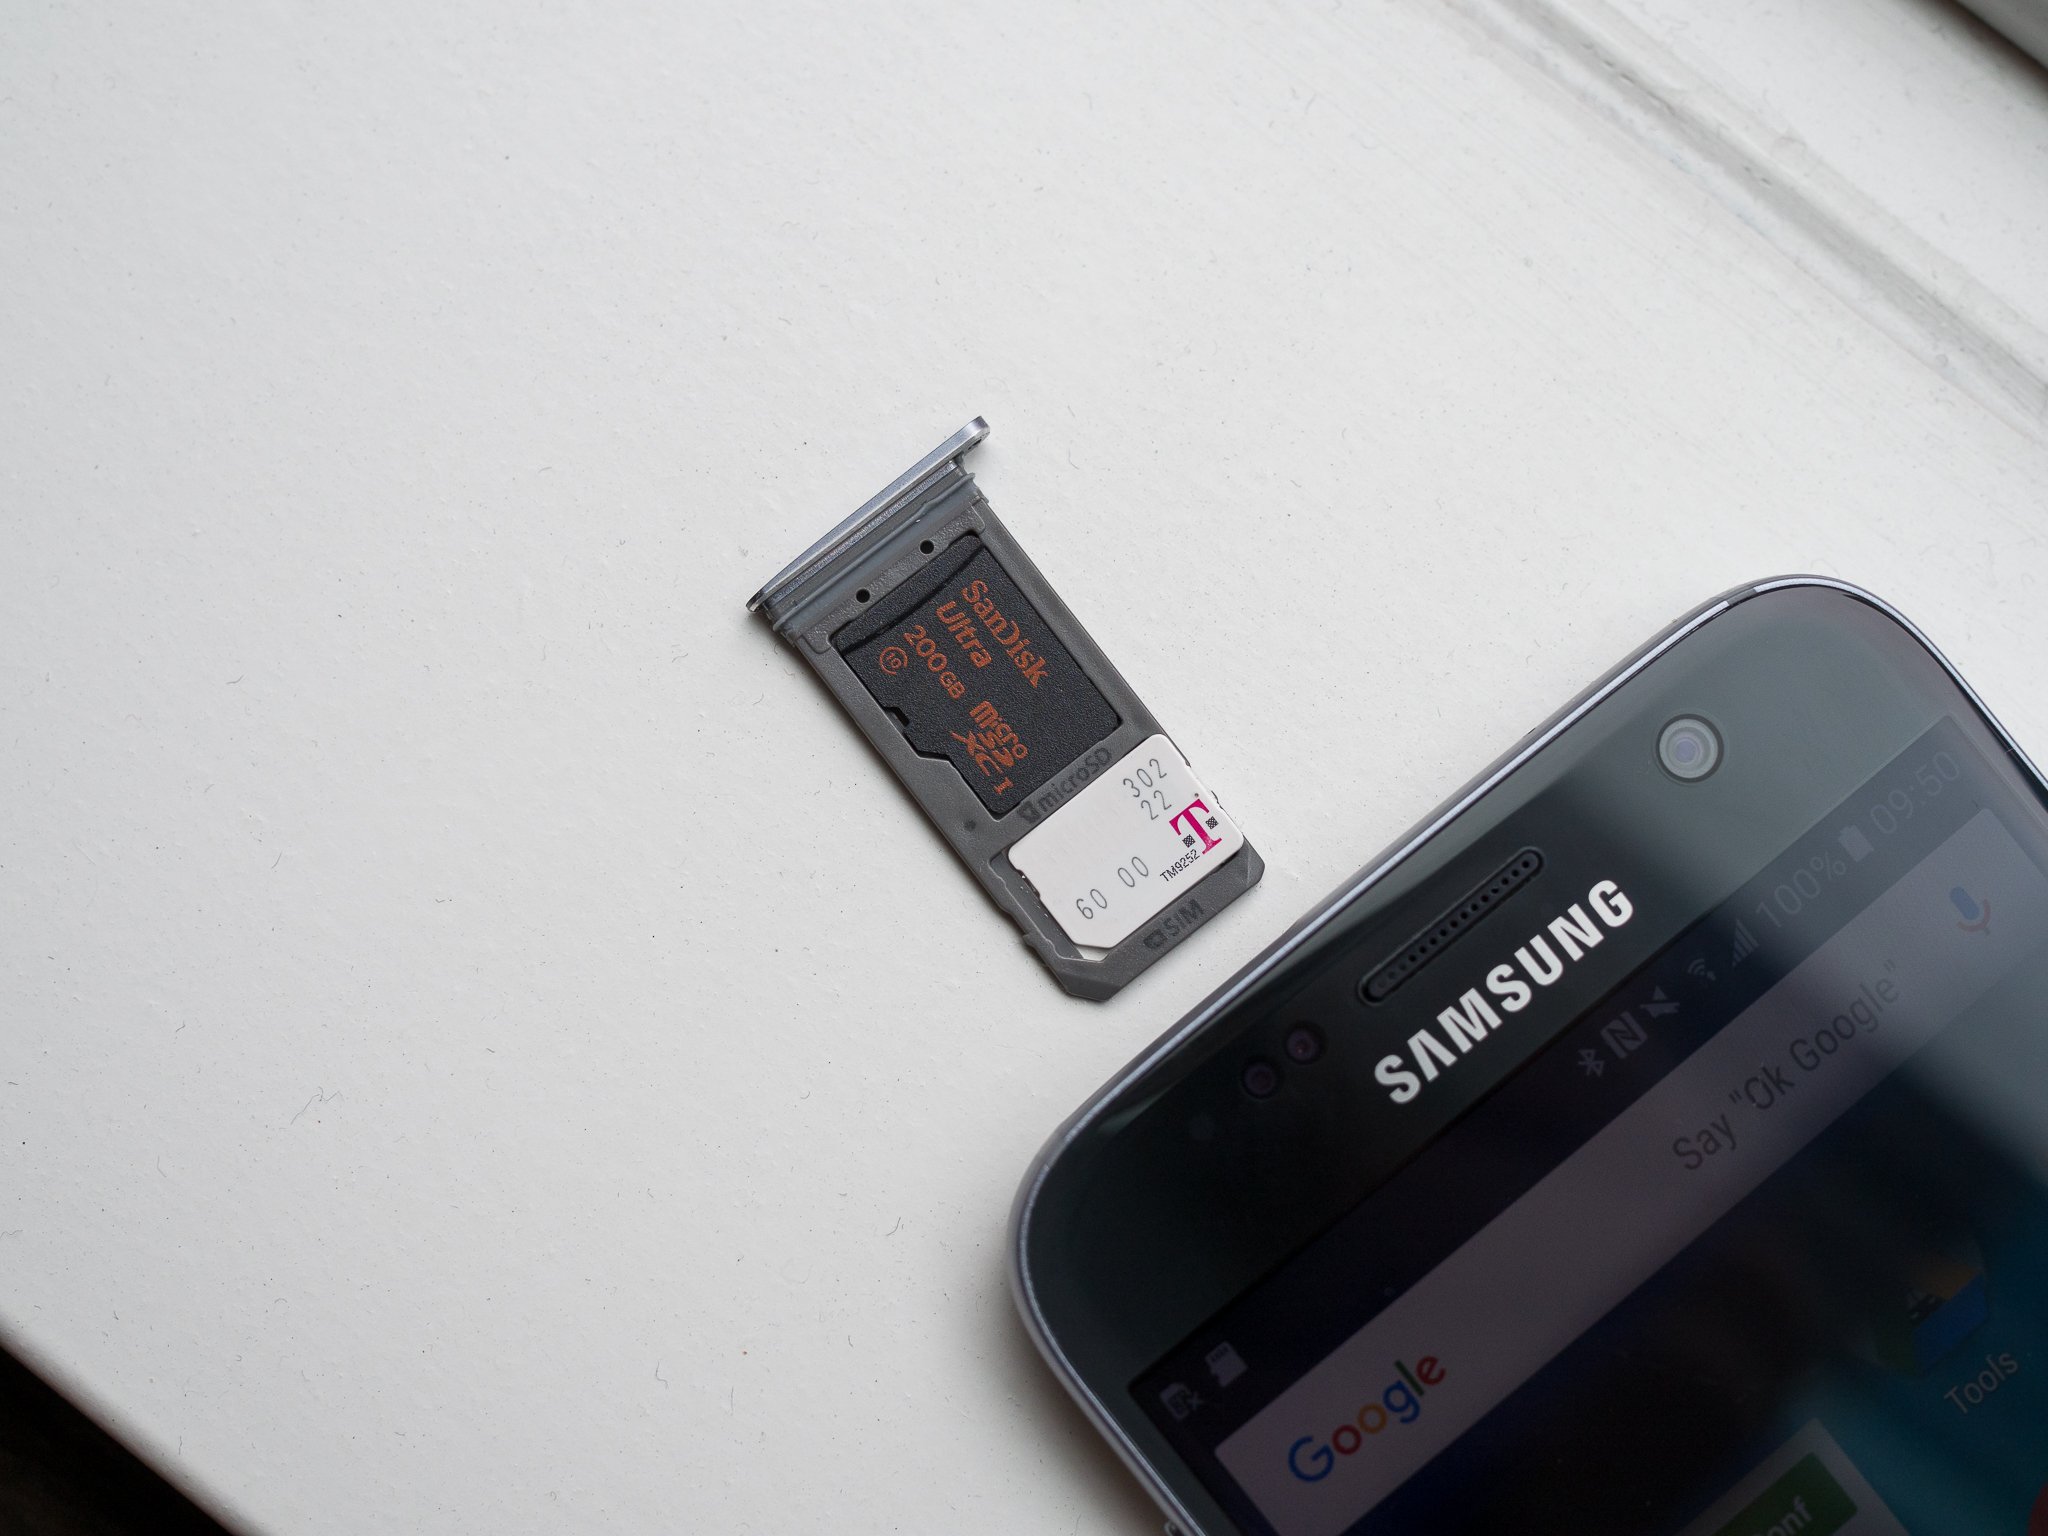
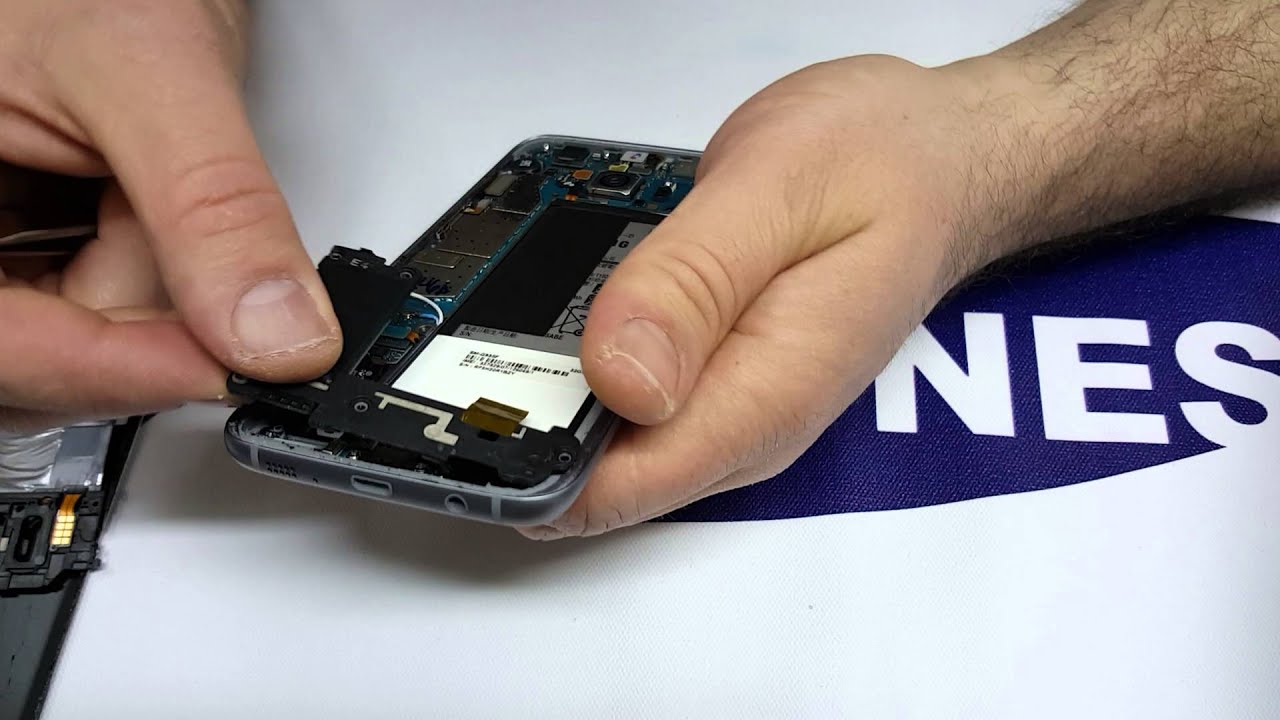
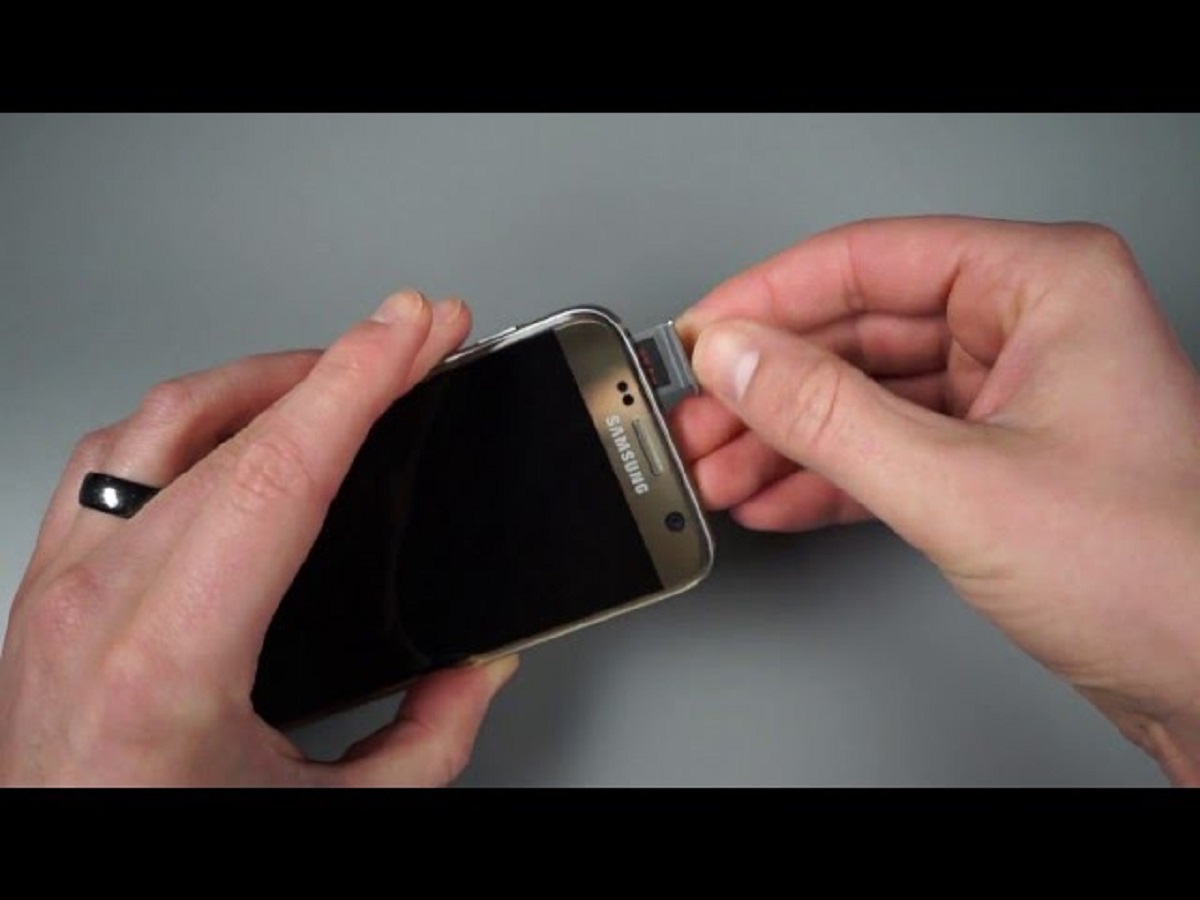
Step 2: Remove the SIM card tray
Removing the SIM card tray from your Samsung Galaxy S7 is a crucial step in preparing the device for the insertion of your SIM card. The SIM card tray is designed to securely hold the SIM card in place, ensuring a stable connection to your mobile network. To access the tray and proceed with the SIM card insertion, you'll need to carefully remove it from the device. Here's a detailed walkthrough of the process:
-
Ejector Tool: As mentioned earlier, the Samsung Galaxy S7 comes with a specialized ejector tool that simplifies the removal of the SIM card tray. Locate the ejector tool, which is typically a small, metallic pin with a rounded tip, and ensure that it is easily accessible for use.
-
Identify the Ejection Slot: On the upper edge of your Galaxy S7, adjacent to the SIM card tray, you'll find a small pinhole or a tiny slot. This is the ejection slot designed for the ejector tool. Gently insert the rounded tip of the ejector tool into the slot, applying light pressure to initiate the ejection process.
-
Eject the Tray: With the ejector tool inserted into the ejection slot, exert a steady, inward pressure to activate the ejection mechanism. As you apply pressure, you'll feel a slight resistance, indicating that the SIM card tray is being released from its position within the device. Continue to apply gentle pressure until the tray pops out slightly.
-
Carefully Remove the Tray: Once the SIM card tray has been partially ejected, carefully pull it out from the device using your fingertips. Exercise caution to ensure a smooth and controlled removal, taking care not to force the tray or apply excessive pressure that may cause damage to the device or the tray itself.
-
Inspect the Tray and Slot: As you remove the SIM card tray, take a moment to inspect both the tray and the slot within the device. Ensure that the tray is free from any obstructions or debris, and verify that the slot is clean and devoid of any foreign objects that may hinder the insertion of the SIM card.
By following these steps, you can successfully remove the SIM card tray from your Samsung Galaxy S7, setting the stage for the next phase of the process: inserting your SIM card into the designated slot within the tray. With the tray in hand, you're now ready to proceed to the next step and seamlessly integrate your SIM card into your device.
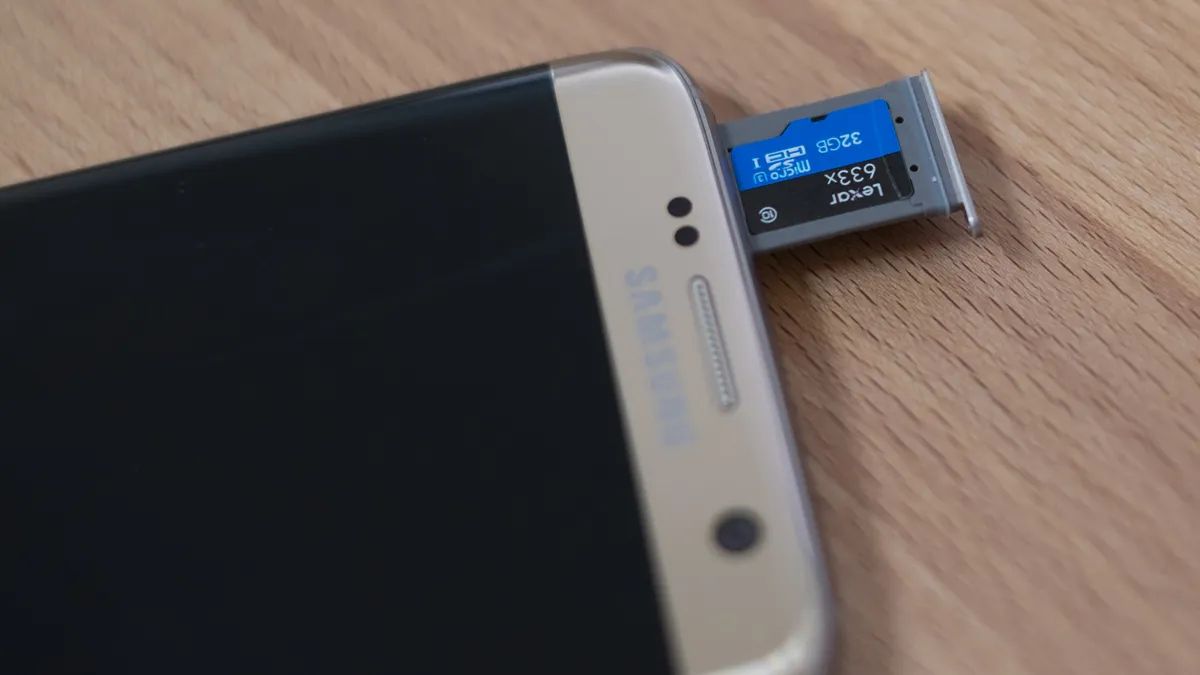
Step 3: Insert the SIM card
With the SIM card tray in hand and the ejection process successfully completed, you are now ready to proceed with the pivotal step of inserting your SIM card into the Samsung Galaxy S7. This step requires precision and care to ensure that the SIM card is correctly positioned within the tray, facilitating a secure and stable connection to your mobile network. Follow these detailed instructions to seamlessly insert the SIM card into your device:
-
Inspect the SIM Card: Before proceeding with the insertion, take a moment to inspect the SIM card itself. Ensure that the card is free from any visible damage, such as bends or scratches, which may affect its functionality. Additionally, verify that the gold contacts on the SIM card are clean and devoid of any dirt or residue that may impede connectivity.
-
Position the SIM Card: Orient the SIM card with the gold contacts facing downward, aligning it with the corresponding layout on the SIM card tray. The SIM card will fit into the tray in a specific configuration, ensuring that it sits securely and establishes a proper connection with the device.
-
Place the SIM Card into the Tray: Carefully position the SIM card onto the designated area within the SIM card tray, ensuring that it rests flat and flush with the tray's surface. Exercise caution to avoid applying excessive pressure when placing the SIM card, as this may cause damage to the card or the tray.
-
Verify the Alignment: Once the SIM card is placed within the tray, double-check the alignment to ensure that it fits seamlessly and aligns with the designated layout. The card should sit snugly within the tray, with the gold contacts facing downward and the card itself sitting flat and level within the tray.
-
Gently Insert the Tray: With the SIM card securely positioned within the tray, carefully reinsert the tray into the SIM card slot on your Samsung Galaxy S7. Ensure that the tray slides in smoothly and aligns with the slot without any resistance, indicating that the SIM card is being seamlessly integrated into the device.
By following these detailed steps, you can successfully insert the SIM card into your Samsung Galaxy S7, setting the stage for the final phase of the process: reinserting the SIM card tray into the device. With the SIM card securely in place, you're now ready to proceed to the next step and complete the setup of your device for seamless connectivity and communication.
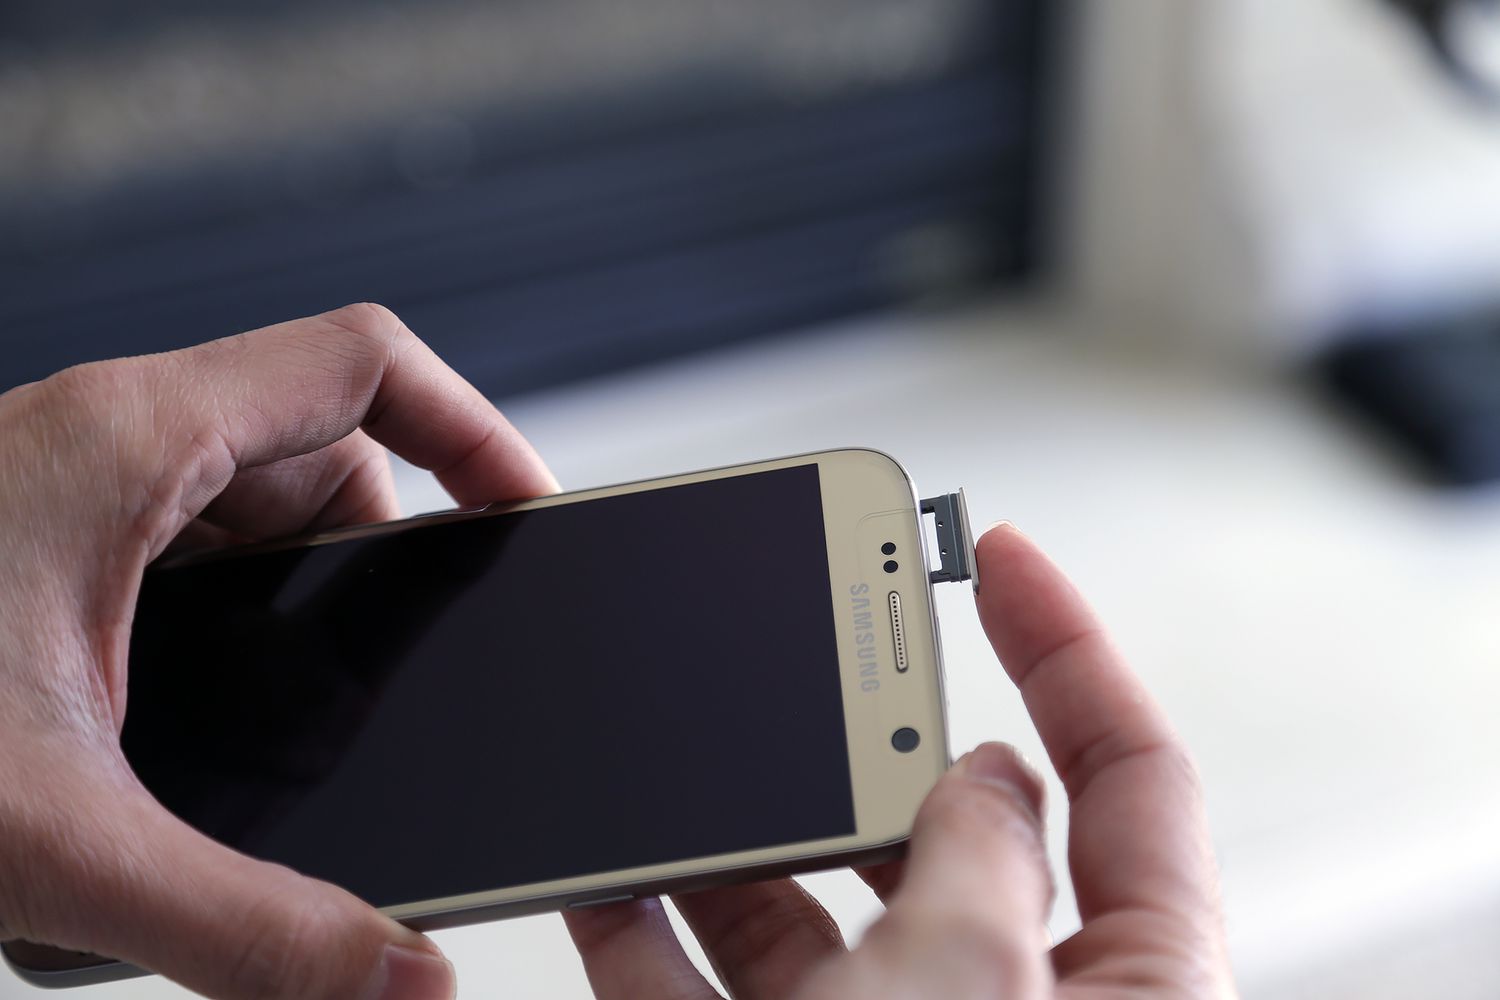
Step 4: Reinsert the SIM card tray
With the SIM card securely inserted into the designated slot within the tray, the final step in the process involves reinserting the SIM card tray back into your Samsung Galaxy S7. This step is crucial for securing the SIM card within the device and ensuring a stable connection to your mobile network. Follow these detailed instructions to seamlessly reinsert the SIM card tray and complete the setup of your device:
-
Align the Tray: Hold the SIM card tray in a position that allows you to visually align it with the slot on your Galaxy S7. Ensure that the tray is oriented correctly, with the side containing the SIM card facing outward and the ejector hole positioned appropriately for insertion.
-
Careful Insertion: With the SIM card tray aligned with the slot, gently slide it back into the device, ensuring a smooth and controlled insertion. Exercise caution to avoid applying excessive force or causing any resistance during the reinsertion process, as this may lead to damage to the tray or the device.
-
Verify Secure Fit: Once the tray is fully inserted, verify that it sits flush with the device's frame and aligns seamlessly with the surrounding edges. The tray should fit snugly into the slot, with no protrusions or misalignments that may indicate an improper fit.
-
Ejector Tool Removal: If you used the ejector tool during the removal process, carefully remove it from the SIM card tray slot. Ensure that the slot is free from any obstructions and that the tray is securely in place before proceeding.
-
Power On and Test: After reinserting the SIM card tray, power on your Samsung Galaxy S7 to initiate the device setup. Once the device is powered on, verify that the SIM card is detected and that the device displays the appropriate network signal, indicating a successful connection.
By following these detailed steps, you can seamlessly reinsert the SIM card tray into your Samsung Galaxy S7, completing the process of integrating your SIM card into the device. With the tray securely in place, your device is now ready to harness the full capabilities of your mobile network, enabling seamless communication, connectivity, and access to mobile data.
This marks the successful completion of the SIM card insertion process for your Samsung Galaxy S7, ensuring that your device is fully equipped to deliver a seamless and reliable mobile experience.
Conclusion
Congratulations! You have successfully completed the process of inserting a SIM card into your Samsung Galaxy S7. By following the step-by-step instructions outlined in this guide, you have ensured that your device is equipped with a vital component for seamless communication, connectivity, and access to your mobile network.
The SIM card, a small yet indispensable element, plays a pivotal role in enabling your Galaxy S7 to make and receive calls, send text messages, and access mobile data. With the SIM card securely integrated into your device, you can now harness the full potential of your Samsung Galaxy S7 and enjoy the array of features and capabilities it offers.
It's important to emphasize the significance of handling the SIM card and the SIM card tray with care and precision. By familiarizing yourself with the location of the SIM card tray, removing the tray using the ejector tool, and delicately inserting the SIM card before reinserting the tray into your device, you have demonstrated a keen attention to detail and a commitment to ensuring a seamless setup process.
As you power on your Samsung Galaxy S7, you can now experience the satisfaction of a well-executed SIM card insertion, knowing that your device is primed for reliable connectivity and communication. Whether you're embarking on a new journey with your Galaxy S7 or upgrading to a new SIM card, the successful completion of this process marks a significant milestone in the setup and configuration of your device.
With the SIM card in place, you can now explore the myriad features and functionalities of the Samsung Galaxy S7, from staying connected with friends and family to accessing the internet on the go. The seamless integration of the SIM card sets the stage for a seamless and enjoyable mobile experience, empowering you to make the most of your device's capabilities.
In conclusion, the successful insertion of the SIM card into your Samsung Galaxy S7 represents a foundational step in unlocking the full potential of your device. By following the guidelines outlined in this comprehensive guide, you have navigated the process with confidence and precision, setting the stage for a seamless and rewarding mobile experience with your Samsung Galaxy S7.