Introduction
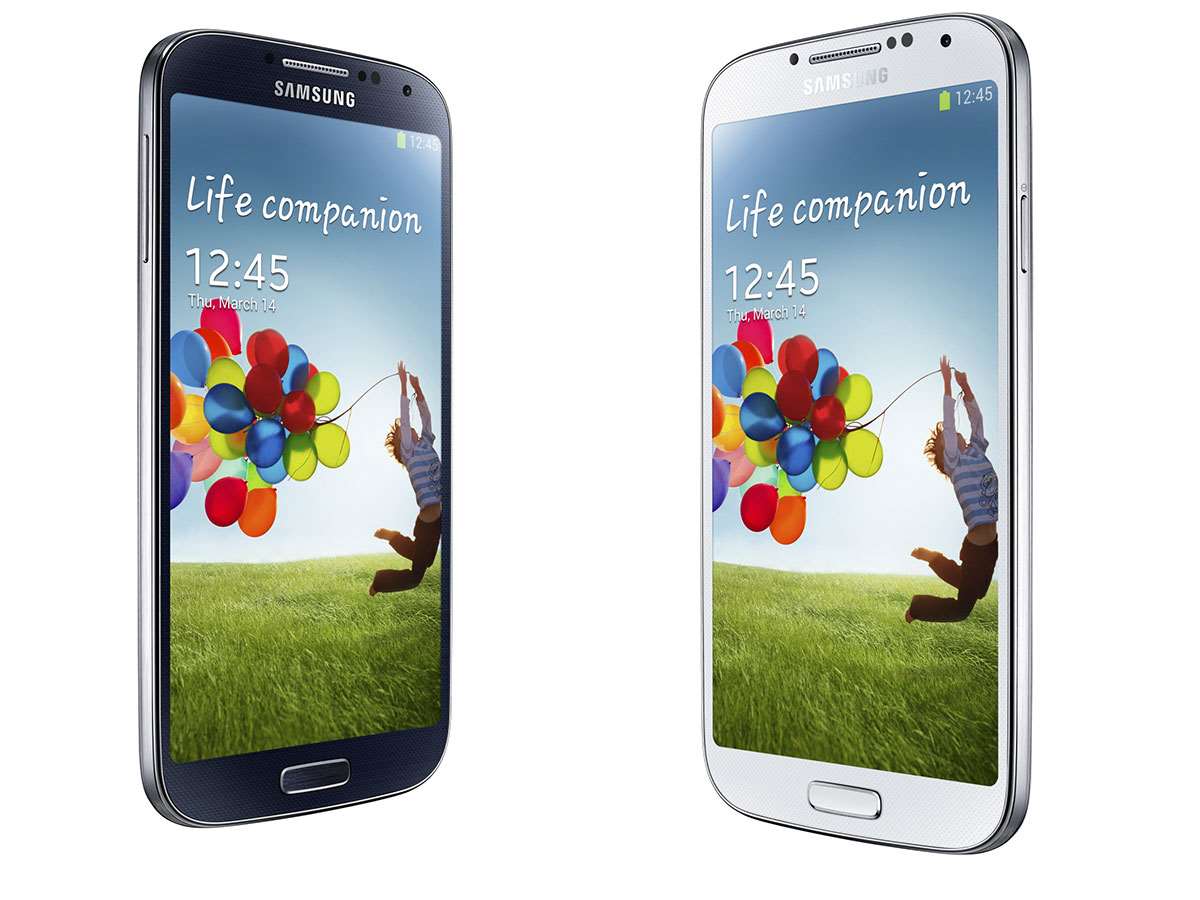
Inserting a SIM card into your Samsung Galaxy S4 is a fundamental step in setting up your device for communication. The SIM card, short for Subscriber Identity Module, is a small chip that holds crucial information such as your phone number, carrier details, and contact list. Without it, your phone would be unable to connect to your mobile network and make calls, send texts, or access mobile data.
In this tutorial, we will guide you through the process of inserting a SIM card into your Galaxy S4, ensuring that you can seamlessly transition from unboxing your new device to being fully connected and ready to communicate. Whether you've just purchased a new Galaxy S4 or are switching to a new SIM card, this step-by-step guide will provide you with the necessary instructions to complete the setup process effortlessly.
By following this tutorial, you will gain a comprehensive understanding of how to access the SIM card slot, properly insert the SIM card, and power on your device. This knowledge will empower you to take full advantage of the communication features offered by your Galaxy S4, allowing you to stay connected with friends, family, and colleagues while on the go.
Let's dive into the process of inserting a SIM card into your Galaxy S4, ensuring that you are equipped with the essential knowledge to embark on your mobile communication journey.
Step 1: Locate the SIM Card Slot
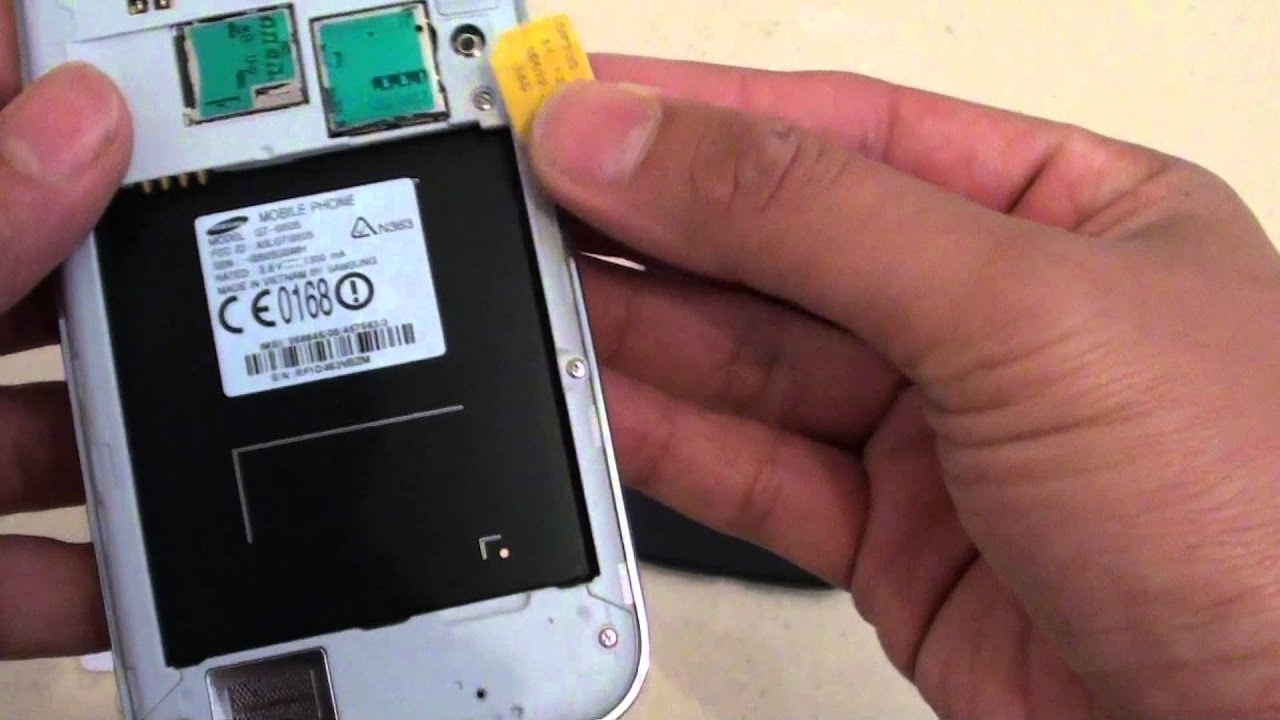
The initial step in setting up your Samsung Galaxy S4 involves locating the SIM card slot. The SIM card slot is typically positioned on the side of the device. To access it, you will need to use the SIM card ejection tool provided with your phone or a small paperclip.
-
Identifying the SIM Card Slot: Examine the sides of your Galaxy S4 to locate the SIM card slot. On most models, it is situated on the left-hand side of the device. You will notice a small pinhole adjacent to the slot, which is where you will insert the ejection tool or paperclip.
-
Using the Ejection Tool: If you have the SIM card ejection tool, insert it into the pinhole next to the SIM card slot. Apply gentle pressure to push the tool into the hole until the SIM card tray is partially ejected from the phone. If the tray does not pop out immediately, do not force it. Simply adjust the angle and continue gently pressing until the tray is released.
-
Using a Paperclip: In the absence of the ejection tool, straighten one end of a paperclip. Carefully insert the straightened end into the pinhole, applying light pressure until the SIM card tray is partially ejected. Exercise caution to avoid using excessive force, as this could cause damage to the SIM card slot.
By successfully locating the SIM card slot, you have completed the first crucial step in preparing your Galaxy S4 for the insertion of the SIM card. This process sets the stage for the subsequent step of inserting the SIM card, allowing you to seamlessly integrate your device with your mobile network and begin utilizing its communication features.
Step 2: Insert the SIM Card
With the SIM card slot now accessible, the next step involves inserting the SIM card into your Samsung Galaxy S4. The SIM card, a small, rectangular chip, contains vital information that enables your device to connect to your mobile network and access communication services. Properly inserting the SIM card is essential to ensure seamless connectivity and functionality.
Follow these detailed instructions to insert the SIM card into your Galaxy S4:
-
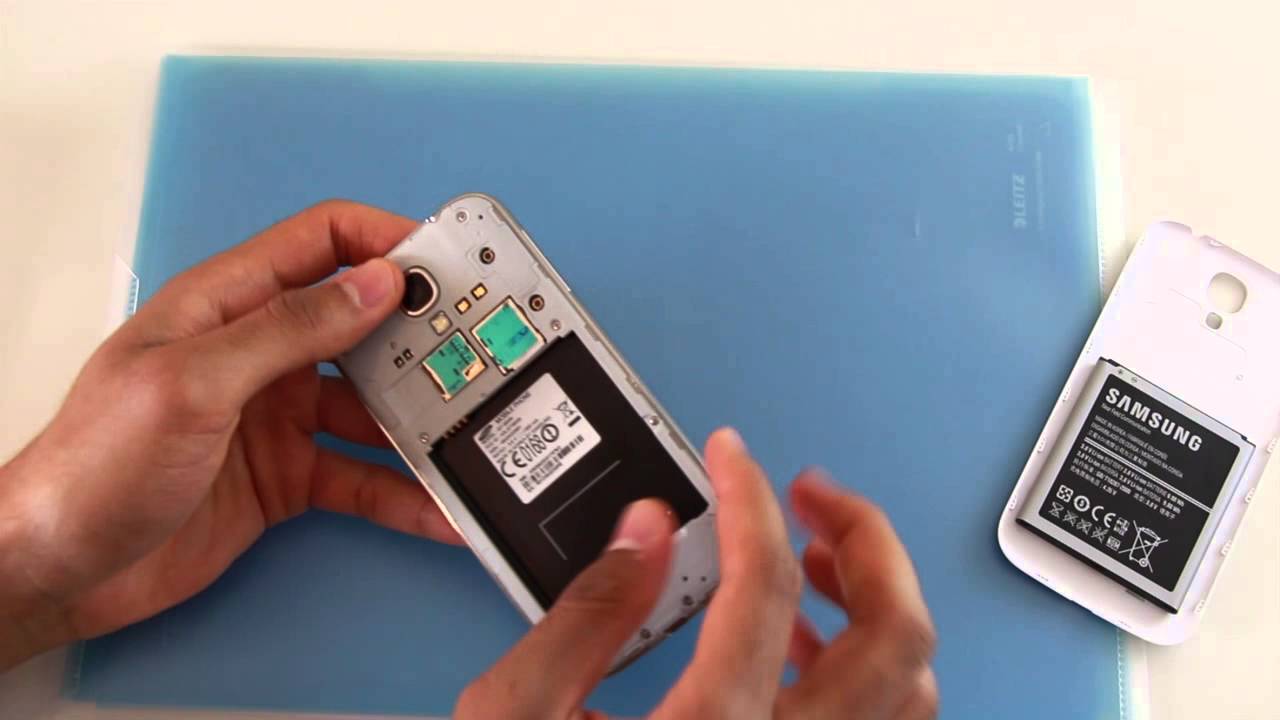
Removing the SIM Card Tray: Carefully grasp the partially ejected SIM card tray and pull it out from the device. The tray will slide out smoothly, allowing you to access the compartment where the SIM card will be placed.
-
Positioning the SIM Card: Examine the SIM card tray to identify the designated area for the SIM card. Align the SIM card with the tray, ensuring that the notched corner of the SIM card matches the corresponding notch on the tray. This alignment is crucial to ensure that the SIM card fits perfectly into the tray without any resistance.
-
Inserting the SIM Card: Once the SIM card is properly aligned with the tray, gently place it into the designated area. Apply a light, even pressure to ensure that the SIM card is securely seated in the tray. Take care to avoid bending or damaging the SIM card during this process.
-
Reinserting the Tray: After successfully placing the SIM card in the tray, carefully slide the tray back into the SIM card slot on your Galaxy S4. Ensure that the tray is inserted in the correct orientation, with the metal contacts of the SIM card facing downward. Apply gentle pressure to slide the tray back into the slot until it is flush with the device.
By following these steps, you have effectively inserted the SIM card into your Samsung Galaxy S4, laying the foundation for seamless connectivity and communication capabilities. The proper insertion of the SIM card ensures that your device can establish a connection with your mobile network, allowing you to make calls, send texts, and access mobile data as needed.
With the SIM card securely in place, you are now ready to proceed to the next step of powering on your Galaxy S4 and initiating the setup process. This pivotal stage will enable you to activate your device and begin exploring its features and functionalities, empowered by the seamless integration of the SIM card into your Galaxy S4.
Now that the SIM card is successfully inserted, it's time to power on your Galaxy S4 and embark on your mobile communication journey.
Step 3: Power On the Device
With the SIM card securely inserted into your Samsung Galaxy S4, the next pivotal step is to power on the device. This essential action initiates the setup process, allowing you to activate your phone and begin exploring its myriad features and functionalities. The process of powering on your Galaxy S4 is straightforward, ensuring that you can seamlessly transition from the SIM card insertion to the activation of your device.
Follow these detailed steps to power on your Samsung Galaxy S4:
-
Locating the Power Button: The power button on the Galaxy S4 is typically positioned on the right-hand side of the device. It is identifiable as a small, protruding button that serves as the primary control for turning the phone on and off.
-
Pressing the Power Button: Using your thumb or finger, press and hold the power button for a few seconds until you see the screen illuminate. As the device powers on, the Samsung logo may appear, indicating that the phone is booting up.
-
Initial Setup Screens: Upon successfully powering on your Galaxy S4, you will be greeted by the initial setup screens. These screens will guide you through essential configuration steps, such as selecting your language, connecting to a Wi-Fi network, and signing in with your Google account.
-
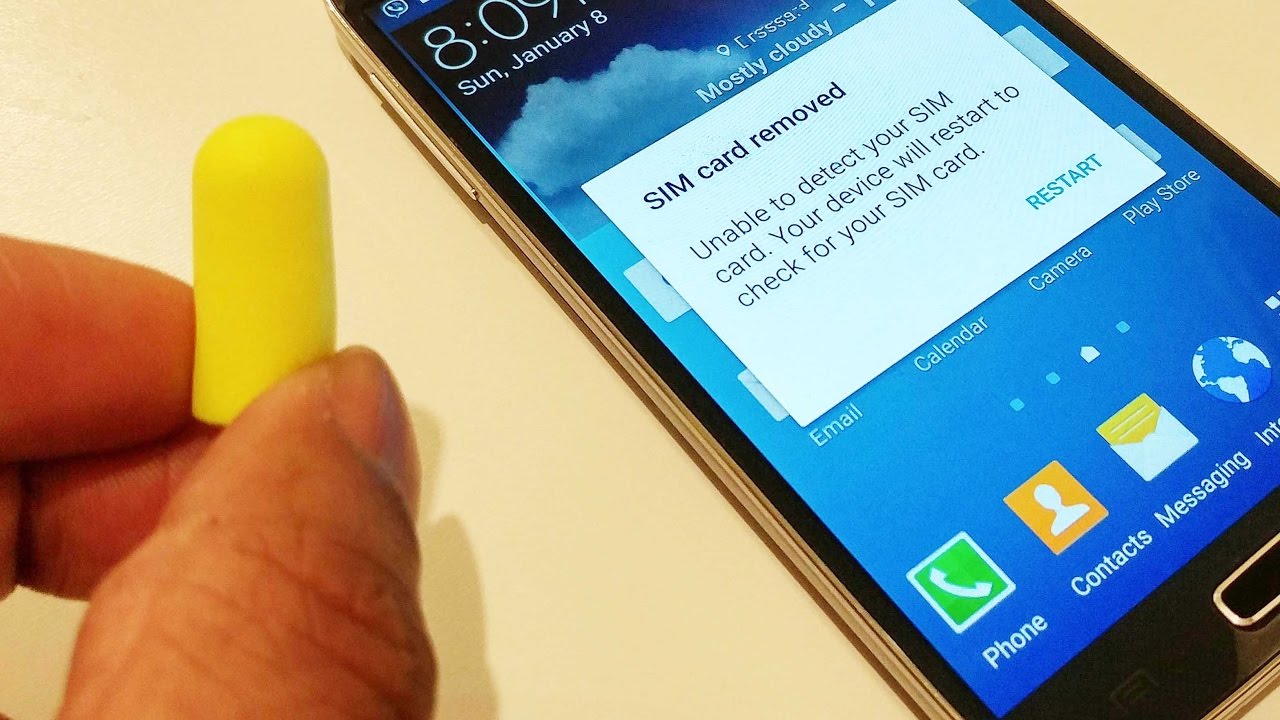
SIM Card Recognition: As the device completes the initial setup, it will recognize the inserted SIM card and establish a connection with your mobile network. This recognition is crucial for enabling voice calls, text messaging, and mobile data usage on your Galaxy S4.
-
Completing the Setup: Follow the on-screen prompts to complete the setup process, including customizing your device settings, adding additional accounts, and personalizing your home screen. Once the setup is complete, your Galaxy S4 will be fully activated and ready for use.
By successfully powering on your Samsung Galaxy S4, you have completed the essential steps to activate your device and integrate the SIM card, ensuring seamless connectivity and communication capabilities. The successful power-on process sets the stage for you to explore the diverse features and functionalities offered by your Galaxy S4, empowering you to stay connected and engaged in the digital world.
With the device powered on and activated, you are now equipped to harness the full potential of your Samsung Galaxy S4, leveraging its advanced capabilities to communicate, connect, and engage with the world around you. Whether making calls, sending messages, or accessing online content, your Galaxy S4 is primed and ready to enhance your mobile experience.
Now that your Galaxy S4 is powered on and activated, you are poised to embark on a seamless and enriching mobile communication journey, empowered by the seamless integration of the SIM card and the activation of your device.
Conclusion
In conclusion, the process of inserting a SIM card into your Samsung Galaxy S4 is a foundational step that paves the way for seamless connectivity and communication capabilities. By following the comprehensive tutorial outlined above, you have gained a thorough understanding of accessing the SIM card slot, properly inserting the SIM card, and powering on your device. This knowledge empowers you to embark on a mobile communication journey equipped with the essential tools to stay connected and engaged in the digital realm.
With the SIM card securely inserted into your Galaxy S4, you have ensured that your device can establish a connection with your mobile network, enabling voice calls, text messaging, and mobile data usage. The proper insertion of the SIM card sets the stage for you to leverage the advanced communication features offered by your Galaxy S4, allowing you to stay connected with friends, family, and colleagues while on the go.
The successful power-on process activates your Samsung Galaxy S4, initiating the setup process and guiding you through essential configuration steps. As the device recognizes the inserted SIM card and establishes a connection with your mobile network, you are poised to explore the diverse features and functionalities of your Galaxy S4. Whether customizing device settings, adding accounts, or personalizing your home screen, your Galaxy S4 is primed and ready to enhance your mobile experience.
As you embark on your mobile communication journey with your Galaxy S4, the seamless integration of the SIM card and the activation of your device ensure that you can harness the full potential of this advanced technology. Whether making calls, sending messages, or accessing online content, your Galaxy S4 serves as a versatile tool to keep you connected and engaged in today's interconnected world.
By mastering the process of inserting a SIM card into your Samsung Galaxy S4, you have laid a solid foundation for leveraging the communication capabilities of your device. This knowledge empowers you to seamlessly integrate your Galaxy S4 into your daily life, enabling you to communicate, connect, and engage with unparalleled convenience and efficiency.
With the SIM card securely in place and your Galaxy S4 powered on and activated, you are now ready to embark on a seamless and enriching mobile communication journey, empowered by the advanced capabilities of your device. As you navigate the digital landscape with your Galaxy S4, may you find boundless opportunities to stay connected, informed, and engaged, enhancing every aspect of your mobile experience.