Introduction
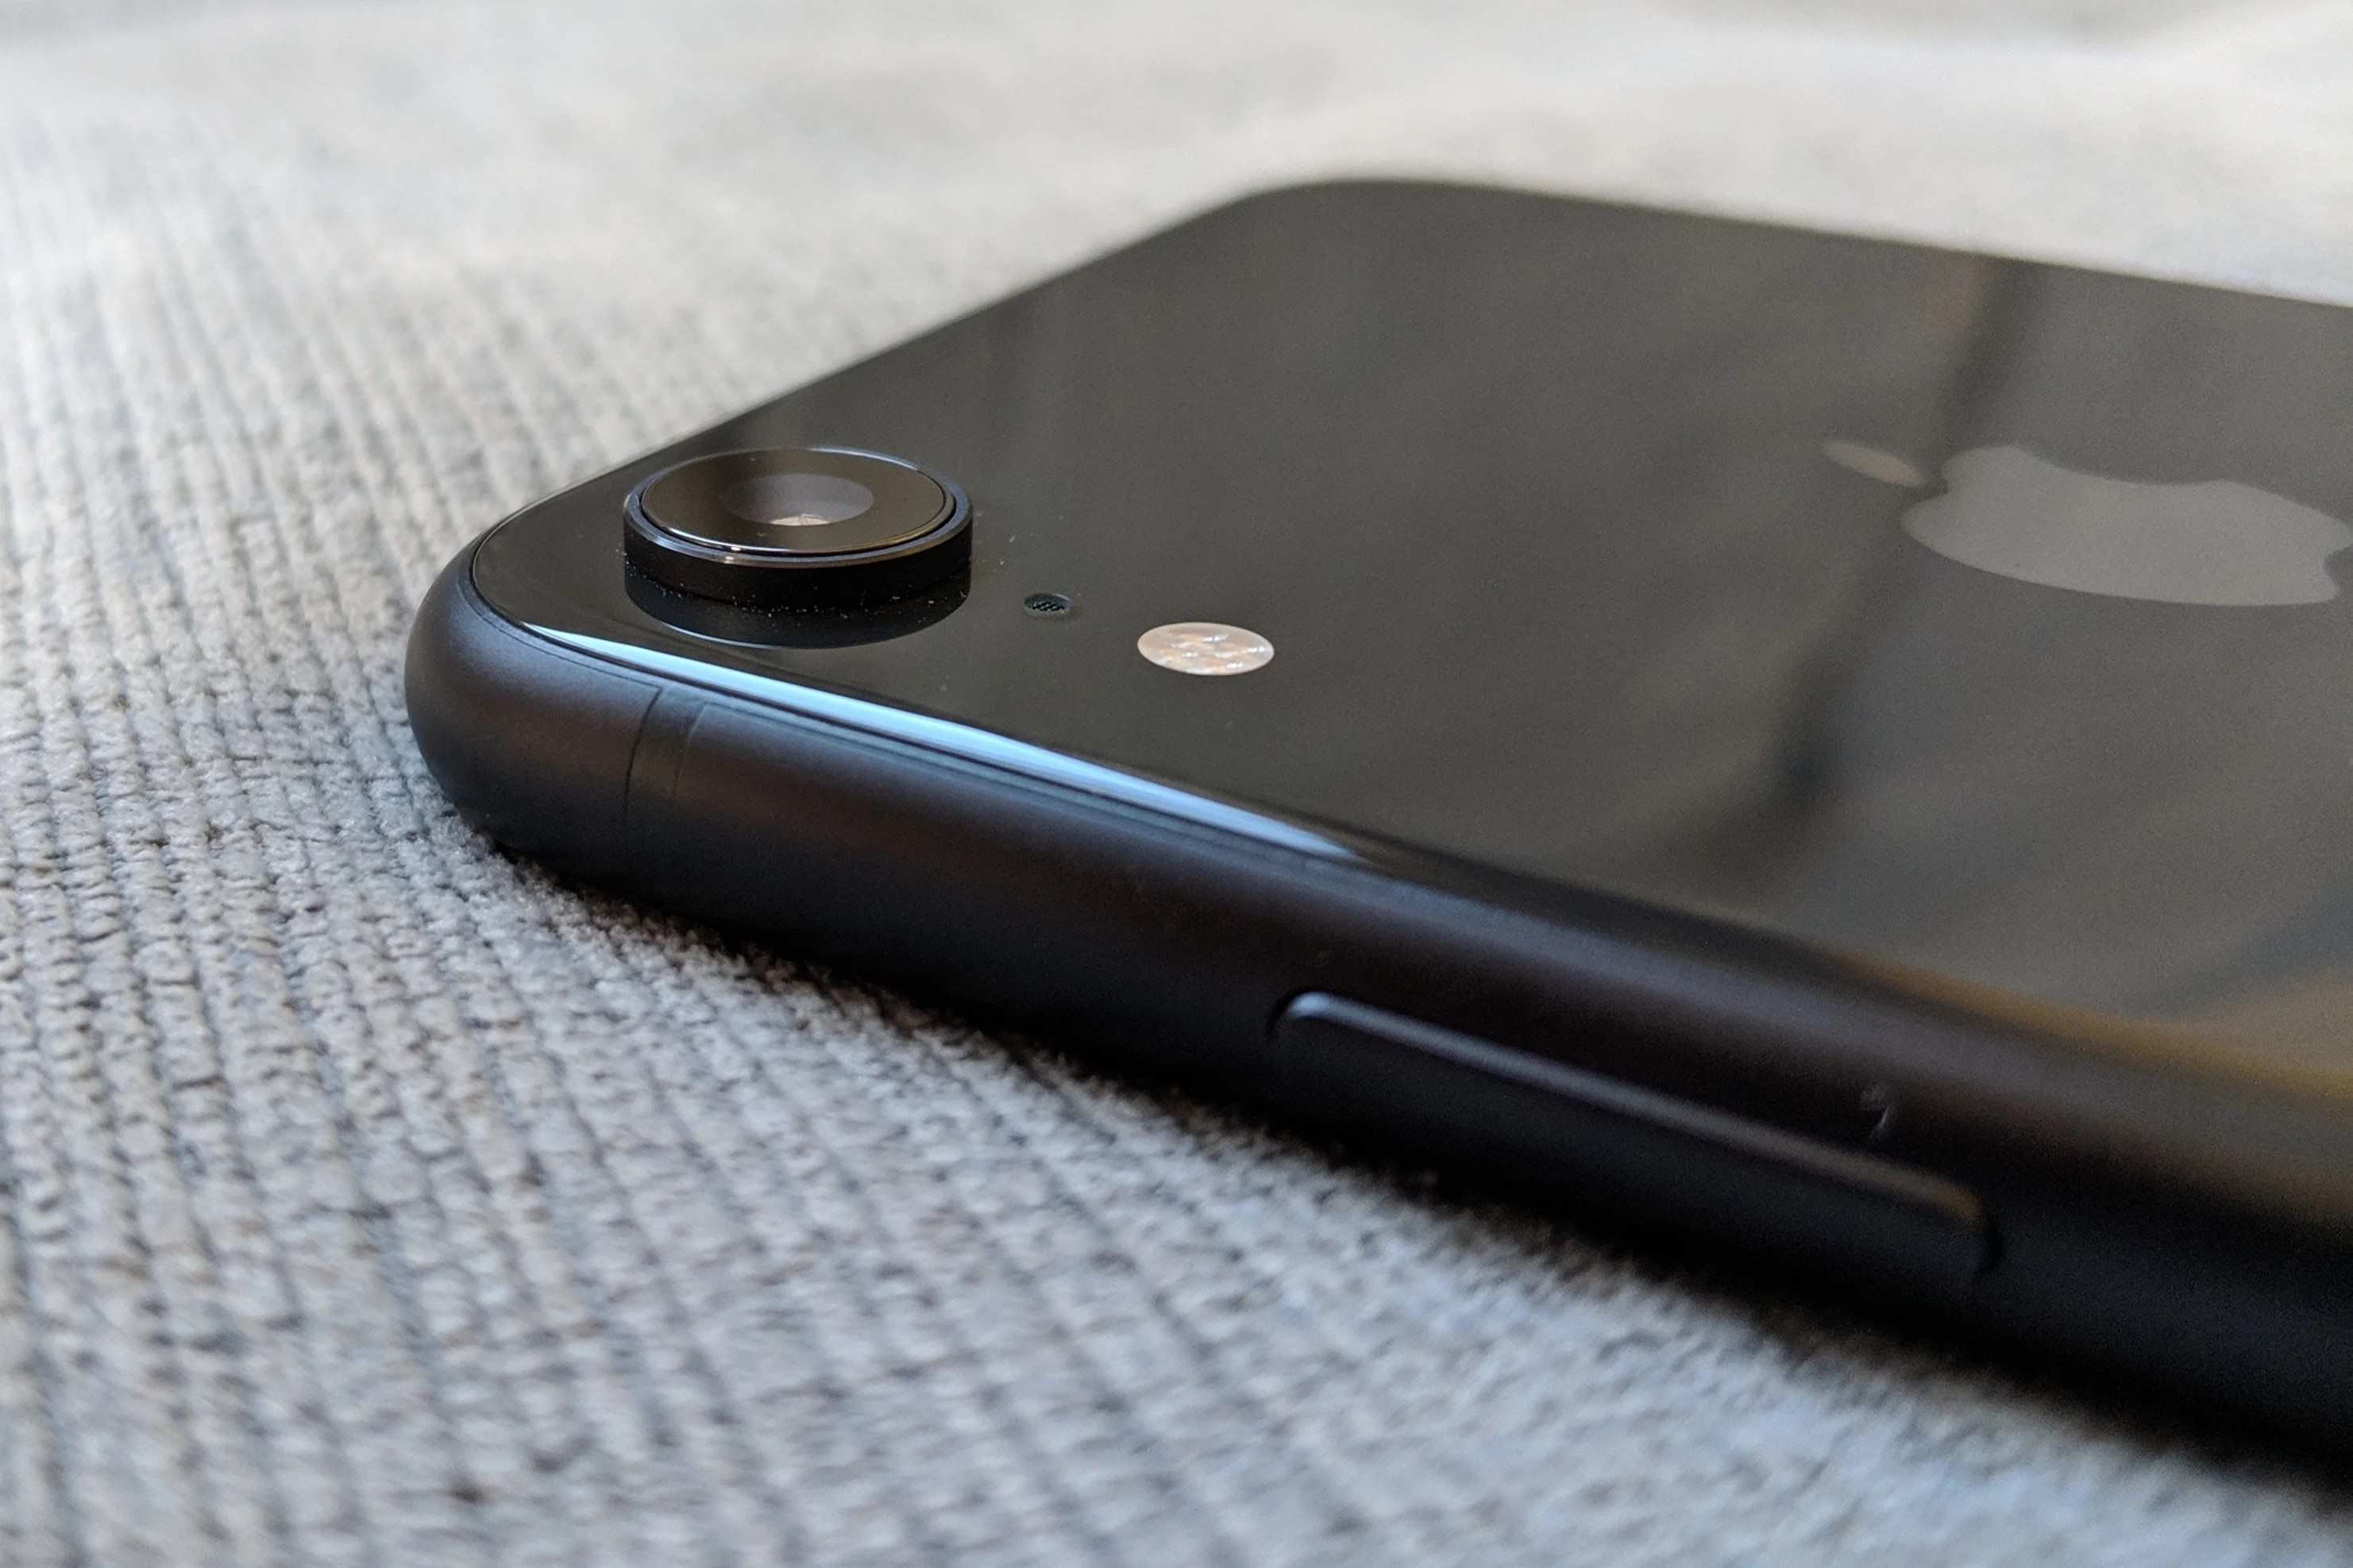
In today's fast-paced digital world, mobile devices have become an indispensable part of our daily lives. Whether it's staying connected with loved ones, accessing information on the go, or simply enjoying entertainment, our smartphones have evolved into powerful tools that cater to our diverse needs. The iPhone XR, known for its impressive features and sleek design, is a popular choice among users seeking a seamless mobile experience.
One crucial aspect of using a mobile device is the management of the SIM card, which serves as the gateway to our cellular network and allows us to make calls, send messages, and access mobile data. At times, users may need to extract the SIM card from their iPhone XR for various reasons, such as switching to a new device, changing service providers, or troubleshooting network issues. While the process of removing the SIM card may seem daunting to some, it can be easily accomplished with the right guidance and a few simple steps.
In this comprehensive guide, we will walk you through the process of extracting the SIM card from your iPhone XR in a clear and concise manner. By following the step-by-step instructions and utilizing the necessary tools, you will gain the confidence to perform this task with ease. Whether you're a tech-savvy individual or a novice user, this guide is designed to provide you with the knowledge and skills to successfully manage your iPhone XR's SIM card.
With a focus on clarity and user-friendly instructions, this guide aims to empower you to handle your iPhone XR's SIM card extraction process efficiently. By understanding the essential steps and techniques involved, you will be well-equipped to navigate this aspect of mobile device management with confidence and ease. Let's embark on this informative journey to uncover the simple yet crucial process of extracting the SIM card from your iPhone XR.
Step 1: Gather necessary tools
Before embarking on the process of extracting the SIM card from your iPhone XR, it's essential to gather the necessary tools to ensure a smooth and hassle-free experience. While the task itself is relatively straightforward, having the right tools at your disposal will streamline the process and minimize the risk of any potential issues.
The primary tool you will need for this task is the SIM eject tool, which is typically provided by Apple within the iPhone XR's original packaging. This small, metallic tool is specifically designed to facilitate the removal of the SIM card tray from the device. Its compact size and pointed tip enable precise and gentle manipulation of the SIM card tray, allowing for safe extraction without causing any damage to the device.
In the event that the original SIM eject tool is not readily available, an alternative can be used. A paperclip, when straightened out, can serve as a makeshift SIM eject tool, offering a similar functionality to the original tool. However, it's important to exercise caution and ensure that the makeshift tool is not too sharp or rigid, as this could potentially scratch or damage the SIM card tray during the extraction process.
Additionally, having a clean, soft cloth on hand can be beneficial for wiping the SIM card and tray, ensuring that any dust or debris is removed before reinsertion. This simple yet effective step can help maintain the integrity of the SIM card and ensure a secure connection when it is placed back into the device.
By gathering these essential tools – the SIM eject tool or a suitable alternative, and a clean, soft cloth – you will be fully prepared to proceed with the subsequent steps of the SIM card extraction process. With the necessary tools in hand, you are poised to navigate the process with confidence and precision, setting the stage for a successful SIM card extraction from your iPhone XR.
Step 2: Locate the SIM card tray
To begin the process of extracting the SIM card from your iPhone XR, it is essential to locate the SIM card tray, which houses the SIM card and facilitates its insertion and removal from the device. The SIM card tray is strategically positioned to ensure ease of access while maintaining the sleek and seamless design of the iPhone XR.
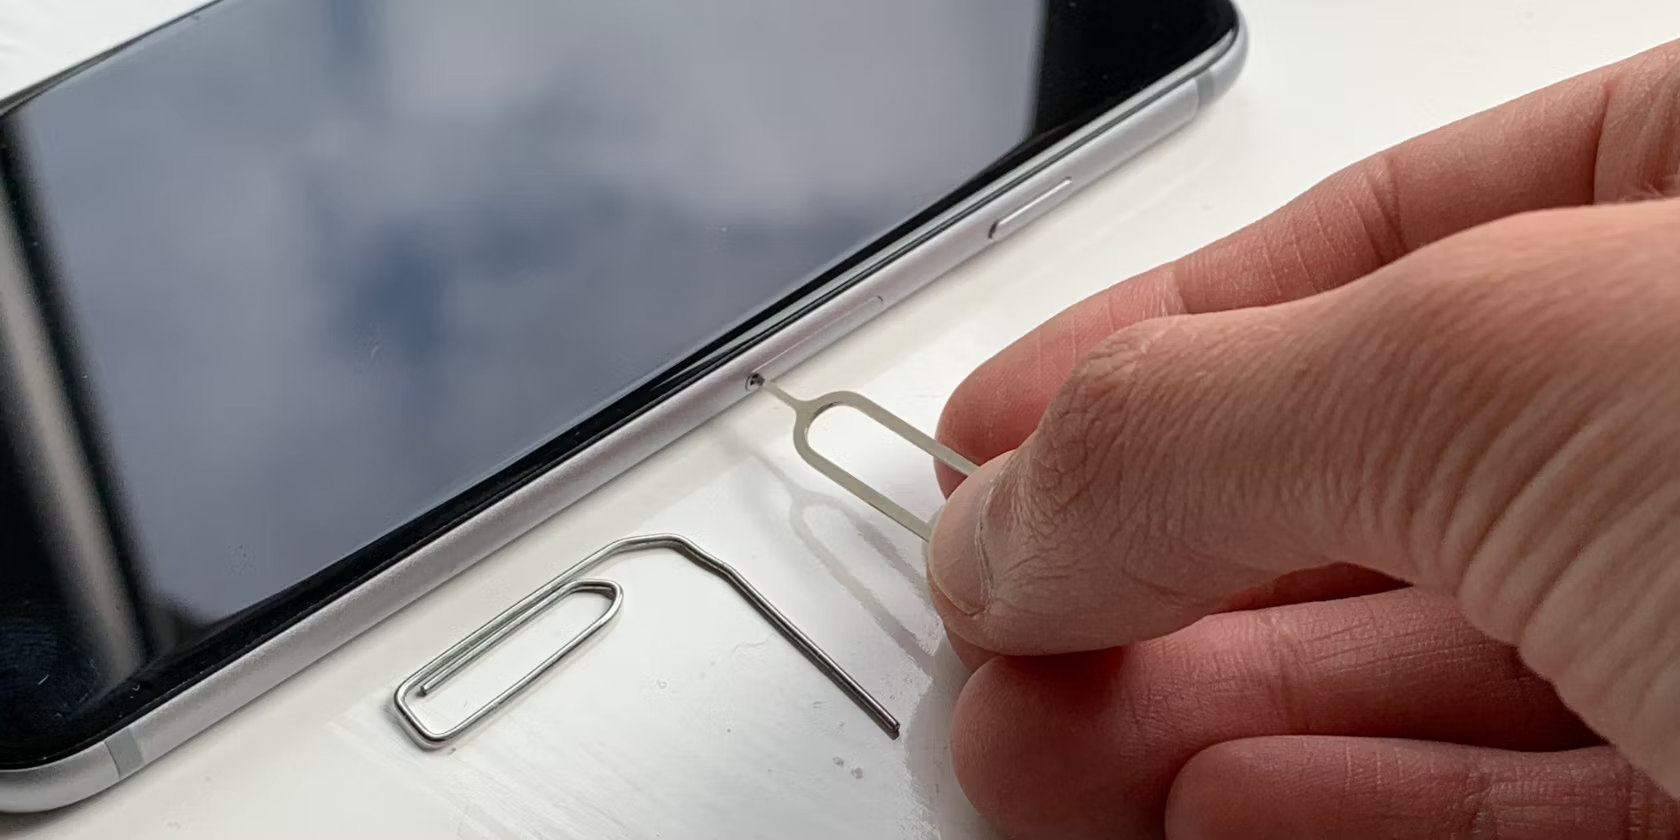
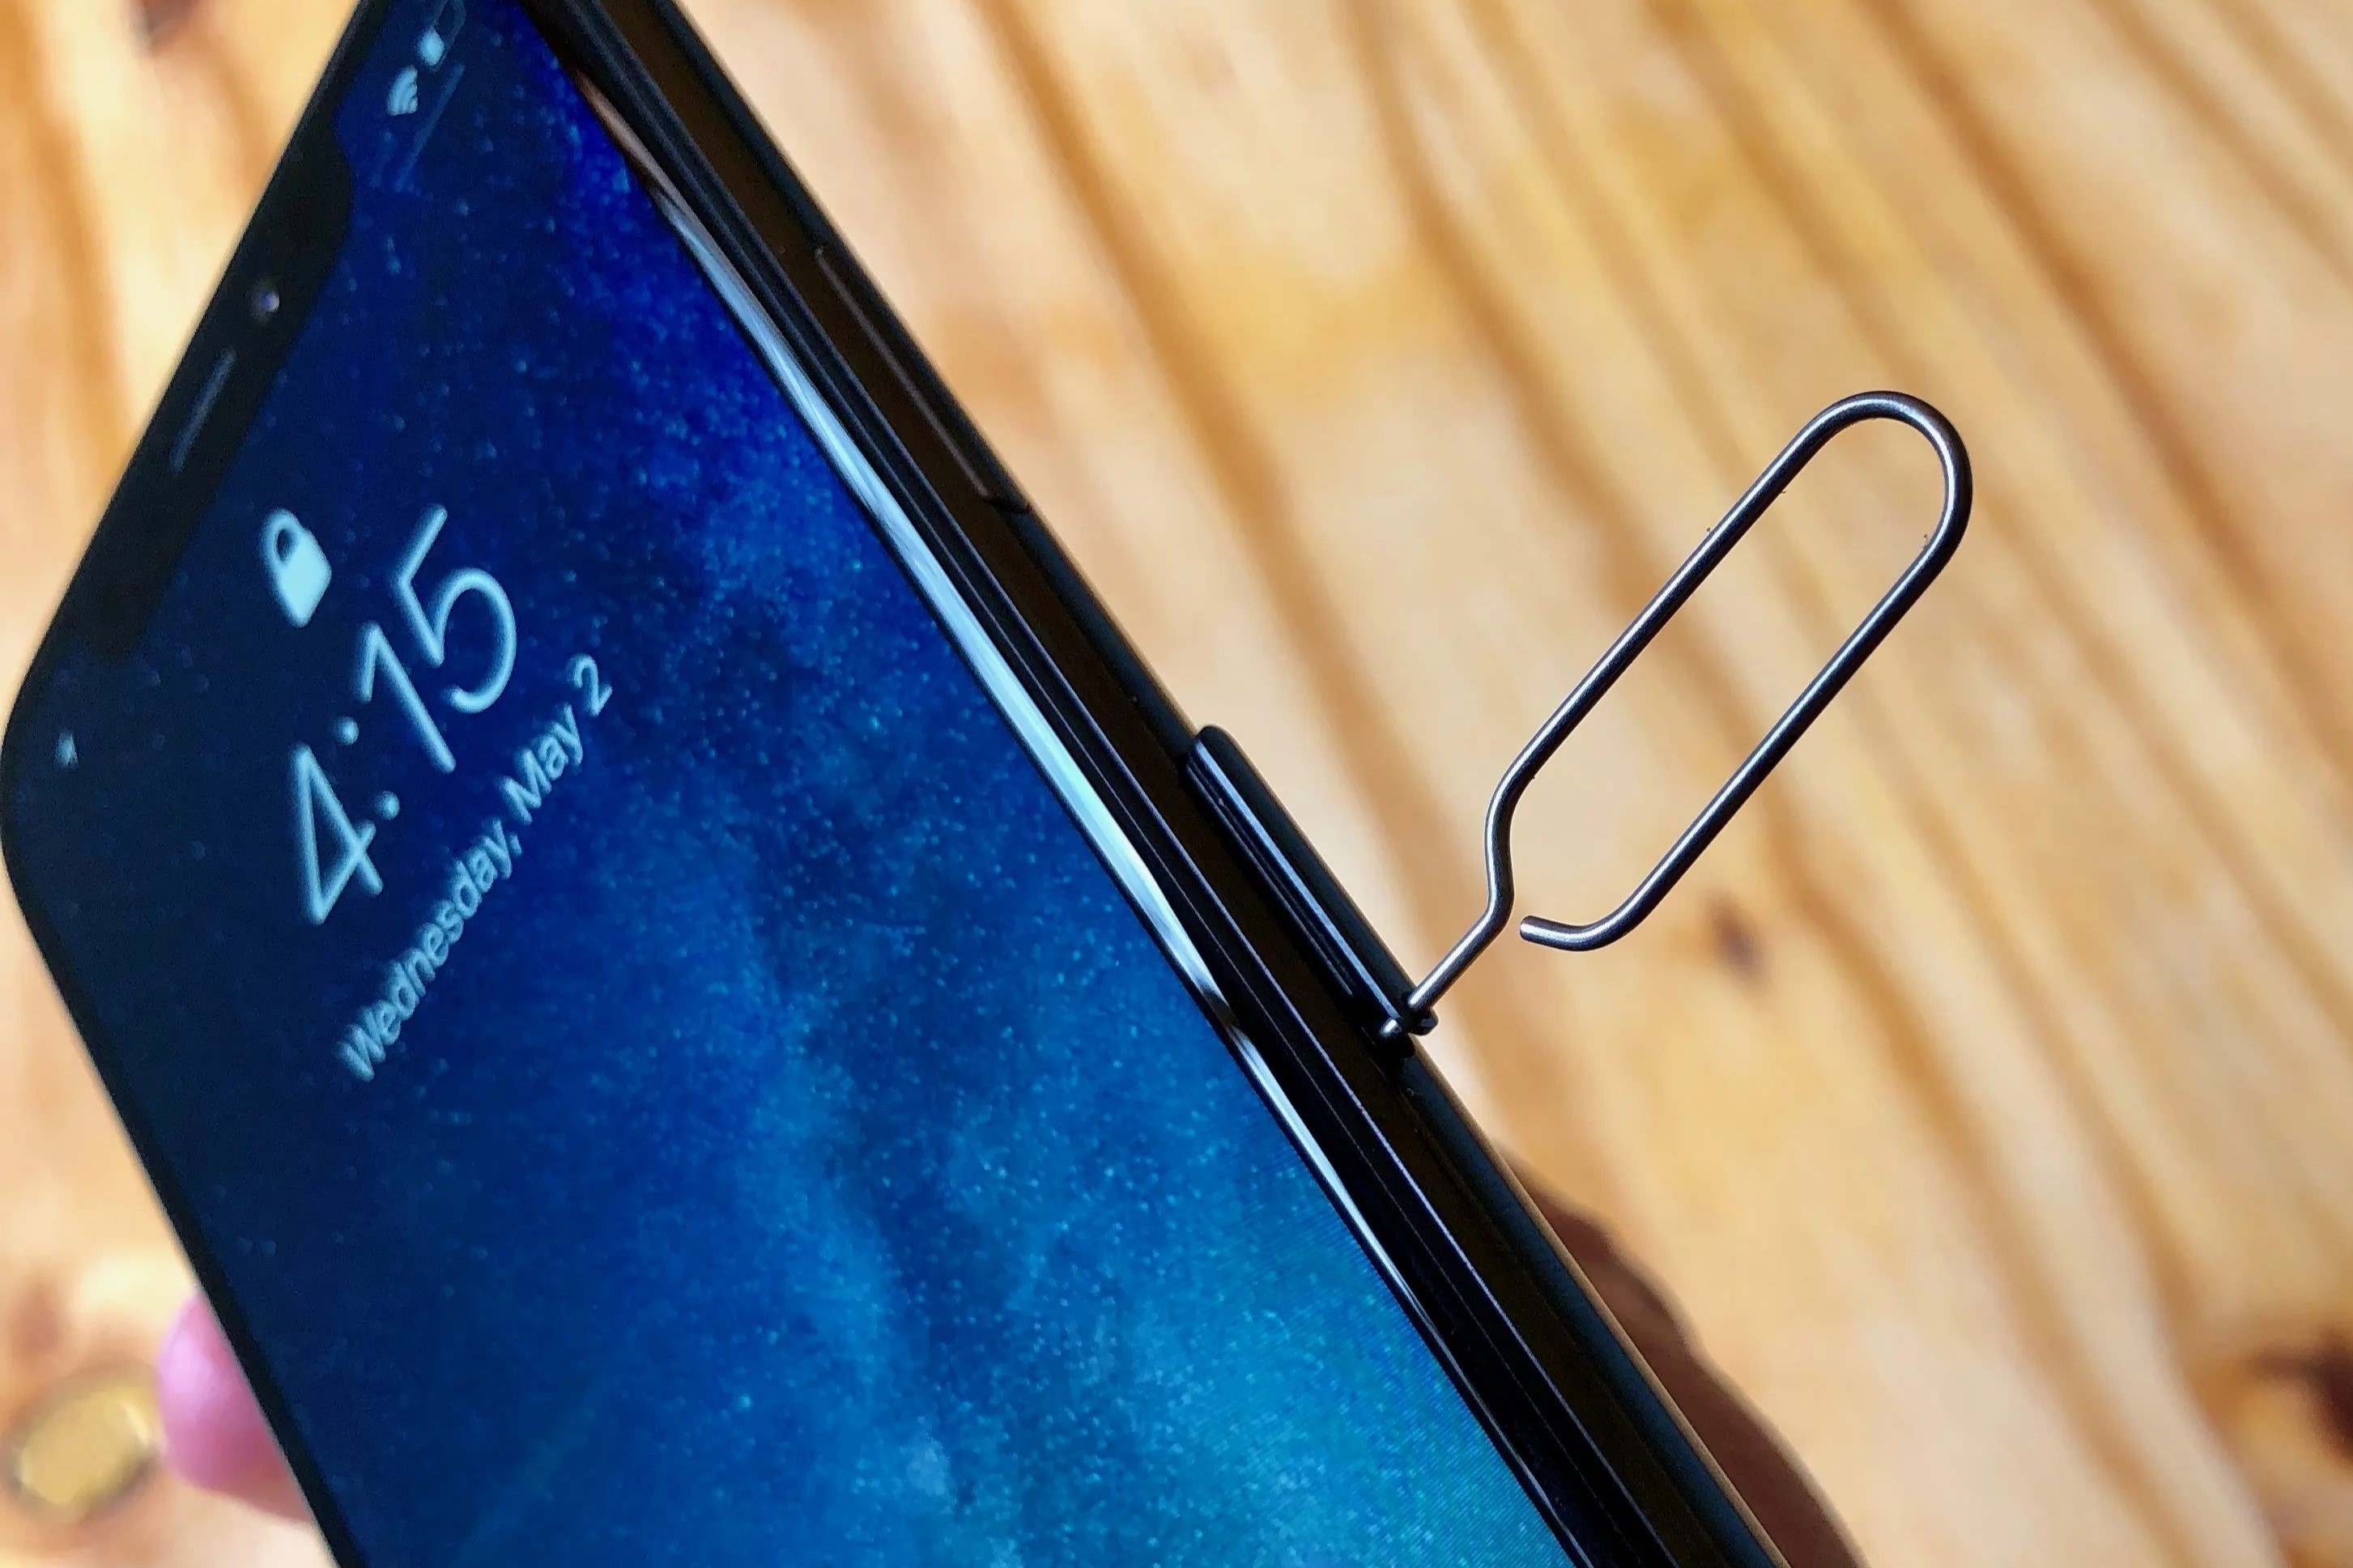
On the right side of the iPhone XR, you will find the SIM card tray slot, which is identifiable by a small pinhole located near the edge of the device. This discreetly positioned pinhole serves as the entry point for the SIM eject tool or alternative tool, allowing for the safe and precise extraction of the SIM card tray.
When handling the iPhone XR, it's important to orient the device so that the right side is facing you. By doing so, you will be able to easily identify the location of the SIM card tray slot and proceed with the subsequent steps of the extraction process.
The placement of the SIM card tray slot on the right side of the iPhone XR is a deliberate design choice that ensures a balanced and symmetrical aesthetic while providing convenient access for users. This thoughtful placement allows for a seamless integration of the SIM card tray into the device's overall design, maintaining a harmonious visual appeal without compromising functionality.
As you prepare to locate the SIM card tray on your iPhone XR, take a moment to familiarize yourself with the device's right-side layout. By identifying the small pinhole and its proximity to the device's edge, you will gain a clear understanding of the precise location of the SIM card tray slot, setting the stage for the subsequent steps of the extraction process.
With a keen eye and a firm grasp of the iPhone XR's right-side layout, you are now ready to proceed to the next step, where you will learn how to safely eject the SIM card tray from the device, paving the way for the seamless extraction of the SIM card.
Step 3: Eject the SIM card tray
With the SIM card tray located and the necessary tools at hand, it's time to proceed with the pivotal step of ejecting the SIM card tray from your iPhone XR. This step requires precision and a gentle touch to ensure the safe removal of the SIM card tray without causing any damage to the device.
Begin by taking the SIM eject tool, or the alternative tool, and inserting its pointed end into the small pinhole adjacent to the SIM card tray slot on the right side of the iPhone XR. Apply gentle pressure to engage the internal mechanism, which will release the SIM card tray from its secured position within the device.
As the internal mechanism is activated, you will feel a slight resistance, indicating that the SIM card tray is being disengaged from its slot. It's important to maintain a steady hand and avoid applying excessive force, as this could potentially damage the delicate components of the device.
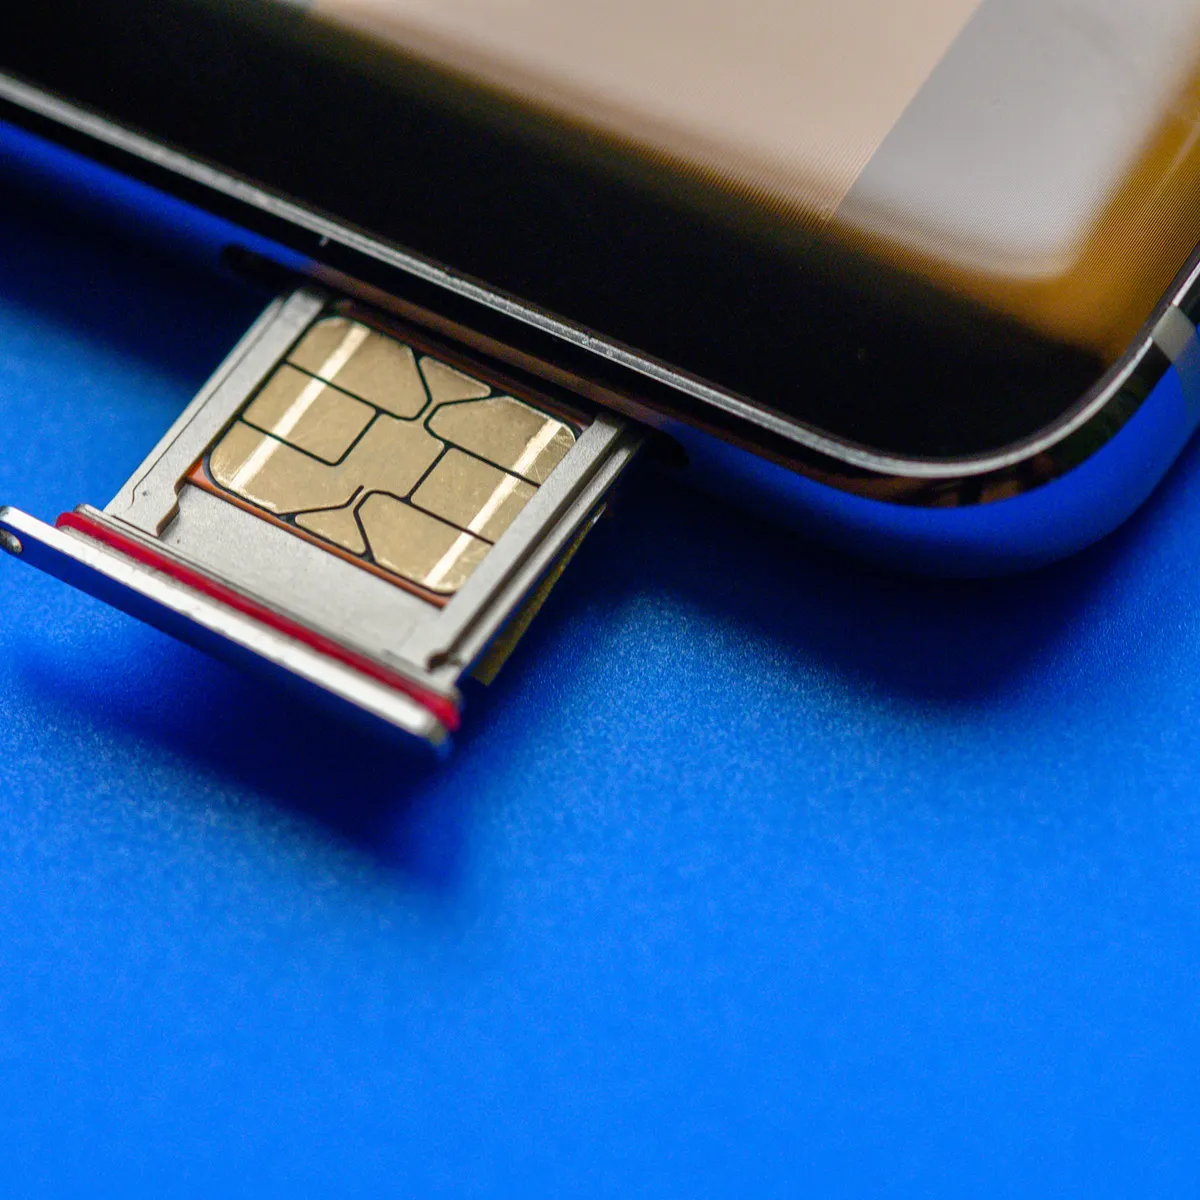
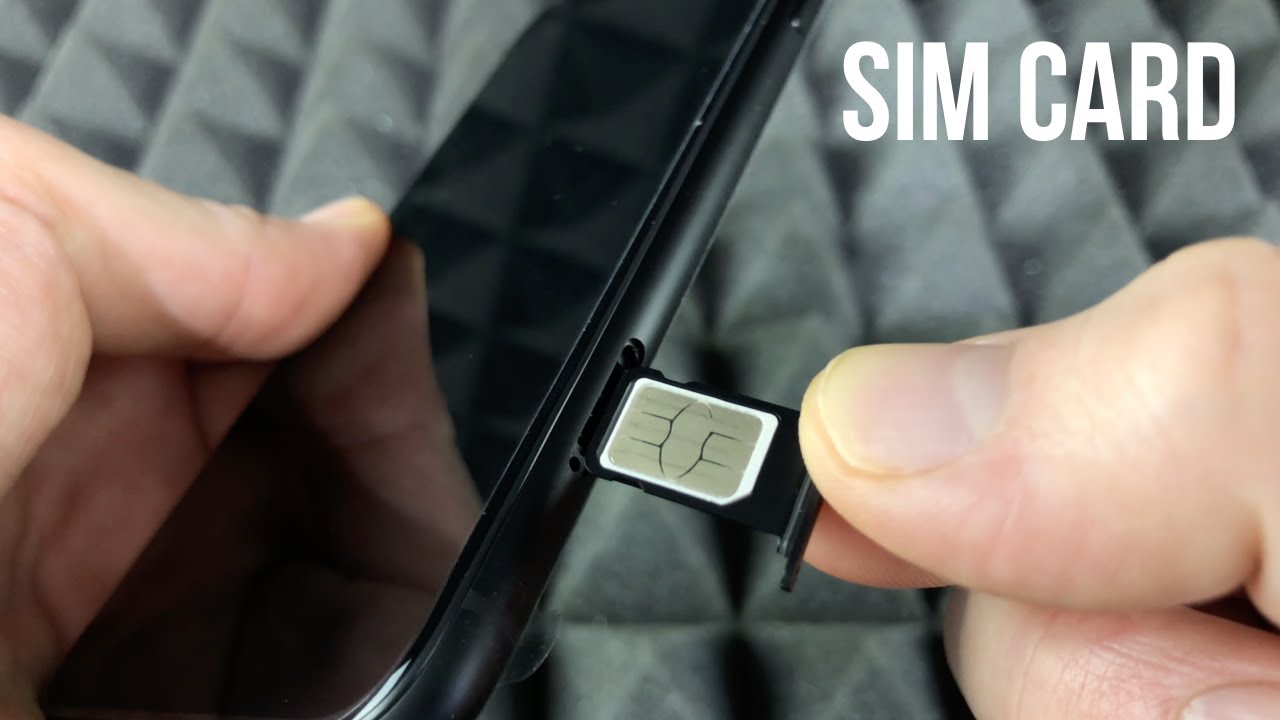
Upon successful disengagement, the SIM card tray will protrude slightly from the device, allowing for easy removal. Carefully grasp the exposed edge of the SIM card tray and gently pull it out of the iPhone XR, taking care to avoid any abrupt movements that may cause the SIM card to dislodge from its position within the tray.
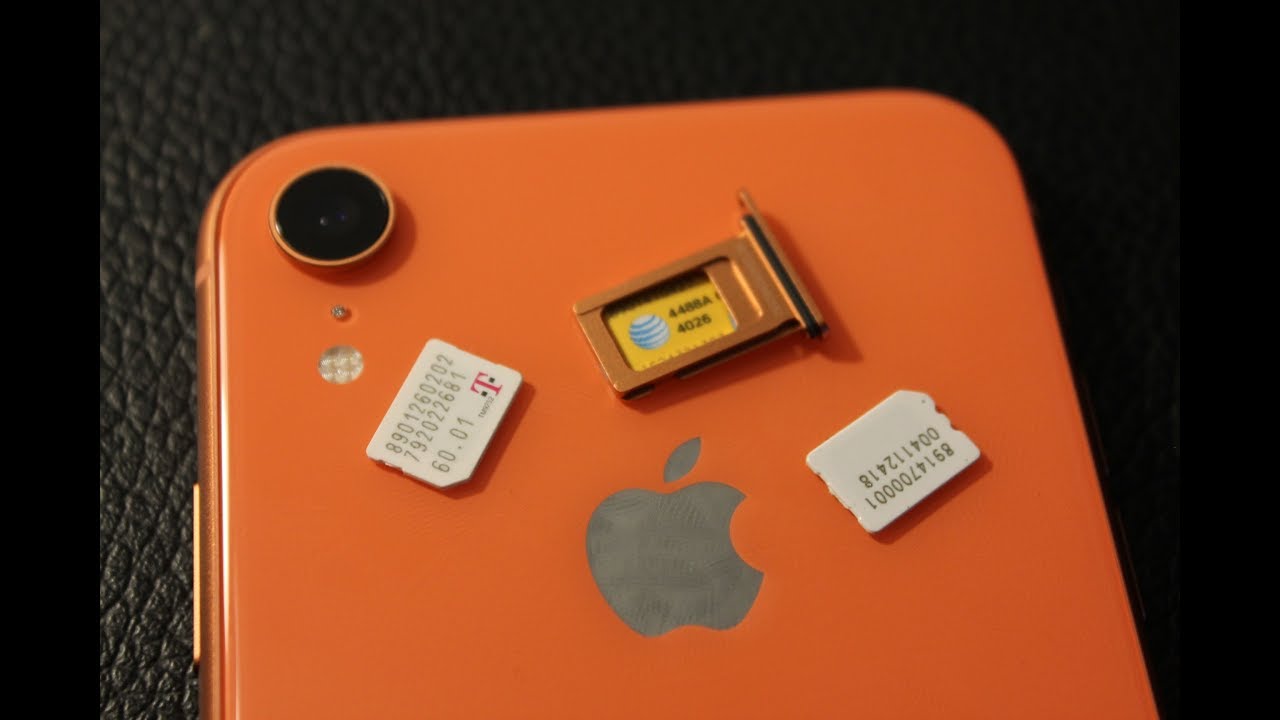
As the SIM card tray is extracted, take a moment to observe the positioning of the SIM card within the tray, ensuring that it remains securely in place. The SIM card should fit snugly within the designated slot, with its contacts facing downward to establish proper connectivity with the device.
With the SIM card tray in hand, carefully set it aside in a secure location, taking care to avoid misplacing it or subjecting it to any potential damage. This will ensure that the SIM card tray and the SIM card remain in optimal condition for the subsequent steps of the extraction process.
By successfully ejecting the SIM card tray from your iPhone XR with precision and care, you have set the stage for the next crucial step of removing the SIM card from the tray. This accomplishment brings you one step closer to managing your iPhone XR's SIM card with confidence and proficiency, laying the groundwork for a seamless and successful extraction process.
Step 4: Remove the SIM card
Having successfully ejected the SIM card tray from your iPhone XR, the next crucial step is to delicately remove the SIM card from the tray. The SIM card, a small yet integral component of your device, is responsible for facilitating your cellular connectivity, making it essential to handle with care during the extraction process.
Inspect the SIM card tray to locate the position of the SIM card. You will notice a small, rectangular slot within the tray, designed to securely hold the SIM card in place. Gently maneuver the tray to access the SIM card and carefully lift it from its designated slot. Exercise caution to avoid bending or damaging the SIM card during this process, ensuring that it remains in optimal condition for reinsertion.
As you remove the SIM card from the tray, take note of its orientation and positioning. The SIM card features a distinctive notch or corner that aligns with the corresponding notch within the tray, guiding its proper placement. By observing this orientation, you will be prepared to seamlessly reinsert the SIM card into the tray when the time comes.
Once the SIM card has been safely removed from the tray, take a moment to inspect it for any signs of damage or debris. Using a clean, soft cloth, gently wipe the SIM card to remove any dust or smudges, ensuring that it remains in pristine condition. This simple yet crucial step will help maintain the integrity of the SIM card and promote a secure connection when it is reinstalled in the device.
With the SIM card safely removed and inspected, set it aside in a secure location, away from any potential sources of damage or interference. This will ensure that the SIM card remains in optimal condition and is readily accessible when it is time to reinsert it into the iPhone XR.
By successfully removing the SIM card from the tray with precision and care, you have completed a pivotal step in the SIM card extraction process. This accomplishment brings you one step closer to managing your iPhone XR's SIM card with confidence and proficiency, laying the groundwork for a seamless and successful extraction process.
Step 5: Reinsert the SIM card tray
With the SIM card safely removed and the necessary steps completed, it's time to proceed with the crucial task of reinserting the SIM card tray into your iPhone XR. This step marks the final phase of the SIM card extraction process, culminating in the seamless restoration of the SIM card to its designated position within the device.
Begin by carefully positioning the SIM card within the tray, ensuring that it aligns with the designated slot and the corresponding notch or corner. The SIM card should fit snugly within the tray, with its contacts facing downward to establish proper connectivity with the device. This precise alignment is essential to ensure a secure and stable connection between the SIM card and the iPhone XR.
Once the SIM card is securely positioned within the tray, gently maneuver the SIM card tray back into its slot on the right side of the iPhone XR. Take care to align the tray with the slot and apply gentle pressure to guide it back into place. Avoid any abrupt movements that may disrupt the positioning of the SIM card within the tray, maintaining a steady and controlled approach throughout the reinsertion process.
As the SIM card tray slides back into its slot, you will feel a subtle resistance, indicating that it is securely engaged within the device. Ensure that the tray is flush with the device's edge, maintaining a seamless and integrated appearance that aligns with the iPhone XR's sleek design. This careful attention to detail will contribute to a secure and stable positioning of the SIM card tray within the device.
With the SIM card tray successfully reinserted, take a moment to ensure that it is securely in place and seamlessly integrated into the iPhone XR. This final confirmation serves as a testament to the precision and care with which you have managed the SIM card extraction process, culminating in the successful restoration of the SIM card to its rightful position within the device.
By reinserting the SIM card tray with precision and attention to detail, you have completed the final step of the SIM card extraction process, effectively managing your iPhone XR's SIM card with confidence and proficiency. This accomplishment underscores your ability to navigate essential device management tasks with ease, ensuring a seamless and successful extraction process from start to finish.
Conclusion
In conclusion, the process of extracting the SIM card from your iPhone XR encompasses a series of essential steps that require precision, care, and attention to detail. By following the step-by-step instructions outlined in this comprehensive guide, you have gained the knowledge and skills necessary to confidently manage your iPhone XR's SIM card with proficiency and ease.
Throughout this informative journey, you have learned the importance of gathering the necessary tools, locating the SIM card tray, ejecting the tray with precision, delicately removing the SIM card, and seamlessly reinserting the tray into the device. Each step represents a pivotal aspect of the extraction process, underscoring the significance of maintaining the integrity of the SIM card and the device itself.
By familiarizing yourself with the layout of the iPhone XR, identifying the SIM card tray slot, and utilizing the SIM eject tool or an alternative, you have effectively prepared yourself for the precise manipulation required to extract the SIM card. The deliberate design of the iPhone XR, including the discreet placement of the SIM card tray slot, reflects a harmonious balance between functionality and aesthetics, ensuring a seamless user experience.
The meticulous care exercised in removing the SIM card from the tray, inspecting it for any signs of damage, and maintaining its pristine condition underscores the significance of handling this essential component with the utmost care. This attention to detail is crucial in ensuring the secure and stable connection between the SIM card and the iPhone XR, contributing to a seamless mobile experience.
As you successfully reinsert the SIM card tray into the device, aligning it with precision and confirming its secure positioning, you affirm your ability to navigate essential device management tasks with confidence and proficiency. This accomplishment serves as a testament to your dedication to maintaining the optimal functionality of your iPhone XR, ensuring that it continues to serve as a reliable and indispensable tool in your daily life.
In mastering the process of extracting the SIM card from your iPhone XR, you have not only acquired valuable skills in device management but also gained a deeper understanding of the intricate components that contribute to the seamless operation of your mobile device. This newfound knowledge empowers you to confidently manage your iPhone XR's SIM card, setting the stage for a seamless and successful extraction process, and ensuring an uninterrupted mobile experience.
As you embark on your continued journey with your iPhone XR, equipped with the knowledge and skills gained from this guide, you are poised to navigate future device management tasks with confidence, ensuring the optimal performance and functionality of your device. With a clear understanding of the SIM card extraction process, you are well-prepared to handle this essential aspect of mobile device management with ease and proficiency.