Introduction
Enabling read receipts on your Samsung S20 can be a valuable feature, providing you with the assurance that your messages have been received and read by the intended recipients. This functionality is particularly useful for maintaining effective communication and ensuring that important messages are acknowledged in a timely manner. By activating read receipts, you can gain insight into the status of your messages, allowing you to follow up as needed and fostering clearer and more efficient interactions with your contacts.
In this comprehensive guide, we will walk you through the step-by-step process of enabling read receipts on your Samsung S20. Whether you're communicating with friends, family, or colleagues, having read receipts activated can offer peace of mind and enhance your overall messaging experience. With our easy-to-follow instructions, you'll be able to navigate the settings of your Messages app and enable this feature in no time.
So, let's dive in and explore how you can empower your Samsung S20 with the capability to provide read receipts, ensuring that your messages are not only delivered but also acknowledged by the recipients. Let's get started with the first step: opening the Messages app.
Step 1: Open the Messages App
To begin the process of enabling read receipts on your Samsung S20, you'll first need to open the Messages app. This app serves as the central hub for all your text-based communications, allowing you to seamlessly send and receive messages from your contacts.
-
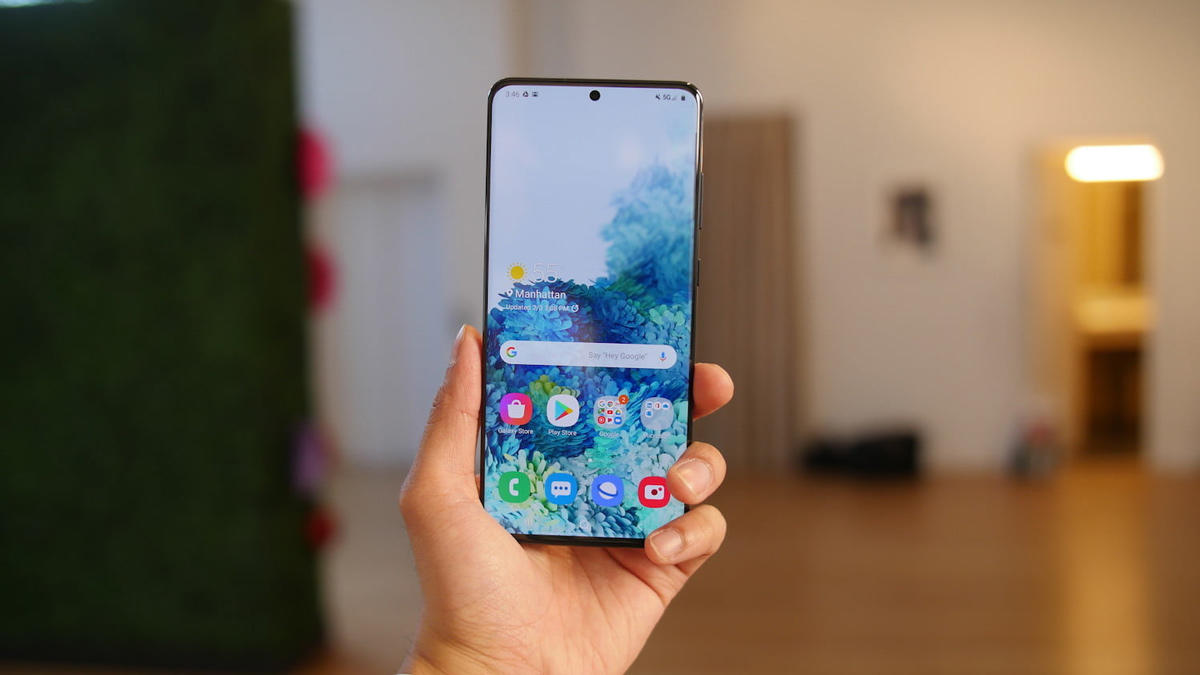
Locate the Messages App Icon: On your Samsung S20's home screen, look for the Messages app icon. It typically features a speech bubble or messaging symbol, making it easily recognizable among your other applications.
-
Tap the Messages App Icon: Once you've located the Messages app icon, simply tap on it to launch the application. This action will open the Messages interface, presenting you with your ongoing conversations and message threads.
-
Accessing the App Drawer: In some instances, the Messages app icon may not be directly visible on your home screen. If this is the case, you can access it by swiping up or down to reveal the app drawer, where all your installed applications are listed. From there, you can locate the Messages app and tap on it to open the application.
-
Using the Search Function: If you have numerous apps installed and are having trouble locating the Messages app, you can utilize the search function on your device. Simply swipe down on the home screen to reveal the search bar, then type "Messages" to quickly locate and access the app.
Once you have successfully opened the Messages app, you are now ready to proceed to the next step in enabling read receipts on your Samsung S20. With the app now accessible, you can seamlessly navigate to the settings where you can configure the read receipt feature, bringing added visibility to your messaging interactions.
Step 2: Access the Settings
After successfully opening the Messages app on your Samsung S20, the next step is to access the settings where you can configure the read receipt feature. This process involves navigating through the app's interface to locate the specific setting that controls the activation of read receipts. By following the steps outlined below, you'll be able to seamlessly access the settings and proceed with enabling this valuable functionality.
-
Locate the Menu Icon: Upon opening the Messages app, look for the menu icon, typically represented by three vertical dots or lines, located either at the top or bottom of the screen. This icon serves as the gateway to the app's settings and additional features.
-
Tap the Menu Icon: Once you've identified the menu icon, tap on it to reveal a dropdown or expanded menu. This action will present you with a range of options and settings that you can explore and customize according to your preferences.
-
Navigate to Settings: Within the menu, locate and tap on the "Settings" option. This will direct you to the settings interface, where you can access various configurations and features related to your messaging experience.
-
Locate the Read Receipts Setting: As you navigate through the settings, keep an eye out for the "Read Receipts" or "Delivery Reports" option. Depending on the specific layout and design of the Messages app on your Samsung S20, this setting may be located within the main settings menu or nested within a subcategory related to messaging preferences.
-
Access the Read Receipts Setting: Once you've located the "Read Receipts" setting, tap on it to access the corresponding configuration screen. This is where you'll be able to enable the feature, allowing your device to send read receipts to the senders of the messages you receive.
By successfully accessing the settings within the Messages app, you are now one step closer to enabling read receipts on your Samsung S20. With the settings interface at your fingertips, you can seamlessly proceed to the next step of actually enabling the read receipt feature, bringing added transparency to your messaging interactions.
Step 3: Enable Read Receipts
Now that you have successfully accessed the settings within the Messages app on your Samsung S20, you are ready to proceed with enabling the read receipt feature. This functionality, once activated, will provide you with valuable insights into the status of your messages, allowing you to know when they have been received and read by the intended recipients. By following the step-by-step instructions outlined below, you can seamlessly enable read receipts and enhance your messaging experience.
-
Toggle the Read Receipts Option: Within the settings interface of the Messages app, locate the "Read Receipts" or "Delivery Reports" option. Once you have found this setting, you will typically see a toggle switch adjacent to it. To enable read receipts, simply tap on the toggle switch, causing it to shift to the "on" position. This action signifies that read receipts will now be sent to the senders of the messages you receive, providing them with confirmation that you have read their messages.
-
Confirmation Prompt: In some instances, upon toggling the read receipts option, you may encounter a confirmation prompt or dialogue box. This prompt serves as a final confirmation before enabling the feature. If prompted, simply review the details presented and confirm your decision to activate read receipts. This additional step ensures that you are intentionally enabling this feature and allows you to proceed with confidence.
-
Verification of Activation: Once you have successfully toggled the read receipts option and confirmed any prompts, take a moment to verify that the feature has been activated. You can typically do this by observing a visual indicator or icon within the Messages app, signaling that read receipts are now enabled. Additionally, you may receive a notification or on-screen confirmation that the feature is active, providing you with reassurance that your messages will now generate read receipts.
By following these straightforward steps, you have effectively enabled read receipts on your Samsung S20, empowering your device to provide confirmation to the senders of your messages. This feature brings added transparency to your communication, allowing for clearer and more accountable interactions with your contacts. With read receipts activated, you can proceed with confidence, knowing that your messages are not only delivered but also acknowledged by the recipients.
With read receipts now enabled, you can seamlessly proceed to the next step of confirming that the feature is fully operational on your Samsung S20. This verification step will provide you with the assurance that read receipts are being sent as intended, further enhancing your messaging experience.
Step 4: Confirm Read Receipts are Enabled
After successfully enabling read receipts on your Samsung S20, it's essential to confirm that the feature is fully operational. This verification step ensures that your device is indeed sending read receipts to the senders of your messages, providing them with confirmation that you have received and read their communications. By confirming the activation of read receipts, you can gain peace of mind and proceed with your messaging interactions with added transparency and accountability.
To confirm that read receipts are enabled on your Samsung S20, follow these straightforward steps:
-
Send Test Messages: To initiate the confirmation process, consider sending test messages to a trusted contact or a secondary device. By sending messages from your Samsung S20 to another device, you can observe the behavior of the read receipt feature in action. Once the messages have been sent, wait for them to be delivered and subsequently read by the recipient.
-
Observe Read Receipt Icons: As the recipient reads the test messages you've sent, keep an eye out for read receipt icons or indicators within the Messages app. Typically, a small icon or label will appear next to the sent messages, indicating that read receipts have been generated and sent to the message senders. This visual confirmation serves as evidence that the read receipt feature is indeed operational on your device.
-
Receive Confirmation Notifications: In some instances, your device may generate notifications or on-screen confirmations when read receipts are sent to message senders. These notifications serve as real-time feedback, informing you that the read receipt feature is actively functioning. By receiving these notifications, you can confidently proceed with your messaging activities, knowing that your messages are being acknowledged through read receipts.
-
Verify with Recipients: For added assurance, consider reaching out to the recipients of your test messages and inquire whether they have received read receipts for the messages you sent. By directly communicating with the recipients, you can confirm that the read receipt feature is functioning from their perspective as well, further validating its activation on your Samsung S20.
By following these steps to confirm the activation of read receipts, you can ensure that this valuable feature is fully operational on your Samsung S20. With read receipts enabled and verified, you can engage in your messaging interactions with increased confidence, knowing that your messages are being acknowledged and accounted for by the recipients.
With read receipts now confirmed to be enabled on your Samsung S20, you can seamlessly proceed with your messaging activities, leveraging the added visibility and accountability that this feature provides. Whether you're communicating with friends, family, or colleagues, the activation of read receipts enhances your overall messaging experience, fostering clearer and more responsive interactions.
Conclusion
In conclusion, enabling read receipts on your Samsung S20 can significantly enhance your messaging experience by providing valuable insights into the status of your messages. By following the step-by-step instructions outlined in this guide, you have successfully empowered your device to send read receipts to the senders of your messages, ensuring that your communications are not only delivered but also acknowledged by the recipients.
With read receipts activated, you can engage in more transparent and accountable interactions with your contacts, knowing that your messages are being received and read. This feature is particularly valuable in scenarios where timely acknowledgments and responses are essential, such as in professional communications or urgent personal messages.
By confirming the activation of read receipts and observing their functionality, you have gained confidence in the reliability of this feature on your Samsung S20. This assurance allows you to proceed with your messaging activities, knowing that your communications are being effectively acknowledged by the intended recipients.
Moving forward, you can leverage the benefits of read receipts to follow up on important messages, track the status of your communications, and ensure that your interactions are clear and responsive. Whether you're coordinating plans with friends, sharing critical information with colleagues, or staying connected with family, the activation of read receipts brings added visibility and accountability to your messaging endeavors.
As technology continues to evolve, the ability to monitor the status of our communications becomes increasingly valuable. With read receipts enabled on your Samsung S20, you are equipped with a powerful tool to enhance your messaging efficiency and ensure that your messages are not only delivered but also actively acknowledged.
In essence, the activation of read receipts on your Samsung S20 represents a proactive step toward fostering clearer and more accountable communication. By embracing this feature, you are embracing a more informed and responsive approach to your messaging interactions, ultimately contributing to more effective and satisfying communication experiences.
With read receipts now seamlessly integrated into your messaging capabilities, you are well-positioned to navigate your digital communications with increased confidence and clarity, knowing that your messages are being acknowledged and accounted for.


