Introduction
Welcome to the world of do-it-yourself (DIY) electronics, where you have the power to create innovative solutions right in the comfort of your own home. In this comprehensive guide, we will delve into the fascinating realm of infrared (IR) technology and show you how to craft your very own IR blaster. An IR blaster, also known as an IR transmitter, is a device that emits infrared signals to control various electronic appliances such as TVs, air conditioners, and audio systems. By constructing your own IR blaster, you can gain a deeper understanding of how these devices function and even customize them to suit your specific needs.
Throughout this step-by-step journey, you will learn how to gather the necessary components, solder the circuit, assemble the IR blaster, and test the IR transmitter. Whether you are a seasoned electronics enthusiast or a curious beginner, this guide is designed to empower you with the knowledge and skills to embark on this exciting DIY project. So, roll up your sleeves, grab your tools, and let's dive into the world of DIY IR blasters!
Materials Needed
To embark on this DIY adventure, you'll need a handful of essential materials and tools. Here's a comprehensive list to ensure you're fully prepared for the journey ahead:
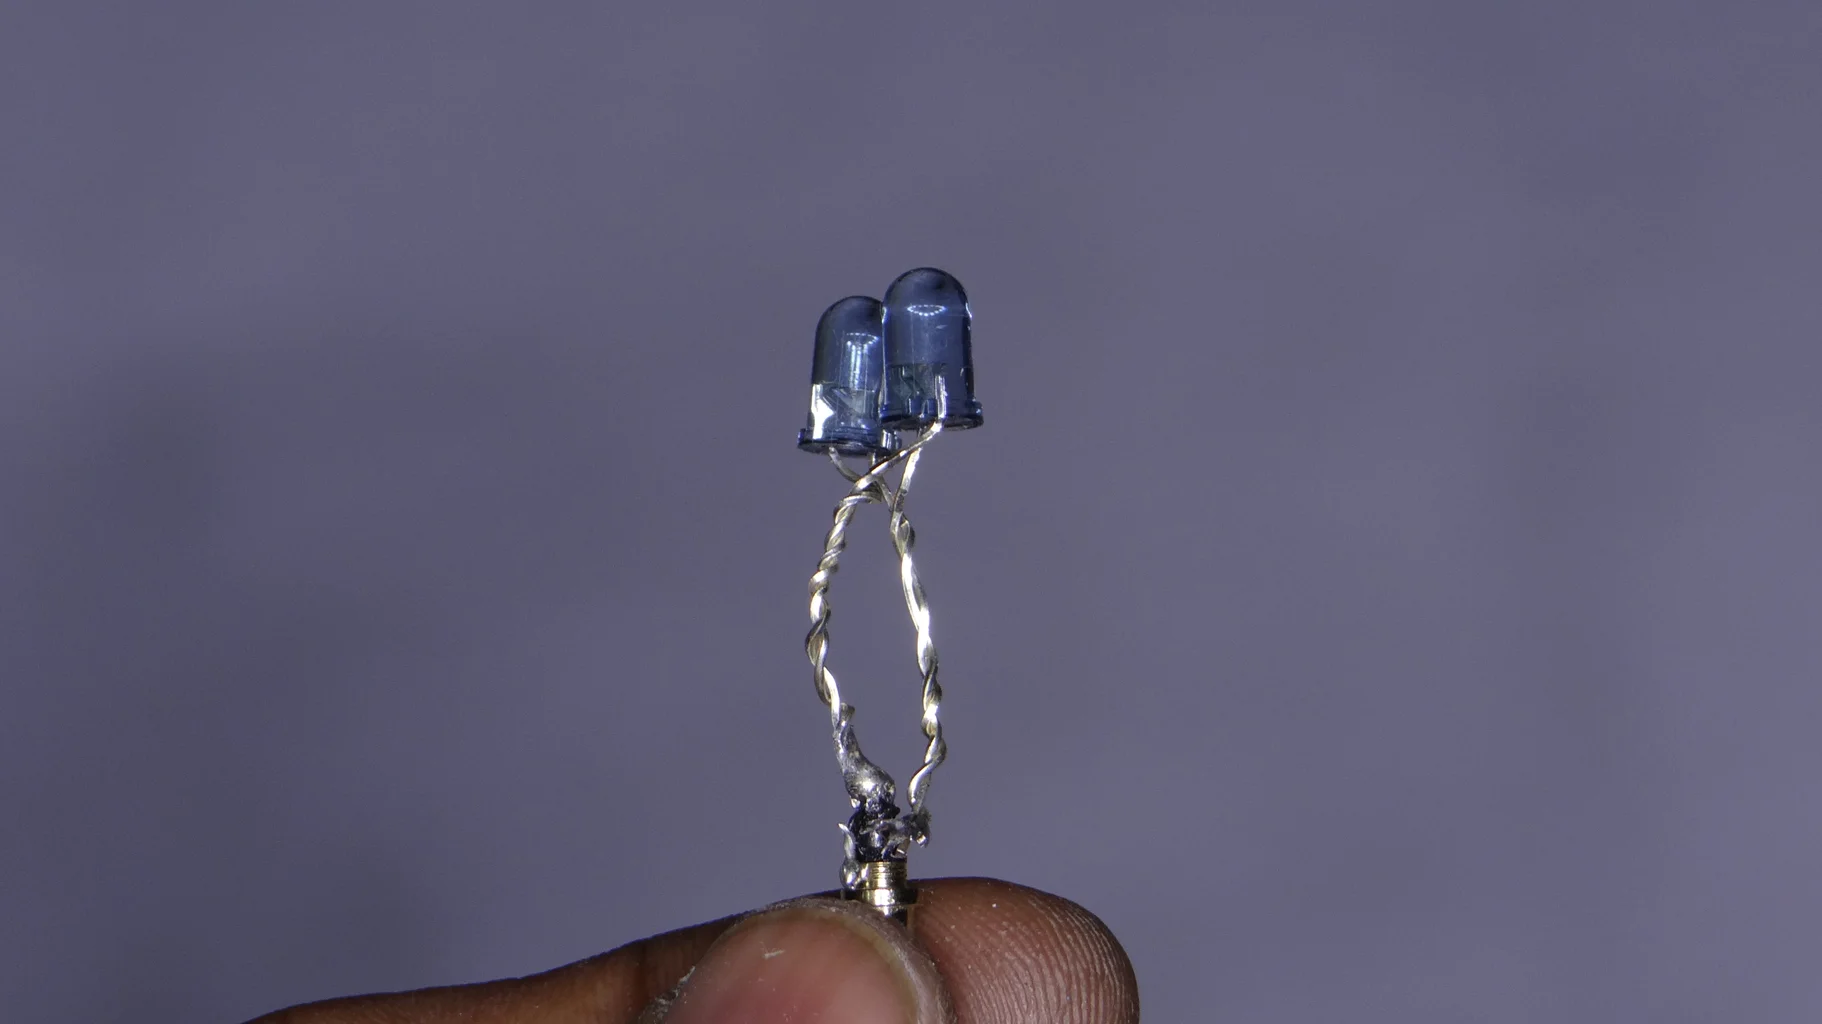
- IR LED: The heart of your IR blaster, this component emits infrared light to control your electronic devices.
- Resistors: These are crucial for regulating the flow of current in your circuit, ensuring the IR LED operates effectively.
- Transistor: This semiconductor device amplifies and switches electronic signals, playing a pivotal role in the functionality of the IR blaster.
- Breadboard: An indispensable tool for prototyping and building electronic circuits, the breadboard provides a platform to assemble and test your IR blaster circuit.
- Jumper Wires: These wires facilitate the connection of components on the breadboard, allowing for a tidy and organized circuit layout.
- Power Source: Depending on your preference, you can opt for a battery or a power supply to energize your IR blaster.
- Soldering Iron and Solder: Essential for joining components and creating secure electrical connections within your circuit.
- Enclosure: While optional, an enclosure can house your IR blaster, providing protection and a polished appearance.
- Multimeter: This versatile tool allows you to measure voltage, current, and resistance, aiding in the testing and troubleshooting of your circuit.
- IR Receiver: While not mandatory, an IR receiver can be used to verify the functionality of your IR blaster by detecting the transmitted infrared signals.
With these materials at your disposal, you'll be well-equipped to dive into the exciting process of crafting your very own IR blaster. Each component plays a vital role in the construction and functionality of the device, and when combined with your creativity and ingenuity, they pave the way for a rewarding DIY experience. Now that you're armed with the necessary materials, let's move on to the next step in our journey: gathering the components.
Step 1: Gathering Components
Gathering the components for your DIY IR blaster is a crucial first step in this exciting journey. Each component plays a pivotal role in the construction and functionality of the device, and ensuring that you have all the necessary materials will set the stage for a smooth and successful project.
The heart of your IR blaster is the IR LED, which emits the infrared light signals used to control electronic appliances. When selecting an IR LED, it's essential to consider its wavelength and power rating to ensure compatibility with the devices you intend to control. Additionally, gathering the appropriate resistors is crucial for regulating the current flow through the IR LED, preventing it from being damaged due to excessive current.
The transistor, another vital component, serves to amplify and switch the electronic signals, contributing to the effective transmission of IR signals. When choosing a transistor, factors such as voltage and current ratings should be taken into account to ensure it aligns with the requirements of your IR blaster circuit.
A breadboard, a fundamental tool in electronics prototyping, provides a platform for assembling and testing your IR blaster circuit. It allows for the temporary arrangement of components, facilitating experimentation and modifications before finalizing the circuit design. Jumper wires are indispensable for creating connections on the breadboard, enabling a tidy and organized layout for the circuit.
Selecting an appropriate power source, such as a battery or power supply, is essential to energize your IR blaster. The choice of power source depends on factors such as portability, voltage requirements, and the intended usage scenario for your IR blaster.
Equipping yourself with a soldering iron and solder is crucial for joining components and creating secure electrical connections within your circuit. Proper soldering techniques are essential to ensure the reliability and longevity of the connections, contributing to the overall functionality of your IR blaster.
While not mandatory, an enclosure can provide protection and a polished appearance for your IR blaster. It offers a housing for the components, safeguarding them from external elements and providing a professional finish to your DIY creation.
In addition, a multimeter, a versatile testing tool, allows you to measure voltage, current, and resistance, aiding in the testing and troubleshooting of your circuit. It serves as an invaluable instrument for verifying the functionality and integrity of the components within your IR blaster circuit.
By meticulously gathering these components, you are laying the groundwork for a successful and rewarding DIY project. Each component, carefully selected and assembled, contributes to the creation of a functional and personalized IR blaster. With these materials at your disposal, you are now ready to embark on the next step: soldering the circuit.
Step 2: Soldering the Circuit
Soldering the circuit is a critical phase in the construction of your DIY IR blaster. It involves the precise and skillful joining of components to create secure electrical connections, ensuring the reliability and functionality of the device. As you embark on this step, meticulous attention to detail and a steady hand are essential to achieve optimal results.
Begin by arranging the components on the breadboard according to the circuit diagram, ensuring that the connections are organized and the components are securely seated. Once the components are in place, it's time to prepare the soldering iron. Allow the soldering iron to reach the appropriate operating temperature, ensuring that it is hot enough to melt the solder and create reliable connections without overheating the components.
With the soldering iron at the ready, carefully apply a small amount of solder to the tip of the iron to ensure good thermal conductivity. Then, delicately touch the soldering iron to the junction of the component lead and the copper pad on the breadboard. The goal is to heat the joint evenly to allow the solder to flow and create a secure bond. As the solder melts, it forms a smooth and shiny fillet, indicating a successful connection.
Exercise patience and precision as you work your way through each connection, ensuring that the solder flows smoothly and creates strong bonds without excessive solder buildup. It's crucial to avoid creating solder bridges between adjacent pads, as this can lead to unintended electrical connections and potential malfunctions in the circuit.
As you progress through the soldering process, periodically inspect the connections to ensure they are clean, shiny, and free from any visual defects. Additionally, verify that there are no unintended solder bridges or cold solder joints, which can compromise the integrity of the circuit.
Once all the connections have been soldered and inspected, allow the circuit to cool before proceeding to the next step. This cooling period ensures that the solder solidifies and forms robust connections, setting the stage for the successful assembly and testing of your DIY IR blaster.
Soldering the circuit is a meticulous and rewarding process that lays the foundation for a functional and reliable IR blaster. By mastering the art of soldering, you empower yourself to create professional-quality electronic devices and gain a deeper appreciation for the intricacies of electronics craftsmanship. With the circuit soldered and ready, you are now poised to move on to the next phase of this exhilarating DIY journey: assembling the IR blaster.
Step 3: Assembling the IR Blaster
With the circuit components securely soldered and the foundation of your DIY IR blaster in place, it's time to transition to the exciting phase of assembling the physical device. Assembling the IR blaster involves integrating the circuit into a tangible form, creating a functional and aesthetically pleasing device ready to emit infrared signals and control electronic appliances.
Begin by carefully considering the form factor and layout of your IR blaster. While functionality is paramount, thoughtful design considerations can elevate the visual appeal and usability of the device. If you've opted for an enclosure, select one that accommodates the circuit components while providing ample space for the IR LED to emit infrared signals unhindered. The enclosure serves as a protective housing, safeguarding the circuit and lending a professional finish to your IR blaster.
Carefully position the circuit within the enclosure, ensuring that the components are securely seated and the connections remain intact. If the enclosure features mounting points or slots for securing the circuit board, take advantage of these features to stabilize the components and minimize movement within the enclosure. This attention to detail contributes to the longevity and reliability of your IR blaster.
Once the circuit is securely positioned, focus on integrating the IR LED into the design. Depending on the chosen form factor, the IR LED may be positioned at the front of the enclosure, allowing it to emit infrared signals with optimal coverage. Ensure that the IR LED is aligned in a manner that facilitates effective transmission of infrared signals to the targeted electronic appliances, maximizing the range and accuracy of the IR blaster.
With the circuit and IR LED seamlessly integrated into the enclosure, proceed to secure the components in place. Utilize appropriate fastening methods, such as screws, clips, or adhesive, to ensure that the circuit and IR LED remain firmly affixed within the enclosure. This step is crucial for maintaining the structural integrity of the IR blaster and preventing component displacement during use.
As the assembly nears completion, take a moment to inspect the device and verify that all components are securely positioned and the connections remain intact. This visual inspection ensures that the IR blaster is poised for optimal performance and durability.
By meticulously assembling the IR blaster, you bring the circuit to life in a tangible and functional form. The careful integration of components and thoughtful design considerations culminate in a personalized IR blaster ready to embark on its mission of controlling electronic appliances through the emission of infrared signals. With the assembly complete, the stage is set for the final phase of this exhilarating DIY journey: testing the IR transmitter.
Step 4: Testing the IR Transmitter
With the assembly of your DIY IR blaster complete, it's time to embark on the crucial phase of testing the IR transmitter. This pivotal step allows you to verify the functionality and effectiveness of your IR blaster, ensuring that it can emit infrared signals and control electronic appliances as intended.
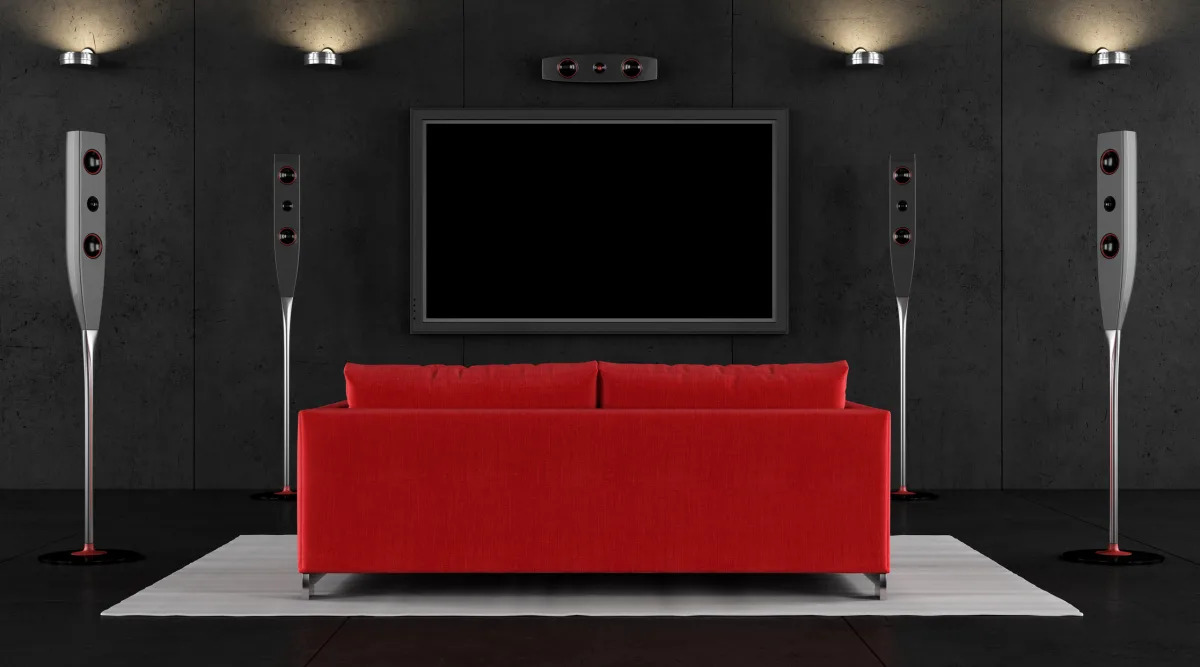
Begin by selecting a compatible electronic appliance, such as a TV or audio system, to serve as the target for your IR transmitter. Position the IR blaster within the line of sight of the appliance, ensuring that the IR LED is oriented towards the appliance's infrared receiver. This alignment is essential for facilitating the transmission of infrared signals from the IR blaster to the targeted appliance.
Next, power up the electronic appliance and activate the IR blaster. Depending on the design of your IR blaster, this may involve connecting it to a power source or inserting batteries to energize the device. Once the IR blaster is powered up, initiate the transmission of infrared signals by activating the corresponding functionality, such as pressing a button on a remote control or triggering a specific command through a microcontroller or smartphone app.
As the IR blaster emits infrared signals, observe the targeted electronic appliance for a response. This response may manifest as a change in settings, the activation of specific functions, or an indicator light confirming the reception of the transmitted IR signals. Pay close attention to the appliance's behavior and verify that it corresponds to the commands transmitted by the IR blaster.
If the targeted appliance responds appropriately to the transmitted IR signals, congratulations are in order – your DIY IR blaster has successfully demonstrated its ability to control electronic devices through the emission of infrared signals. This validation signifies the effective functionality of your IR transmitter and paves the way for its integration into your home entertainment or automation setup.
In the event that the targeted appliance does not respond to the transmitted IR signals, it's time to engage in troubleshooting to identify and address any potential issues. Begin by verifying the alignment of the IR blaster and the targeted appliance, ensuring that the line of sight is unobstructed and the IR LED is emitting signals effectively. Additionally, inspect the connections within the circuit and confirm that all components are functioning as intended.
By meticulously testing the IR transmitter and addressing any potential issues, you empower yourself to fine-tune and optimize the functionality of your DIY IR blaster. This iterative process of testing and refinement contributes to the development of a reliable and effective IR transmitter, tailored to your specific requirements and capable of seamlessly integrating into your electronic ecosystem.
As you conclude the testing phase, celebrate the accomplishments of your DIY journey and revel in the satisfaction of witnessing your personalized IR blaster in action. With the IR transmitter successfully tested and validated, you have unlocked the potential to enhance your home entertainment experience and exert control over electronic appliances with a device crafted through your ingenuity and expertise.
Conclusion
In conclusion, the journey of crafting your own DIY IR blaster has been a remarkable exploration of electronics, creativity, and hands-on ingenuity. From the initial gathering of components to the meticulous soldering of the circuit, the assembly of the physical device, and the pivotal testing phase, every step has contributed to a rich and rewarding experience. As you reflect on this journey, it's evident that the DIY IR blaster represents more than just a functional device – it embodies the spirit of innovation, empowerment, and personalized craftsmanship.
Throughout this DIY endeavor, you've not only acquired practical skills in electronics and circuit assembly but also nurtured a deeper understanding of infrared technology and its applications in controlling electronic appliances. The careful selection and integration of components, coupled with the precision of soldering and assembly, have culminated in the creation of a personalized IR blaster tailored to your specific needs and preferences.
The DIY IR blaster serves as a testament to the power of creativity and resourcefulness, showcasing your ability to transform raw materials and electronic components into a functional and customized device. As you observed the successful transmission of infrared signals and the control exerted over electronic appliances, the sense of accomplishment and pride further solidified the significance of this DIY project.
Beyond the tangible outcomes, the journey of creating a DIY IR blaster has fostered a deeper connection with the world of electronics and do-it-yourself innovation. It has encouraged experimentation, problem-solving, and the pursuit of knowledge, instilling a sense of confidence in tackling future DIY projects and technological challenges.
As you integrate the DIY IR blaster into your home entertainment setup or automation system, it becomes a testament to your resourcefulness and creativity, enriching your daily interactions with technology. Whether it's simplifying the control of multimedia devices, customizing home automation routines, or exploring new applications for the IR blaster, its presence serves as a constant reminder of the capabilities unlocked through DIY exploration.
In essence, the DIY IR blaster embodies the fusion of technology and creativity, inspiring a sense of curiosity and innovation. It stands as a testament to the endless possibilities that emerge when passion, knowledge, and hands-on craftsmanship converge. As you continue to explore the realms of DIY electronics and innovation, the DIY IR blaster will remain a symbol of your ability to transform ideas into tangible solutions, fueling the spirit of creativity and empowerment in your journey of discovery and innovation.