Introduction
Welcome to the troubleshooting guide for digital cameras that won’t turn on. It can be frustrating and worrisome when you press the power button on your camera, only to be met with a blank screen or no response at all. But fear not! In this article, we will explore some common reasons why digital cameras fail to turn on and provide practical solutions to get your camera up and running again.
A digital camera can be an indispensable tool for capturing precious moments and preserving memories. Whether you use it for professional photography or personal enjoyment, a functioning camera is essential. However, like any electronic device, digital cameras are prone to issues that can prevent them from powering on.
Before we dive into the reasons why your camera may not be turning on, it’s important to note that troubleshooting can vary depending on the specific make and model of your camera. It’s always recommended to consult your camera’s user manual for manufacturer-specific troubleshooting steps.
Now, let’s explore some common culprits behind a digital camera’s refusal to turn on and learn how to address these issues effectively.
Common Reasons for a Digital Camera Not Turning On
There are several potential causes for a digital camera not turning on. Understanding these common reasons can help you troubleshoot and resolve the issue quickly. Let’s delve into the most frequently encountered culprits:
- Low Battery: One of the most common reasons for a camera not turning on is a low or completely drained battery. If you haven’t charged your camera in a while or have been using it extensively, the battery may need to be recharged or replaced.
- Faulty Power Button: If the power button on your camera is malfunctioning or stuck, it may prevent the device from turning on. Try pressing the button firmly and ensuring that it is not blocked or damaged. If the power button appears to be the problem, it might require professional repair.
- Problematic Memory Card: In some cases, a faulty or corrupted memory card can cause a camera to refuse to turn on. Remove and reinsert the memory card, or try using a different memory card to see if the camera powers on.
- Software Glitches: Just like any electronic device, digital cameras can encounter software glitches that prevent them from powering on. A firmware or software update may be required to resolve the issue. Consult your camera’s user manual or the manufacturer’s website for instructions on how to update the camera’s software.
- Broken or Loose Connections: Inspect the battery compartment and other connections on your camera. Loose or damaged connections can prevent power from reaching the camera, causing it not to turn on. Check for any loose components or corrosion and clean them if necessary.
- Water or Physical Damage: Exposure to water or physical damage can render a camera inoperable. If your camera has been exposed to water or dropped, it may not function properly or at all. In such cases, professional repair may be required.
Now that we’ve identified some of the common reasons why a digital camera may not be turning on, let’s move on to the practical solutions to get your camera back in action.
Low Battery
One of the most common reasons for a digital camera not turning on is a low or completely drained battery. If you haven’t charged your camera in a while or have been using it extensively, it’s important to check the battery level. Here are some steps you can take to address this issue:
- Inspect the battery: Remove the battery from the camera and examine it for any signs of damage, such as leaks or corrosion. If the battery appears damaged or swollen, replace it with a new one.
- Charge the battery: Connect the camera to a power source using the provided charger and let it charge for the recommended amount of time. Ensure that the charger is compatible with your camera model.
- Swap the battery: If you have access to a spare battery or a compatible battery from another device, try swapping it with the one in your camera. If the camera powers on with the new battery, it indicates that the old battery may need to be replaced.
Once you have charged the battery or replaced it with a functional one, try turning on your digital camera. If the battery was the main issue, your camera should now power on successfully. However, if the camera still does not turn on, move on to the next troubleshooting step.
Faulty Power Button
If your digital camera’s power button is malfunctioning or stuck, it can prevent the device from turning on. Here are some solutions to address a faulty power button:
- Press the power button firmly: Sometimes, the power button might not be fully depressed, preventing it from registering the press. Press the button firmly, but not forcefully, to ensure that it is being activated properly.
- Clean around the power button: Dust, dirt, or debris around the power button can interfere with its functionality. Use a clean, dry cloth or a compressed air canister to gently clean the area around the power button. Be careful not to apply excessive pressure.
- Inspect for physical damage: Examine the power button for any visible damage or misalignment. If you notice any cracks, breakage, or unevenness, it is likely that the power button needs to be repaired or replaced. In such cases, seek professional assistance or contact the camera manufacturer for guidance.
If none of the above steps resolve the issue, and you are confident that the power button is the culprit, consider alternative ways to turn on your camera. Some cameras have alternative power switches or buttons, such as a remote control or an alternative power button located on the side or back of the device. Refer to your camera’s user manual or consult the manufacturer’s website for information on alternative power options.
If the camera still does not turn on after trying alternative power options, it may be necessary to have the power button repaired or replaced by an authorized service center or technician.
Problematic Memory Card
A faulty or corrupted memory card can also be a common cause of a digital camera not turning on. Here are some steps you can take to address this issue:
- Remove and reinsert the memory card: Turn off your camera and carefully remove the memory card from its slot. Inspect the card for any visible damage or debris. Clean the contacts on the memory card using a lint-free cloth or a soft brush. Then, reinsert the memory card securely into the slot, making sure it clicks into place.
- Try a different memory card: If your camera still does not turn on after reinserting the memory card, try using a different memory card. It’s possible that the original card is defective or corrupted. By using a different card, you can determine whether the issue lies with the camera or the memory card.
- Format the memory card: If the camera still doesn’t turn on with a different memory card, consider formatting the original card. Formatting erases all the data on the card and resets it to its default settings. Note that this will permanently delete all the files stored on the card, so make sure to back up any important data before formatting.
Once you have tried these steps, attempt to turn on your camera again. If the memory card was the problem, the camera should now power on successfully. However, if the camera still does not turn on, move on to the next troubleshooting step.
Software Glitches
Like any electronic device, digital cameras can experience software glitches that prevent them from powering on. Here are some steps you can take to address potential software-related issues:
- Check for firmware updates: Visit the camera manufacturer’s website or refer to the user manual to see if there are any available firmware updates for your camera model. Firmware updates often include bug fixes and improvements that can help resolve software-related issues.
- Perform a firmware reset: If your camera has become unresponsive or is exhibiting erratic behavior, performing a firmware reset might help. Refer to the user manual or the manufacturer’s website for instructions on how to reset the camera’s firmware. Keep in mind that performing a firmware reset will erase any custom settings or personalized configurations, so it’s a good idea to back up any important data beforehand.
- Reset camera settings: If the camera powers on but still exhibits software-related issues, consider resetting the camera’s settings to their default values. This can help resolve any unintentional changes or invalid configurations that might be causing the problem. Look for the “Reset” or “Restore Default Settings” option in your camera’s menu and follow the prompts to reset the settings.
After performing the necessary software-related troubleshooting steps, attempt to turn on your camera. If the issue was due to a software glitch, these steps should help resolve it and allow your camera to power on normally. However, if the camera still does not turn on, proceed to the next troubleshooting step.
Broken or Loose Connections
Loose or damaged connections can prevent a digital camera from turning on. Here are some steps you can take to address this issue:
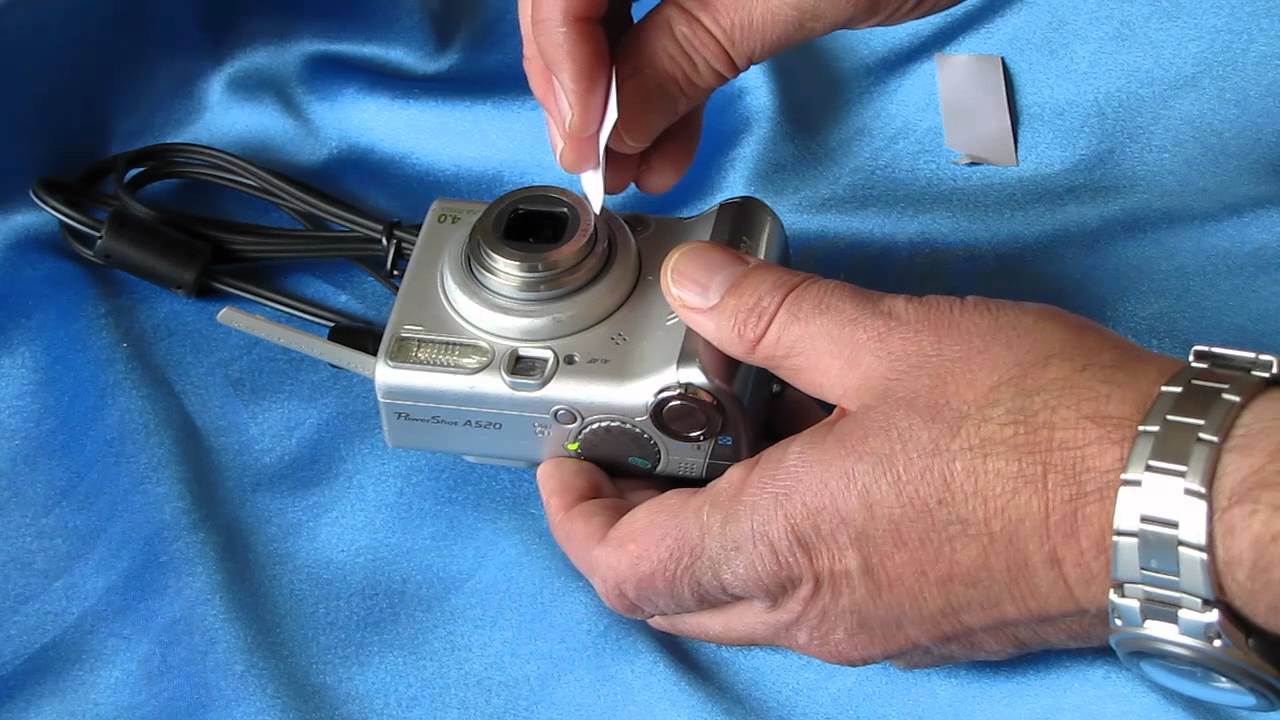
- Check the battery compartment: Inspect the battery compartment for any signs of loose connections or corrosion. If you notice any loose battery contacts, gently bend them back into place using a small tool like a toothpick. If you see corrosion, clean it off using a cotton swab dipped in a solution of equal parts water and vinegar.
- Inspect other connections: Examine other connections on your camera, including the USB port, memory card slot, and any other ports or compartments. Look for any bent pins, debris, or signs of damage. If you find any issues, carefully clean the affected area and attempt to straighten any bent pins using a non-conductive tool like a toothpick.
- Ensure proper insertion: Double-check that all cables, memory cards, and accessories are inserted correctly and securely. Sometimes, a partially inserted cable or a loose memory card may cause power issues. Remove and reinsert these components to ensure a proper connection.
Once you have inspected and secured all the connections, try turning on your camera again. If the issue was due to a broken or loose connection, your camera should now power on successfully. However, if the camera still does not turn on, proceed to the next troubleshooting step.
Water or Physical Damage
Exposure to water or physical damage can cause a digital camera to refuse to turn on. If your camera has been subjected to water or has encountered physical trauma, follow these steps:
- Power off and remove components: Immediately power off your camera and remove any removable components such as the battery, memory card, and lens. This will prevent further damage and increase the chances of successful recovery.
- Dry the camera: Gently pat the camera with a soft, absorbent cloth to remove any visible moisture. Avoid using excessive force or rubbing, as this could further damage the delicate internal components. You may also use a hairdryer on the lowest heat setting or a bag of uncooked rice to aid in the drying process. However, be cautious not to overheat the camera or let any rice grains enter the camera’s openings.
- Allow time to dry: After the initial drying, place the camera and its components in a well-ventilated area for at least 48 hours. This will help ensure that any residual moisture evaporates completely before attempting to power on the camera.
- Assess for physical damage: Carefully inspect the camera for any visible physical damage, such as cracks, dents, or loose parts. If you notice any major damage, it may be necessary to seek professional repair from an authorized service center or technician.
- Attempt to power on the camera: Once you are confident that the camera is dry and free of visible damage, reinsert the battery and memory card. Then, attempt to power on the camera. If it turns on successfully, check its functionality by taking test shots and ensuring that all features are working as expected.
Keep in mind that water or physical damage can cause long-term issues with a digital camera. If your camera still does not turn on despite following these steps, it might require professional repair or replacement.
Solutions for a Digital Camera That Won’t Turn On
When faced with a digital camera that refuses to turn on, there are several practical solutions you can try to get it back in working order:
- Charge the battery: Ensure that the camera battery is charged by connecting it to a power source using the provided charger. If the battery is depleted, allowing it to charge for the recommended amount of time should resolve the issue.
- Clean and inspect the power button: Remove any dust, dirt, or debris around the power button using a clean, dry cloth or a compressed air canister. Inspect the power button for any visible damage or misalignment that may be preventing it from functioning properly.
- Check and format the memory card: Remove and reinsert the memory card, making sure it is securely inserted into the camera. If the camera still won’t turn on, try using a different memory card. Formatting the memory card as a last resort can help resolve potential compatibility or corruption issues.
- Reset the camera’s firmware: Consult the user manual or manufacturer’s website for instructions on how to perform a firmware reset. This can help address any software glitches that may be causing the camera to malfunction.
- Check and secure connections: Inspect the battery compartment, USB port, memory card slot, and other connections for loose components, corrosion, or damage. Clean any debris and ensure all connections are securely in place.
- Assess and fix water or physical damage: If your camera has been exposed to water or experienced physical damage, follow the steps outlined in the “Water or Physical Damage” section earlier. Taking immediate action and allowing thorough drying can potentially save your camera.
Remember that the specific troubleshooting steps can vary depending on your camera model and manufacturer. If the problem persists even after trying these solutions, it may be necessary to consult with the manufacturer’s customer support or seek professional repair from an authorized service center.
Charge the Battery
One of the simplest and most common reasons for a digital camera not turning on is a low or completely drained battery. If your camera is unresponsive, it’s crucial to ensure that the battery is adequately charged. Here are the steps to take:
- Inspect the battery: Remove the battery from the camera and examine it for any signs of damage, such as leaks or corrosion. If the battery appears damaged or swollen, it is essential to replace it with a new one.
- Connect the charger: Using the provided charger, connect your camera to a power source, such as a wall outlet or a computer’s USB port. Make sure the charger is compatible with your camera model.
- Allow time for charging: Let the camera charge for the recommended amount of time specified in the user manual or by the manufacturer. It might take several hours for the battery to reach a sufficient charge level.
While charging, ensure that the camera is turned off. Some cameras may have an LED indicator that turns on during charging to signify the battery’s status. Once the battery is fully charged, unplug the charger from the camera.
After charging the battery, attempt to turn on the camera. If the low battery was the main issue, your camera should now power on successfully. It’s also a good practice to periodically check and recharge your camera’s battery to prevent any future power-related problems.
If the camera still does not turn on even after charging the battery, it’s recommended to explore other troubleshooting steps to address the issue.
Clean and Inspect the Power Button
A faulty or stuck power button can prevent a digital camera from turning on. It’s important to clean and inspect the power button to ensure it is not obstructed or damaged. Here are the steps to take:
- Power off the camera: If your camera is on, turn it off before proceeding. This ensures that the power button is not stuck in the “on” position.
- Gently clean around the power button: Use a clean and dry cloth to remove any dust, dirt, or debris that may be affecting the power button’s functionality. Be gentle to avoid applying excessive force or causing any damage to the button.
- Inspect for physical damage: Carefully examine the power button for any visible signs of damage, such as cracks, misalignment, or loose parts. If you notice any significant damage, it may require professional repair or replacement.
- Press the power button: Press the power button firmly, making sure it is fully depressed. Sometimes, the button may not register a press if it is only partially pressed. Apply adequate pressure to ensure it is activated properly.
If the power button is loose or wobbles, it might indicate a more significant underlying issue. In such cases, it is advisable to seek professional assistance or contact the camera manufacturer for guidance on repairing or replacing the power button.
After cleaning and inspecting the power button, attempt to turn on your camera. If the power button was the cause of the problem, your camera should now power on successfully. If the issue persists, it’s time to explore other troubleshooting steps.
Check and Format the Memory Card
A problematic or corrupted memory card can be a common reason why a digital camera fails to turn on. To address this issue, it is important to check and, if necessary, format the memory card. Here’s what you can do:
- Remove and reinsert the memory card: Power off your camera and carefully remove the memory card from its slot. Inspect the card for any visible damage, such as scratches or dirt. Clean the gold contacts on the memory card using a lint-free cloth or a soft brush. Then, reinsert the memory card securely into the camera, ensuring it clicks into place.
- Try a different memory card: If your camera still fails to turn on after reinserting the memory card, try using a different memory card. It is possible that the original memory card has become defective or corrupted. By using a different card, you can determine if the issue lies with the camera or the memory card.
- Format the memory card: If the camera still does not turn on with a different memory card, it may be necessary to format the original memory card. Formatting the card erases all data and resets it to its default settings. However, please note that formatting will permanently delete all files stored on the card. If you have important data on the card, make sure to back it up before proceeding.
To format the memory card, go to your camera’s settings menu and look for the “Format” or “Format Memory Card” option. Follow the prompts to initiate the formatting process. Once completed, reinsert the memory card and attempt to turn on your camera again.
If the memory card was the cause of the problem, your camera should now power on successfully. However, if the camera still does not turn on, it is advisable to move on to the next troubleshooting step.
Reset the Camera’s Firmware
If your digital camera is experiencing software glitches or malfunctions that prevent it from turning on, resetting the camera’s firmware can help resolve the issue. The firmware is the software that controls the camera’s operations. Here’s how you can reset the firmware:
- Check for firmware updates: Visit the camera manufacturer’s website or consult the user manual to check if there are any available firmware updates for your camera model. Updating the firmware can often address known bugs and improve overall performance.
- Perform a firmware reset: If your camera is still unresponsive after updating the firmware or no updates are available, you can perform a firmware reset. Refer to the user manual or the manufacturer’s website for specific instructions on how to reset the camera’s firmware.
- Reset camera settings: If a firmware reset option is not available or doesn’t resolve the issue, you can try resetting the camera’s settings to their default values. This can help resolve any corrupted settings or configurations that may be causing the problem. Look for the “Reset” or “Restore Default Settings” option in your camera’s menu and follow the on-screen prompts to reset the settings.
Keep in mind that performing a firmware reset or resetting the camera’s settings will erase any custom settings you have configured. It is a good practice to note down your personalized settings and back up any important data before proceeding with the reset.
After resetting the camera’s firmware or settings, attempt to turn on your camera again. If the issue was related to a software glitch, your camera should now power on successfully. However, if the camera still does not turn on, it may be necessary to explore the next troubleshooting step.
Check and Secure Connections
Loose or faulty connections can often be the culprit when a digital camera fails to power on. Checking and securing these connections is a crucial step in troubleshooting the issue. Here’s what you can do:
- Inspect the battery compartment: Carefully examine the battery compartment for any loose connections or signs of corrosion. If you notice any loose battery contacts, use a non-conductive tool such as a toothpick to gently bend them back into place. If there is corrosion, clean it off using a cotton swab dipped in a mixture of equal parts water and vinegar.
- Check other connections: Inspect other connections on your camera, such as the USB port, memory card slot, and any other ports or compartments. Look for any bent pins, debris, or signs of damage. If you find any issues, carefully clean the affected area and attempt to straighten any bent pins using a non-conductive tool.
- Ensure proper insertion: Double-check that all cables, memory cards, and accessories are inserted correctly and securely. Sometimes, a partially inserted cable or a loose memory card may cause power issues. Remove and reinsert these components to ensure a proper and secure connection.
Once you have inspected and secured all the connections, try turning on your camera again. If the issue was indeed due to loose or faulty connections, your camera should now power on successfully. If the camera does not turn on, it is advisable to explore the next troubleshooting step to identify and resolve the problem.
Assess and Fix Water or Physical Damage
Exposure to water or physical damage can render a digital camera inoperable. If your camera has been subjected to water or encountered physical trauma, it’s essential to assess and address the damage. Here’s what you can do:
- Power off and remove components: Immediately power off your camera and remove any removable components such as the battery, memory card, and lens. This helps prevent further damage and increases the chances of a successful recovery.
- Dry the camera: Gently pat the camera with a soft, absorbent cloth to remove any visible moisture. Avoid using excessive force or rubbing, as this could further damage the delicate internal components. You can also use a hairdryer on the lowest heat setting or place the camera in a bag of uncooked rice to aid in the drying process. However, be cautious not to overheat the camera or let any rice grains enter the camera’s openings.
- Allow time to dry: After the initial drying, place the camera and its components in a well-ventilated area for at least 48 hours. This allows any remaining moisture to evaporate completely before attempting to power on the camera.
- Assess for physical damage: Carefully inspect the camera for any visible signs of physical damage, such as cracks, dents, or loose parts. If you notice any major damage, it may require professional repair from an authorized service center or technician.
- Attempt to power on the camera: Once you are confident that the camera is dry and free of visible damage, reinsert the battery and memory card. Then, attempt to power on the camera. If it turns on successfully, check its functionality by taking test shots and ensuring that all features work as expected.
It’s important to note that water or physical damage can cause long-term issues with a digital camera. If your camera still does not turn on or function properly despite following these steps, it is highly recommended to consult with the manufacturer’s customer support or seek professional repair from an authorized service center.
Conclusion
When your digital camera fails to turn on, it can be frustrating and worrisome. However, by following the troubleshooting steps outlined in this guide, you can often identify and resolve the problem. From checking the battery and power button to addressing issues with the memory card, software glitches, and damaged connections, there are various solutions to explore.
It is essential to approach the troubleshooting process with patience and caution. Not all cameras and situations are the same, so it’s always a good idea to consult your camera’s user manual or contact the manufacturer for specific guidance.
If all else fails and your camera still does not turn on, it may be necessary to seek professional repair or consider replacing the device, depending on the extent of the issue. However, by taking the time to troubleshoot and attempt the solutions provided, you increase the chances of successfully resolving the problem without incurring additional costs.
Remember, regular maintenance and care can also help prevent issues from arising. Keeping your camera’s firmware up to date, handling it with care, and protecting it from water and physical damage can go a long way in preserving its longevity and functionality.
With the troubleshooting steps and techniques outlined in this guide, you have the tools to tackle the most common reasons why a digital camera may not turn on. So, don’t let a power issue dampen your enthusiasm for capturing those special moments. Take action and enjoy the use of your fully functioning camera once again!


