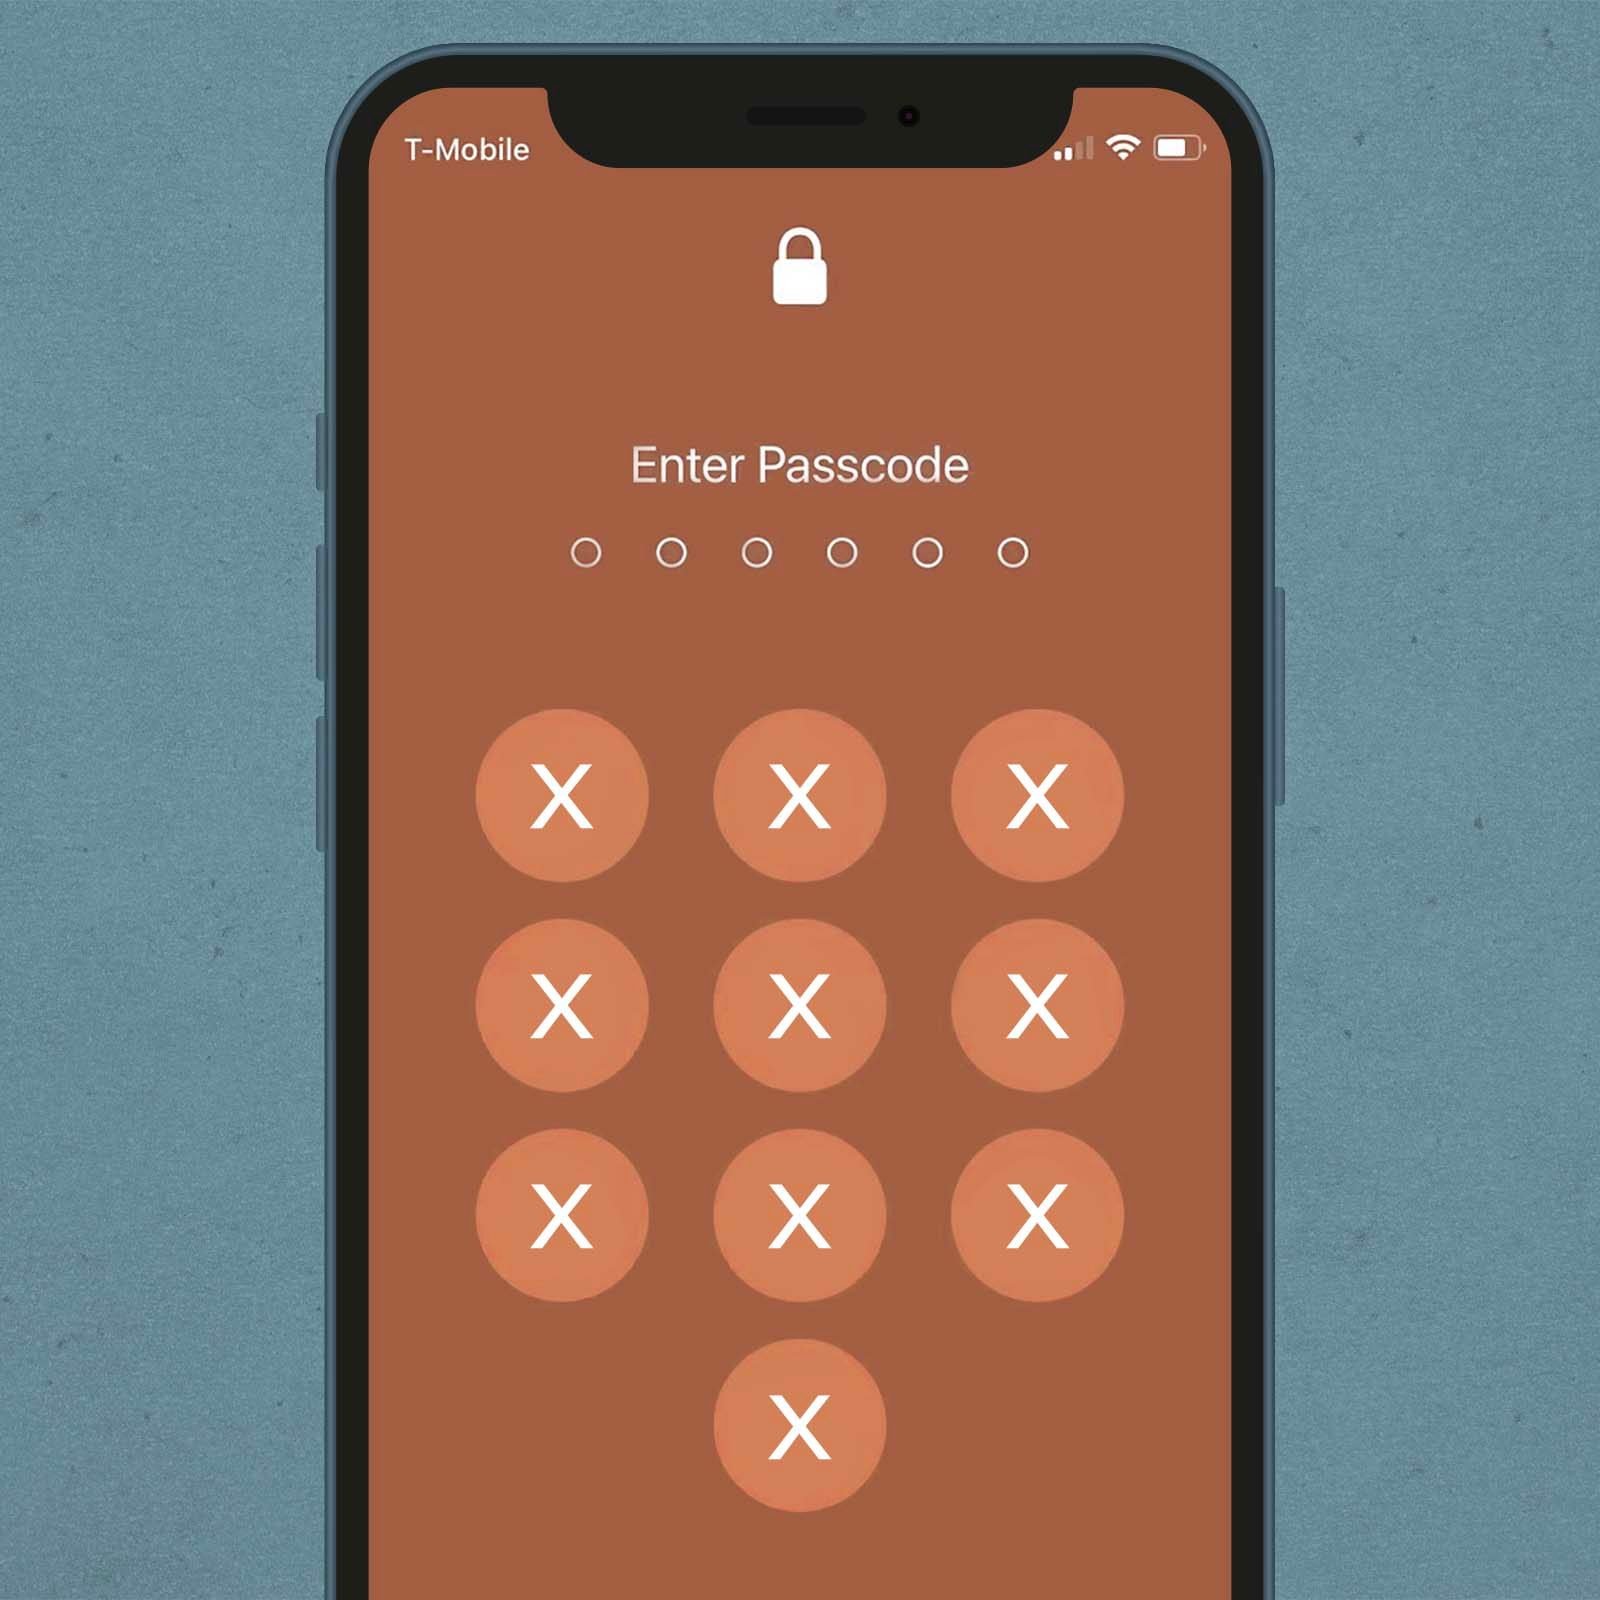
Common Issues with Face ID Setup
Setting up Face ID is a convenient and secure way to unlock your iPhone or iPad, but sometimes you may encounter issues during the setup process. Here are some common problems that users face and possible solutions to resolve them:
1. Face Not Recognized: The most common issue with Face ID setup is when your device fails to recognize your face. This can occur if your face is not properly positioned or if there are any obstructions that prevent the TrueDepth camera system from capturing a clear image. Make sure to position your face within the frame and ensure that your entire face is visible to the camera.
2. Dirty or Smudged Camera: Another reason for Face ID setup failure is when the TrueDepth camera system is dirty or smudged. Clean the front-facing camera and the surrounding area using a microfiber cloth to remove any debris or fingerprints that could affect the camera’s performance.
3. Sensor Obstruction: If there are any foreign objects obstructing the sensors on your device, Face ID may not function properly. Check for any dirt, dust, or debris in the front camera or the infrared sensor and gently clean them if necessary.
4. Brightness and Contrast: Adjusting the brightness and contrast settings on your device can sometimes improve Face ID recognition. Ensure that the ambient lighting is adequate, avoid extremely bright or dim environments, and adjust the brightness and contrast levels if needed.
5. Alternative Appearance: If you are wearing glasses, a hat, or a scarf that significantly changes your appearance, Face ID may have difficulty recognizing you. In such cases, enroll an alternative appearance while setting up Face ID to ensure better recognition in different situations.
6. Well-Lit Environment: Setting up Face ID in a well-lit environment can increase the accuracy of facial recognition. Ensure that you are in a room with sufficient lighting to allow the TrueDepth camera system to capture clear facial details during the setup process.
7. Software Updates: Keeping your device’s software up to date is crucial for optimal performance. Check for any pending software updates and install them to ensure that your device has the latest enhancements and bug fixes related to Face ID.
8. Restart Your Device: Sometimes a simple restart can resolve temporary glitches. Restart your iPhone or iPad and try setting up Face ID again.
9. Technical Support: If you have followed all the troubleshooting steps and are still experiencing issues with Face ID setup, it is recommended to contact Apple Support for further assistance. Their trained professionals can provide specialized guidance to resolve any complex issues you may encounter.
By understanding these common issues and applying the suggested solutions, you can ensure a smooth and successful Face ID setup experience.
Ensuring Your Face is Properly Positioned
When setting up Face ID, it is important to ensure that your face is properly positioned to allow for accurate facial recognition. Here are some tips to help you position your face correctly during the setup process:
1. Hold your device at eye level: Position your iPhone or iPad at eye level, making sure that the TrueDepth camera is facing your face directly. This allows the camera to capture your facial features accurately.
2. Center your face within the frame: Align your face within the outline displayed on the screen. Make sure your entire face is visible, including your forehead, eyes, nose, and mouth. Avoid tilting your head or angling your face too much as it can hinder the camera’s ability to capture the necessary details.
3. Remove any obstructions: Ensure that there are no objects covering your face, such as hats, scarves, or sunglasses. These can interfere with the camera’s ability to capture a clear image of your facial features.
4. Keep a reasonable distance: Maintain an appropriate distance from the device while setting up Face ID. Being too close or too far away can affect the camera’s ability to capture your face accurately. Follow the on-screen prompts to find the ideal distance for optimal recognition.
5. Look directly at the camera: Keep your eyes focused on the front-facing TrueDepth camera to allow it to capture the intricate details of your eyes and face. Avoid looking away or diverting your gaze during the setup process.
6. Ensure proper lighting: Choose a well-lit environment while setting up Face ID. Good lighting enhances the camera’s ability to capture facial features effectively. Avoid overly bright or dimly lit areas as they may impact the accuracy of recognition.
7. Hold the device steady: Keep your iPhone or iPad steady while the camera captures your face. Avoid any unnecessary movements or shaking that could lead to a blurry or distorted image.
By following these guidelines and ensuring that your face is correctly positioned during the Face ID setup, you increase the chances of successful and accurate facial recognition. Take your time and make the necessary adjustments to get the best possible results.
Cleaning the TrueDepth Camera System
If you’re experiencing issues with Face ID setup, one possible reason is a dirty TrueDepth camera system. Cleaning the camera and its surroundings can help improve facial recognition accuracy. Here’s how you can clean the TrueDepth camera system:
1. Gather the necessary tools: To clean the TrueDepth camera system, you’ll need a microfiber cloth. Avoid using any harsh chemicals or abrasive materials as they can damage the camera or the screen.
2. Power off your device: Before cleaning the camera, it’s important to turn off your iPhone or iPad to prevent accidental touches or damage. Press and hold the power button, then swipe to power off.
3. Wipe the camera: Use a clean, dry microfiber cloth to gently wipe the front-facing camera and the surrounding area. Apply light pressure to remove any fingerprints, smudges, or dust particles that may have accumulated. Be mindful not to press too hard or scrub vigorously, as this could damage the camera lens.
4. Pay attention to the sensors: Along with the camera lens, make sure to clean the infrared sensor and dot projector. These components are essential for accurate facial recognition. Use gentle, circular motions with the microfiber cloth to remove any dirt or debris.
5. Inspect the camera: After cleaning, visually inspect the TrueDepth camera system to ensure it’s free from any remaining dirt or smudges. If you notice any stubborn marks, you can dampen a corner of the microfiber cloth with water and gently wipe the affected area. Remember to squeeze out excess water before cleaning to prevent any moisture from entering the device.
6. Allow the camera to dry: If you used a damp cloth, give the camera and surrounding area sufficient time to dry before turning on your device. Moisture can interfere with the camera’s functionality and may lead to additional issues.
It’s important to regularly clean the TrueDepth camera system to maintain optimal performance of Face ID. If you notice persistent issues even after cleaning, consider reaching out to Apple Support for further assistance. They can provide additional troubleshooting steps or recommend professional cleaning services if necessary.
By taking the time to clean and maintain your TrueDepth camera system, you can enhance the accuracy and reliability of Face ID for a seamless unlocking experience.
Checking for Obstructed Sensors
If you’re encountering difficulties during Face ID setup, one possible cause could be obstructed sensors. The sensors located near the TrueDepth camera system may be impeded by dirt, dust, or other objects, affecting the accuracy of facial recognition. Follow these steps to check for obstructed sensors and resolve any issues:
1. Power off your device: Before checking for obstructed sensors, turn off your iPhone or iPad to prevent accidental touches or damage. Press and hold the power button, then swipe to power off.
2. Inspect the front-facing camera: Take a close look at the front-facing camera and its surrounding area for any visible obstructions. Look for dirt, dust, lint, or any other foreign objects that might be blocking the sensors.
3. Use a soft brush or compressed air: If you notice any visible debris near the sensors, gently brush it away with a soft brush or use a can of compressed air. Be careful not to apply excessive force or blow compressed air directly onto the camera lens.
4. Carefully remove obstructions: If there are any easily removable objects, such as a sticker or a protective film covering the sensors, carefully remove them. Ensure that you peel off any adhesive residue and clean the area afterward to avoid further obstructions.
5. Inspect the proximity sensor: Along with the front-facing camera, there is a proximity sensor located near the earpiece of your device. Check for any visible obstructions such as fingerprints or dirt. Gently clean the area using a soft cloth if needed.
6. Verify sensor functionality: After removing any obstructions, turn on your device and test the Face ID functionality. While setting up Face ID, follow the on-screen instructions to position your face correctly within the frame and check if the sensors are now functioning properly.
7. Contact Apple Support if needed: If you’ve followed these steps and are still experiencing issues with obstructed sensors, it’s advisable to contact Apple Support or visit an authorized service center for further assistance. They can provide expert guidance and determine if any hardware repair or replacement is necessary.
Regularly checking for obstructed sensors and keeping the TrueDepth camera system clean can significantly improve the performance of Face ID. By taking these simple steps, you can ensure that your device recognizes your face accurately and unlocks smoothly.
Adjusting the Brightness and Contrast Settings
If you’re facing difficulties while setting up Face ID, adjusting the brightness and contrast settings of your device can help improve facial recognition accuracy. Here’s how you can make the necessary adjustments:
1. Access Display & Brightness settings: Go to the Settings app on your iPhone or iPad and tap on “Display & Brightness”. This is where you can adjust the visual settings of your device.
2. Increase brightness: If you’re in a dimly lit environment, increasing the brightness of your device can provide better visibility for the TrueDepth camera system. Simply drag the brightness slider to the right to increase the brightness level.
3. Decrease brightness: On the other hand, if you’re in a brightly lit environment, lowering the brightness can prevent overexposure and enhance facial recognition accuracy. Slide the brightness slider to the left to decrease the brightness level.
4. Adjust auto-brightness: If your device has the Auto-Brightness feature enabled, it automatically adjusts the screen brightness based on ambient lighting conditions. Toggle this feature off or on, depending on your preference and the lighting conditions you’re in.
5. Tweak contrast settings: Contrast refers to the difference between light and dark areas on the screen. Some users have found that adjusting the contrast settings can improve the accuracy of Face ID. In the Display & Brightness settings, tap on “Accessibility” and go to “Display Accommodations”. From there, you can adjust the “Contrast” by moving the slider to the left or right.
6. Test Face ID accuracy: After making these adjustments, test the Face ID functionality again by following the on-screen instructions during setup. Ensure that you position your face properly within the frame and observe if the changes in brightness and contrast settings have positively affected the accuracy of facial recognition.
Remember that these adjustments can vary depending on individual preferences and different lighting conditions. Experiment with different settings to find what works best for you and your environment. Additionally, consider using True Tone, a feature that automatically adjusts the color temperature of your device’s display based on the ambient lighting, for a more consistent viewing experience.
By tweaking the brightness and contrast settings, you can potentially improve the performance of Face ID and ensure that your device accurately recognizes your face for a seamless unlocking experience.
Trying an Alternative Appearance
If you’re having trouble with Face ID setup, especially if you frequently wear accessories or change your appearance, trying an alternative appearance can help improve recognition. Here’s how you can set up an alternative appearance:
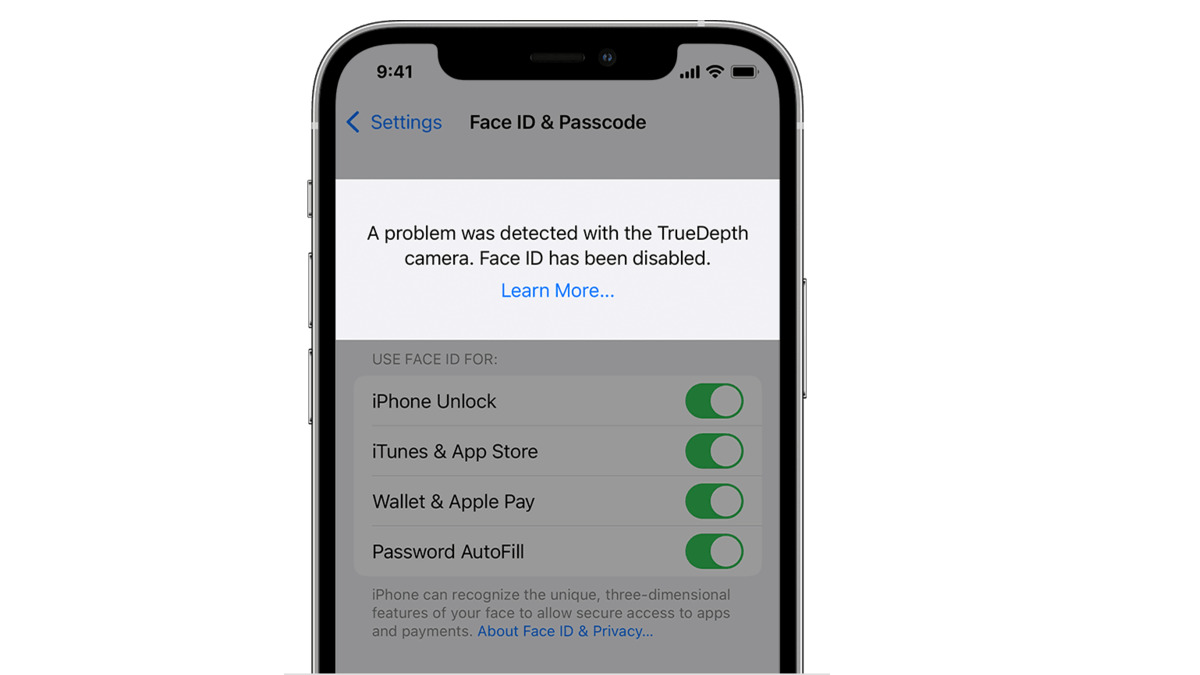
1. Access the Face ID & Passcode settings: Open the Settings app on your iPhone or iPad and tap on “Face ID & Passcode”. You’ll need to enter your passcode to continue.
2. Select “Set Up an Alternative Appearance”: Scroll down and tap on “Set Up an Alternative Appearance”. This option allows you to enroll your face again with a different appearance, such as wearing glasses, a hat, or a different hairstyle.
3. Follow the on-screen instructions: The setup process for the alternative appearance is similar to the initial Face ID setup. Position your face within the frame, making sure it is fully visible to the front-facing camera. Rotate your head in different angles to capture various perspectives of your face.
4. Complete the alternative appearance setup: Once you’ve gone through the setup process for the alternative appearance, your device will save the additional facial data. This allows Face ID to recognize you even when you’re wearing accessories or have changed your appearance.
5. Test Face ID recognition: After setting up the alternative appearance, test Face ID recognition with your newly enrolled appearance. Make sure to wear the accessories or make the changes to your appearance that you accounted for during the setup process. This will help ensure that Face ID consistently recognizes your face in different scenarios.
By setting up an alternative appearance, you are providing additional facial data to enhance Face ID’s recognition capabilities. This allows the system to adapt to variations in your appearance, such as wearing different accessories or hairstyles. It’s important to note that Face ID can only store one alternative appearance, so if you need to change it, you have the option to reset Face ID and set it up again.
Remember, Face ID technology is designed to continuously learn and adapt to changes in your appearance. If you experience any issues with recognition after setting up an alternative appearance, try setting up Face ID again, following the positioning and environment guidelines provided during the setup process.
Enrolling an alternative appearance can greatly improve the accuracy and reliability of Face ID, ensuring that you can easily unlock your device even when your overall appearance varies.
Setting Up Face ID in a Well-Lit Environment
Proper lighting plays a crucial role in the accuracy and performance of Face ID. When setting up Face ID, it is important to choose a well-lit environment to ensure optimal facial recognition. Here’s how you can set up Face ID in a well-lit environment:
1. Select an adequately lit room: Choose a room or area with sufficient lighting. Natural light or evenly distributed artificial light is ideal for setting up Face ID. Avoid setting up Face ID in extremely dimly lit rooms or under bright direct sunlight to ensure accurate facial recognition.
2. Avoid backlighting: When positioning your face for Face ID setup, make sure the primary light source is in front of you rather than behind you. Backlighting can cast shadows on your face, making it difficult for the TrueDepth camera system to capture accurate facial details.
3. Avoid strong reflections: Be cautious of any reflective surfaces, such as mirrors or glass windows, in the vicinity. Strong reflections can cause glares, which may affect the camera’s ability to capture your face accurately. Position yourself and your device in a way that avoids such reflections.
4. Position your face properly: While setting up Face ID, ensure that your face is fully visible within the outline displayed on the screen. Position your face at eye level, centered within the frame, and make sure your eyes, nose, and mouth are clearly visible to the camera.
5. Follow the on-screen instructions: During the setup process, follow the prompts on the screen that guide you to move your head slowly to capture different angles of your face. Stay within the frame and maintain a steady posture to allow the TrueDepth camera system to capture detailed facial information accurately.
6. Test in different lighting conditions: After successfully setting up Face ID in a well-lit environment, test its performance in various lighting conditions. Try unlocking your device in dim lighting, bright lighting, and other environments to ensure consistent and reliable facial recognition.
Setting up Face ID in a well-lit environment ensures that the TrueDepth camera system can capture clear and detailed images of your face, leading to more accurate facial recognition. Remember to position yourself properly, avoid backlighting and strong reflections, and follow the on-screen instructions during the setup process.
If you continue to experience issues with Face ID recognition, even after setting it up in a well-lit environment, consider examining other potential issues such as obstructions, dirty camera lenses, or software updates. And, as always, Apple Support is available to offer further assistance if needed.
By following these guidelines and ensuring a well-lit environment, you can maximize the performance and reliability of Face ID on your iPhone or iPad.
Updating Your Device Software
Keeping your device’s software up to date is essential for optimal performance, including the functionality of Face ID. Regular software updates from Apple often include improvements and bug fixes that can directly impact the accuracy and reliability of Face ID. Here’s how you can update your device’s software:
1. Check for available updates: Open the Settings app on your iPhone or iPad and navigate to “General”. Tap on “Software Update” to check if there are any available updates for your device.
2. Download and install updates: If an update is available, tap on “Download and Install” to proceed. Ensure that your device is connected to a stable Wi-Fi network and has sufficient battery life or is plugged into a power source to complete the update smoothly.
3. Follow the prompts: Once the update is downloaded, follow the on-screen instructions to install the update. Your device will usually restart during this process, so make sure to save any important work before proceeding.
4. Enable automatic updates: To ensure that your device stays up to date automatically, you can enable the “Automatic Updates” feature. This feature allows your device to download and install updates overnight while it’s connected to Wi-Fi and charging.
Regularly updating your device’s software not only improves the performance of Face ID but also enhances the overall functionality, security, and stability of your iPhone or iPad. It is recommended to keep your device up to date to benefit from the latest advancements and fixes provided by Apple.
If you’re experiencing issues with Face ID after updating your device’s software, it is possible that the update could have caused temporary glitches or compatibility issues. In such cases, restarting your device can help resolve any minor software-related issues and refresh system processes.
By regularly updating your device’s software, you can ensure that Face ID is functioning at its best. It is important to stay proactive with software updates to take advantage of any optimizations that can enhance the accuracy and reliability of Face ID on your device.
Restarting Your iPhone or iPad
Sometimes, a simple restart of your iPhone or iPad can help resolve temporary glitches and improve the performance of Face ID. Restarting your device essentially closes any background processes or applications that might be interfering with Face ID. Here’s how you can restart your iPhone or iPad:
1. Press and hold the power button: Locate the power button on your device. Press and hold it until an on-screen slider appears.
2. Slide to power off: On the screen, you’ll see a slider with the option to power off your device. Slide the slider to the right to turn off your iPhone or iPad.
3. Wait for a few seconds: After your device turns off, wait for at least 10 seconds before proceeding to the next step. This ensures that any residual electrical charge is discharged completely.
4. Turn on your device: Press and hold the power button again until the Apple logo appears on the screen. Release the button, and your device will boot up.
5. Test Face ID functionality: After your device has restarted, test the Face ID functionality by following the on-screen instructions during setup. Ensure that your face is properly positioned and observe if the issues you were facing during setup have been resolved.
Restarting your iPhone or iPad refreshes the system and clears any temporary issues that might be affecting Face ID. It’s a quick and simple troubleshooting step that can often resolve minor software-related problems.
If restarting your device doesn’t resolve the issues you’re experiencing with Face ID setup, consider other troubleshooting steps such as checking for obstructed sensors, cleaning the TrueDepth camera system, or updating your device’s software. In some cases, contacting Apple Support or visiting an authorized service center may be necessary for further assistance.
By restarting your device, you give Face ID a fresh start and a chance to function optimally. It’s a basic yet effective solution for addressing any temporary glitches that may be hindering the setup process.
Troubleshooting Face ID with Apple Support
If you’ve followed all the troubleshooting steps and are still experiencing issues with Face ID setup, contacting Apple Support is the next course of action. Apple’s support team consists of trained professionals who can provide specialized guidance and assistance to resolve Face ID-related problems. Here’s how you can troubleshoot Face ID with Apple Support:
1. Contact Apple Support: Visit the Apple Support website or use the Support app on your iPhone or iPad to initiate a support request. You can choose to chat with a representative, schedule a call, or make an appointment at an Apple Store or authorized service center.
2. Explain the issue in detail: When communicating with Apple Support, provide a detailed description of the Face ID issue you’re experiencing. Include any error messages, specific steps you’ve tried, and the duration of the problem. The more information you provide, the better they can assist you.
3. Follow their guidance: Apple Support may ask you to perform additional troubleshooting steps specific to your device and circumstances. Follow their guidance closely and provide any requested information or diagnostics to aid in the troubleshooting process.
4. Consider service alternatives: If the Face ID issue persists and cannot be resolved through software troubleshooting alone, Apple Support may suggest service options such as a hardware inspection or repair. Depending on the warranty or AppleCare coverage, you may be eligible for a device replacement or repair.
Apple Support is dedicated to ensuring the satisfaction of their customers and will do their best to resolve any Face ID issues you encounter. They have access to resources, tools, and specialized knowledge to diagnose and address complex problems that may not have been resolved through general troubleshooting steps.
Remember to prepare your device’s serial number and purchase details when reaching out to Apple Support, as they may require this information to verify your eligibility for service or warranty coverage.
By troubleshooting Face ID with Apple Support, you can gain access to personalized assistance and potential resolutions to your Face ID setup problems. Their expertise and support can help you overcome any challenges you’re facing and ensure that Face ID is functioning optimally on your iPhone or iPad.