How to Use Spotify Offline
Spotify is a popular streaming service that allows you to access millions of songs right at your fingertips. While streaming music is convenient, it requires a stable internet connection, which might not always be available. However, with Spotify’s offline feature, you can still enjoy your favorite tunes even without an internet connection. In this article, we will guide you through the steps to use Spotify offline.
To begin, you need to have the Spotify app installed on your device. If you haven’t done so already, visit your device’s app store and download the Spotify app. Once installed, open the app and sign in using your Spotify account credentials.
Next, it’s essential to upgrade to Spotify Premium. While Spotify’s free version allows you to stream music, it doesn’t provide access to the offline feature. With Spotify Premium, you can download songs, playlists, and albums to listen to offline. It also offers an ad-free listening experience and higher audio quality.
After upgrading to Spotify Premium, you can start creating your offline playlist. To do this, search for your favorite songs, albums, or playlists and click on the three-dot menu next to the items you want to save. From the options provided, select “Save to Your Library” or “Save to Playlist”. If you choose to save it as a playlist, give it a name and click “Create”.
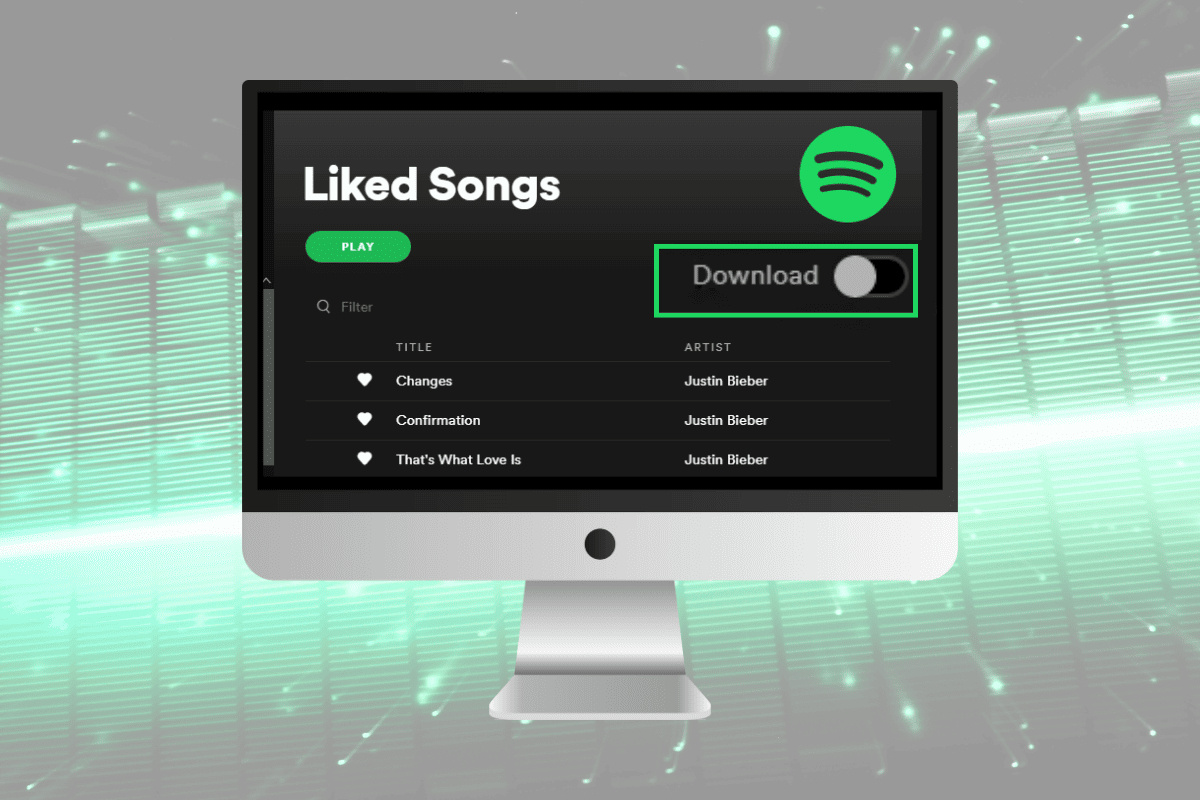
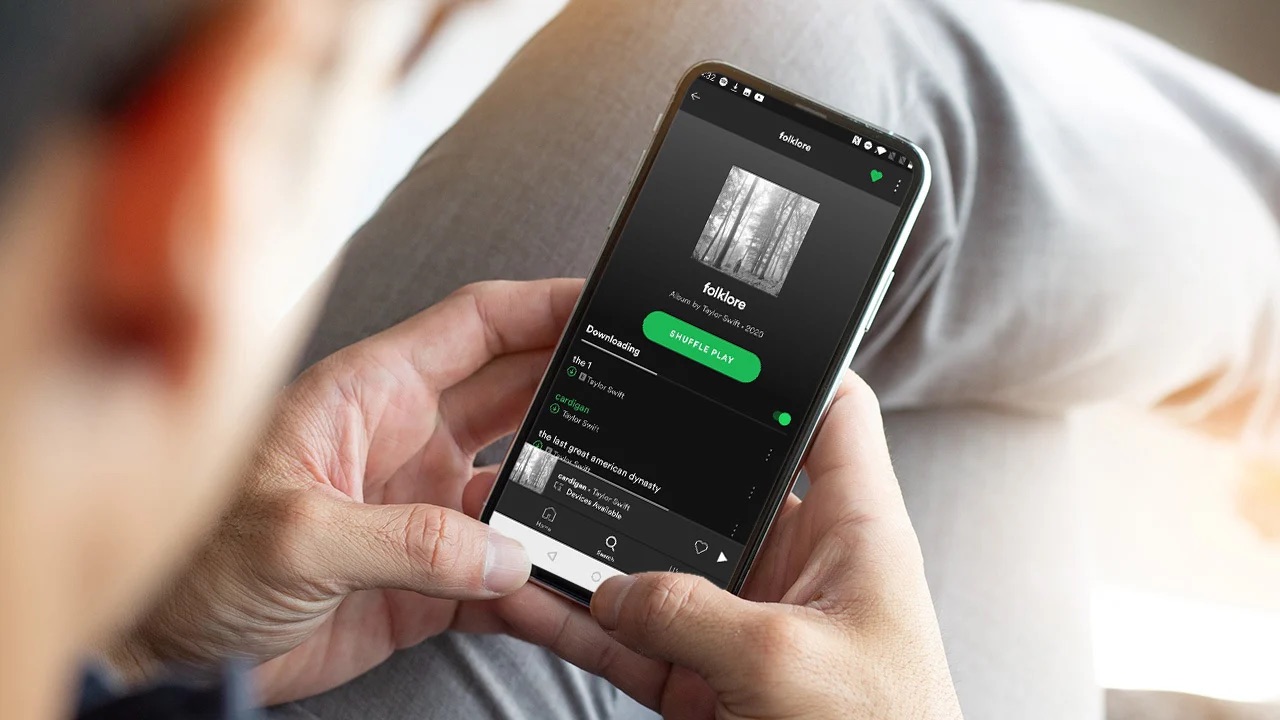
Now it’s time to enable offline mode. Open your Spotify app and go to the “Your Library” section. Tap on the playlist or album you want to make available offline. You will notice a toggle switch that says “Download”. Toggle it on, and Spotify will start downloading the songs to your device. You can monitor the download progress in the “Downloads” section.
Once you have downloaded your chosen playlist or album, you can enjoy it offline anytime. Simply go to the “Your Library” section and select the playlist or album. You will find all the downloaded songs ready to play, even without an internet connection.
Managing your offline playlists is also straightforward. You can delete downloaded songs or entire playlists if you want to clear up space on your device. To do this, go to the “Your Library” section and find the playlist or album. Tap on the three-dot menu and select “Remove Download” to remove specific songs or “Delete Downloaded Playlist” to remove the entire playlist.
Using Spotify offline allows you to enjoy your favorite music wherever you go, even if you don’t have access to the internet. Whether you’re on a long flight, commuting underground, or simply in an area with poor network coverage, Spotify’s offline feature ensures you never miss a beat. Upgrade to Spotify Premium today and unlock the world of offline listening!
Introduction
Spotify has revolutionized the way we listen to music, offering a vast library of songs from various genres at our fingertips. Whether you’re a music enthusiast or someone who simply enjoys listening to songs on the go, Spotify’s convenience and accessibility are unparalleled. However, there’s one drawback – a stable internet connection is required to stream music, and this might not always be available.
That’s where Spotify’s offline feature comes in. With this feature, you can download your favorite songs, albums, and playlists to your device, allowing you to enjoy them even when you don’t have an internet connection. Whether you’re traveling, in an area with poor network coverage, or simply want to save on data usage, using Spotify offline is a game-changer.
In this article, we will guide you through the process of using Spotify offline, enabling you to access your music library anytime and anywhere. We’ll cover everything from downloading the Spotify app and upgrading to Spotify Premium, to creating offline playlists and managing them effectively.
By following the steps outlined, you’ll be able to make the most of Spotify’s offline feature and have uninterrupted access to your favorite tunes. So, whether you’re embarking on a long road trip or heading to a remote location, you won’t have to worry about losing connection or missing out on your favorite tracks.
Let’s dive in and discover how to use Spotify offline, ensuring a seamless and enjoyable listening experience wherever you are.
Why Use Spotify Offline
While streaming music on Spotify is incredibly convenient, there are several compelling reasons why you should consider using Spotify offline:
1. Save on data usage: Streaming music can consume a significant amount of mobile data, especially if you listen to music frequently or for long durations. By downloading your favorite songs, albums, and playlists in advance, you can listen to them offline, saving on data usage and avoiding unexpected data overages.
2. Uninterrupted listening experience: With an offline playlist, you don’t have to worry about interruptions caused by poor network connections or buffering. Once your chosen songs are downloaded to your device, you can enjoy them seamlessly, without any interruptions or disruptions.
3. Travel and remote areas: When you’re traveling or in remote areas where internet access may be limited or unavailable, having access to your favorite music can be a comforting and enjoyable experience. Whether you’re on a long flight or exploring remote destinations, Spotify’s offline feature ensures that you have your personalized soundtrack wherever you go.
4. Preserving battery life: Streaming music online can drain your device’s battery quickly. By using Spotify offline, you can conserve your battery life since your device doesn’t need to constantly connect to the internet and stream music. This is especially useful if you’re on a long journey or in situations where charging your device isn’t possible.
5. Personalized playlists: Spotify allows you to create personalized playlists tailored to your mood, activities, or music preferences. By using Spotify offline, you have the freedom to curate your own playlists and enjoy them anytime, even without an internet connection. This enables you to have a customized listening experience that perfectly aligns with your preferences.
By utilizing Spotify’s offline feature, you can maximize your enjoyment of the streaming service and overcome the limitations of an internet connection. Whether it’s for practical reasons like saving data and battery life, or simply for the convenience of listening to music on the go, using Spotify offline offers a multitude of benefits. So, let’s explore how you can make the most of this feature and start enjoying your favorite music offline!
Step 1: Downloading the Spotify App and Signing In
The first step to using Spotify offline is to download the Spotify app on your device and sign in to your Spotify account. Here’s how you can get started:
1. Choose your device: Spotify is compatible with a wide range of devices, including smartphones, tablets, computers, and smart speakers. Visit your device’s app store or the Spotify website to download the app.
2. Download the app: Search for “Spotify” in your device’s app store (such as the App Store for iOS devices or Google Play Store for Android devices) and tap on the app icon. Click on the “Install” or “Get” button to start downloading the app to your device.
3. Sign up or sign in: If you’re a new user, you’ll need to sign up for a Spotify account. Open the app and click on the “Sign Up” button to create a new account. Follow the prompts to enter your email address, choose a password, and provide some basic information. If you already have a Spotify account, simply click on the “Log In” button and enter your account credentials.
4. Choose your subscription: Spotify offers both a free version and a premium version. The free version allows you to stream music with ads, while the premium version offers additional features like ad-free listening, offline mode, and higher audio quality. To use Spotify offline, it’s recommended to upgrade to Spotify Premium. Click on the “Upgrade” or “Get Premium” button within the app to choose your subscription and follow the prompts to complete the upgrade process.
5. Launch the app: Once you have successfully downloaded the Spotify app and signed in to your account, launch the app on your device. You’ll have access to a vast library of songs, albums, and playlists.
By following these steps, you can easily download the Spotify app, create an account, and sign in to start exploring and enjoying the world of music at your fingertips.
Step 2: Upgrading to Spotify Premium
If you want to unlock the full potential of Spotify and access the ability to listen to music offline, you’ll need to upgrade to Spotify Premium. Here’s how you can upgrade and enjoy the benefits of an ad-free and offline listening experience:
1. Open Spotify: Launch the Spotify app on your device and sign in to your account if you haven’t done so already.
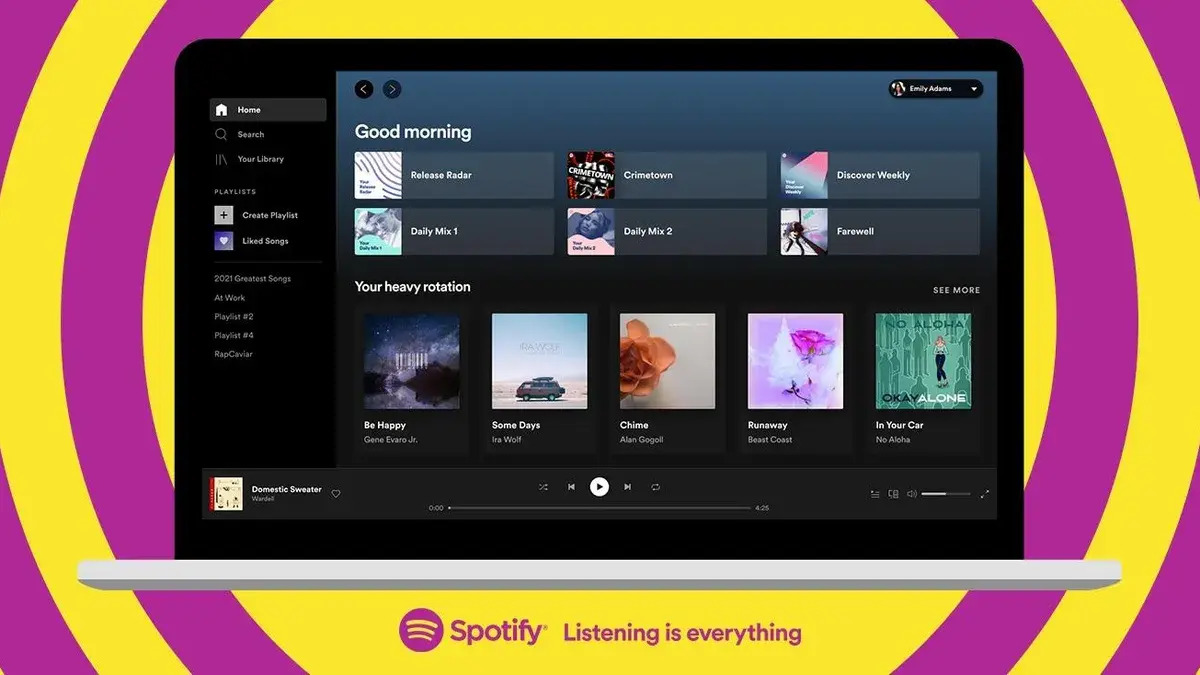
2. Go to Your Library: Tap on the “Your Library” icon located at the bottom of the screen. This will take you to your music library where you can browse through your playlists, albums, and liked songs.
3. Tap on the settings icon: Look for the gear or settings icon, typically located in the top right corner of the screen. Tap on it to access your account settings.
4. Select “Upgrade to Premium”: In the account settings menu, you’ll find an option to “Upgrade to Premium.” Tap on this option to proceed to the upgrade page.
5. Choose your subscription: On the upgrade page, you’ll see the available subscription plans. Select the one that suits your preferences and budget. Spotify offers individual, family, and student plans, each with its own benefits.
6. Complete the payment: Follow the prompts to enter your payment information and complete the upgrade process. Spotify accepts various payment methods, including credit or debit cards and third-party services like PayPal.
7. Enjoy Spotify Premium: Once you’ve successfully upgraded to Spotify Premium, you’ll have access to features such as ad-free listening, high-quality audio, unlimited skips, and, most importantly, the ability to download songs, albums, and playlists for offline listening.
Upgrading to Spotify Premium enhances your overall listening experience by removing ads and giving you the flexibility to enjoy your favorite music even when you’re offline or have a weak internet connection. With the premium features, you’ll have full control over your music library and explore everything that Spotify has to offer.
Step 3: Creating an Offline Playlist
Now that you have upgraded to Spotify Premium, it’s time to create your offline playlist. Follow these steps to curate a personalized collection of songs, albums, or playlists that you can listen to even without an internet connection:
1. Open Spotify: Launch the Spotify app on your device and sign in to your Premium account.
2. Navigate to the “Your Library” section: Tap on the “Your Library” icon located at the bottom of the screen. This will take you to your music library where you can access your playlists, albums, and liked songs.
3. Create a new playlist: In the “Your Library” section, look for the option to create a new playlist. On most devices, you’ll find a “Create Playlist” button or a “+ New Playlist” option. Tap on it to begin creating your offline playlist.
4. Name your playlist: Give your playlist a descriptive and memorable name. This will make it easier to find and manage later on. You can choose a name based on a theme, mood, or specific genre.
5. Add songs, albums, or playlists: To add songs to your playlist, you have a few options. You can search for specific songs, albums, or artists and tap the ellipsis (three-dot) menu next to the desired item. From there, select “Add to Playlist” and choose the playlist you just created. You can also add entire albums or existing playlists to your offline playlist by following the same steps.
6. Personalize your playlist: Once you have added songs or albums to your playlist, you can rearrange the order by dragging and dropping them. You can also remove songs by tapping on the ellipsis menu and selecting “Remove from Playlist”. Customize your playlist according to your preferences and create the perfect offline music collection.
7. Save your changes: It’s important to save your playlist after making any modifications. This ensures that your changes are synced and reflected across all your devices. Look for the save icon, usually represented by a checkmark or a floppy disk symbol, and tap on it to save your playlist.
By following these steps, you can easily create an offline playlist tailored to your tastes and preferences. This gives you the freedom to enjoy your favorite songs, albums, or playlists anytime, regardless of your internet connectivity.
Step 4: Enabling Offline Mode
Now that you have curated your offline playlist, it’s time to enable offline mode on Spotify. By toggling on this setting, you can download your chosen songs, albums, or playlists to your device for offline listening. Here’s how you can enable offline mode:
1. Open the Spotify app: Launch the Spotify app on your device and sign in to your Premium account.
2. Go to your playlist: Navigate to the “Your Library” section by tapping on the “Your Library” icon at the bottom of the screen. Locate the playlist you want to make available offline and tap on it to open it.
3. Toggle on the “Download” option: On the top right corner of the playlist page, you’ll find a toggle switch labeled “Download”. Tap on it to enable offline mode for that playlist.
4. Wait for the download to complete: Once you’ve enabled offline mode, Spotify will start downloading the songs, albums, or playlists to your device. The time it takes to download depends on the size of the content and the speed of your internet connection. You can monitor the download progress in the “Downloads” section of the app.
5. Access your downloaded content: Once the download is complete, you can access your offline content by going to the “Your Library” section, selecting the playlist, and navigating to the songs within it. These downloaded songs will be available for playback even when you don’t have an internet connection.
6. Manage your downloaded content: If you want to remove a song, album, or playlist from your offline collection, simply navigate to the “Your Library” section, find the playlist, and tap on the three-dot menu next to it. Select “Remove Download” to delete specific songs or “Delete Downloaded Playlist” to remove the entire playlist from offline mode.
By enabling offline mode, you have the flexibility to listen to your favorite music without relying on an internet connection. Whether you’re traveling, in an area with poor network coverage, or simply want to save on data usage, enabling offline mode ensures you can enjoy your music anytime and anywhere.
Step 5: Managing Your Offline Playlists
Once you have enabled offline mode and downloaded your favorite playlists, it’s important to know how to effectively manage and organize them. Here are some steps to help you manage your offline playlists on Spotify:
1. Open the Spotify app: Launch the Spotify app on your device and sign in to your account.
2. Navigate to the “Your Library” section: Tap on the “Your Library” icon located at the bottom of the screen to access your music library.
3. Locate your downloaded playlists: Scroll through your playlists to find the ones that have been downloaded for offline listening. These playlists will have a green arrow next to their name.
4. Play your downloaded playlists: To start listening to your offline playlists, simply tap on the desired playlist, and the songs within it will be available for playback.
5. Edit your downloaded playlists: If you want to make changes to your offline playlists, such as adding or removing songs, you can do so by tapping on the three-dot menu next to the playlist. From there, you can select options like “Add Songs” to add more tracks, or “Remove Download” to remove specific songs from the downloaded playlist.
6. Delete downloaded playlists: If you want to clear space on your device or remove a downloaded playlist, go to the playlist in the “Your Library” section, tap on the three-dot menu, and select “Delete Downloaded Playlist”. This will remove the entire playlist from your device while keeping the original playlist intact in your account.
7. Manage downloaded songs: If you want to manage individual songs that are downloaded, go to the playlist or album and tap on the three-dot menu next to the song you wish to remove. Select “Remove from Playlist” to remove the specific song from the playlist while keeping it available in your account for future downloads if desired.
By effectively managing your offline playlists, you can keep your music library organized, ensure you have enough space on your device, and have a seamless offline listening experience with Spotify.
Conclusion
Using Spotify offline is a fantastic way to enjoy your favorite music anytime, anywhere, even without an internet connection. By following the steps outlined in this guide, you can seamlessly download your preferred songs, albums, and playlists to your device, allowing for uninterrupted listening pleasure.
Starting with downloading the Spotify app and signing in, upgrading to Spotify Premium unlocks the full potential of the offline feature, ensuring a superior listening experience. Creating personalized offline playlists allows you to curate a collection of songs that align with your taste and preferences, while enabling offline mode ensures that you can access your downloaded content even when you have no internet connectivity.
Managing your offline playlists is essential for keeping your music library organized and maximizing storage space on your device. Removing or adding songs, deleting downloaded playlists, and editing your music collection can easily be accomplished within the Spotify app.
Whether you’re heading on a long journey, exploring remote areas, or simply want to save on data usage, Spotify offline mode is a game-changer. It provides the flexibility to enjoy your favorite music without relying on an internet connection, giving you the freedom to appreciate your preferred tunes at all times.
So, embrace the power of Spotify’s offline feature and make the most of your music library. Upgrade to Spotify Premium, create your personalized offline playlists, enable offline mode, and manage your downloaded content. With Spotify offline, the joy of music is never far away, no matter where you are!


