Introduction
Welcome to the world of smart entertainment! With the advancement of technology, Smart TVs have revolutionized the way we consume media by combining traditional TV functions with internet connectivity. Now, you can stream your favorite shows, browse the web, and enjoy a plethora of online content right from your living room.
In this article, we will explore how to effectively use the internet on your Smart TV. Whether you want to connect your TV to the internet, configure the settings, or make the most out of the available apps and features, we’ve got you covered. So, let’s dive in and unlock the full potential of your Smart TV!
Connecting your Smart TV to the internet is the first step towards experiencing a whole new level of entertainment. By establishing an internet connection, you can access a wide range of online content, including streaming services, social media platforms, and even web browsing.
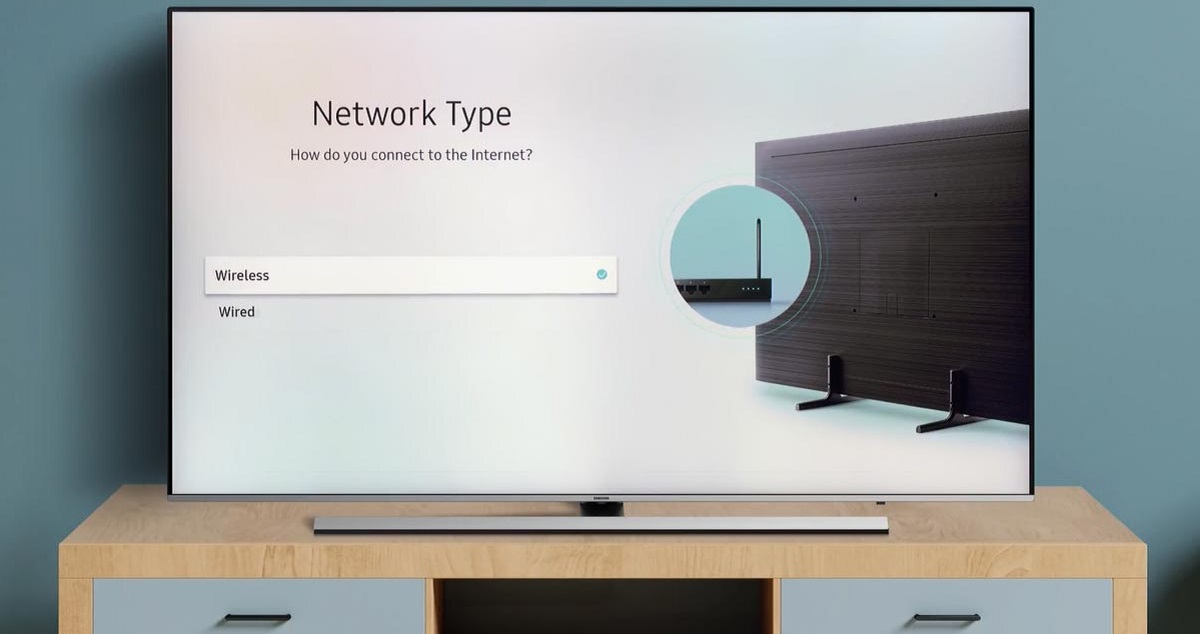
There are two main methods for connecting your Smart TV to the internet: wired and wireless. Wired connections typically involve using an Ethernet cable, while wireless connections make use of your home’s Wi-Fi network. Let’s explore each option in detail and choose the one that best suits your needs.
Once you’ve connected your Smart TV to the internet, it’s essential to configure the internet settings properly. This ensures a seamless browsing experience and maximizes the potential of online apps and features. We’ll guide you through the process of setting up your internet connection, including entering the Wi-Fi password and completing any necessary network configurations.
With the internet successfully set up on your Smart TV, you can now take advantage of the built-in internet browser. Browse your favorite websites, watch viral videos, and stay up-to-date with the latest news right from the comfort of your couch. We’ll provide you with tips and tricks to optimize your internet browsing experience and make the most out of the browser’s features.
In addition to the internet browser, Smart TVs come equipped with various popular apps that offer a wide range of online content and services. From streaming platforms like Netflix and Hulu to social media apps like YouTube and Facebook, there’s something for everyone. We’ll highlight some of the most popular apps and show you how to make the most of them.
Lastly, we’ll provide you with some tips and tricks to ensure a smooth and hassle-free internet browsing experience on your Smart TV. From optimizing your connection speed to managing cookies and clearing the cache, these tips will help you overcome any potential hurdles and enjoy uninterrupted online entertainment.
Now that you have an overview of what’s to come, let’s get started on exploring the exciting world of using the internet on your Smart TV. Get ready to unleash the full potential of your Smart TV and elevate your entertainment experience.
Connecting your Smart TV to the Internet
Before you can start enjoying the vast array of online content on your Smart TV, you’ll need to establish a connection to the internet. There are two main methods for connecting your Smart TV: through a wired connection or a wireless connection. Let’s explore each option in detail.
Wired Connection
A wired connection involves connecting your Smart TV directly to your modem or router using an Ethernet cable. This type of connection provides a stable and reliable connection, ensuring smooth streaming and browsing experiences. To connect your Smart TV via a wired connection, follow these steps:
- Locate the Ethernet port on the back of your Smart TV. It is usually labeled as “LAN” or “Ethernet”.
- Connect one end of the Ethernet cable to the Ethernet port on your Smart TV.
- Connect the other end of the Ethernet cable to an available Ethernet port on your modem or router.
- Once connected, your Smart TV will automatically detect the wired connection and establish an internet connection.
Wireless Connection
If you prefer a wireless connection, you can connect your Smart TV to your home’s Wi-Fi network. This provides the convenience of not having to worry about cables and enables you to place your TV anywhere within the range of your Wi-Fi signal. To connect your Smart TV wirelessly, follow these steps:
- Access the settings menu on your Smart TV. The method may vary depending on the TV model, but typically you can access it through a dedicated button on your remote or through the on-screen menu.
- Navigate to the network settings or wireless settings section.
- Select the option to connect to a Wi-Fi network.
- A list of available Wi-Fi networks will appear. Select your home Wi-Fi network from the list.
- If your network is password-protected, enter your Wi-Fi password using the on-screen keyboard or remote control.
- Once you have entered the password, select “Connect” or “OK” to establish the wireless connection.
Once you have successfully connected your Smart TV to the internet, you are ready to explore the world of online entertainment. Whether you choose a wired or wireless connection, ensure that your internet connection is stable and provides sufficient speed for smooth streaming and browsing experiences.
Now that you have established an internet connection on your Smart TV, let’s move on to configuring the internet settings to optimize your browsing experience.
Wired Connection
Connecting your Smart TV to the internet via a wired connection can ensure a reliable and stable internet connection, which is crucial for seamless streaming and browsing experiences. To set up a wired connection, you will need an Ethernet cable and access to your modem or router.
Here’s a step-by-step guide on how to connect your Smart TV to the internet using a wired connection:
- Locate the Ethernet port on the back or side of your Smart TV. It is usually labeled as “LAN” or “Ethernet”.
- Take one end of the Ethernet cable and plug it into the Ethernet port on your Smart TV.
- Next, take the other end of the Ethernet cable and connect it to an available Ethernet port on your modem or router.
- Ensure that the connection is secure on both ends to avoid any interruptions.
- Once connected, your Smart TV will automatically detect the wired connection and establish an internet connection.
It’s important to note that the location of the Ethernet port may vary depending on the TV model. Consult your TV’s manual or check for labeling on the back of the TV to locate the Ethernet port accurately.
Advantages of a wired connection include a more stable and consistent internet connection compared to a wireless connection. It eliminates the possibility of signal interference or weak Wi-Fi signals, ensuring smoother streaming and faster downloads.
Additionally, a wired connection is a great option if your Smart TV is located near your modem or router, as it allows for a direct and secure connection without having to worry about Wi-Fi range or network congestion.
While setting up a wired connection might involve some additional cable management and consideration for the physical placement of your TV, the benefits of a fast and reliable internet connection make it a worthy choice.
Now that you have successfully connected your Smart TV to the internet via a wired connection, you can proceed to configure the internet settings and start enjoying all the online content available on your Smart TV.
Wireless Connection
A wireless connection offers convenience and flexibility when connecting your Smart TV to the internet. With a wireless connection, you can enjoy the benefits of internet access without the need for physical cables. To set up a wireless connection, you will need your home’s Wi-Fi network name (SSID) and password.
Follow these steps to connect your Smart TV to the internet wirelessly:
- Access the settings menu on your Smart TV. The method may vary depending on the TV model, but you can typically find it through a dedicated button on your remote or the on-screen menu.
- Navigate to the network settings or wireless settings section.
- Select the option to connect to a Wi-Fi network.
- A list of available Wi-Fi networks will appear on the screen. Choose your home Wi-Fi network from the list.
- If prompted, enter your Wi-Fi password using the on-screen keyboard or remote control.
- Once you have entered the password, select “Connect” or “OK” to establish the wireless connection.
It is important to select the correct Wi-Fi network and enter the password accurately to ensure a successful connection.
When choosing a location for your Smart TV, ensure that it is within the range of your Wi-Fi network. As walls, furniture, and other objects can weaken the Wi-Fi signal, it is advisable to place your Smart TV as close to your Wi-Fi router as possible for a stronger and more reliable connection.
Wireless connections offer the advantage of flexibility, allowing you to place your Smart TV anywhere within the Wi-Fi range. You can easily move your TV around or rearrange your living space without worrying about the availability of an Ethernet cable connection. However, keep in mind that wireless connections may be more prone to interference or signal strength issues, especially if you have many devices connected to your Wi-Fi network or if you live in a densely populated area.
If you encounter connectivity issues, consider improving your Wi-Fi signal by placing your router in a central location, away from obstructions, or using Wi-Fi extenders to boost the signal strength. Additionally, ensure that your Smart TV’s software or firmware is up to date, as manufacturers often release updates that address connectivity and performance issues.
Once you have successfully connected your Smart TV to the internet wirelessly, you can proceed to configure the internet settings and enjoy a wide range of online content right from the comfort of your living room.
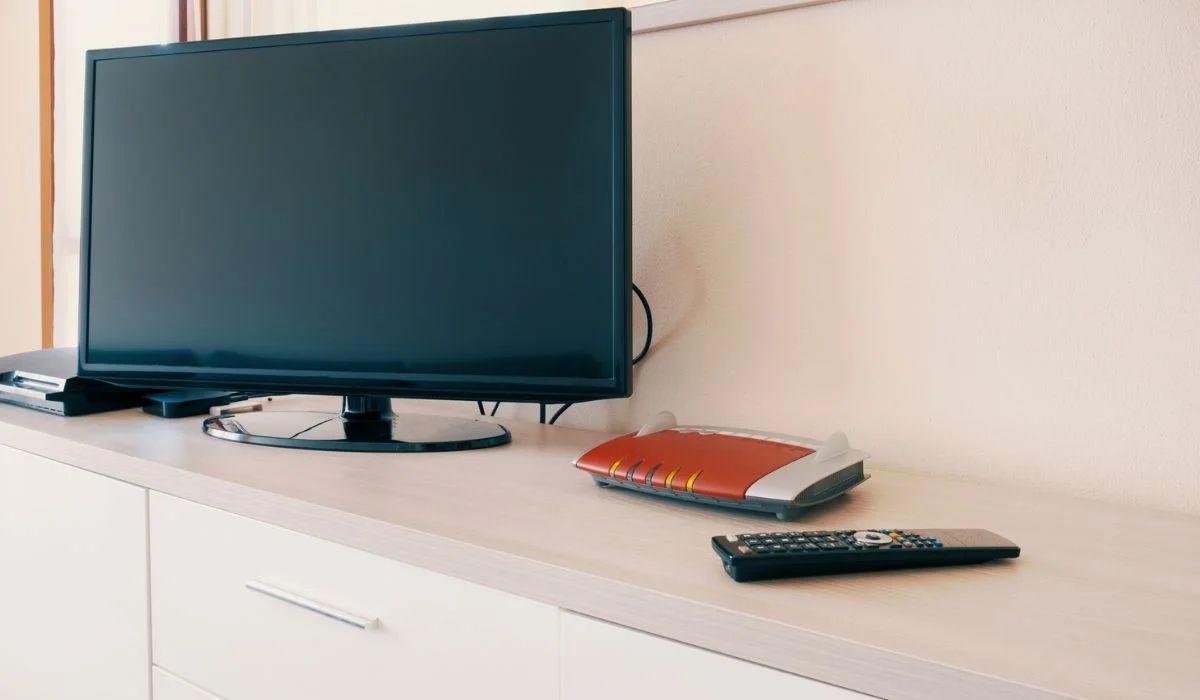
Connecting via Ethernet Cable
Connecting your Smart TV to the internet via an Ethernet cable is a reliable and straightforward method that ensures a stable and consistent internet connection. This wired connection method is particularly useful if you want to avoid any potential issues related to Wi-Fi connectivity or if you require faster internet speeds for streaming or online gaming.
To connect your Smart TV to the internet using an Ethernet cable, follow these steps:
- Locate the Ethernet port on the back or side of your Smart TV. It is typically labeled as “LAN” or “Ethernet”.
- Insert one end of the Ethernet cable into the Ethernet port on your Smart TV.
- Take the other end of the Ethernet cable and plug it into an available Ethernet port on your modem or router.
- Ensure that the cable is securely connected to both the TV and the modem/router to avoid any interruptions in the network connection.
- Once the cable is connected, your Smart TV will automatically detect the wired connection and establish an internet connection.
Using an Ethernet cable provides several advantages over a wireless connection. Firstly, it guarantees a more stable and reliable internet connection, as you are directly connected to the modem or router. This is especially important for activities that require a consistent internet connection, such as streaming high-definition videos or online gaming.
Additionally, connecting via Ethernet typically offers faster network speeds compared to Wi-Fi, as the wired connection eliminates potential interference or signal strength issues that can occur with wireless connections. This ensures smoother and buffer-free streaming experiences, especially for high-bandwidth content.
Another benefit of using an Ethernet connection is improved network security. Since the connection is physically wired and does not rely on Wi-Fi signals, the risk of unwanted access to your network is reduced.
If your Smart TV is located at a considerable distance from your modem or router, you may need to use a longer Ethernet cable or consider using Ethernet over Powerline adapters. These adapters utilize your home’s existing electrical wiring to transmit the Ethernet signal, allowing you to connect your Smart TV to the internet without the need for long cables or additional Wi-Fi extenders.
Once you have successfully connected your Smart TV to the internet using an Ethernet cable, you can proceed to configure the internet settings and start enjoying a wide range of online content with a stable and reliable internet connection.
Connecting via Wi-Fi
Connecting your Smart TV to the internet through a Wi-Fi connection offers convenience and flexibility, allowing you to enjoy online content without the need for physical cables. Setting up a Wi-Fi connection is a straightforward process that requires your TV to be within range of your home’s Wi-Fi network.
To connect your Smart TV to the internet via Wi-Fi, follow these steps:
- Access the settings menu on your Smart TV. The method to access the settings may vary depending on your TV model. Typically, there is a dedicated button on the remote or an option in the on-screen menu.
- Navigate to the network settings or wireless settings section.
- Select the option to connect to a Wi-Fi network.
- A list of available Wi-Fi networks will appear on the screen. Choose your home Wi-Fi network from the list.
- If prompted, enter your Wi-Fi password using the on-screen keyboard or remote control.
- Select “Connect” or “OK” to establish the wireless connection.
Ensure that you select the correct Wi-Fi network and enter the password accurately to ensure a successful connection.
Connecting via Wi-Fi offers the advantage of flexibility, as you can place your Smart TV anywhere within the range of your Wi-Fi signal. This allows you to avoid the hassle of running cables or being limited by the physical proximity to your modem or router.
While setting up a Wi-Fi connection, keep in mind that the range and signal strength of your Wi-Fi network may affect the quality of your connection. Walls, furniture, and other objects can hinder the Wi-Fi signal, resulting in a weaker connection or potential dropouts. To optimize your connection, consider the following tips:
- Position your Smart TV within a reasonable range of your Wi-Fi router to ensure a strong and stable signal.
- Minimize barriers between your Smart TV and the router. Avoid placing it behind thick walls or large, dense objects that may obstruct the Wi-Fi signal.
- Reduce interference from other devices operating on the same frequency band as your Wi-Fi. Devices like cordless phones, baby monitors, and microwave ovens can sometimes interfere with Wi-Fi signals.
- If you experience connectivity issues, you can try resetting your Wi-Fi router or contacting your internet service provider for further assistance.
Connecting via Wi-Fi is a popular choice as it provides the convenience to move your Smart TV around or rearrange your living space without worrying about cables. It is ideal for situations where running an Ethernet cable may not be practical or feasible.
Once you have successfully connected your Smart TV to the internet via Wi-Fi, you can proceed to configure the internet settings and immerse yourself in the world of online entertainment with just a few clicks of your remote.
Configuring the Internet Settings on your Smart TV
Once you have successfully connected your Smart TV to the internet, it’s important to configure the internet settings to ensure optimal performance and a seamless browsing experience. Configuring the settings will vary depending on your specific Smart TV model, but most TVs offer similar options to customize your internet connection.
Here are some common steps to configure the internet settings on your Smart TV:
- Access the settings menu on your Smart TV. This can typically be done with a dedicated button on your remote or through the on-screen menu.
- Navigate to the network settings or internet settings section.
- Choose the option to configure or manage your internet connection.
- Depending on your TV, you may have the option to choose between automatic or manual configuration.
- If the automatic configuration option is available, select it to allow your TV to automatically detect and apply the necessary settings to connect to the internet.
- If the automatic configuration does not work or is not available, you may need to enter the details manually. This includes entering the IP address, subnet mask, gateway, and DNS server information as provided by your internet service provider.
- Follow the on-screen instructions and prompts to complete the configuration process.
During the configuration process, you may encounter additional settings like DHCP (Dynamic Host Configuration Protocol) or Proxy settings. In most cases, leaving these settings on their default or automatic options should suffice. However, if you have specific network requirements or if your internet service provider advises otherwise, you can make the necessary adjustments.
It’s worth mentioning that some Smart TVs offer additional advanced settings that allow you to optimize your internet connection further. These settings may include options to prioritize bandwidth for streaming, adjust the video quality, or enable certain security features. Exploring these settings can help tailor your Smart TV’s internet experience to your preferences.
It’s essential to keep your Smart TV’s firmware or software up to date. Manufacturers often release updates that include improvements and bug fixes related to internet connectivity and performance. Check for updates regularly or set your TV to automatically update to ensure you have the latest firmware installed.
By configuring the internet settings on your Smart TV, you can ensure a smooth browsing experience, optimize your connection for streaming, and address any specific network requirements you may have.
Now that your Smart TV’s internet settings are configured, you’re ready to explore the variety of online content available and make the most out of your Smart TV’s capabilities.
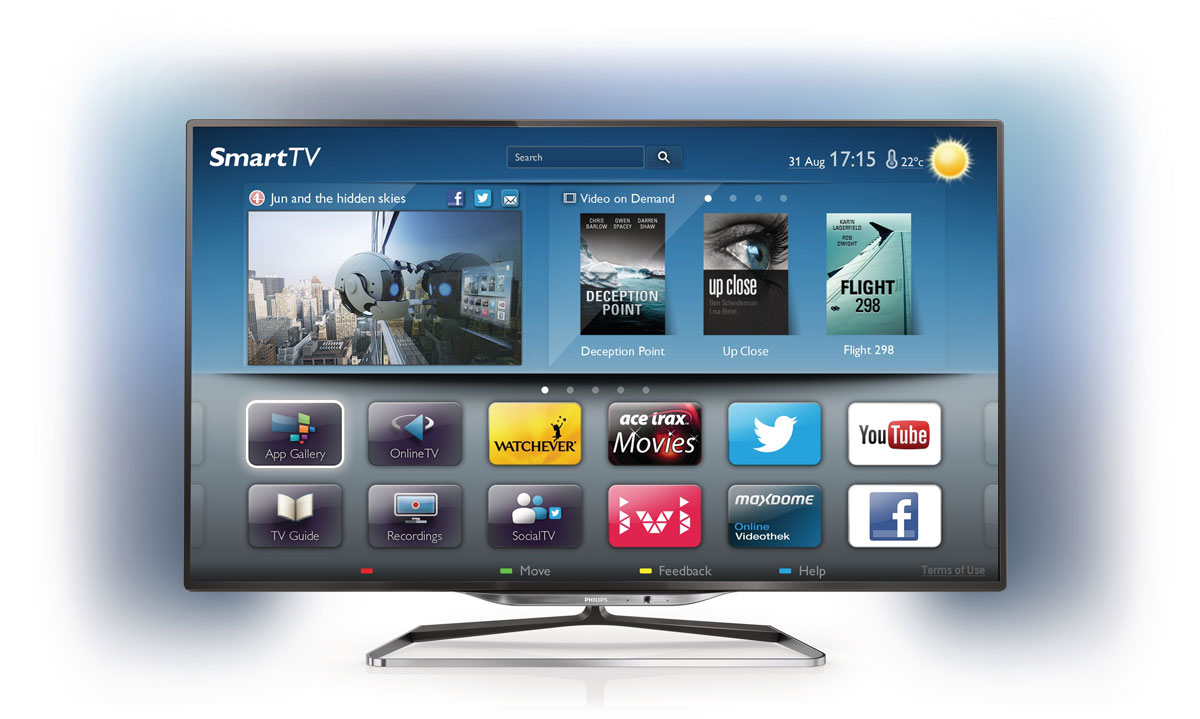
Internet Browser on your Smart TV
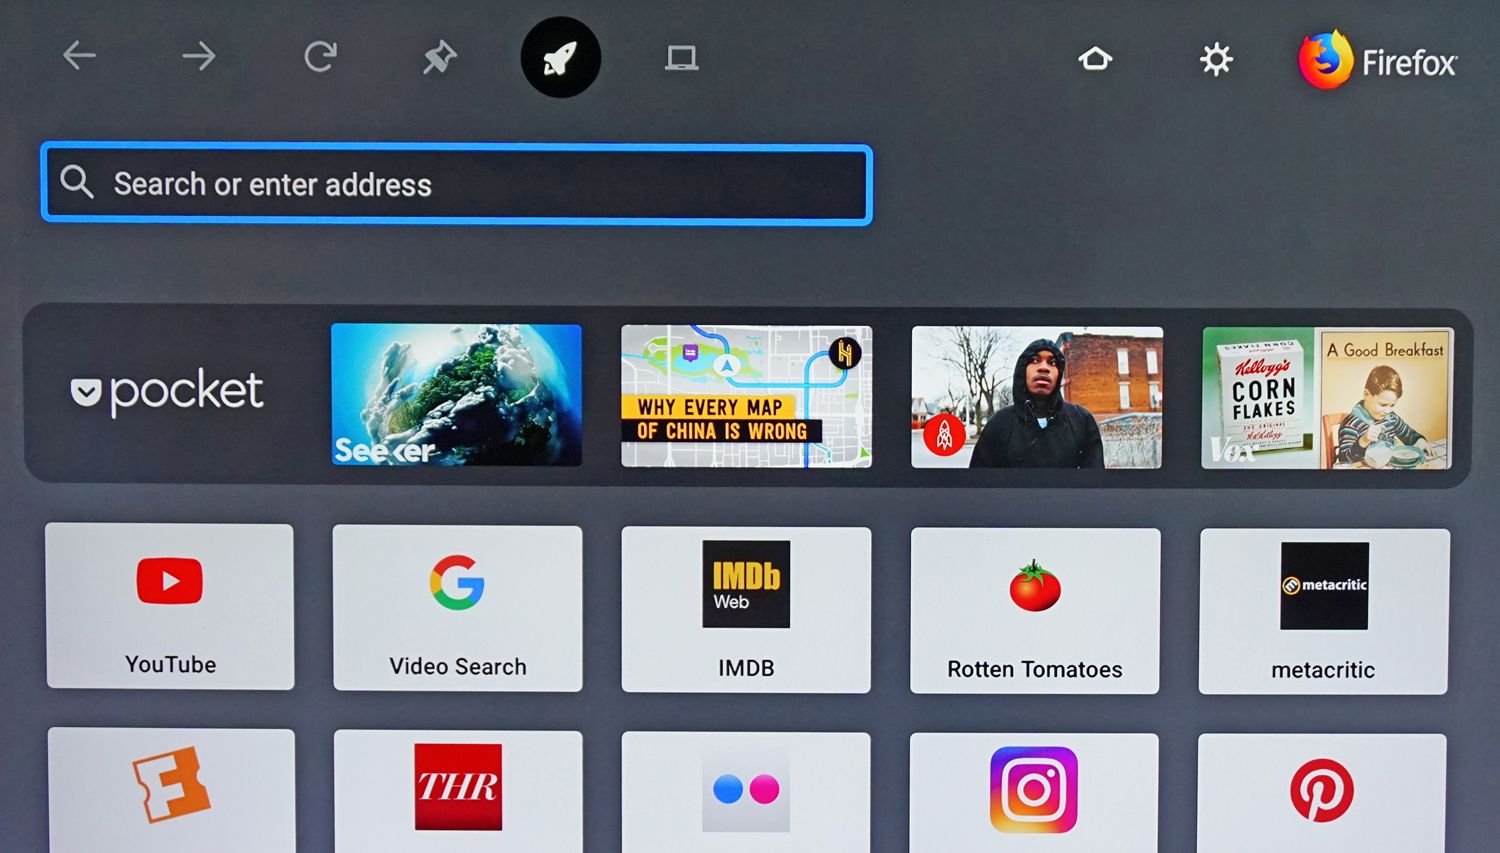
One of the key features of a Smart TV is the built-in internet browser, which allows you to browse the web and access your favorite websites directly from your TV screen. With the internet browser on your Smart TV, you can search for information, watch online videos, check social media, and much more, all without leaving your couch.
The internet browser on your Smart TV may vary depending on the TV model and operating system. However, most Smart TVs provide a user-friendly interface and navigation tools that make it easy to surf the web. Here’s how to make the most out of your Smart TV’s internet browser:
1. Launching the Internet Browser
To open the internet browser on your Smart TV, you can typically find an icon or shortcut on the home screen or in the app menu. Alternatively, you may also find a browser button on your TV’s remote control. Simply select the browser icon or press the browser button to launch the internet browser.
2. Navigating and Entering URLs
Once the internet browser is open, you can navigate through web pages using the arrow keys on your remote control or any navigation buttons provided. To visit a specific website, use the on-screen keyboard or a connected USB keyboard to enter the URL into the address bar at the top of the browser.
Some Smart TVs support voice input, allowing you to speak the website name or search term to initiate the browsing action. Check your TV’s user manual or settings menu to see if voice input is available and how to activate it.
3. Zooming and Adjusting the Screen
While viewing web pages on your Smart TV, you may need to adjust the zoom level or screen positioning for better readability. Depending on your TV’s browser, you can zoom in or out using the zoom controls provided. This makes it easier to read small text or view details on web pages.
If the web page does not fit the screen properly, you can adjust the screen size or aspect ratio from your TV’s settings menu to ensure a comfortable browsing experience.
4. Managing Bookmarks and History
Similar to web browsers on other devices, your Smart TV’s internet browser allows you to manage bookmarks and view your browsing history. You can bookmark your favorite websites for quick access, and the browser will remember your browsing history for easy navigation or revisiting previously visited sites.
Check your browser’s settings or options menu to find the bookmark and history management features. From there, you can add new bookmarks, organize them into folders, and clear your browsing history if desired.
Please note that due to the differences in TV models and operating systems, the features and functions of the internet browser may vary. Refer to your TV’s user manual or online support resources for specific instructions and details about the internet browser on your Smart TV.
With the internet browser on your Smart TV, you can enjoy a variety of online content, from news websites to streaming platforms, right from the comfort of your living room. Explore the web, stay connected, and make the most out of your Smart TV’s browsing capabilities.
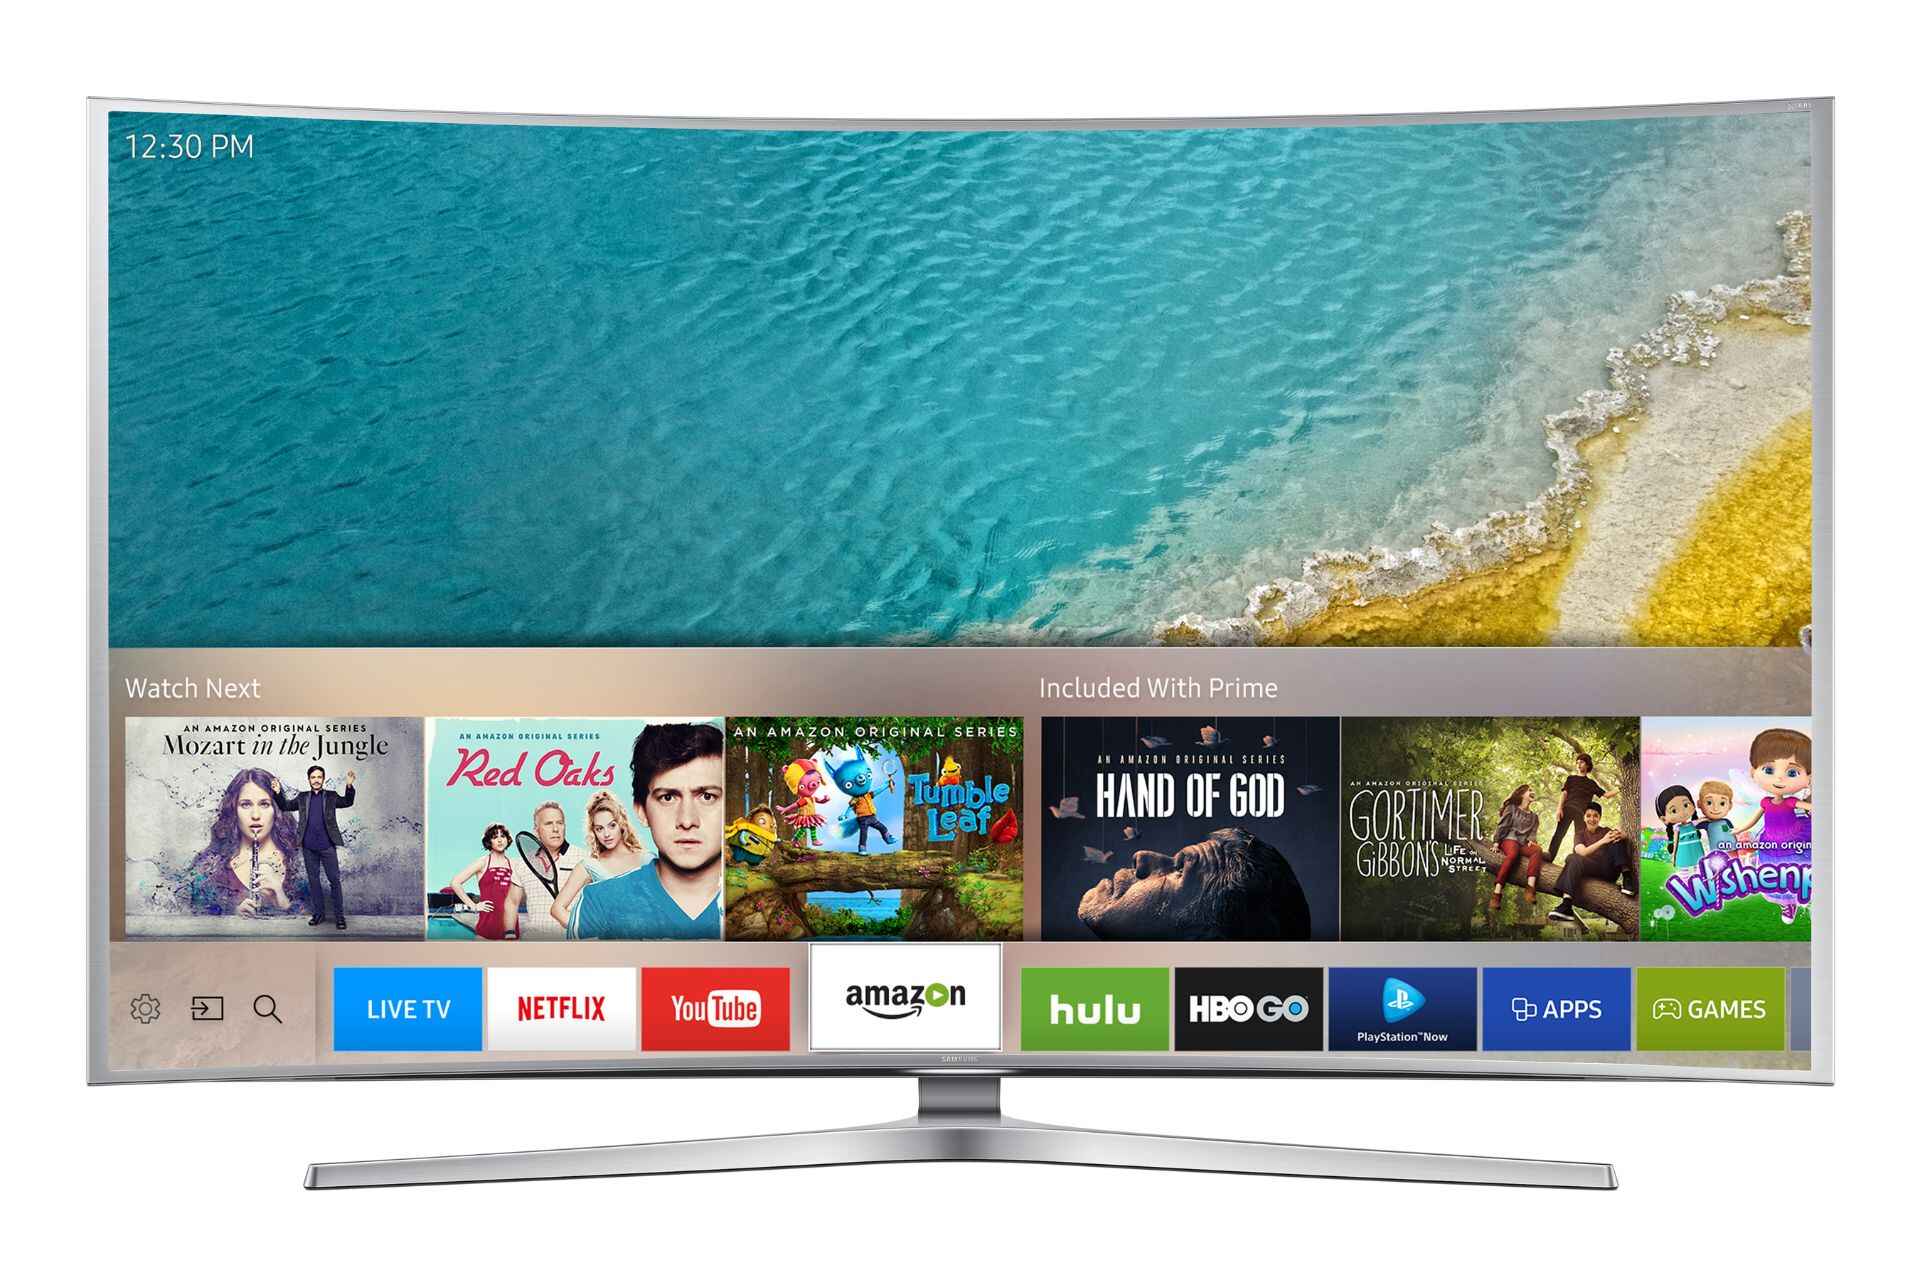
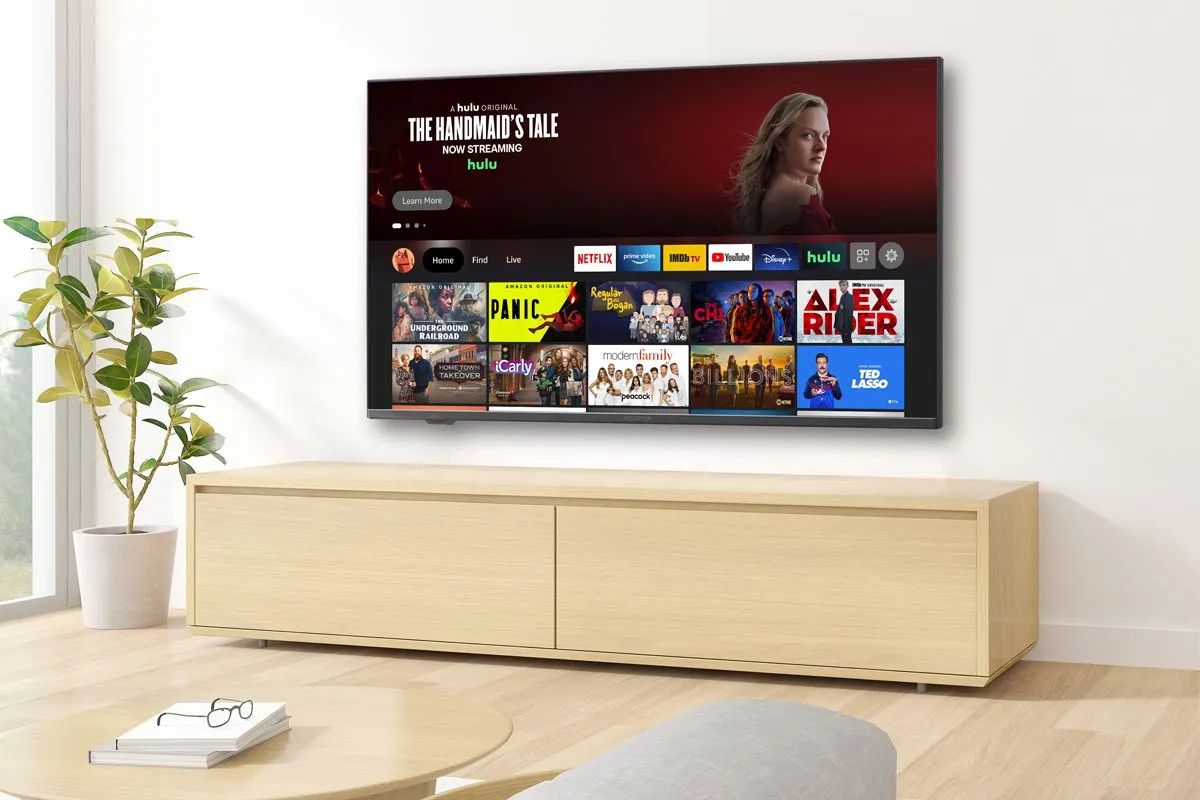
Popular Apps for Internet Use on Smart TV
Smart TVs come equipped with a wide range of pre-installed apps that offer a variety of online content and services. These apps bring the internet directly to your TV, allowing you to access popular websites, stream videos, listen to music, play games, and much more. Here are some of the most popular apps for internet use on Smart TVs:
1. Netflix
Netflix is a leading streaming service that offers a vast library of movies, TV shows, documentaries, and more. With a Netflix subscription, you can enjoy binge-watching your favorite series or discover new content right from your Smart TV.
2. YouTube
YouTube is a video-sharing platform that hosts a wide array of user-generated content, including music videos, vlogs, tutorials, product reviews, and more. Whether you’re looking for entertainment or educational content, YouTube on your Smart TV delivers unlimited video streaming.
3. Hulu
Hulu is a streaming service that offers a combination of current and classic TV shows, movies, and original content. With a Hulu subscription, you can catch up on your favorite shows or explore a wide range of genres, providing hours of entertainment on your Smart TV.
4. Amazon Prime Video
Amazon Prime Video is a streaming service that provides access to a vast library of movies, TV series, and Amazon Originals. With Amazon Prime membership, you can enjoy streaming high-quality content on your Smart TV, including popular shows like “The Marvelous Mrs. Maisel” and “The Boys”.
5. Spotify
Spotify is a popular music streaming platform that offers millions of songs, podcasts, and playlists. With the Spotify app on your Smart TV, you can curate the perfect soundtrack for your day, create playlists, and enjoy your favorite tunes with high-quality audio.
6. Facebook Watch
Facebook Watch is a video platform on Facebook that hosts a variety of video content, including original programming, live streams, and user-generated videos. Stay connected with family and friends, get updates, and explore trending videos all from your Smart TV.
7. Twitch
Twitch is a streaming platform primarily focused on live streaming video game content. From competitive gaming tournaments to creative arts and music streams, Twitch offers a wide range of live and recorded content to cater to various interests and hobbies.
These are just a few examples of the many apps available for internet use on Smart TVs. Other popular apps include Disney+, HBO Max, ESPN, BBC iPlayer, and many more, depending on your region and TV model. Explore your TV’s app store to discover a world of entertainment and services that cater to your interests and preferences.
With the wide variety of apps available on your Smart TV, you can enjoy a diverse range of online content without the need for additional devices. Stay entertained, informed, and connected on the big screen of your Smart TV.
Tips and Tricks for Smooth Internet Browsing on Smart TV
Browsing the internet on your Smart TV can be a convenient and enjoyable experience. To ensure a smooth and hassle-free internet browsing experience, here are some tips and tricks to keep in mind:
1. Optimize Your Internet Connection
A stable and fast internet connection is essential for smooth browsing. Ensure that your Smart TV is located within range of your Wi-Fi network or connected via a reliable Ethernet cable. Consider positioning your Wi-Fi router in a central location to improve signal strength, or use Wi-Fi extenders for extended coverage.
2. Keep Your Software Updated
Regularly update your Smart TV’s firmware or software to benefit from the latest features, security patches, and performance improvements. Manufacturers often release updates that address any known bugs or issues related to internet connectivity and browsing.
3. Manage Cookies and Clear Cache
Clearing your browser’s cache and managing cookies can help improve browsing performance. Over time, accumulated cache files and cookies can slow down the browser. Go to the browser settings menu to clear the cache or manage cookie settings as per your preferences.
4. Use Ad Blockers
Consider installing ad-blocking extensions or apps to minimize intrusive ads while browsing the internet. Ad blockers can enhance your browsing experience by reducing the number of ads displayed, which can result in faster load times and less disturbance while navigating websites.
5. Bookmark Frequently Visited Sites
Create bookmarks for your frequently visited websites to easily access them in the future. This saves time by eliminating the need to type in the URL each time you want to visit a specific site. Organize your bookmarks into folders for better management and quicker navigation.
6. Use Search Suggestions
Take advantage of search suggestions provided by your Smart TV’s internet browser. As you type in the search bar, the browser may suggest relevant search terms, saving you time and effort. Selecting a suggestion can help refine your search and deliver more accurate results.
7. Ensure Security Measures
Protect your online privacy and security while browsing by ensuring the necessary security measures. Avoid entering personal information on unsecured websites, look for the padlock symbol in the address bar indicating a secure connection (HTTPS), and consider using a virtual private network (VPN) for an additional layer of protection.
8. Adjust Browser Settings
Explore the settings menu of your Smart TV’s internet browser to customize your browsing experience. This may include adjusting the font size, enabling or disabling pop-up blockers, managing search engines, or changing the default homepage to suit your preferences.
9. Use Voice Control
Take advantage of voice control features if available on your Smart TV. Voice commands can make browsing more convenient, allowing you to search the web, open websites, or navigate the browser using spoken instructions instead of using the remote control or on-screen keyboard.
10. Close Unused Tabs or Apps
If you have multiple tabs or apps open in your Smart TV’s internet browser, close the ones you’re not using. This frees up system resources and can contribute to better browsing performance, ensuring smoother navigation and reduced potential for slowdowns.
By following these tips and tricks, you can enhance your internet browsing experience on your Smart TV. Enjoy seamless navigation, faster page loading times, and convenient access to your favorite websites right from the comfort of your living room.
Conclusion
Congratulations! You have now learned how to effectively use the internet on your Smart TV. By following the steps outlined in this article, you can connect your Smart TV to the internet, configure the settings, and make the most out of the available apps and features.
Whether you choose a wired or wireless connection, ensure a stable and fast internet connection to enjoy a seamless browsing experience and smooth streaming of your favorite online content.
Configuring the internet settings on your Smart TV allows you to optimize your connection, customize your browsing experience, and address any specific network requirements you may have.
With the built-in internet browser, you can explore websites, watch videos, and stay updated with the latest news and trends directly from your Smart TV. The popular apps available for internet use on Smart TVs bring a world of entertainment, from streaming platforms to music services, right to your living room.
Additionally, we provided you with tips and tricks for smooth internet browsing, including optimizing your internet connection, managing cookies and cache, and using ad blockers to enhance your overall experience.
Now that you have unlocked the full potential of your Smart TV, it’s time to immerse yourself in a world of online entertainment, stay connected with your favorite websites and apps, and enjoy endless hours of streaming, browsing, and gaming. Happy exploring!