Introduction
Welcome to the world of multitasking and enhanced productivity! In this article, we will explore how to connect and use an external monitor with your Lenovo Ultrabook. Whether you’re a professional looking to expand your workspace or a casual user seeking a larger display for entertainment purposes, adding an external monitor to your Ultrabook can greatly enhance your computing experience.
Lenovo Ultrabooks are known for their sleek design, portability, and advanced features. While the built-in display on your Lenovo Ultrabook is impressive, sometimes you need a larger screen to work on complex projects, immerse yourself in high-definition media, or simply enjoy the benefits of a dual-monitor setup. Adding an external monitor not only expands your screen real estate but also allows you to have a more efficient workflow.
In this guide, we’ll walk you through the process of connecting an external monitor to your Lenovo Ultrabook and adjusting the display settings to optimize your viewing experience. You’ll learn about the different types of ports on your Ultrabook, the cables you’ll need, and how to troubleshoot common issues that may arise.
Whether you’re a tech-savvy individual or new to the world of external monitors, this article is designed to provide you with a step-by-step guide that is easy to follow. So, let’s dive in and unlock the potential of using an external monitor with your Lenovo Ultrabook!
Benefits of Using an External Monitor
Adding an external monitor to your Lenovo Ultrabook offers a plethora of benefits that can significantly enhance your productivity, entertainment, and overall computing experience. Let’s explore some of the advantages:
1. Increased Screen Real Estate: One of the primary benefits of using an external monitor is the expansion of your screen real estate. This allows you to have multiple windows open side by side, making it easier to multitask and work on complex projects. You can have your main work window open on the external monitor while having reference documents or communication apps open on your Ultrabook’s display.
2. Improved Productivity: With a larger display, you can view more content at once without the need for constantly switching between windows. This increased efficiency can lead to enhanced productivity, as you’ll be able to complete tasks more quickly and seamlessly. Whether you’re working on spreadsheets, coding, or video editing, the extra screen space provided by an external monitor can make a noticeable difference.
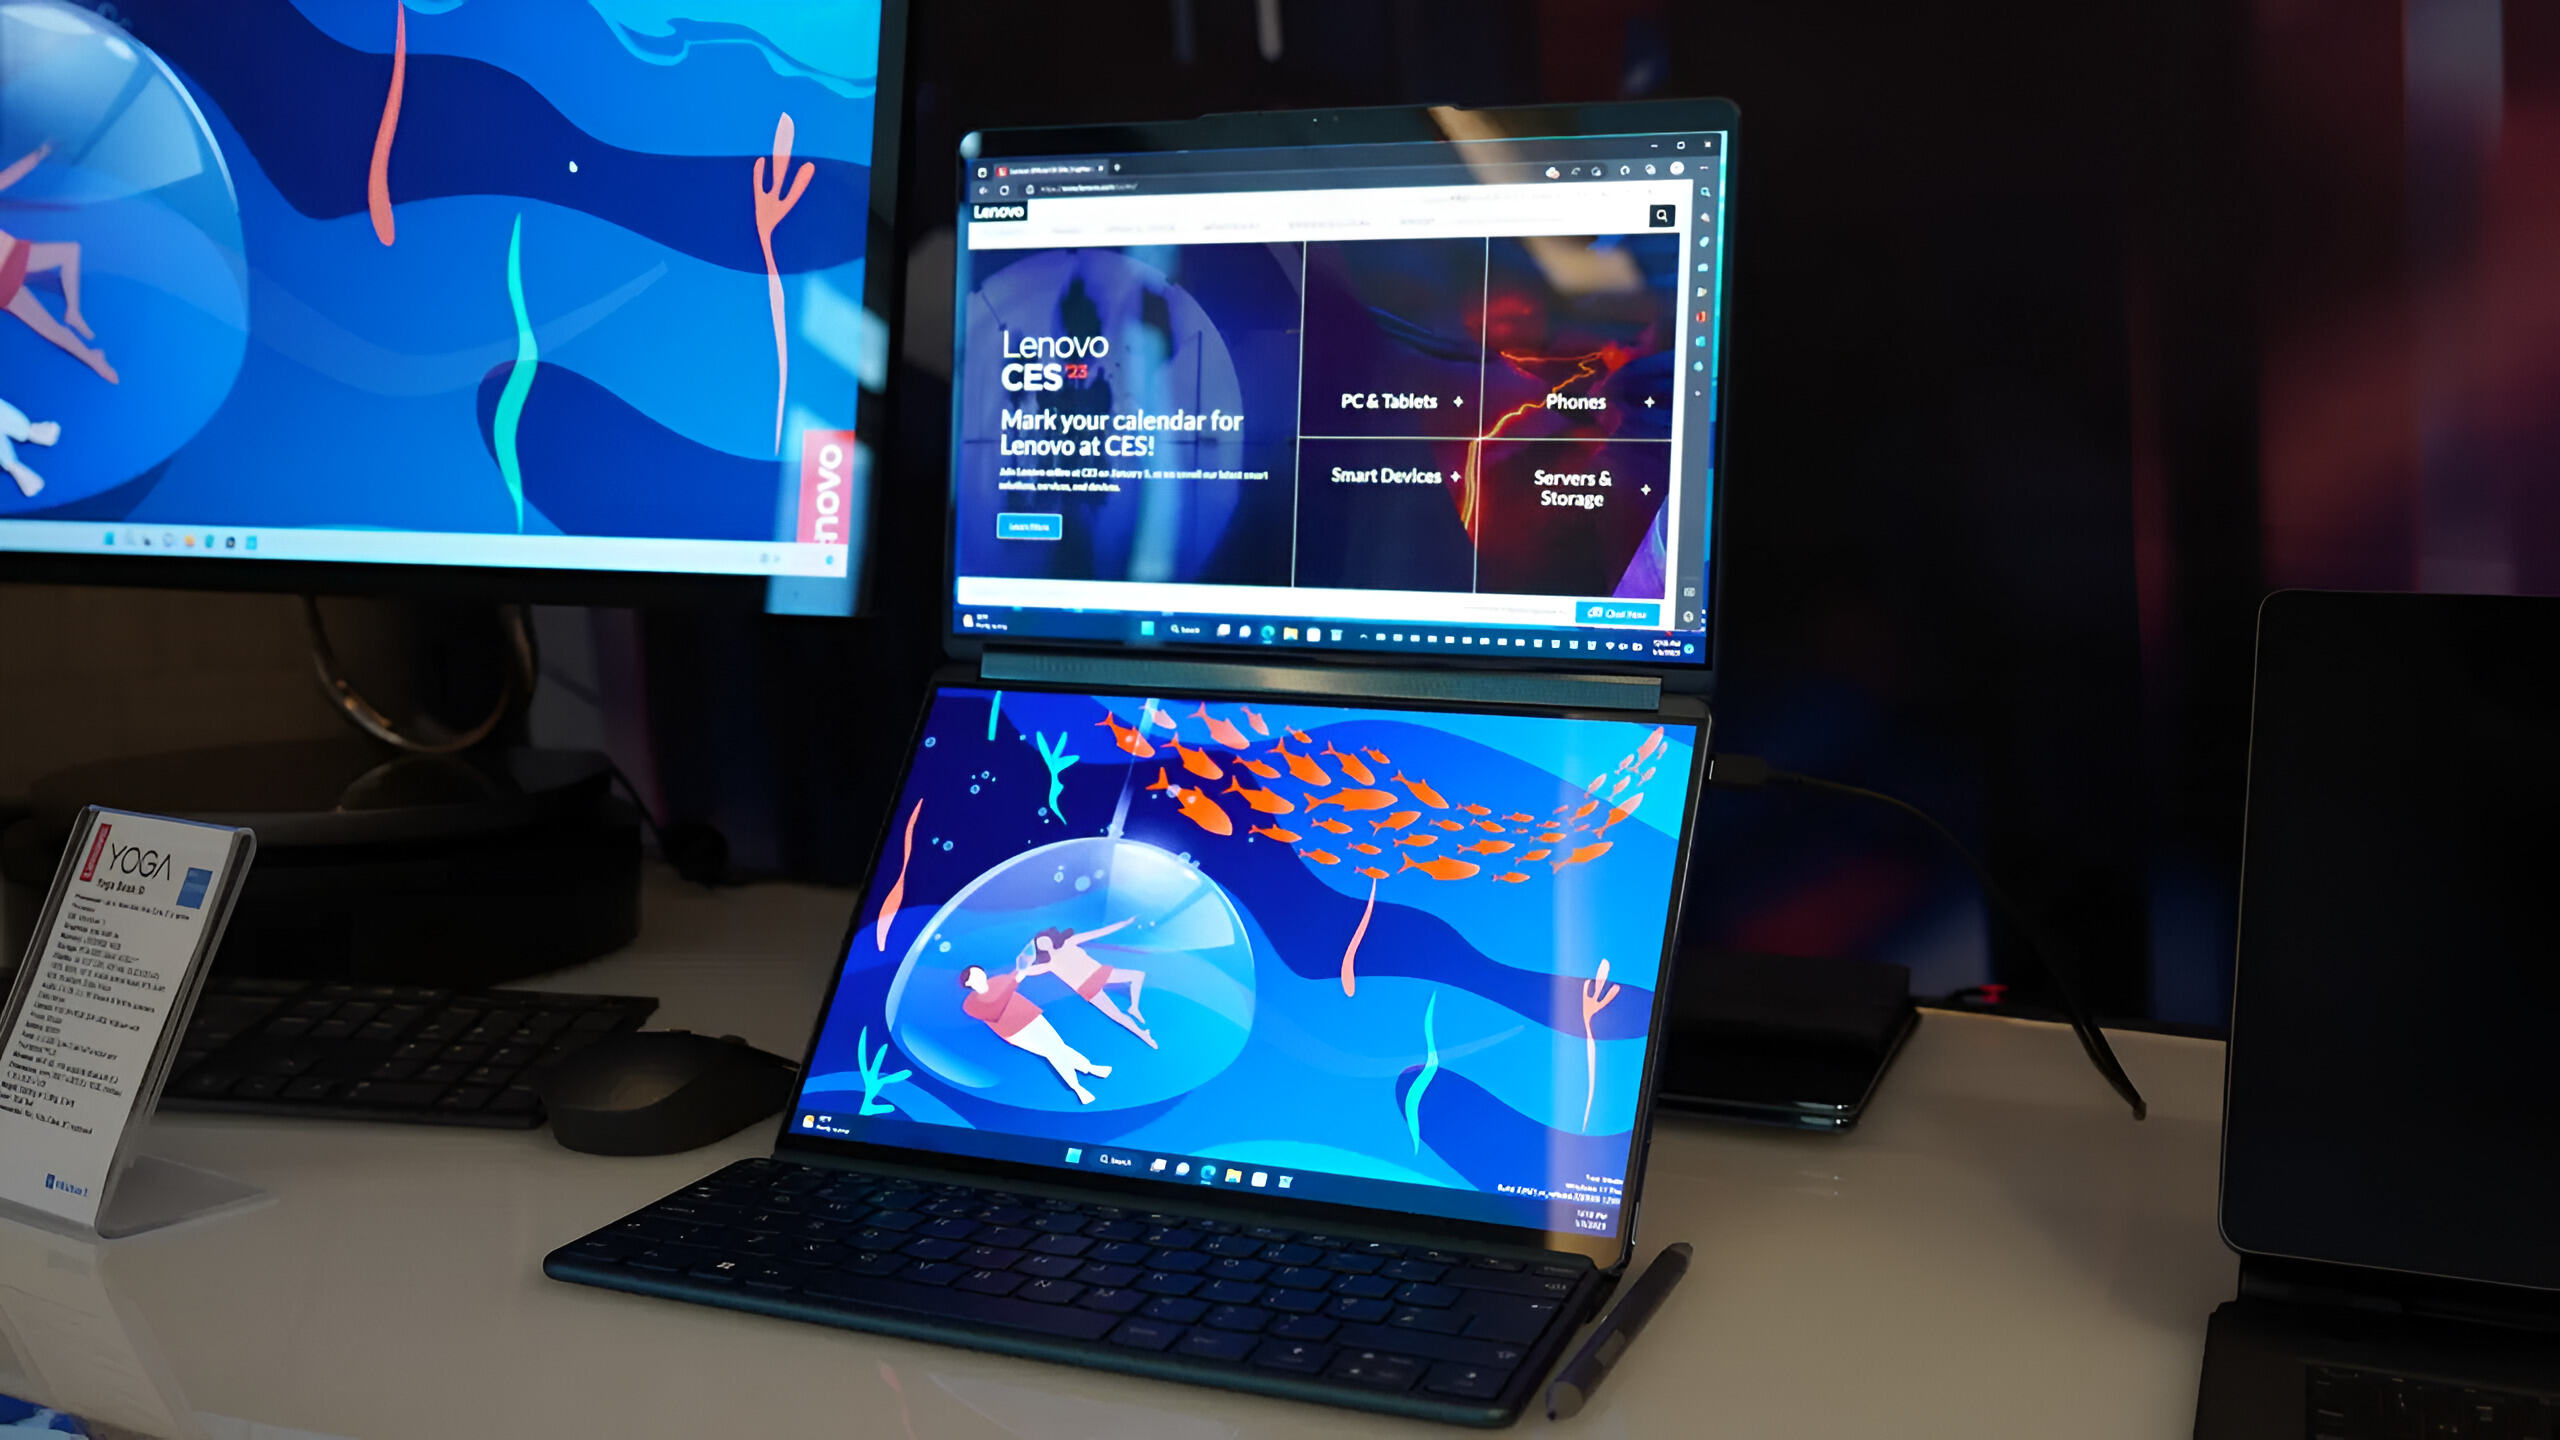
3. Enhanced Multimedia Experience: If you enjoy watching movies, streaming videos, or gaming, an external monitor can take your multimedia experience to new heights. The larger screen size and improved resolution offer a more immersive and immersive viewing experience. Colors are more vibrant, details are crisper, and you can appreciate the visual intricacies of your favorite media with greater clarity.
4. Ergonomic Benefits: Working on a laptop for extended periods can strain your neck and eyes due to the smaller screen size and fixed viewing angle. By connecting an external monitor, you can position it at eye level, providing a more ergonomically friendly setup. This reduces neck and eye strain and promotes better posture, leading to a more comfortable and productive work environment.
5. Collaboration and Presentations: If you frequently collaborate with colleagues or deliver presentations, an external monitor can be a game-changer. By connecting your Ultrabook to a larger screen, everyone in the room can easily view the content being displayed. This makes it easier to share ideas, discuss projects, and deliver impactful presentations that leave a lasting impression.
These are just a few of the many benefits of using an external monitor with your Lenovo Ultrabook. From increased productivity to enhanced multimedia experiences, the addition of an external monitor can revolutionize the way you work and play. So, let’s move on to the next section and explore the requirements for connecting an external monitor to your Lenovo Ultrabook.
Requirements for Using an External Monitor with Lenovo Ultrabook
Before you can start enjoying the benefits of an external monitor with your Lenovo Ultrabook, there are a few requirements to consider. Let’s take a look at what you’ll need:
1. Compatible Ports: The first requirement is to ensure that your Lenovo Ultrabook has compatible ports for connecting an external monitor. Most modern Ultrabooks come with at least one HDMI or DisplayPort, and some may even have USB-C ports that support video output. Check the specifications of your Ultrabook or consult the user manual to identify the available ports.
2. Supported Resolution: Another important factor to consider is the supported resolution of your Ultrabook and the external monitor. Ensure that your Ultrabook can support the desired resolution of the external monitor to ensure optimal display quality. Higher resolutions provide sharper images and more screen real estate, but make sure your Ultrabook’s graphics capabilities can handle it.
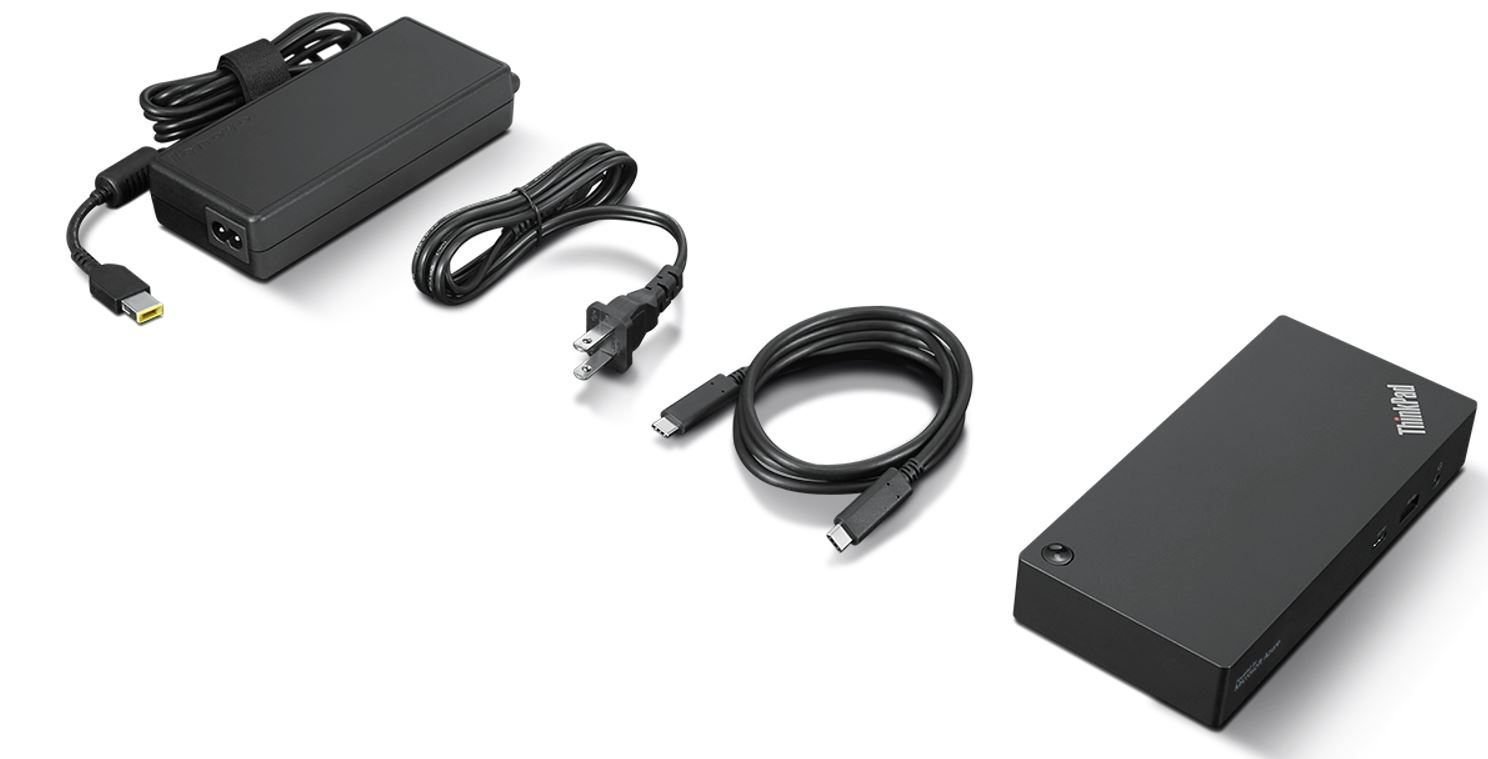
3. Cable Type: To connect your Lenovo Ultrabook to an external monitor, you’ll need the appropriate cable. The type of cable required depends on the available ports on your Ultrabook and the ports available on the external monitor. Some common cable types include HDMI, DisplayPort, DVI, and VGA. Determine which cable you need based on the available ports, and ensure that it supports the desired resolution and refresh rate of your monitor.
4. External Monitor: Of course, you’ll need an external monitor to connect to your Lenovo Ultrabook. Choose a monitor that suits your needs, whether it’s a standard monitor, an ultrawide display, or a high-resolution monitor for graphic design or video editing. Consider factors such as screen size, resolution, refresh rate, and additional features like built-in speakers or USB ports.
5. Display Settings: Ensure that your Ultrabook’s operating system and display drivers are up to date. This ensures compatibility and provides access to the necessary display settings to optimize your experience with the external monitor. Check for any available updates through Lenovo’s support website or the device manager on your Ultrabook.
By fulfilling these requirements, you’ll have everything you need to connect and use an external monitor with your Lenovo Ultrabook. Next, let’s move on to the step-by-step process of connecting the external monitor to your Ultrabook and adjusting the display settings.
Step 1: Check the Ports on Your Lenovo Ultrabook
Before you can connect an external monitor to your Lenovo Ultrabook, you need to identify the available ports on your device. Here’s how you can check:
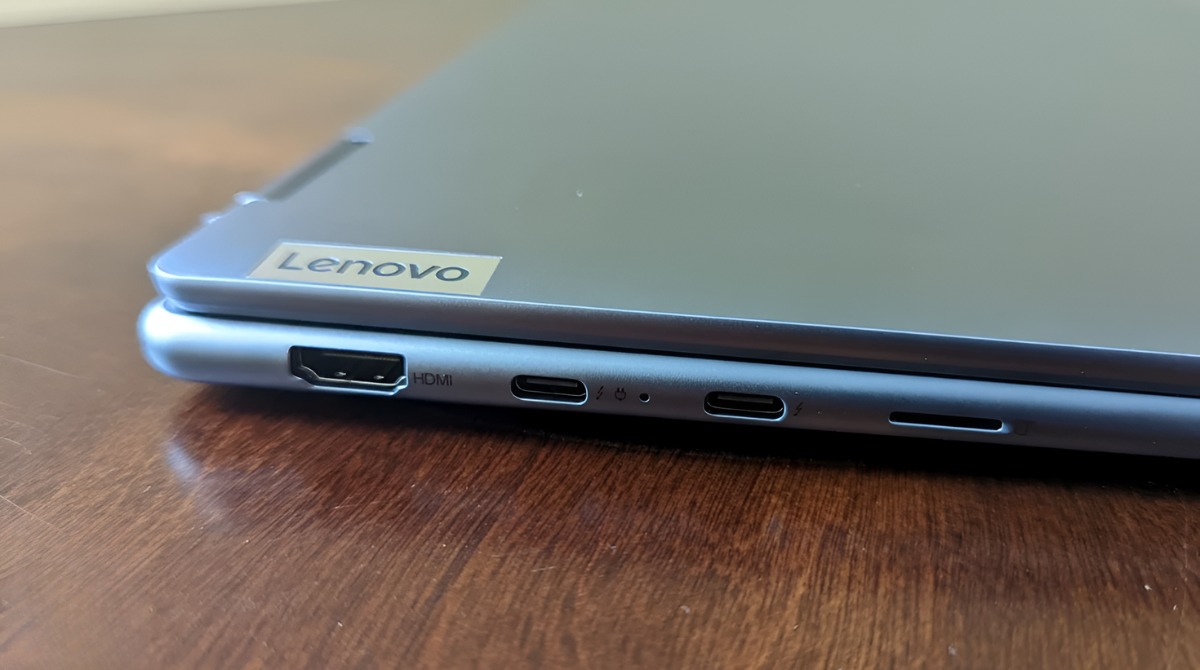
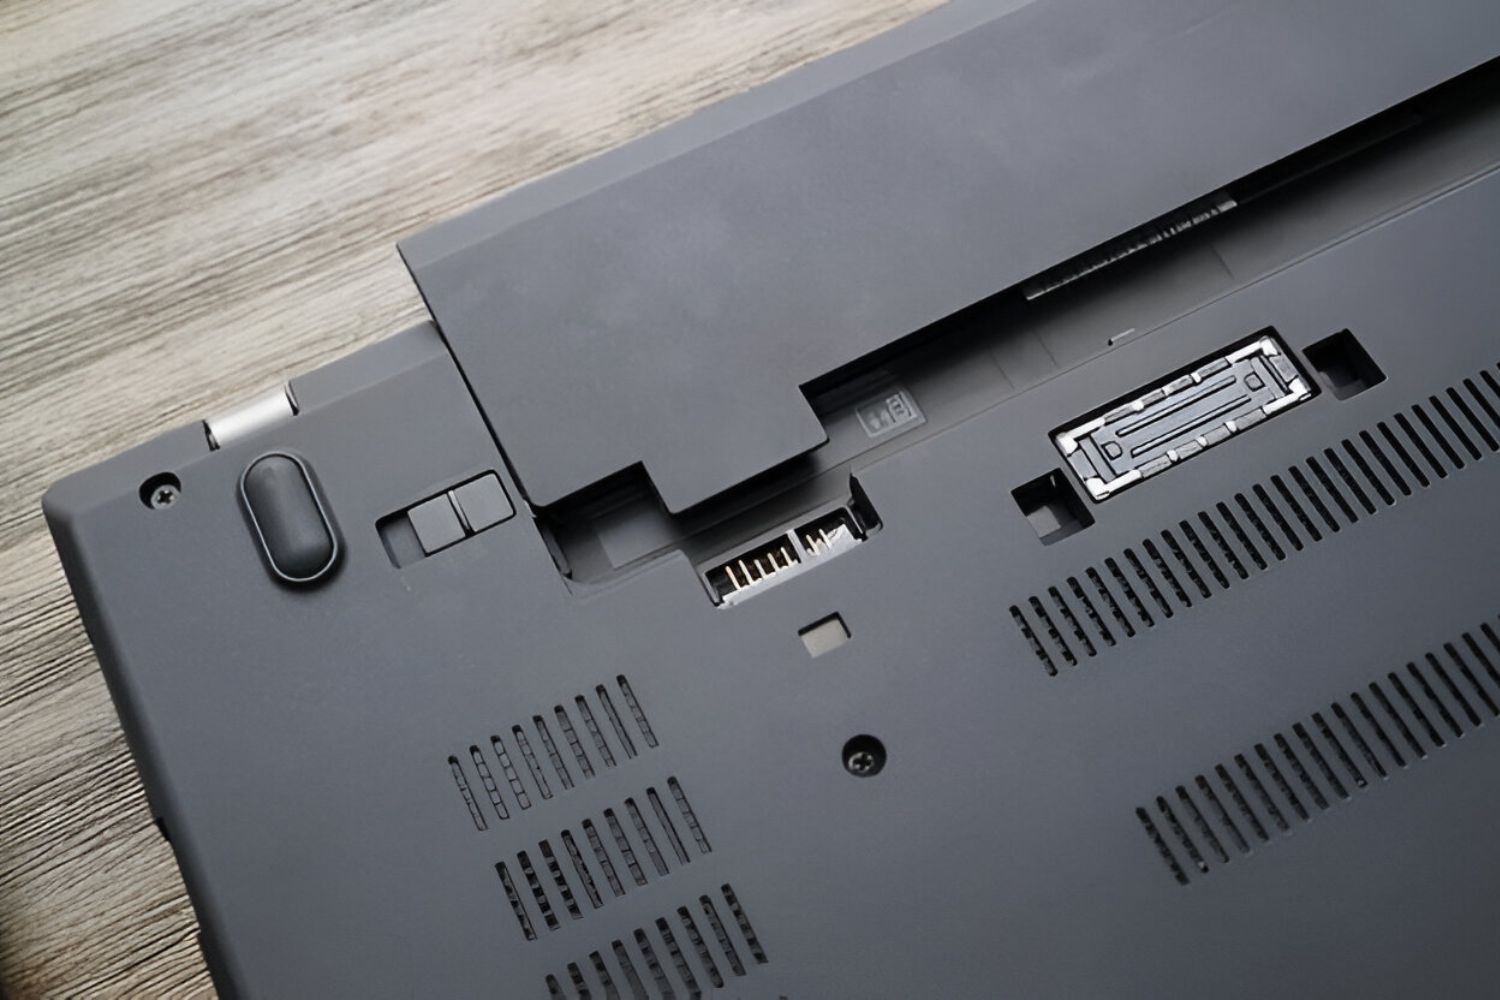
1. Examine the Sides of Your Ultrabook: Start by looking at the sides of your Ultrabook. You may find one or more ports that are suitable for connecting an external monitor. The most common ports are HDMI, DisplayPort, and USB-C, but depending on the model and age of your Ultrabook, you may have other port options as well.
2. Consult the User Manual or Manufacturer’s Website: If you’re unsure which ports are available on your Lenovo Ultrabook, refer to the user manual that came with your device. The manual typically provides detailed information about the ports and their functionalities. Alternatively, you can visit the manufacturer’s website and search for the specifications of your specific model.
3. Use System Information Tool: On Windows, you can use the System Information tool to identify the ports on your Lenovo Ultrabook. To do this, press the Windows key + R to open the Run dialog box, then type “msinfo32” and hit Enter. In the System Information window, expand the Components section and select “Ports (COM & LPT)” or “Display”. This will provide a list of the available ports on your device.
4. Check Display Settings: Another way to identify the available ports is through the display settings on your Ultrabook. On Windows, right-click on the desktop and select “Display settings”. Scroll down to the “Multiple displays” section, and you should see a diagram representing the available ports. Each port will be labeled, allowing you to identify them easily.
5. Look for Icons or Labels: On some Ultrabook models, the ports may have corresponding icons or labels next to them, indicating their purpose. These icons can be helpful in quickly identifying the ports you have available.
By following these steps, you can easily identify the ports on your Lenovo Ultrabook. Once you know which ports are available, you can move on to the next step of determining the type of cable you need to connect your Ultrabook to an external monitor. So, let’s proceed to step 2!
Step 2: Determine the Type of Cable You Need
Once you have identified the available ports on your Lenovo Ultrabook, the next step is to determine the type of cable you need to connect your Ultrabook to an external monitor. Here’s how you can do that:
1. Check the Ports on Your Monitor: Take a look at the ports available on your external monitor. Common options include HDMI, DisplayPort, DVI, and VGA. Ensure that your monitor has at least one port that matches the available ports on your Ultrabook.
2. Consider the Supported Resolution and Refresh Rate: Determine the maximum resolution and refresh rate that your monitor supports. This information is usually provided in the monitor’s specifications. Ensure that the cable you choose can handle the desired resolution and refresh rate without any issues.
3. Match the Ports on Your Ultrabook and Monitor: Find a cable that has the appropriate connectors to match the ports on your Ultrabook and monitor. For example, if your Ultrabook has an HDMI port and your monitor has an HDMI port as well, you’ll need an HDMI cable. If the ports don’t match, you may need an adapter or a different type of cable that can convert the signal from one port to another.
4. Consider Cable Length: Take into account the distance between your Ultrabook and the monitor and choose a cable that is long enough to comfortably reach the desired location. Keep in mind that longer cables may result in degraded signal quality, so choose an appropriate length based on your specific needs.
5. Additional Features: Consider if you have any additional requirements, such as audio support or the need for a specific type of cable like a Thunderbolt cable. Some cables may also offer features like gold-plated connectors for better signal transmission or cable management features. Take these factors into consideration when choosing the cable.
By considering these factors, you can determine the type of cable you need to connect your Lenovo Ultrabook to an external monitor. Once you have the required cable, you’re ready to move on to the next step of connecting the external monitor to your Ultrabook. So let’s proceed to step 3!
Step 3: Connect the External Monitor to Your Lenovo Ultrabook
Now that you’ve determined the type of cable you need, it’s time to connect the external monitor to your Lenovo Ultrabook. Follow these steps to ensure a successful connection:
1. Power Off Your Ultrabook and Monitor: Before connecting any cables, power off both your Ultrabook and the external monitor. This will prevent any potential damage to the devices and ensure a smooth connection.
2. Locate the Ports on Your Ultrabook: Identify the appropriate port on your Lenovo Ultrabook that matches the port on your monitor. Common options include HDMI, DisplayPort, and USB-C. Ensure that you have the correct cable and connector to fit into the port on your Ultrabook.
3. Connect the Cable to Your Monitor: Plug one end of the cable into the corresponding port on your monitor. Ensure a secure connection by firmly inserting the connector into the port. If you’re using an adapter, connect it to the cable first and then attach it to the monitor.
4. Connect the Cable to Your Ultrabook: Connect the other end of the cable to the matching port on your Lenovo Ultrabook. Again, ensure a secure connection by firmly inserting the connector into the port. If you’re using an adapter, connect it to the cable first and then attach it to the Ultrabook.
5. Power on Your Ultrabook and Monitor: Once the cable is properly connected, power on your Ultrabook and the external monitor. Your Ultrabook should automatically detect the external monitor and adjust the display settings accordingly.
6. Adjust Display Settings if Necessary: If your Ultrabook doesn’t automatically detect the external monitor or if the display settings are not optimal, you may need to manually adjust them. On Windows, right-click on the desktop, select “Display settings,” and make necessary adjustments such as screen resolution, orientation, and multiple display settings.
7. Test the Connection: To ensure that the connection is working properly, open a window or application and drag it across both the Ultrabook’s built-in display and the external monitor. You should be able to see the window displayed on both screens simultaneously.
Once you have successfully connected the external monitor to your Lenovo Ultrabook, you can now enjoy the expanded screen real estate and improved productivity. In the next step, we will explore how to adjust display settings on your Ultrabook to optimize your viewing experience with the external monitor. So, let’s move on to step 4!
Step 4: Adjust Display Settings on Your Lenovo Ultrabook
After connecting the external monitor to your Lenovo Ultrabook, it’s important to adjust the display settings to optimize your viewing experience. Follow these steps to make the necessary adjustments:
1. Open Display Settings: Right-click on the desktop and select “Display settings” from the context menu. This will open the display settings panel.
2. Identify Multiple Display Options: In the display settings panel, you’ll see options related to the multiple displays. Make sure the external monitor is detected and recognized. Usually, it will be labeled as “Display 2” or “Second screen”.
3. Adjust Screen Resolution: In the display settings panel, you can adjust the screen resolution of the external monitor. Select the external monitor from the drop-down menu and choose the resolution that suits your needs. It’s recommended to use the native resolution of the monitor for the best display quality.
4. Set Display Orientation: If needed, you can also adjust the display orientation of the external monitor. Choose between landscape and portrait mode, depending on your preferences and the content you’ll be working with.
5. Arrange Multiple Screens: If you’re using both the built-in display and the external monitor simultaneously, you can arrange their positions in the display settings panel. Drag and drop the monitor icons to the desired location to match the physical arrangement of your screens.
6. Adjust Scaling Options: If the size of the text and icons is not optimal on the external monitor, you can adjust the scaling settings. In the display settings panel, click on “Change the size of text, apps, and other items” and adjust the scaling slider to your preference.
7. Apply the Changes: Once you have made the necessary adjustments, click on “Apply” to save the changes and apply them to your Ultrabook and the external monitor.
By following these steps, you can adjust the display settings on your Lenovo Ultrabook to ensure that the external monitor functions seamlessly and provides an optimized viewing experience. Take your time to experiment with different settings and configurations to find what works best for you.
Now that you have successfully adjusted the display settings, you’re ready to use your Lenovo Ultrabook with the external monitor. In the next step, we will cover how to test the connection and ensure that everything is working as expected. Let’s proceed to step 5!
Step 5: Test the External Monitor
After connecting and adjusting the display settings, it’s crucial to test the external monitor to ensure that it’s functioning properly. Follow these steps to conduct a quick test:
1. Open a Window or Application: To test the external monitor, open a window, application, or file on your Lenovo Ultrabook.
2. Drag the Window to the External Monitor: Click and drag the window or application to the edge of your Ultrabook’s screen that corresponds to the external monitor. The window should seamlessly extend onto the external monitor.
3. Verify Display on the External Monitor: Look at the external monitor and ensure that the window or application is displayed correctly. It should look crisp, clear, and properly scaled on the external monitor.
4. Test Multimedia Playback: Play a video or audio file on your Ultrabook and observe the playback on the external monitor. Ensure that the video is smooth, audio is in sync, and the media displays as expected on the external monitor.
5. Check for Cursor Movement: Move your cursor across both the Ultrabook’s screen and the external monitor. The cursor should seamlessly transition between the two screens.
6. Test Touchpad, Keyboard, and External Devices: If your Ultrabook has a touchpad or external devices connected, test their functionality to ensure they work as expected in conjunction with the external monitor.
7. Verify Multiple Displays: If you have set up an extended display across both the Ultrabook’s screen and the external monitor, ensure that your Ultrabook recognizes both screens and allows you to easily navigate between them.
By following these steps, you can verify that the external monitor is working correctly with your Lenovo Ultrabook. If any issues occur during the testing process, refer to the troubleshooting section for common issues and solutions.
Now that you have tested the external monitor and everything is functioning properly, you can fully enjoy the benefits of an expanded workspace and enhanced productivity. In the next section, we will cover some common issues that may arise during the connection or usage of an external monitor with your Lenovo Ultrabook. So, let’s move on to the troubleshooting section!
Troubleshooting Common Issues
While connecting and using an external monitor with your Lenovo Ultrabook is generally straightforward, you may encounter some common issues. Here are a few troubleshooting tips to help resolve these issues:
1. No Display on the External Monitor: If the external monitor is not displaying anything, ensure that the cable is securely connected to both the Ultrabook and the monitor. Try disconnecting and reconnecting the cable or using a different cable to rule out a faulty connection.
2. Incorrect Resolution or Scaling: If the external monitor is not displaying the correct resolution or the content is too small or large, go to the display settings on your Ultrabook and adjust the resolution and scaling settings. Choose the recommended resolution for the external monitor for the best display quality.
3. Flickering or Distorted Display: If you experience flickering or a distorted display on the external monitor, check the cable connections to ensure they are secure. Try using a different cable or port to see if the issue persists. Updating your graphics drivers may also help resolve this issue.
4. No Sound on the External Monitor: If you’re not getting any sound on the external monitor, ensure that the audio cable is connected properly between the Ultrabook and the monitor if applicable. Check the audio settings on your Ultrabook and ensure that the correct audio output is selected.
5. Display Not Extending or Duplicating: If you’re unable to extend or duplicate the display across the Ultrabook’s screen and the external monitor, go to the display settings on your Ultrabook and ensure that the multiple display mode is set correctly. Try disconnecting and reconnecting the external monitor and adjusting the settings again.
6. Driver or Firmware Issues: Outdated graphics drivers or firmware can cause compatibility issues with the external monitor. Visit the Lenovo website and download the latest drivers for your Ultrabook’s graphics card or check for firmware updates. Install the updates and restart your Ultrabook to see if the issue is resolved.
7. Power Management Settings: If the external monitor goes into power-saving mode or turns off unexpectedly, check the power management settings on both your Ultrabook and the monitor. Adjust the settings to prevent the monitor from entering sleep mode too quickly or to ensure the Ultrabook is not conserving power at the expense of the external monitor.
If you’ve exhausted these troubleshooting tips and are still experiencing issues with the external monitor, consult the user manual or contact Lenovo’s customer support for further assistance.
By troubleshooting these common issues, you can overcome any challenges that arise when using an external monitor with your Lenovo Ultrabook. Now that you’re equipped with the knowledge to tackle potential problems, you can enjoy an uninterrupted and enhanced computing experience with your external monitor.
Conclusion
Congratulations! You have successfully learned how to use an external monitor with your Lenovo Ultrabook. By following the steps outlined in this guide, you can expand your screen real estate, improve productivity, and enhance your overall viewing experience.
We explored the benefits of using an external monitor, including increased screen space, improved productivity, enhanced multimedia experiences, ergonomic advantages, and easier collaboration. Connecting an external monitor to your Lenovo Ultrabook allows you to take full advantage of its capabilities and maximize your efficiency in both work and play.
We discussed the requirements for using an external monitor, such as having compatible ports, considering the supported resolution, determining the type of cable needed, and ensuring your display settings are up to date. By fulfilling these requirements, you can ensure a seamless connection between your Ultrabook and the external monitor.
We provided step-by-step instructions on checking the ports on your Ultrabook, determining the type of cable required, connecting the external monitor, adjusting display settings, and testing the connection. Following these steps will help you set up and optimize your experience with an external monitor.
Additionally, we covered troubleshooting common issues that may arise during the connection or usage of an external monitor. By employing the troubleshooting tips, you can overcome any challenges you may encounter and ensure the smooth operation of your external monitor setup.
Remember to consult your Ultrabook’s user manual and Lenovo’s customer support if you face any difficulties or require further assistance specific to your device.
Now that you’re equipped with the knowledge and understanding of how to use an external monitor with your Lenovo Ultrabook, enjoy the added convenience, productivity, and impressive visual experience that comes with a larger screen. Make the most out of your Ultrabook and take your computing experience to the next level!