Why Upgrade to an SSD?
Upgrading your laptop to a solid-state drive (SSD) can bring a multitude of benefits and significantly improve its performance. Unlike traditional mechanical hard drives, SSDs use flash memory technology, resulting in faster data access times and improved overall responsiveness. Here are a few compelling reasons why you should consider upgrading to an SSD:
- Speed and Performance: SSDs are known for their blazingly fast read and write speeds, which can greatly reduce the boot-up time of your laptop and make applications load faster. Whether you’re opening large files, running resource-intensive programs, or multitasking, an SSD can handle it all with ease.
- Reliability: Unlike mechanical hard drives, SSDs lack moving parts, making them more resistant to shock, vibrations, and physical damage. This makes them ideal for laptops that are constantly on the move, as they can withstand the occasional bumps and jostling.
- Energy Efficiency: SSDs consume less power than traditional hard drives, resulting in improved battery life for your laptop. This means you can work or enjoy multimedia for longer periods without needing to recharge.
- No Noise: Due to their lack of moving parts, SSDs operate silently, eliminating the annoying spinning noise that mechanical hard drives often produce. This provides a more peaceful and noise-free computing experience.
- Enhanced Durability: SSDs have a longer lifespan than mechanical hard drives, reducing the need for frequent replacements. With an SSD upgrade, you can enjoy faster performance for many years to come without worrying about drive failure.
Overall, upgrading to an SSD can breathe new life into your laptop, giving it a significant performance boost and improving your overall user experience. Whether you’re a casual user or someone who relies on their laptop for demanding tasks, the benefits of an SSD are hard to ignore.
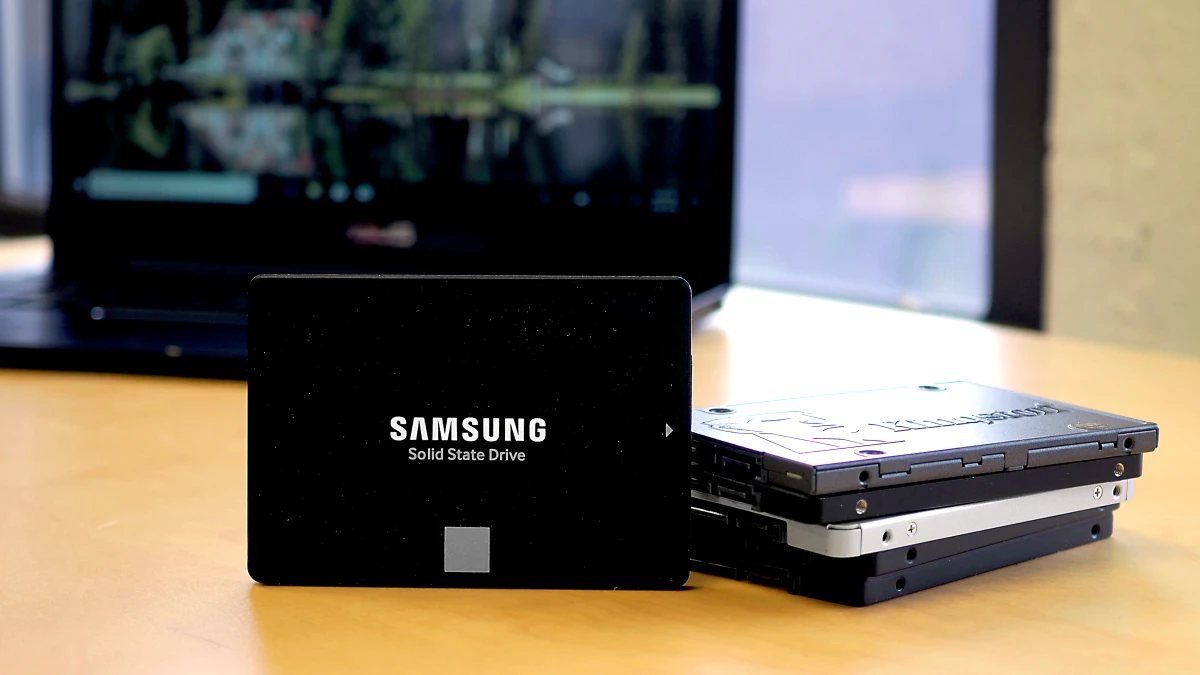
Choosing the Right SSD for Your Laptop
When it comes to selecting the right solid-state drive (SSD) for your laptop, there are a few factors to consider. The right SSD can provide the optimal performance and storage capacity that aligns with your needs. Here’s a guide to help you make an informed decision:
- Storage Capacity: Determine how much storage capacity you require based on your usage. SSDs come in various capacities, ranging from 128GB to 4TB or more. Consider your current and future storage needs before making a decision.
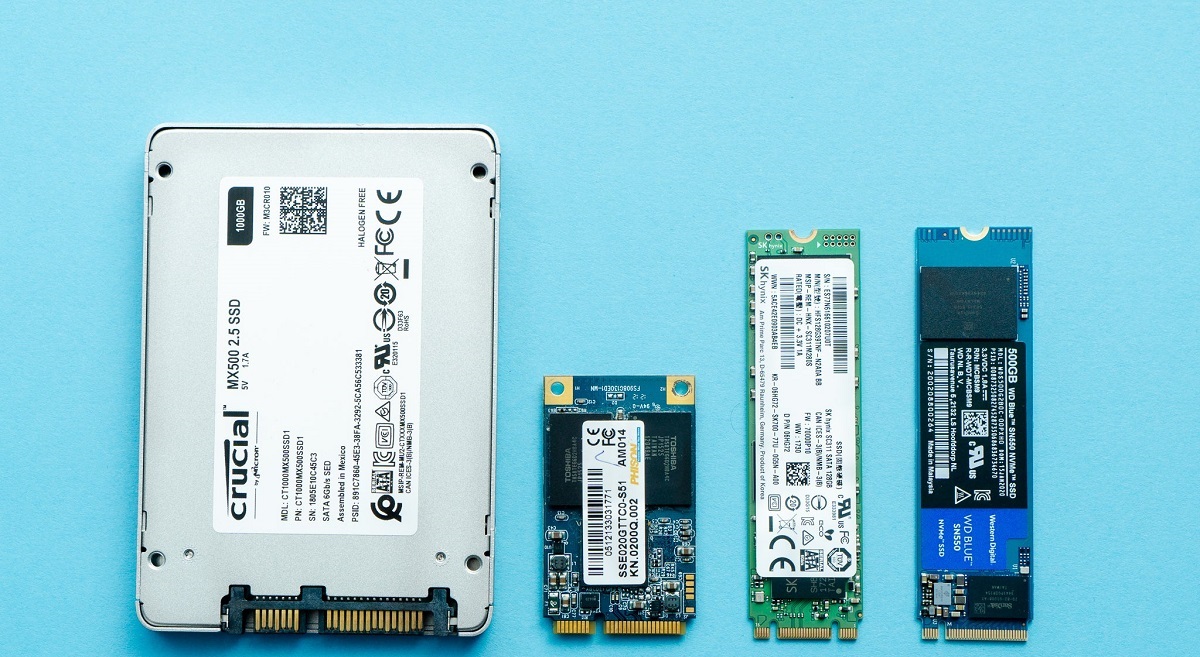
- Form Factor: Check the form factor of the SSD to ensure compatibility with your laptop. Most laptops use the 2.5-inch form factor, but some ultrabooks and thin laptops require the smaller M.2 form factor.
- Interface: SSDs use different interfaces to connect with your laptop. The most common interfaces are SATA and NVMe. SATA SSDs are compatible with most laptops, while NVMe SSDs offer faster speeds but require laptops with NVMe support.
- Speed: Consider the read and write speeds of the SSD. Higher speeds result in faster data transfer and improved overall performance. Look for SSDs with fast sequential read and write speeds for optimal performance.
- Brand and Reliability: Choose SSDs from reputable brands known for their reliability and quality. Research customer reviews and ratings to ensure you select a reliable and durable SSD for your laptop.
- Price: Set a budget for your SSD upgrade and compare prices from different manufacturers. Consider the balance between features, performance, and cost to find the best SSD within your budget.
Ultimately, the right SSD for your laptop will depend on your specific requirements and budget. Take the time to research and compare different options before making a decision. Investing in a high-quality SSD will not only provide improved performance but also ensure the longevity of your laptop.
Backing Up Your Data
Before embarking on the process of upgrading your laptop to a solid-state drive (SSD), it is crucial to back up your data. This ensures that you don’t lose any important files or information during the upgrade process. Here are some methods you can use to back up your data:
- External Hard Drive: Use an external hard drive to create a full backup of your laptop’s data. Connect the external drive to your laptop and copy all important files, folders, and documents onto it. Make sure to double-check for any hidden or system files that need to be backed up as well.
- Cloud Storage: Utilize cloud storage services such as Google Drive, Dropbox, or Microsoft OneDrive to back up your files. These services offer a convenient and secure way to store your data online. Simply upload your important files to the cloud and ensure they are synced before proceeding with the SSD upgrade.
- Disk Imaging Software: Consider using disk imaging software such as Acronis True Image or Macrium Reflect to create a complete image of your laptop’s hard drive. This creates an exact replica of your drive, including the operating system, applications, and files. You can then restore this image onto your new SSD, ensuring all data and settings are transferred seamlessly.
Regardless of the method you choose, it is essential to verify that your backup is successful and that all crucial data is securely stored. Take the time to organize and categorize your files so that the restoration process is smooth and efficient. Regularly backing up your laptop’s data is also a good practice to adopt, even after the SSD upgrade, to prevent data loss due to various unforeseen circumstances.
By taking the necessary precautions to back up your data, you can proceed with the SSD upgrade confidently, knowing that your important files are securely stored and protected. Remember, data loss can occur during any upgrade process, and it is better to be prepared than to risk losing valuable information.
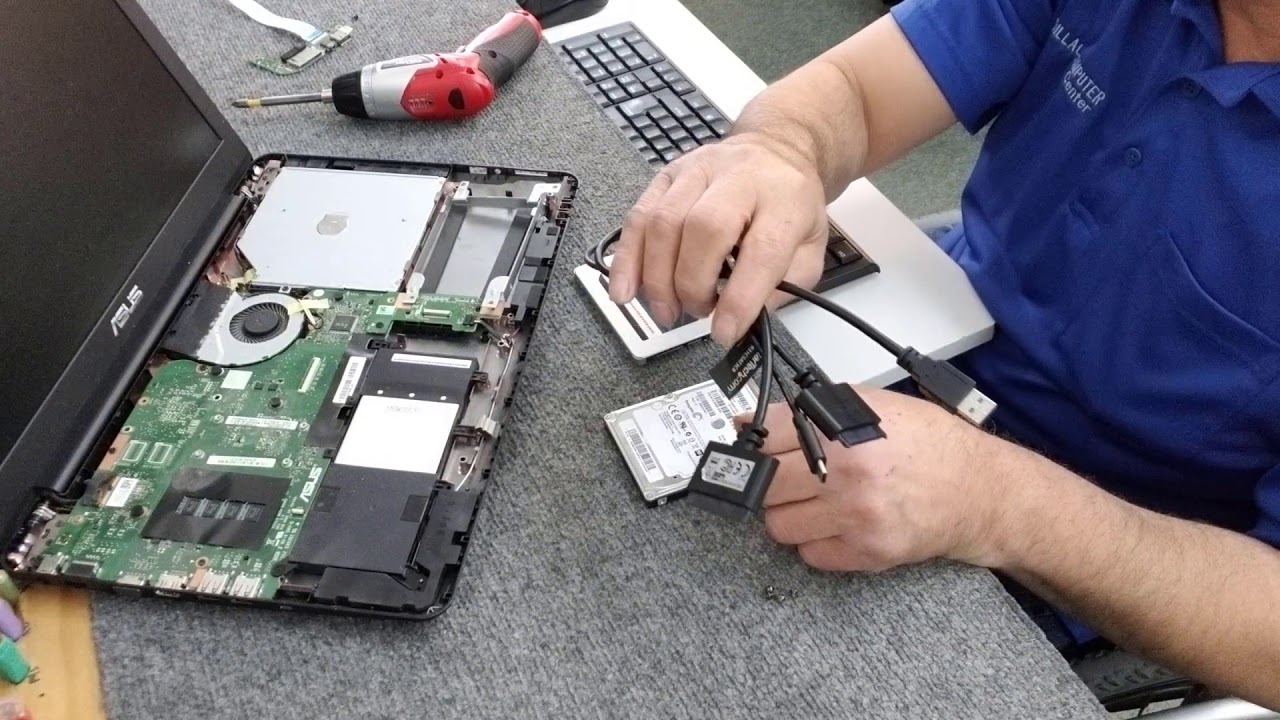
Disassembling Your Laptop
Before you can begin upgrading your laptop to a solid-state drive (SSD), you’ll need to disassemble it to access the internal components. Follow these steps to safely disassemble your laptop:
- Gather Tools: Start by gathering the necessary tools, such as a small Phillips screwdriver, a plastic pry tool or guitar pick, and an anti-static wrist strap if available.
- Power Down and Disconnect: Power down your laptop and disconnect it from any power sources. Remove the battery, if possible, to avoid any electric shock.
- Locate Screws: Flip your laptop over and locate the screws that secure the bottom panel. These screws are typically indicated by small icons or text.
- Remove Screws: Unscrew the screws using your Phillips screwdriver and keep them in a safe place. Take note of any different-sized screws and their original positions to ensure proper reassembly later.
- Pry Off Bottom Panel: Gently insert the plastic pry tool or guitar pick between the bottom panel and the laptop frame. Carefully pry and lift the panel, starting from a corner, until it pops off. Be cautious not to force it and take note of any clips or connectors that may need to be detached.
- Disconnect Cables: Look for any cables connecting the bottom panel to the motherboard or other components. Carefully disconnect these cables by gently pulling them straight out from their connectors. Use the plastic pry tool if needed, but be gentle to avoid damage.
- Remove Components: Depending on your laptop model, you may need to remove other components, such as the hard drive or memory modules, to gain access to the drive bay. Refer to your laptop’s manual or online guides for specific instructions on removing these components.
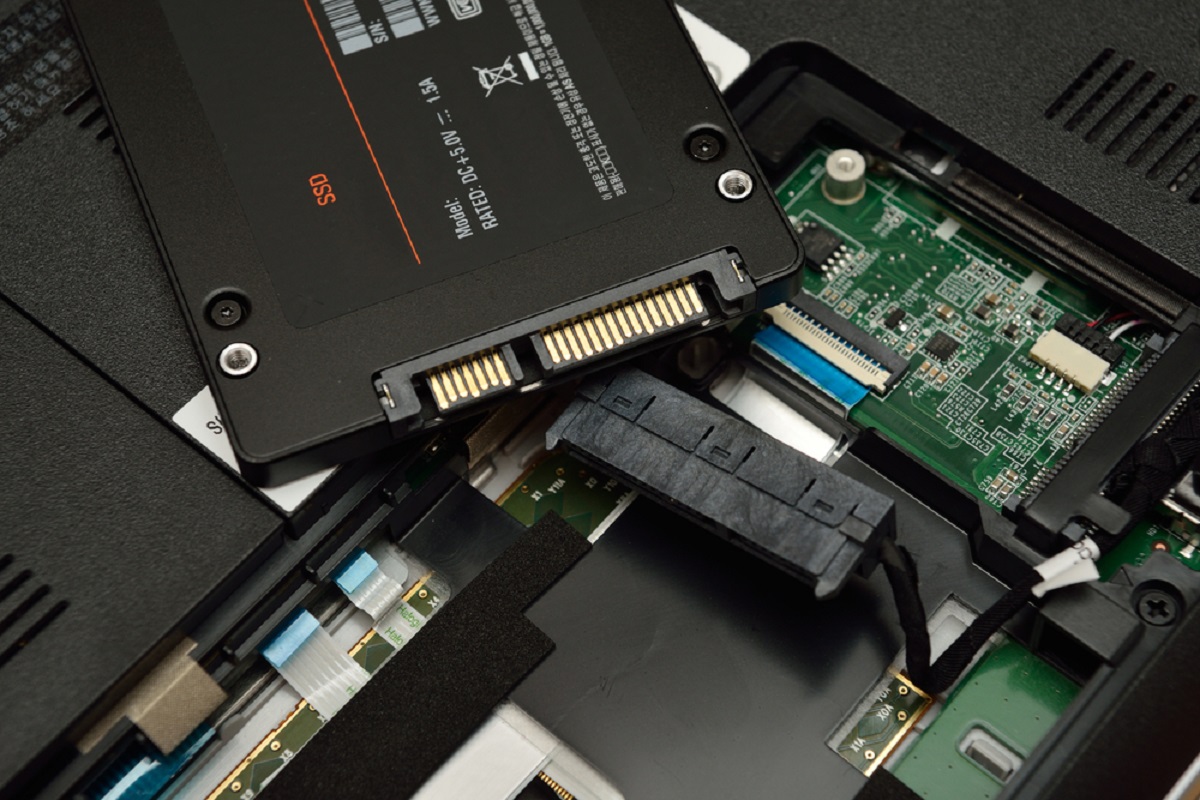
- Locate and Access Drive Bay: Once you’ve removed any necessary components, locate the drive bay where the SSD will be installed. It is usually a small rectangular slot or cage with mounting brackets.
- Prepare SSD: If the SSD does not come pre-installed in a caddy, attach the appropriate mounting brackets or screws to secure it properly in the drive bay.
- Secure and Reassemble: Carefully slide the SSD into the drive bay, ensuring a snug fit. Reconnect any cables that were disconnected earlier. Then, reattach the bottom panel by aligning it with the laptop frame and gently pressing it back into place. Finally, tighten the screws to secure the bottom panel.
Remember, each laptop model may have slight variations in the disassembly process, so it’s essential to consult your laptop’s manual or search for specific disassembly guides for your model. Take your time and handle the components with care to avoid any damage.
Once you have successfully disassembled your laptop and accessed the drive bay, you’re ready to proceed with the next steps of the SSD installation process.
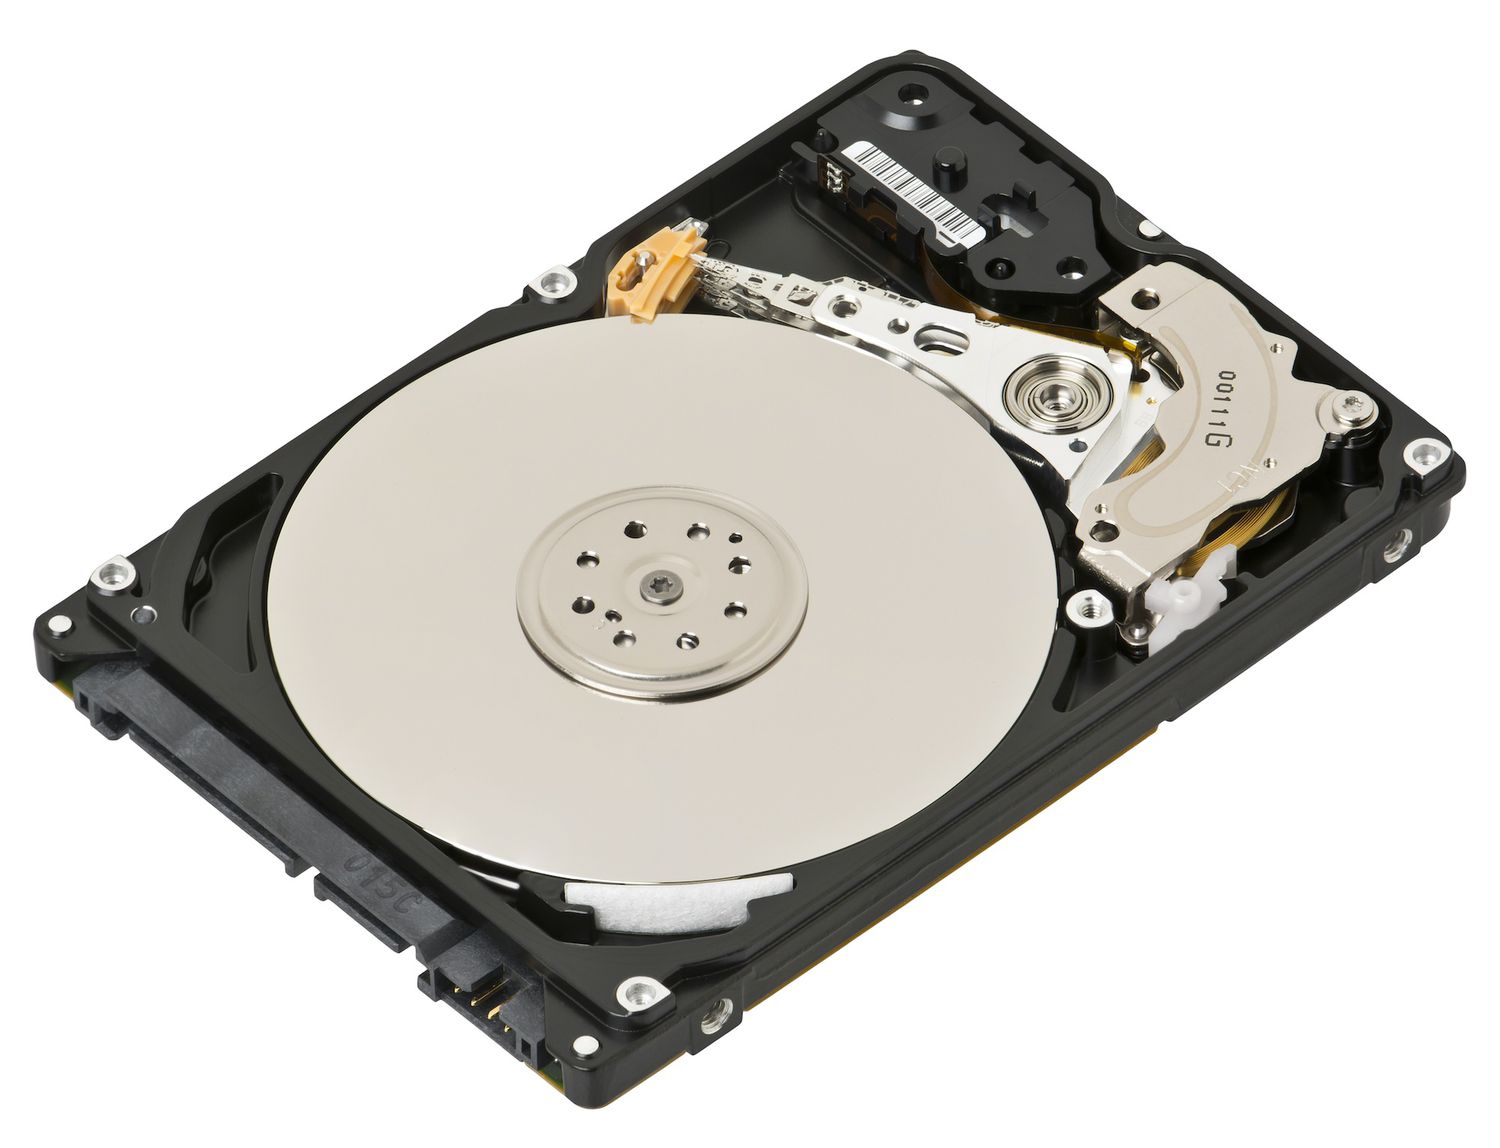
Removing the Old Hard Drive
Now that you have disassembled your laptop and accessed the drive bay, it’s time to remove the old hard drive to make way for the new solid-state drive (SSD). Follow these steps to safely remove the old hard drive:
- Identify the Old Hard Drive: Locate the current hard drive in the drive bay. It is typically a rectangular-shaped device with a SATA or M.2 interface and connected to the motherboard via cables.
- Unplug Cables: Carefully unplug the cables connected to the old hard drive. These cables include the SATA data cable, which transfers data from the drive to the motherboard, and the SATA power cable, which supplies power to the drive.
- Remove Mounting Brackets or Screws: If the old hard drive is secured by mounting brackets or screws, remove them using a screwdriver or a small wrench. Keep these screws or brackets in a safe place, as you may need them later.
- Take Out the Old Hard Drive: Carefully slide the old hard drive out of the drive bay, ensuring that you do not force it or damage any surrounding components.
- Inspect the Old Hard Drive: Take a moment to inspect the old hard drive for any physical damage or wear. If the drive is in good condition, you may consider repurposing it as an external storage device or keeping it as a backup.
It is important to note that during the removal process, you should handle the old hard drive with care and avoid any unnecessary force or impact that could cause damage. Additionally, be mindful of static electricity by grounding yourself or using an anti-static wrist strap to prevent any static discharge that could harm the drive or other components.
With the old hard drive successfully removed from the drive bay, it’s time to proceed with installing the new SSD into your laptop. Keep the old drive in a safe place until you have completed the SSD installation.
Installing the SSD
Now that you have removed the old hard drive, it’s time to install the new solid-state drive (SSD) into your laptop. Follow these steps to properly install the SSD:
- Prepare the SSD: If the SSD does not come pre-installed in a caddy or mounting brackets, attach the appropriate brackets or screws to secure it in the drive bay. Refer to the SSD manufacturer’s instructions for specific installation details.
- Insert the SSD: Carefully slide the SSD into the vacant drive bay, ensuring that it aligns with the connectors properly. Use gentle force if necessary, but do not force it into place as it may damage the SSD or the connectors.
- Secure the SSD: If your laptop’s drive bay has mounting brackets or screws, use them to secure the SSD in place. Ensure that the SSD is tightly secured and does not wiggle or move when gently shaken.
- Connect Cables: Connect the necessary cables to the SSD. This typically includes the SATA data cable and the SATA power cable. Make sure the cables are securely attached to the SSD and the corresponding connectors on the laptop’s motherboard.
- Reassemble Your Laptop: To complete the installation, carefully reassemble your laptop by following the steps in reverse order. Place the bottom panel back onto the laptop frame, making sure it fits properly. Tighten the screws, but be cautious not to overtighten and damage the laptop’s casing.
During the installation process, it is essential to handle the SSD with care and avoid any unnecessary force or impact that could damage the drive or other components. Additionally, be mindful of static electricity by grounding yourself or using an anti-static wrist strap to prevent any static discharge that could harm the SSD or other sensitive parts of the laptop.
Once you have successfully installed the SSD and reassembled your laptop, you’re one step closer to enjoying the benefits of improved performance and faster data access. The next step is to transfer your data from the old hard drive to the new SSD and ensure that everything is properly set up and functional.
Reassembling Your Laptop
Now that you have successfully installed the new solid-state drive (SSD) into your laptop, it’s time to reassemble the various components and put everything back together. Follow these steps to properly reassemble your laptop:
- Align the Bottom Panel: Take the bottom panel and align it with the laptop frame. Ensure that all clips or hooks are properly aligned with their corresponding slots.
- Press the Panel in Place: Gently press the bottom panel down until it snaps back into place. Apply even pressure along the edges to ensure a secure fit. Avoid using excessive force that could damage the panel or other components.
- Tighten the Screws: Once the bottom panel is in place, begin tightening the screws that were removed during the disassembly process. Ensure that each screw is properly aligned and tightened, but avoid overtightening to prevent damage to the laptop casing.
- Reconnect Cables: Look for any cables that were disconnected earlier, such as the display cable, keyboard ribbon cable, or any other internal cables. Carefully reconnect each cable to its corresponding port. Take your time and double-check that all cables are securely connected.
- Reinsert the Battery: If you removed the laptop’s battery during the disassembly process, reinsert it into its designated slot. Ensure a firm connection and that the battery is properly secured.
During the reassembly process, it is important to handle the laptop and its components with care. Avoid applying excessive force or pressure that could damage delicate parts. Take your time and double-check that all steps are followed correctly to ensure a successful reassembly.
Once you have reassembled your laptop, you are ready to move on to the next crucial step: transferring your data from the old hard drive to the new SSD. This step ensures that your files, documents, and settings are seamlessly transferred and ready for use on the upgraded laptop.
Transferring Your Data
Now that you have successfully reassembled your laptop with the new solid-state drive (SSD) installed, it’s time to transfer your data from the old hard drive to the new SSD. Follow these steps to safely and efficiently transfer your data:
- Connect the Old Hard Drive: If possible, connect the old hard drive to your laptop using an external hard drive enclosure or adapter. This allows you to access the data on the old drive without physically installing it back into the laptop.
- Copy Important Files: Once the old hard drive is connected, browse through its contents and identify the important files, folders, documents, and media that you want to transfer to the new SSD. Copy these files to a temporary location on your laptop’s internal storage or an external storage device.
- Use Data Migration Software: To simplify the transfer process, consider using data migration software such as Macrium Reflect, Clonezilla, or Samsung Data Migration (if you are using a Samsung SSD). These software tools allow you to clone the entire contents of the old hard drive onto the new SSD, including the operating system and all files.
- Follow the Software Instructions: Install and launch the chosen data migration software. Follow the on-screen instructions to select the source drive (the old hard drive) and the destination drive (the new SSD). Confirm the settings and start the migration process.
- Wait for the Transfer to Complete: The data migration process may take some time, depending on the size of the data and the speed of your drives. Ensure that your laptop is connected to a power source to prevent any interruptions during the transfer. Stay patient and let the software complete the migration.
- Verify the Transfer: Once the transfer is complete, double-check the new SSD to ensure that all your files and data were successfully transferred. Open and test a few files and applications to ensure that everything is functioning correctly.
It is crucial to verify that all your essential data has been successfully transferred before removing the old hard drive or making any changes to it. This ensures that you have a complete backup should any issues arise.
By following these steps to transfer your data, you can seamlessly continue working, accessing your files, and enjoying your laptop with the upgraded SSD.
Updating Your Laptop’s Firmware
After transferring your data onto the new solid-state drive (SSD), it is essential to update your laptop’s firmware to ensure compatibility and optimal performance. Firmware updates often contain bug fixes, security patches, and performance enhancements. Here are the steps to update your laptop’s firmware:
- Identify Your Laptop’s Manufacturer: Determine the manufacturer of your laptop. This information can typically be found on the laptop itself or in the user manual.
- Visit the Manufacturer’s Website: Go to the manufacturer’s official website and navigate to the support or drivers section.
- Locate Firmware Updates: Look for any available firmware updates specific to your laptop model. These updates may be listed under the “BIOS” or “UEFI” category.
- Read the Release Notes: Before downloading and installing any firmware updates, read the release notes or accompanying documentation. This will give you an overview of the changes and improvements included in the update.
- Download and Install the Update: Follow the instructions provided by the manufacturer to download and install the firmware update. This process may involve running an executable file or creating a bootable USB drive.
- Follow the Update Process: During the firmware update process, read and follow the on-screen instructions carefully. Ensure that your laptop is connected to a stable power source and avoid interrupting the update process.
- Restart Your Laptop: Once the firmware update is complete, restart your laptop to apply the changes. The updated firmware will now be active on your laptop.
- Verify the Update: After restarting, enter the BIOS or UEFI settings of your laptop to confirm that the firmware update was successful. Check the version number or release date to ensure that it matches the latest update provided by the manufacturer.
Keep in mind that the process of updating firmware can vary slightly depending on the laptop manufacturer and model. It is vital to follow the specific instructions provided by the manufacturer to ensure a successful firmware update.
By regularly updating your laptop’s firmware, you can ensure that your laptop is running on the latest version, with improved compatibility, stability, and security. This, in turn, maximizes the performance and longevity of your laptop, providing a smooth and reliable computing experience.
Optimizing Your SSD
Once you have installed and updated the solid-state drive (SSD) in your laptop, it’s important to optimize its performance to maximize its benefits. Here are some steps you can take to optimize your SSD:
- Enable TRIM: Ensure that TRIM is enabled on your SSD. TRIM is a command that helps the SSD maintain its performance over time by efficiently managing deleted data. To enable TRIM, open the Command Prompt or Terminal and enter the appropriate command specific to your operating system:
- – For Windows: Enter “fsutil behavior set DisableDeleteNotify 0” and press Enter.
- – For macOS: TRIM is automatically enabled for most SSDs, so no action is required.
- – For Linux: TRIM is usually enabled by default, but you can verify by checking the TRIM status using the command “sudo systemctl status fstrim”.
- Disable Automatic Defragmentation: Disable automatic defragmentation on your SSD. Unlike traditional hard drives, SSDs do not benefit from defragmentation. In fact, defragmenting an SSD can lead to unnecessary wear and tear without any noticeable performance improvement. In Windows, automatic defragmentation is usually disabled by default for SSDs, but it’s always good to double-check.
- Adjust Power Settings: Modify your laptop’s power settings to optimize SSD performance. Set the power plan to “High Performance” or “Balanced” to ensure that the SSD operates at its full potential. Avoid using power-saving modes that may limit performance and access to the SSD.
- Update SSD Firmware: Check for firmware updates for your SSD periodically and install them as recommended by the manufacturer. These updates can provide performance improvements, bug fixes, and security enhancements.
- Regularly Update Drivers and Operating System: Keep your laptop’s drivers and operating system up to date. Updated drivers, especially SATA or NVMe drivers, can improve compatibility and performance with your SSD. Regular operating system updates often include optimizations for various hardware components, including SSDs.
- Minimize Unnecessary Writing: SSDs have a limited number of write cycles, so it’s advisable to minimize unnecessary writing to prolong their lifespan. Avoid excessive file transfers, temporary file storage, or frequent large downloads onto your SSD. Instead, use secondary storage or external drives whenever possible.
- Enable Disk Encryption: If security is a concern, consider enabling disk encryption on your SSD. This will protect your data in case of theft or unauthorized access. Consult your operating system’s documentation for guidance on enabling disk encryption.
By following these optimization steps, you can enhance the performance and lifespan of your SSD, ensuring smooth and efficient operation. Remember to perform regular maintenance and cleaning routines to keep your laptop running optimally.
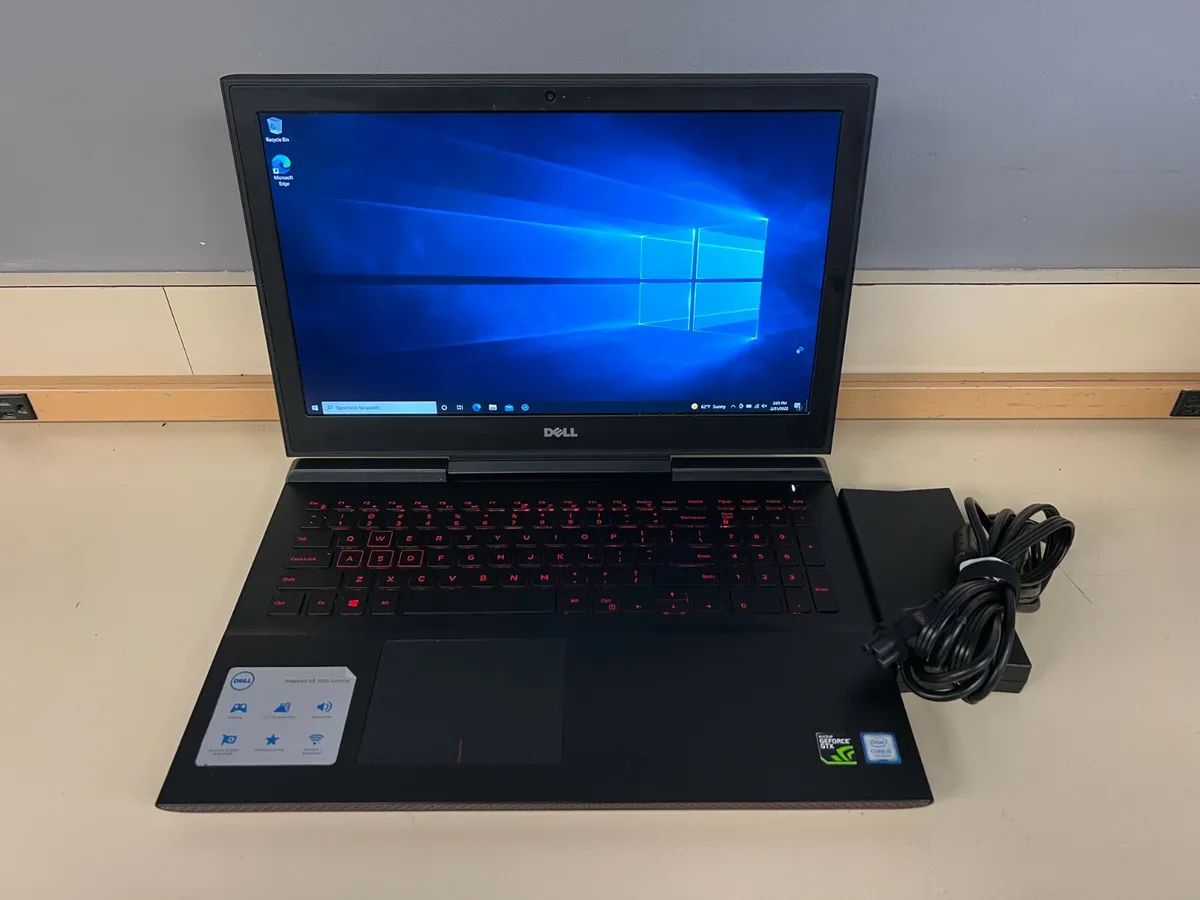
Enjoying the Benefits of an SSD
Now that you have successfully upgraded your laptop to a solid-state drive (SSD) and optimized its performance, you can fully enjoy the numerous benefits that an SSD brings:
- Lightning-Fast Performance: Experience significantly faster boot-up times, application launches, and file transfers. The quick read and write speeds of an SSD make your laptop more responsive and efficient.
- Improved Overall Responsiveness: Enjoy a smoother and snappier computing experience as your laptop quickly responds to your commands. Tasks such as opening programs, browsing the web, and multitasking become notably faster and more enjoyable.
- Reduced Load Times: Seamlessly load and switch between applications, games, and files with minimal waiting. SSDs eliminate the latency seen with traditional hard drives, resulting in near-instantaneous access to your data.
- Enhanced Productivity: Complete your tasks efficiently with fewer delays and interruptions. Whether you’re working on complex documents, editing videos, or running demanding software, an SSD’s quick performance boosts your productivity levels.
- Extended Battery Life: Enjoy longer periods of productivity or entertainment on the go. SSDs consume less power compared to traditional hard drives, resulting in improved battery life for your laptop.
- Quiet and Cool Operation: Experience a quieter and cooler laptop environment. SSDs produce no noise or vibrations since they lack moving parts. Additionally, they generate less heat, contributing to a more comfortable and efficient laptop experience.
- Durable and Reliable: Trust in the durability and reliability of SSDs. Their solid-state nature, absence of moving parts, and resistance to shocks make them more rugged and less susceptible to physical damage.
- Longevity and Future-Proofing: Invest in the long-term performance of your laptop. SSDs have a longer lifespan than traditional hard drives, offering improved longevity and ensuring your laptop remains relevant for years to come.
With an SSD, you can unlock the full potential of your laptop, enjoying a seamless and efficient computing experience. Whether you’re a student, professional, or casual user, the benefits of an SSD will enhance your day-to-day tasks and provide a substantial improvement over traditional storage options.
Remember to regularly update your SSD firmware, perform routine maintenance, and implement good data management practices to keep your SSD running optimally and prolong its lifespan. Embrace the transformation that an SSD brings to your laptop, and revel in the enhanced performance and responsiveness every time you power it on.