Introduction
Welcome to the wonderful world of Chromebooks! If you’re the proud owner of a Chromebook, you’ve likely experienced the joy of using Google Chrome as your go-to web browser. Chrome is known for its speed, security, and user-friendly interface, but like any software, it needs to be regularly updated to ensure optimal performance and protection against online threats.
Updates to Chrome not only bring new features and enhancements but also patch any vulnerabilities that may have been discovered. By keeping your Chrome browser up to date, you can enjoy improved browsing experiences, including faster page loading times, better compatibility with websites and apps, and enhanced security measures.
In this guide, we will explore the various methods for updating Chrome on your Chromebook. Whether you prefer automatic updates or want more control over the update process, we’ve got you covered. We’ll also provide troubleshooting tips for any potential update issues you may encounter.
So, without further ado, let’s dive into the world of Chrome updates and ensure that your Chromebook is running the latest and greatest version of the Chrome browser!
Checking for Chrome Updates
Before we delve into the methods of updating Chrome on your Chromebook, it’s essential to know whether an update is available or not. Fortunately, Chromebooks make it easy to check for updates with just a few simple steps:
- Click on the time in the bottom-right corner of your Chromebook’s screen. This will open the system tray.
- Locate the settings gear icon and click on it.
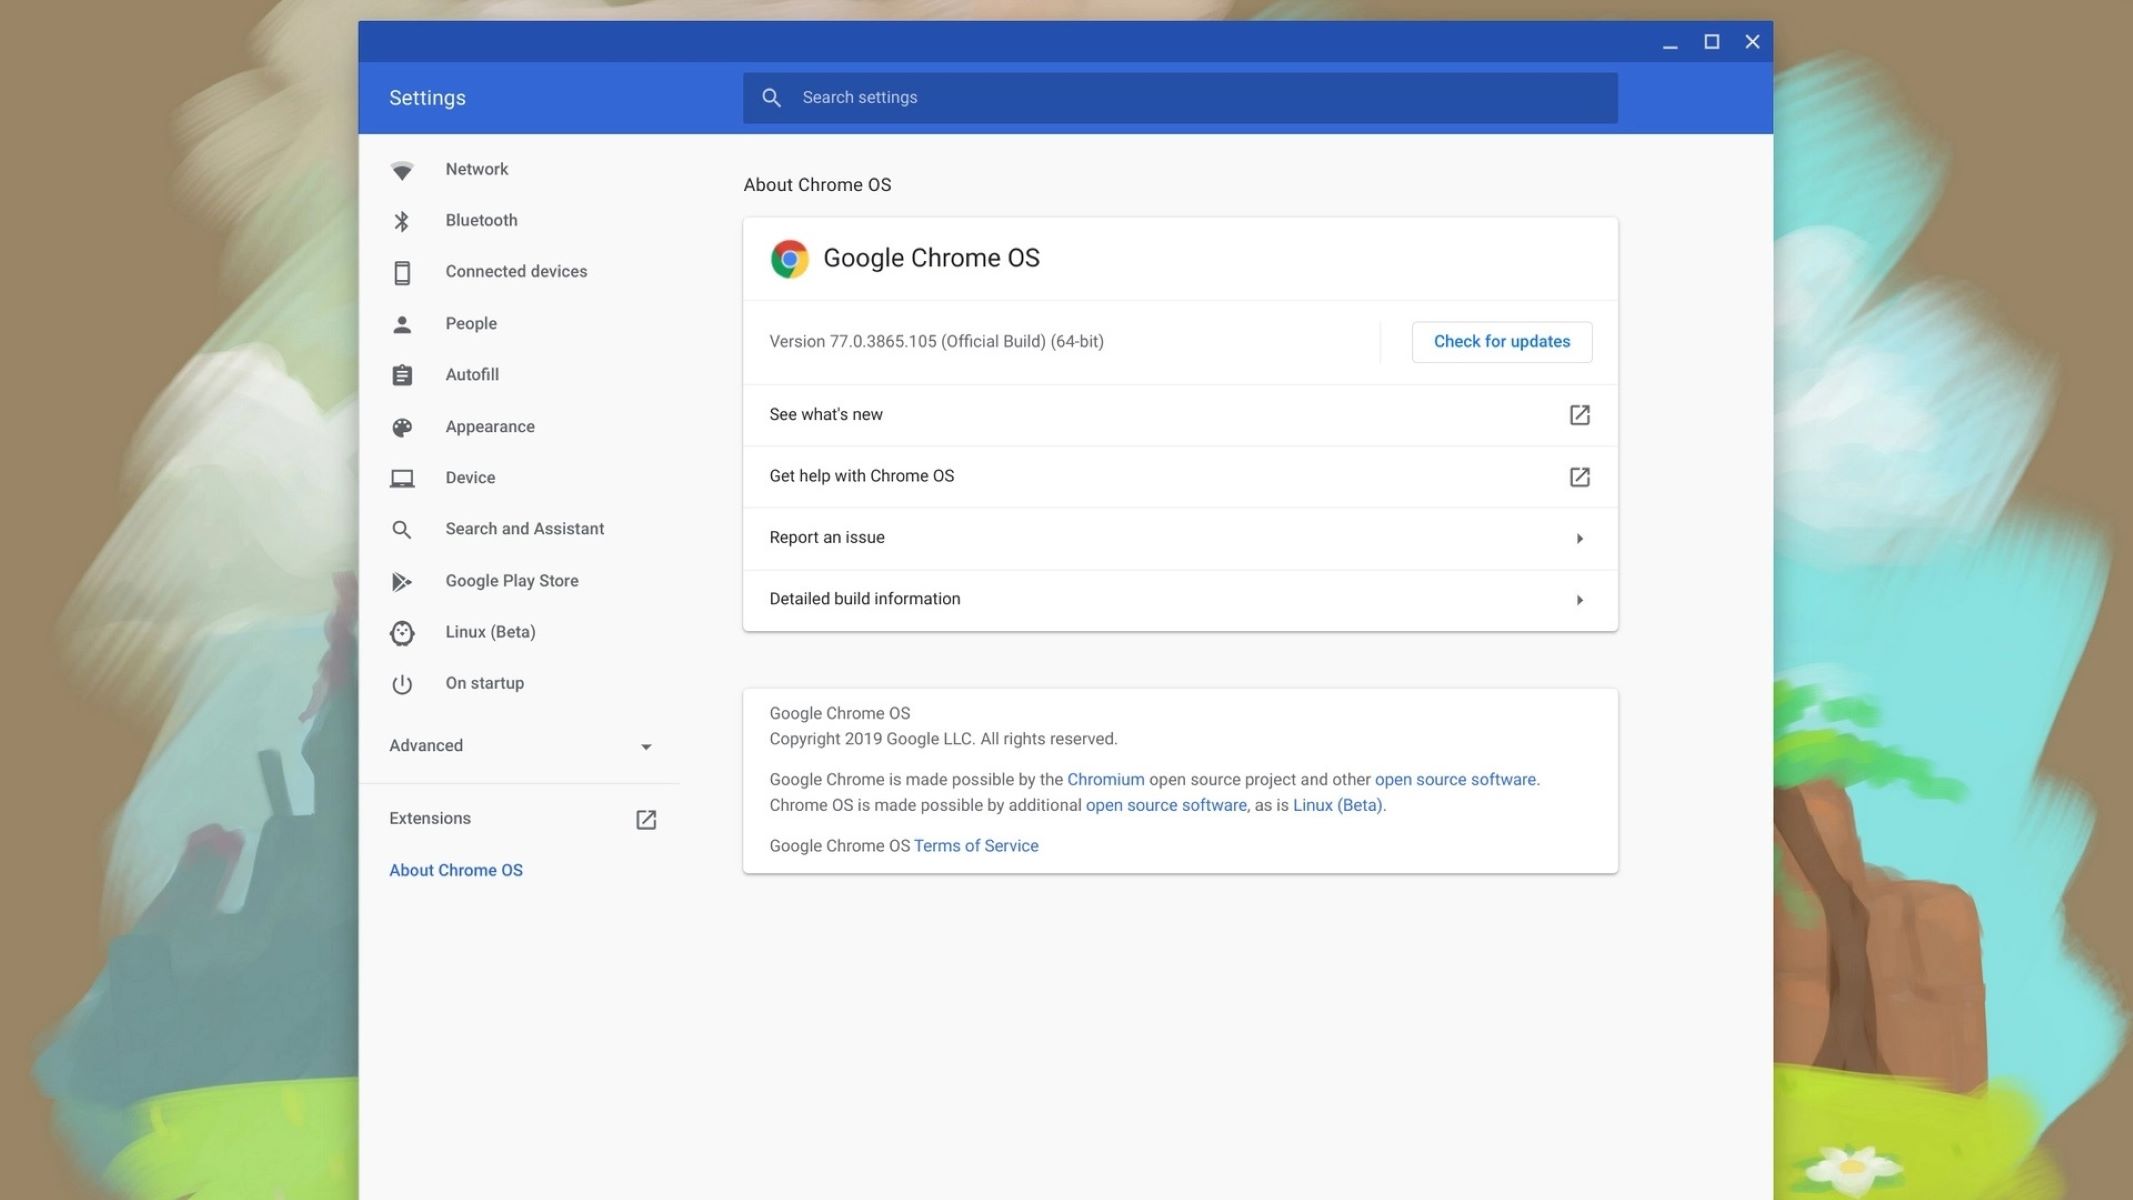
- In the settings menu, click on the “About Chrome OS” option.
- On the “About” page, you will see the “Check for updates” button. Click on it to initiate the update check.
Chrome OS will now check for any available updates. If an update is found, your Chromebook will begin the downloading and installation process automatically. You will be prompted to restart your Chromebook once the update is complete.
Alternatively, you can also check for updates by following these steps:
- Click on the time in the bottom-right corner of your Chromebook’s screen to open the system tray.
- Click on the notification bell icon to open the notification center.
- In the notification center, you will see an option to “Restart to update.” This indicates that an update is available.
Clicking on “Restart to update” will initiate the update process, and your Chromebook will restart to complete the installation.
Keeping your Chromebook up to date ensures that you have the latest features, bug fixes, and security patches. It’s a good practice to regularly check for updates to stay current with the latest improvements.
Automatic Chrome Updates
One of the convenient features of Chrome on your Chromebook is its ability to automatically update itself. With automatic updates enabled, you can ensure that your Chrome browser stays up to date without having to manually check for updates.
By default, Chromebooks are set to receive automatic updates, which is highly recommended for most users. However, it’s always good to double-check the settings to confirm that automatic updates are indeed enabled. Here’s how:
- Click on the time in the bottom-right corner of your Chromebook’s screen to open the system tray.
- Click on the settings gear icon to access the settings menu.
- In the settings menu, click on “About Chrome OS.”
- On the “About” page, you will find the “Additional details” button. Click on it to expand the options.
- Ensure that the “Automatic updates” option is toggled on. If it’s already enabled, you can rest easy knowing that your Chromebook will keep itself updated automatically.
If automatic updates are disabled, you can enable them by following these steps:
- Click on the time in the bottom-right corner of your Chromebook’s screen to open the system tray.
- Click on the settings gear icon to access the settings menu.
- Navigate to “Settings” and click on it.
- In the settings menu, click on “About Chrome OS.”
- On the “About” page, click on “Additional details” to expand the options.
- Toggle on the “Automatic updates” option.
Once enabled, your Chromebook will automatically download and install the latest Chrome updates in the background. It will notify you when an update is ready to be installed, and you can restart your device to complete the update process.
Automatic updates offer a hassle-free way to keep your Chromebook and Chrome browser up to date. They ensure that you have the latest features, security fixes, and performance enhancements without any manual intervention.
Manual Chrome Updates
While automatic updates are the preferred method for keeping your Chrome browser up to date, there may be occasions when you want more control over when and how the updates are installed. Chromebooks offer several manual update options that allow you to manually initiate the update process. Here are three methods to manually update Chrome on your Chromebook:
1. Updating Chrome through the Settings Menu:
- Click on the time in the bottom-right corner of your Chromebook’s screen to open the system tray.
- Click on the settings gear icon to access the settings menu.
- In the settings menu, click on “About Chrome OS.”
- On the “About” page, click on the “Check for updates” button to manually initiate the update check.
- If an update is available, it will start downloading and installing automatically. You will be prompted to restart your Chromebook once the update is complete.
2. Updating Chrome through the Chrome Web Store:
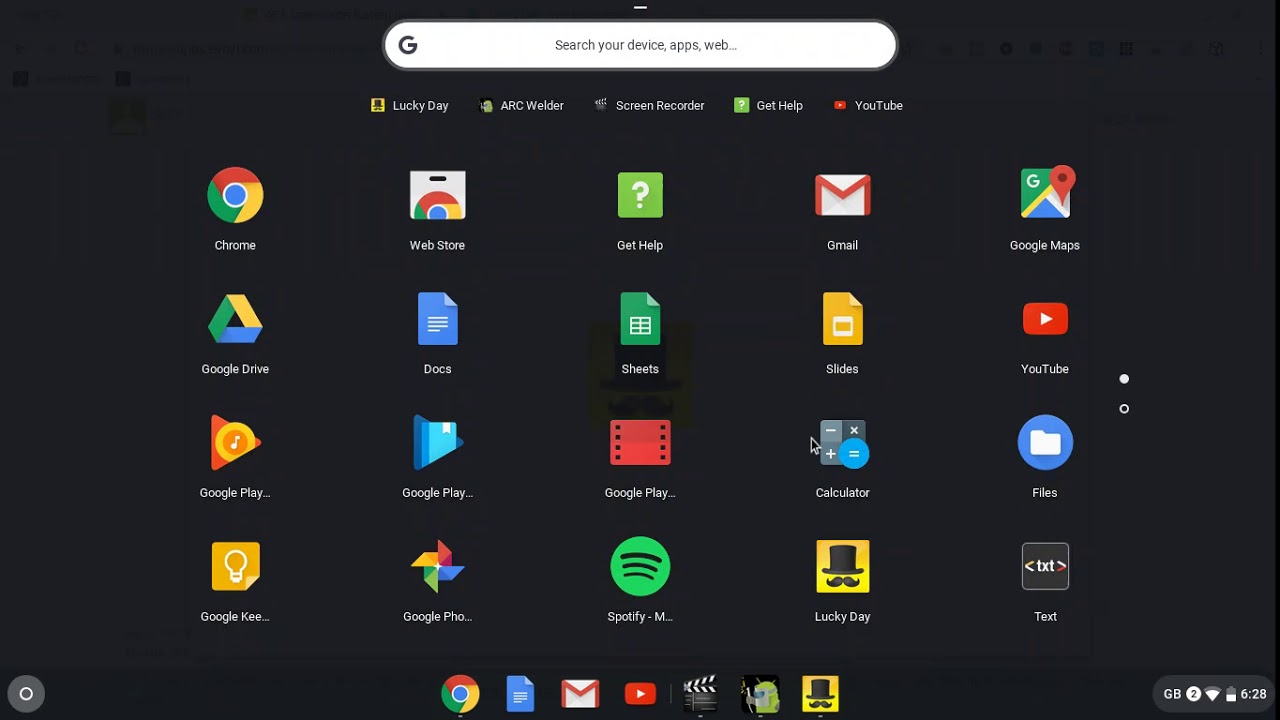
- Open the Chrome Web Store by clicking on the app launcher icon at the bottom-left corner of your screen and selecting “Web Store.”
- In the search bar, type “Chrome” and press Enter.
- If an update is available, you will see a “Update” button next to the Chrome app. Click on it to update Chrome.
3. Updating Chrome from the About Chrome Page:
- Open a new tab in Chrome by clicking on the “+” icon next to your existing tabs.
- In the address bar, type “chrome://settings/help” and press Enter.
- If an update is available, you will see a “Relaunch” button. Click on it to update Chrome.
By manually updating Chrome, you can choose when to check for updates and install them according to your preferences. This way, you have more control over the update process and can ensure that your Chrome browser remains up to date.
Updating Chrome through the Settings Menu
If you prefer a manual approach to updating your Chrome browser on your Chromebook, you can easily do so through the settings menu. This method allows you to have more control over when and how the updates are installed. Here’s how you can update Chrome through the settings menu:
- Click on the time in the bottom-right corner of your Chromebook’s screen to open the system tray.
- Click on the settings gear icon to access the settings menu.
- In the settings menu, scroll down and click on “About Chrome OS.”
- On the “About” page, you will find the “Check for updates” button. Click on it to manually initiate the update check.
- If an update is available, Chrome OS will start downloading and installing it automatically.
- Once the update is complete, you will be prompted to restart your Chromebook to apply the changes.
This method is straightforward and ensures that you are in complete control of the update process. By manually checking for updates through the settings menu, you can ensure that your Chrome browser is up to date with the latest features, bug fixes, and security patches.
It’s important to note that Chrome OS checks for updates automatically, so you don’t have to manually check every time. However, if you want to have more control over the update process, using the settings menu is a simple and effective method.
Remember to regularly check for updates to keep your Chromebook and Chrome browser running smoothly and securely. The latest updates often bring performance improvements and new features that enhance your browsing experience.
Updating Chrome through the Chrome Web Store
Another method to manually update Chrome on your Chromebook is through the Chrome Web Store. This method is especially useful if you want to check for updates and install them directly from the web store. Here’s how you can update Chrome through the Chrome Web Store:
- Open the Chrome Web Store by clicking on the app launcher icon at the bottom-left corner of your screen and selecting “Web Store.”
- In the search bar at the top-left corner of the web store, type “Chrome” and press Enter.
- If an update is available, you will see a “Update” button next to the Chrome app.
- Click on the “Update” button to initiate the update process.
- Chrome will download and install the update automatically, and you may be prompted to restart your Chromebook to apply the changes.
Updating Chrome through the Chrome Web Store gives you the convenience of checking for updates and installing them directly from the web store interface. It allows you to easily keep your Chrome browser up to date with the latest features and enhancements.
This method is useful if you are already browsing the web store and want to quickly update your Chrome browser without navigating through the settings menu. It’s a simple and efficient way to ensure that you have the most recent version of Chrome installed on your Chromebook.
Remember, regularly updating Chrome is essential to benefit from improved performance, enhanced security, and new features. By manually updating Chrome through the Chrome Web Store, you can stay up to date with the latest developments in the Chrome browser ecosystem.
Updating Chrome from the About Chrome Page
If you prefer a direct and quick method to update Chrome on your Chromebook, you can utilize the “About Chrome” page within the browser itself. By accessing this page, you can easily check for updates and install them with just a few clicks. Here’s how you can update Chrome from the “About Chrome” page:
- Open a new tab in Chrome by clicking on the “+” icon next to your existing tabs.
- In the address bar at the top, type “chrome://settings/help” and press Enter.
- This will take you directly to the “About Chrome” page, where you can find information about your current Chrome version and check for updates.
- If an update is available, you will see a “Relaunch” button next to the version details.
- Click on the “Relaunch” button to start the update process.
- Chrome will automatically download and install the update in the background.
- Once the update is complete, you will be prompted to relaunch the browser to apply the changes.
Updating Chrome from the “About Chrome” page offers a convenient and straightforward method to keep your browser up to date. It eliminates the need to navigate through menus or external web stores, allowing you to complete the update process within the browser itself.
This method is particularly useful if you want to quickly check for updates and apply them without interrupting your browsing session. With just a few clicks, you can ensure that your Chrome browser is running the latest version, providing you with improved performance, new features, and enhanced security.
Remember to periodically check for updates from the “About Chrome” page to stay up to date with the latest advancements in the Chrome browser. Regularly updating Chrome on your Chromebook helps to maintain a smooth and secure browsing experience.
Troubleshooting Chrome Update Issues
While updating Chrome on your Chromebook is usually a smooth process, there may be instances where you encounter issues or errors. If you’re experiencing troubles with updating Chrome, don’t worry – there are several troubleshooting steps you can take to resolve the problem. Here are some common issues and their corresponding solutions:
1. Network Connectivity Issues:
If you’re having trouble updating Chrome, ensure that your Chromebook is connected to a stable internet connection. Check your Wi-Fi connection or try switching to a different network if possible. A weak or unstable internet connection can hinder the update process.
2. Insufficient Storage Space:
Chrome updates can require a significant amount of storage space. If you’re running low on disk space, the update may fail. To resolve this, delete unnecessary files or transfer them to an external storage device to free up space. You can also remove unused Chrome extensions or apps to create more space for the update.
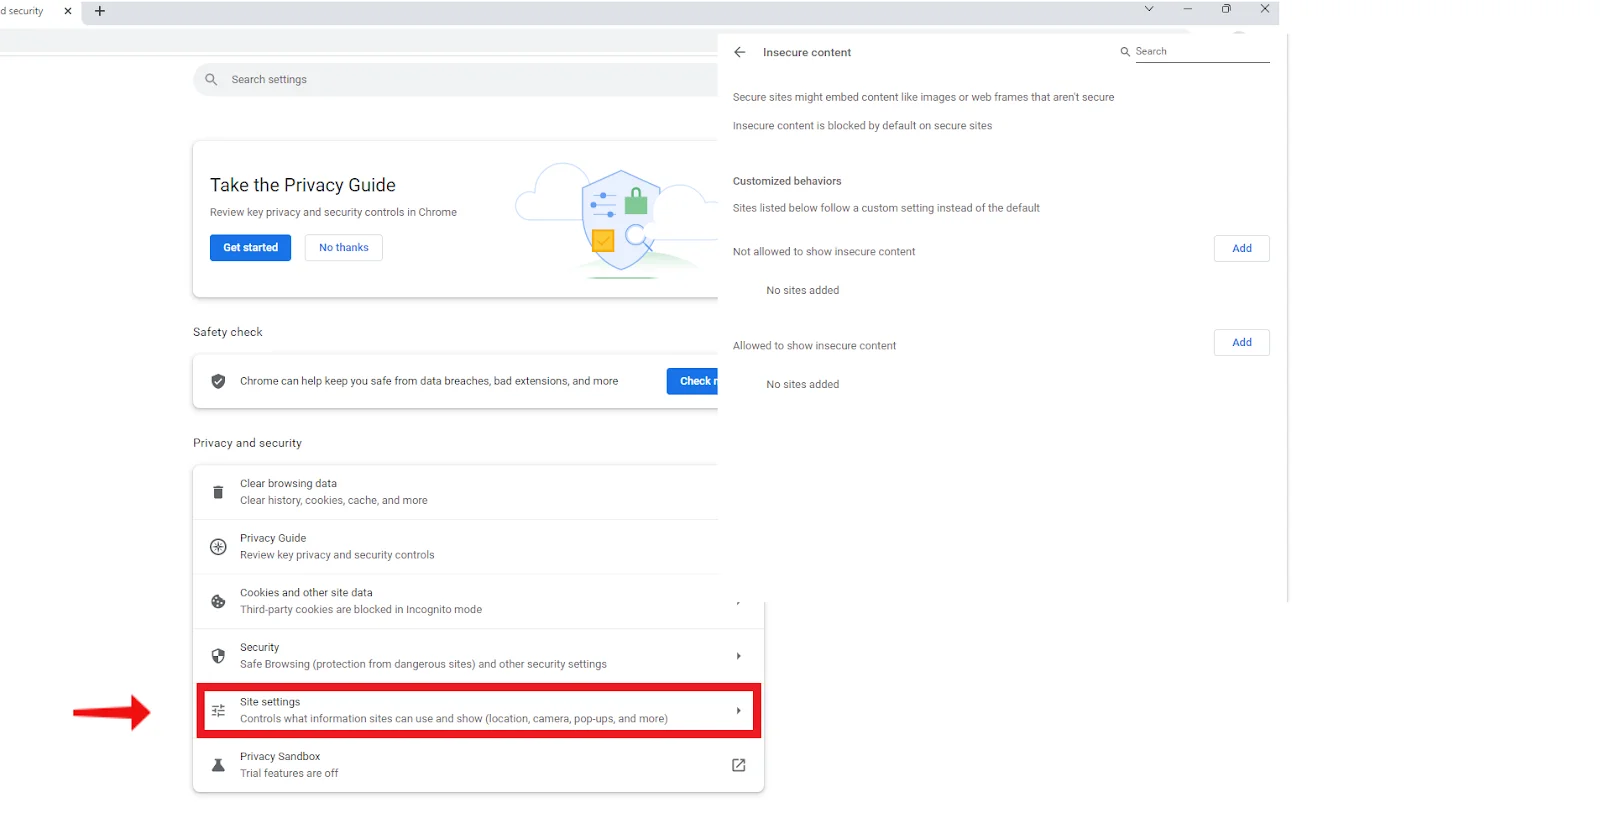
3. Clear Cache and Cookies:
Corrupted cache or cookies can interfere with the update process. Clearing the cache and cookies can help resolve issues. To do this, navigate to Chrome settings, then click on “Privacy and security.” Under “Clear browsing data,” select “Advanced” and choose “All time” as the time range. Check the boxes for “Cookies and other site data” and “Cached images and files,” then click “Clear data.”
Restarting your Chromebook can often resolve update-related issues. Simply turn off your Chromebook, wait for a few seconds, and then turn it back on. This helps to refresh the system and can fix any temporary glitches that may be preventing the update.
5. Powerwash:
If all else fails, you can consider performing a Powerwash. This process will reset your Chromebook to its factory settings, erasing all your data and settings. Be sure to back up any important files before doing a Powerwash. Once completed, you can set up your Chromebook again and check if the update issue is resolved.
If the above troubleshooting steps don’t resolve the update problem, you can visit the Chromebook Help Center or consult the official Google Chrome support forums for further assistance. The support channels offer resources and community support to help you troubleshoot specific issues.
Remember that keeping Chrome up to date is crucial for a seamless browsing experience. By troubleshooting any update issues promptly, you can ensure that your Chromebook and Chrome browser are running the latest version with all the benefits of performance improvements, security patches, and new features.
Conclusion
Updating Chrome on your Chromebook is essential to ensure optimal performance, improved security, and access to the latest features. In this guide, we’ve explored various methods for updating Chrome, including automatic updates, manual updates through the settings menu, the Chrome Web Store, and the “About Chrome” page.
Automatic updates are the recommended option for most users, as they ensure that your Chrome browser stays up to date without any manual intervention. However, if you prefer more control over the update process, you can choose to update Chrome manually through the settings menu, the Chrome Web Store, or the “About Chrome” page.
We’ve also covered troubleshooting steps for common update issues you may encounter. By addressing issues related to network connectivity, storage space, cache, and cookies, or considering a Powerwash if necessary, you can overcome these obstacles and successfully update Chrome.
Remember to regularly check for Chrome updates to stay current with the latest improvements. Having the latest version of Chrome ensures a smoother browsing experience, enhanced security, and access to exciting new features. Whether you prefer automatic updates or want to manually update Chrome, keeping your Chromebook up to date is a crucial step in making the most of its capabilities.
We hope this guide has provided valuable insights and assistance in updating Chrome on your Chromebook. Explore the methods mentioned, troubleshoot any issues that arise, and enjoy a seamless and secure browsing experience with the latest version of Chrome!