Introduction
When it comes to enjoying your Samsung LED TV to its fullest potential, tuning in the perfect picture and sound is essential. Whether you’re watching your favorite movies, catching up on the latest TV shows, or immersing yourself in a gaming session, understanding how to optimize the tuner settings can make a significant difference in your viewing experience.
A built-in tuner is a key feature in Samsung LED TVs, allowing you to access over-the-air broadcast channels without the need for an external set-top box. By following a few simple steps, you can scan for available channels, fine-tune picture and sound quality, and even create a list of your favorite channels for easy access.
In this guide, we will take you through the process of tuning in your Samsung LED TV, helping you unlock the full potential of your entertainment system. Whether you’re a tech-savvy enthusiast or a casual viewer, these tips will help you optimize your TV’s performance and bring your favorite content to life.
Before we dive into the details, it’s important to note that each Samsung LED TV model may have slightly different menu layouts and options. However, the general principles and steps discussed in this guide should be applicable to most Samsung LED TVs.
So sit back, relax, and let’s explore how to get the most out of your Samsung LED TV’s built-in tuner.
Understanding the Built-in Tuner
Before we begin the tuning process, it’s essential to understand how the built-in tuner in your Samsung LED TV works. The tuner is responsible for receiving over-the-air broadcast signals and decoding them into picture and sound that can be displayed on your TV.
Samsung LED TVs typically come with an integrated digital tuner, capable of receiving both standard-definition (SD) and high-definition (HD) signals. This means that you can watch your favorite local TV channels without the need for a separate cable or satellite box. However, if you use a cable or satellite service, you may need to access the tuner settings differently.
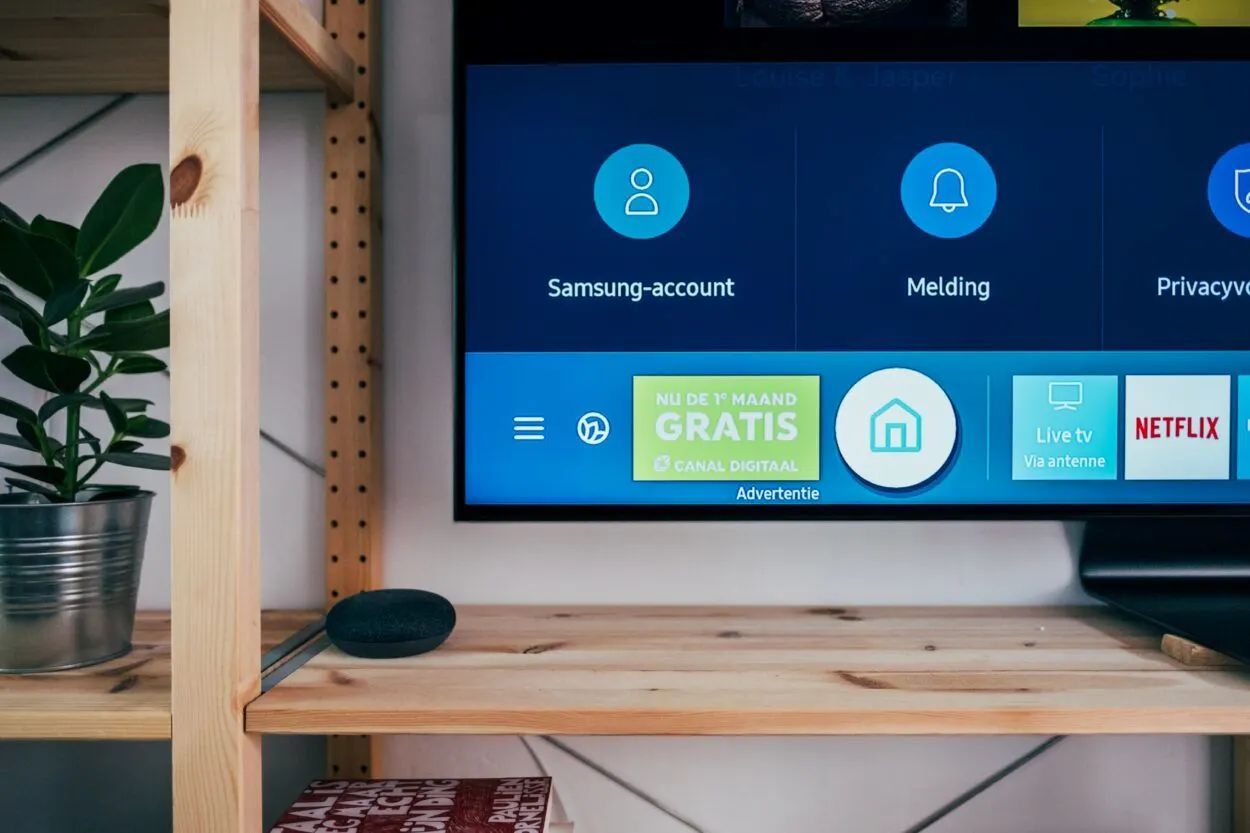
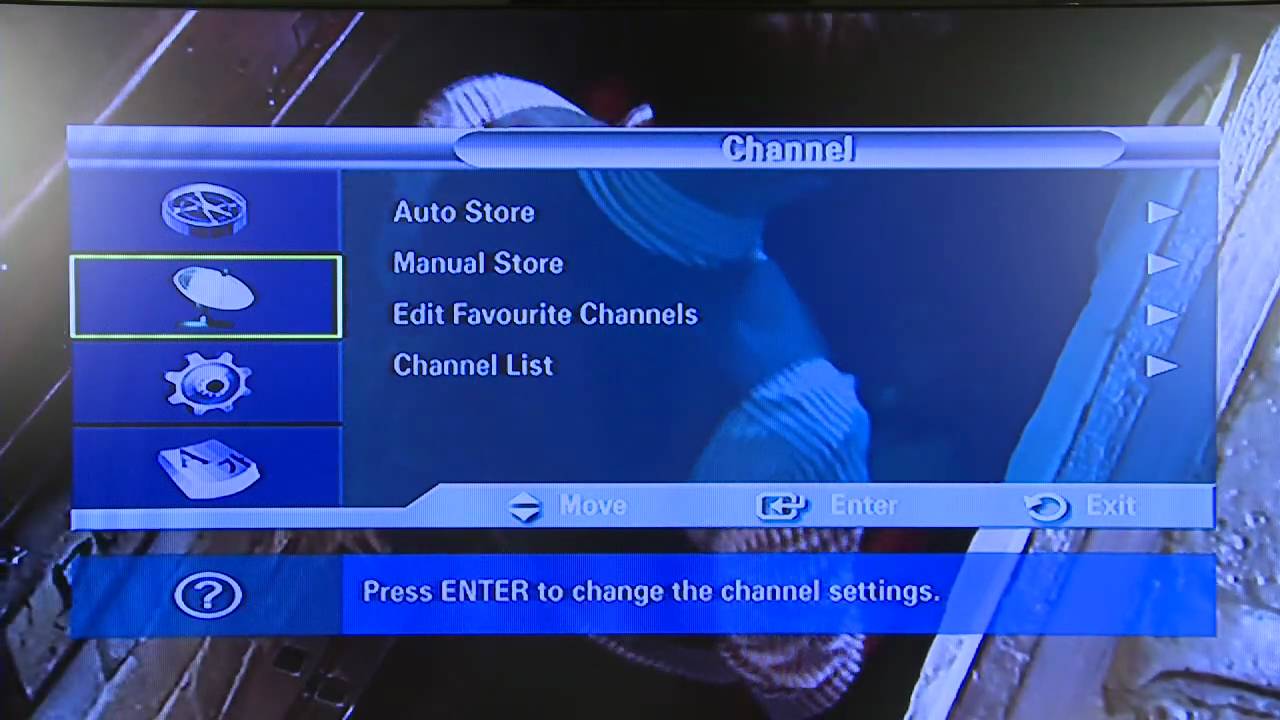
To access the built-in tuner settings, navigate to the TV’s main menu using the remote control. Look for options such as “Channel” or “Tuner” to access the tuning and scanning features. Within these settings, you’ll find options for scanning channels, fine-tuning picture and sound, and managing your favorite channels.
It’s important to note that the built-in tuner may not be able to receive certain channels if you live in an area with weak or distant broadcast signals. In such cases, you may need to complement your TV’s tuner with an external antenna or amplifier to improve signal reception.
Additionally, if you’re using an external source, such as a cable or satellite box, to receive TV signals, you’ll need to switch the input source on your TV to the appropriate HDMI or AV input. The built-in tuner will not be used in this scenario, and you should refer to the user manual or contact your service provider for further instructions.
By understanding the basics of the built-in tuner in your Samsung LED TV, you’ll be better equipped to navigate the tuning process and optimize your viewing experience. So, let’s move on to the next step: scanning for channels.
Scanning for Channels
Once you’re familiar with the built-in tuner of your Samsung LED TV, the next step is to scan for available channels. Scanning for channels is a crucial process as it allows your TV to detect and store all the available over-the-air broadcast channels in your area.
To start the channel scanning process, grab your TV remote and navigate to the “Channel” or “Tuner” settings in the main menu. Look for the “Auto Program” or “Channel Scan” option and select it. Depending on your TV model, you may be prompted to choose between an “Antenna” or “Cable” scan. If you are using an antenna to receive signals, select the “Antenna” option. If you are using a cable or satellite service, choose the “Cable” option.
Once you’ve made the appropriate selection, your TV will begin scanning for available channels. This process may take a few minutes. It’s important to keep your TV connected to the antenna or cable source during the scan to ensure accurate detection of channels.
Once the scanning process is complete, your Samsung LED TV will display a list of detected channels. Take some time to review the list and ensure that all your desired channels are included.
If some channels are missing, or if you believe that certain channels should be available in your area but are not detected, you can try the following troubleshooting steps:
- Adjust the position and angle of your antenna to improve signal reception.
- Check the antenna cable connections for any loose or damaged cables.
- Consider using a more powerful antenna or an amplifier to boost signal strength.
Once you’re satisfied with the scanned channels, don’t forget to save the channel list. This will allow you to quickly access your favorite channels later. You can usually find the option to save channels by navigating to the “Channel” or “Tuner” settings and selecting the appropriate option.
Scanning for channels is an important step to ensure that you can access all the available broadcast channels in your area. Once you’ve completed this step, you’re ready to fine-tune the picture and sound quality of your Samsung LED TV, which we’ll discuss in the next section.
Troubleshooting Signal Issues
While scanning for channels, you may encounter signal issues that can affect the quality of your TV reception. Weak or distorted signals can result in pixelation, freezing, or complete loss of channels. Fortunately, there are several troubleshooting steps you can take to address these signal issues and ensure a seamless viewing experience on your Samsung LED TV.
1. Check your antenna: Start by inspecting your antenna for any physical damage or misalignment. Make sure it is properly connected to your TV and positioned to receive the best possible signal. Adjusting the direction or height of your antenna may improve signal reception.
2. Use a signal booster: If you are experiencing weak signals, consider using a signal booster or amplifier. These devices can strengthen the incoming signals and improve the overall reception quality.
3. Avoid signal interference: Keep away from any potential sources of signal interference, such as large metal objects, electronic devices, or neighboring Wi-Fi routers. These can disrupt the TV signal and result in poor reception.
4. Upgrade your antenna: If your current antenna is not performing as expected, you may want to consider upgrading to a more powerful or specialized antenna designed for better reception. Research the available options and choose one that suits your specific needs and location.
5. Check your cables: Ensure that the cables connecting your TV to the antenna or cable source are in good condition and securely connected. Loose or damaged cables can introduce signal loss and affect the overall picture and sound quality.
6. Consult a professional: If you have tried the above troubleshooting steps and are still experiencing signal issues, it may be beneficial to seek help from a professional antenna technician. They can conduct a signal analysis, assess your setup, and recommend specific solutions for your signal problems.
By addressing signal issues promptly, you can enjoy a clear and uninterrupted viewing experience on your Samsung LED TV. Remember, a strong and stable signal is essential for optimal picture and sound quality.
Now that we’ve looked at troubleshooting signal issues, let’s move on to the next section, where we’ll explore how to fine-tune the picture and sound quality on your Samsung LED TV.
Fine-tuning Picture and Sound Quality
Once you have successfully tuned in to the available channels and resolved any signal issues, the next step is to fine-tune the picture and sound quality on your Samsung LED TV. By adjusting these settings, you can enhance your viewing experience and enjoy content with optimal clarity and audio performance.
Adjusting the Picture Settings:
Start by accessing the picture settings menu on your Samsung LED TV. This can typically be done by navigating to the “Picture” or “Display” settings using your TV remote. Here are some key settings to focus on:
- Brightness and Contrast: Adjusting the brightness and contrast settings helps to achieve the desired level of brightness and depth in the picture.
- Color and Saturation: Fine-tune the color and saturation levels to ensure vibrant and lifelike colors on your screen.
- Sharpness: Modify the sharpness setting to enhance the clarity and details in the picture. Avoid setting it too high, as it may introduce image artifacts.
- Backlight: The backlight setting controls the brightness of the LED panel. Adjust it to suit your viewing environment and preference.
- Picture Mode: Experiment with different picture modes, such as Standard, Movie, or Game, to find the one that suits your content and viewing conditions the best.
Optimizing the Sound Settings:
To achieve optimal audio performance, navigate to the audio or sound settings menu on your Samsung LED TV. Here are a few key settings to consider:
- Sound Mode: Choose a sound mode that best suits your content, such as Standard, Movie, or Music, to enhance the audio experience.
- Equalizer: Access the equalizer settings to fine-tune the audio frequencies and achieve a more balanced sound output.
- Volume Leveler: Enable the volume leveler option to automatically adjust the audio level between different programs and channels, reducing sudden volume fluctuations.
- Surround Sound: If available, enable the surround sound option to create a more immersive audio experience, especially when watching movies or playing games.
Remember, the optimal picture and sound settings may vary depending on your personal preferences, the content being viewed, and the lighting conditions of your viewing environment. Take some time to experiment with different settings and find the combination that delivers the best viewing and listening experience for you.
With the picture and sound quality fine-tuned to your liking, you can now sit back, relax, and fully enjoy your favorite movies, TV shows, and games on your Samsung LED TV.
In the next section, we’ll explore how to utilize picture modes for optimal viewing on your Samsung LED TV.
Using Picture Modes for Optimal Viewing
One of the key features of your Samsung LED TV is the availability of different picture modes. These modes are pre-configured settings that adjust various picture parameters to optimize the viewing experience based on different types of content and viewing conditions. Understanding and utilizing these picture modes can greatly enhance your overall viewing pleasure.
To access the picture modes on your Samsung LED TV, navigate to the “Picture” or “Display” settings in the main menu. Look for the option that allows you to select or customize the picture mode. Here are some popular picture modes and their recommended usage:
- Standard Mode: This is the default mode and provides a balanced picture setting suitable for most types of content. It is a good starting point if you’re unsure which mode to choose.
- Movie Mode: Designed specifically for movies and cinematic content, this mode aims to reproduce colors and contrast in a way that closely resembles the filmmaker’s intention. It typically enhances the richness of colors and provides a more immersive viewing experience.
- Sports Mode: If you’re an avid sports watcher, this mode is for you. It optimizes the picture settings for fast-paced action, reducing motion blur and enhancing clarity and detail, so you won’t miss any thrilling moments during the game.
- Game Mode: When playing video games, enabling the Game Mode reduces input lag, making your gaming experience more responsive. It also enhances visibility in dark game scenes and provides a more vibrant and detailed picture.
- Vivid Mode: As the name suggests, this mode offers a vivid and vibrant picture with higher saturation levels and increased brightness. It is ideal for showcasing content that benefits from a more intense and eye-catching visual presentation.
While these picture modes can significantly enhance your viewing experience, keep in mind that personal preferences and environmental factors may dictate different preferences. Therefore, it’s worth experimenting with different modes and fine-tuning the settings to achieve your desired outcome.
Add-on tip: If you want more control over the picture settings, some Samsung LED TVs offer a “Custom” or “User” mode that allows you to manually adjust various picture parameters such as brightness, contrast, color, and sharpness. This option provides full flexibility to create a customized picture profile tailored to your preferences.
By utilizing the appropriate picture mode or customizing the settings to your liking, you can unlock the full potential of your Samsung LED TV and enjoy an optimized and immersive viewing experience across various types of content.
In the next section, we’ll explore how to enhance audio performance by utilizing different sound modes on your Samsung LED TV.
Enhancing Audio with Sound Modes
Aside from the visual experience, sound quality plays a significant role in immersing yourself in your favorite movies, TV shows, or music on your Samsung LED TV. To enhance the audio performance, Samsung LED TVs offer various sound modes that tailor the sound output to different content genres and viewing preferences.
To access the sound modes, navigate to the “Sound” or “Audio” settings in the main menu of your Samsung LED TV. Look for the option that allows you to select or customize the sound mode. Here are some commonly available sound modes and their recommended usage:
- Standard Mode: This is the default sound mode that provides a balanced audio setting suitable for most purposes. It delivers clear dialogue, well-defined sound effects, and a wide soundstage.
- Movie Mode: Designed to enhance cinematic experiences, movie mode focuses on delivering immersive audio with a wider soundstage and enhanced bass. It’s perfect for enjoying movies or TV shows with surround sound effects.
- Music Mode: If you’re a music lover, music mode optimizes the audio settings to reproduce accurate and high-fidelity sound. It enhances the clarity of vocals and delivers a well-balanced audio experience for enjoying your favorite tunes.
- Sports Mode: Sports mode emphasizes crowd noise, commentator voices, and stadium ambience, enhancing the audio elements that make you feel like you’re in the middle of the action. It’s an excellent choice for sports enthusiasts who want to enhance their viewing experience.
- Game Mode: When playing video games, game mode is specifically designed to enhance audio cues and provide a more immersive gaming experience. It emphasizes directional sound, ensuring you can hear enemy footsteps or environmental sounds clearly.
In addition to these commonly found sound modes, some Samsung LED TVs also offer advanced audio features like virtual surround sound, dialog enhancement, and equalizer settings. These features allow you to customize the audio output to your specific preferences.
Remember, the optimal sound mode may vary depending on the content, your personal preferences, and the acoustic conditions of your viewing environment. It’s worth exploring different sound modes and fine-tuning the settings to achieve the best audio experience for your needs.
Lastly, if you’re using external speakers or a soundbar with your Samsung LED TV, make sure to select the appropriate sound output settings in the menu to ensure optimal sound performance.
By utilizing the sound modes and adjusting the settings to your liking, you can greatly enhance the audio performance of your Samsung LED TV and take your viewing experience to the next level.
In the next section, we’ll explore how to manage your favorite channels and create a personalized channel list on your Samsung LED TV.
Managing Favorite Channels
One of the handy features of your Samsung LED TV’s built-in tuner is the ability to manage your favorite channels, allowing for quick and convenient access to the content you love. Instead of scrolling through a long list of channels every time, you can create a personalized channel list that includes only your preferred channels.
To manage your favorite channels, start by opening the “Channel” or “Tuner” settings menu on your Samsung LED TV. Look for the option that allows you to edit or create a channel list. Here’s how you can make the most of this feature:
Adding Channels to Your Favorites:
Scroll through the list of scanned channels and select the channel you wish to add to your favorites. Look for an option such as “Add to Favorites” or a star icon that signifies adding it to your preferred list. Repeat this process for all the channels you want to include in your favorites list.
Organizing Your Favorite Channels:
Once you have added channels to your favorites, you can further organize them to suit your preferences. Navigate to the “Favorites” or “Channel List” section in the settings menu and select the option to edit or arrange the channels. You can reorder the channels, rename them for easier identification, or even create custom categories to group similar channels together (e.g., News, Sports, Entertainment).
Removing Channels from Your Favorites:
If there are channels you no longer wish to have in your favorites list, you can easily remove them. Navigate to the “Favorites” or “Channel List” section, locate the channel you want to remove, and select the option to delete or remove it from your favorites.
Accessing Your Favorite Channels:
Now that you have organized your favorite channels, accessing them is simple. Depending on your Samsung LED TV model, you can usually press a dedicated “Favorites” button on your remote control, open the channel list menu, or use a quick-access feature to instantly view your personalized channel lineup. This eliminates the hassle of scrolling through channels and allows you to quickly jump to your preferred content.
Managing your favorite channels offers a convenient and personalized TV viewing experience. You can easily access the channels you love without the need to search through a long list, saving you time and effort.
Now that you know how to manage your favorite channels, let’s move on to the next section, where we’ll share some tips for maintaining a high-quality signal on your Samsung LED TV.
Tips for Maintaining a High-quality Signal
To ensure that you always enjoy a high-quality signal and optimal performance on your Samsung LED TV, here are some tips to help you maintain a strong and reliable TV signal:
1. Position your Antenna:
If you’re using an antenna to receive over-the-air broadcast signals, the placement of your antenna is crucial. Experiment with different locations and angles to find the best signal reception. Generally, higher placement, away from obstructions, and facing the direction of the TV broadcast towers tend to yield better results.
2. Use a Signal Amplifier:
If you’re experiencing weak signal strength, consider using a signal amplifier. These devices are placed in line with the antenna and help boost the incoming signal, potentially improving reception and picture quality. Ensure that your signal amplifier is compatible with your antenna and TV system.
3. Check and Replace Cables:
Faulty or damaged cables can significantly impact signal quality. Regularly check the cables connecting your TV to the antenna or external devices and replace them if necessary. Ensure that the cables are properly connected and in good condition to minimize signal interference.
4. Avoid Signal Interference:
Avoid placing your TV near other electronic devices that could cause signal interference. Items such as cordless phones, wireless routers, microwave ovens, and certain lights can disrupt the TV signal. Keep your TV away from these sources of interference to maintain a strong and stable signal.
5. Update your TV’s Firmware:
Manufacturers often release firmware updates for their TVs, which can include performance improvements and bug fixes that enhance signal reception and overall TV performance. Regularly check for firmware updates for your Samsung LED TV and install them to ensure optimal signal quality and functionality.
6. Consider a Different Antenna:
If you’re consistently experiencing poor signal quality, you might want to upgrade your antenna. Different antennas have varying ranges and reception capabilities. Research and invest in an antenna that is suitable for your location and matches your signal requirements.
7. Monitor Signal Strength:
Most Samsung LED TVs display signal strength information in the settings menu. Monitor the signal strength for each channel to identify any anomalies or consistent weak signals. This information can help you troubleshoot issues and make appropriate adjustments to improve signal quality.
By following these tips, you can optimize your Samsung LED TV’s signal reception and maintain a consistently high-quality viewing experience. Remember to regularly check and adjust your setup as needed to ensure the best performance.
Now that you’re armed with these signal maintenance tips, you’re ready to enjoy crystal-clear picture and sound quality on your Samsung LED TV.
In the next section, we’ll wrap up our guide with a summary of the key points and final thoughts.
Conclusion
In conclusion, optimizing your Samsung LED TV’s tuner settings is essential for a satisfying viewing experience. By understanding the built-in tuner and scanning for channels, you can ensure access to all available content. Troubleshooting signal issues will help maintain a strong and stable signal, while fine-tuning picture and sound settings will enhance the quality of your entertainment. Utilizing picture modes and sound modes allows you to customize the viewing experience according to your preferences and the content you’re watching. Managing favorite channels enables quick access to your preferred content, saving you time and effort. Finally, following tips for maintaining a high-quality signal ensures consistent performance on your Samsung LED TV.
Whether you’re enjoying movies, TV shows, sports events, or gaming sessions, taking the time to optimize your Samsung LED TV’s tuner settings will enhance your overall entertainment experience. With crystal-clear picture and immersive sound, you’ll be able to immerse yourself in your favorite content like never before.
So, grab your remote control, navigate the menu options, and take full advantage of the features and settings available on your Samsung LED TV. Each small adjustment will contribute to maximizing your viewing pleasure. Remember, every TV model may have slightly different menus and options, so refer to your specific user manual for more precise instructions.
Now it’s time to sit back, relax, and enjoy all the incredible content your Samsung LED TV has to offer!