Introduction
Welcome to this guide on how to test SSD speed on your Mac! If you’re curious about the performance of your Solid State Drive (SSD) and want to measure its speed, you’ve come to the right place. SSDs offer faster read and write speeds compared to traditional hard drives, making them an excellent choice for improving your Mac’s overall performance.
Understanding the speed of your SSD is crucial, especially when it comes to tasks like booting up your Mac, launching applications, and transferring files. By assessing its speed, you can identify potential bottlenecks in your system and take appropriate measures to optimize its performance.
This guide will walk you through various methods to test the speed of your SSD on a Mac. We’ll explore built-in tools like Terminal and third-party apps that provide detailed insights into the performance of your SSD. Whether you’re a technophile looking to fine-tune your Mac’s performance or simply curious about the capabilities of your SSD, this guide has got you covered.
Before we dive into the different methods, it’s important to note that SSD speed can vary depending on various factors, such as the model of your Mac, the type of SSD installed, and the health of your SSD. Testing the speed will give you a snapshot of its current performance, but keep in mind that it may fluctuate over time due to factors like data fragmentation and wear leveling.
Now, let’s explore the different ways to test SSD speed on a Mac and unleash the full potential of your solid state drive!
Understanding SSD Speed
Before we delve into the methods of testing SSD speed on your Mac, it’s important to have a basic understanding of what SSD speed entails. It refers to the rate at which data can be read from or written to the solid state drive. This speed is measured in terms of the read and write operations per second (IOPS) and the data transfer rate in megabytes per second (MB/s).
SSD speed is influenced by several factors, including the type of SSD technology used, the interface it’s connected to, and the specific SSD model. One of the key advantages of SSDs over traditional hard drives is their significantly faster access times. Unlike HDDs, which rely on moving mechanical parts to access data, SSDs use flash memory chips that allow for near-instantaneous access to data. This results in quicker boot times, faster application launches, and overall snappier system performance.
When it comes to SSD speed, there are two key aspects to consider:
- Read Speed: This refers to the rate at which data can be retrieved from the SSD. A higher read speed means that data can be accessed more quickly, resulting in faster file transfers and application launches. Read speed is particularly important when dealing with large files, such as video editing projects or high-resolution images.
- Write Speed: This refers to the rate at which data can be written to the SSD. A higher write speed is beneficial for tasks that involve copying or saving data, such as backing up files or creating large project files. Faster write speeds ensure that the SSD can handle these tasks efficiently without any delays.
It’s important to note that while SSDs typically offer faster read and write speeds compared to HDDs, not all SSDs are created equal. The speed can vary significantly depending on the specific model and technology used. Thus, it’s essential to test the performance of your SSD to get an accurate measure of its speed.
Now that we have a better understanding of what SSD speed entails, let’s explore the various methods you can use to test the speed of your SSD on a Mac.
Checking for Supported SSDs
Before you begin testing the speed of your SSD on a Mac, it’s important to ensure that your SSD is compatible with your Mac model. Different Mac models support different types of SSDs, so it’s crucial to check for compatibility to avoid any issues.
To determine if your SSD is supported, you can follow these steps:
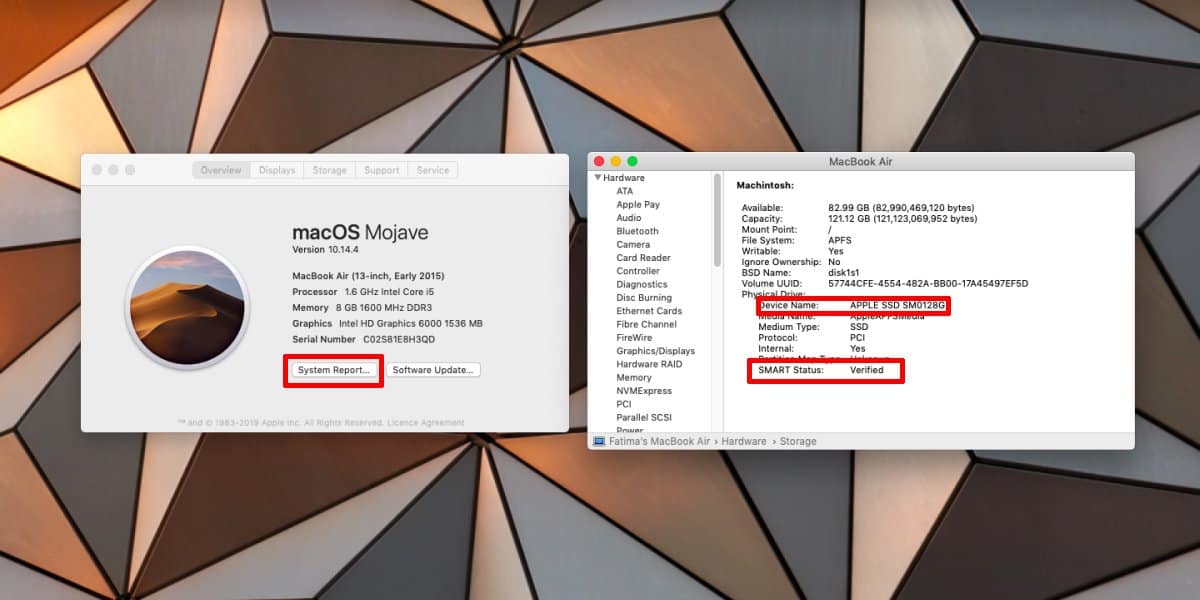
- Identify your Mac model: Click on the Apple menu in the top-left corner of your screen and select “About This Mac.” The window that appears will display information about your Mac, including the model name.
- Research compatibility: Once you know your Mac model, visit the manufacturer’s website or consult the Apple Support website to find information regarding the supported SSD types or specific models that are compatible with your Mac.
- Check connector type: SSDs may use different connector types, such as SATA (Serial ATA) or NVMe (Non-Volatile Memory Express). Verify which connector type your Mac supports and ensure that your SSD matches the connector type.
- Consider capacity limits: Some Mac models may have limitations on the maximum capacity of the supported SSD. Make sure that your chosen SSD meets the capacity requirements of your Mac.
By taking these steps, you can ensure that your SSD is compatible with your Mac model before proceeding with the speed testing methods. This will help you avoid any potential issues or incompatibilities that may arise during the testing process.
Keep in mind that the process of checking for supported SSDs may vary slightly depending on your specific Mac model and the manufacturer of your SSD. It’s always a good idea to consult the official documentation or support channels for accurate information regarding compatibility.
Now that you have checked for supported SSDs and confirmed compatibility with your Mac, it’s time to move on to the different methods you can use to test the speed of your SSD.
Using the Disk Speed Test App
One of the easiest ways to test the speed of your SSD on a Mac is by using the Disk Speed Test app, which is available for free on the Mac App Store. This app allows you to measure the read and write speeds of your SSD quickly and conveniently.
Here’s how you can use the Disk Speed Test app to test your SSD speed:
- Open the Mac App Store on your Mac and search for the “Disk Speed Test” app.
- Click on the “Get” button to download and install the app on your Mac.
- Launch the Disk Speed Test app from your Applications folder or using the Launchpad.
- Choose the target drive: In the Disk Speed Test app, click on the dropdown menu labeled “Target” and select your SSD drive from the list of available drives.
- Select the test parameters: You can modify the test parameters by adjusting the file size, test duration, and queue depth according to your preference.
- Run the test: Click on the “Start” button to initiate the test. The app will measure the read and write speeds of your SSD and display the results in real-time.
- Review the results: Once the test is complete, you can view the read and write speeds of your SSD in the Disk Speed Test app. This will give you an idea of its performance and allow you to compare it with other SSDs or industry benchmarks.
Using the Disk Speed Test app is a straightforward way to obtain a quick assessment of your SSD’s read and write speeds. However, keep in mind that the results may vary slightly depending on various factors, such as the workload on your Mac and the health of your SSD.
Now that you have learned how to use the Disk Speed Test app, let’s explore another method to test the speed of your SSD using the Terminal.
Using the Terminal
If you prefer a more hands-on approach, you can use the Terminal to test the speed of your SSD on a Mac. The Terminal is a powerful built-in utility that allows you to execute commands and perform various tasks.
Follow these steps to test your SSD speed using the Terminal:
- Open the Terminal app on your Mac. You can find it in the Utilities folder within the Applications folder, or you can use Spotlight to search for it.
- Type the following command and press Enter to list the available disks on your Mac:
- Identify your SSD: Look for the disk identifier of your SSD in the list of disks. It will be in the format `/dev/diskX` (where X is a number).
- Type the following command, replacing `diskX` with the actual disk identifier of your SSD, and press Enter:
- Find the `Media Name` in the output, which will provide the name of your SSD. Please take note of this name for future reference.
- Type the following command, replacing `diskX` with the disk identifier of your SSD, and press Enter:
- Enter your user password when prompted and press Enter.
- Wait for the command to complete: This command writes a 1GB file filled with zeroes to your SSD. The time it takes to complete will give you an idea of the write speed of your SSD.
diskutil list
diskutil info diskX
sudo dd if=/dev/zero of=/dev/diskX bs=1m count=1024
Once the Terminal command finishes executing, you’ll get the results displaying the duration it took to write the 1GB file. This time can be used as an indicator of your SSD’s write speed.
Using the Terminal provides a more technical and in-depth way to test your SSD’s speed. However, it requires a basic understanding of command-line operations, and it’s crucial to carefully follow the instructions to avoid any unintended consequences.
Now that you have learned how to test your SSD speed using the Terminal, let’s explore another method that involves using third-party apps.
Using Third-Party Apps
If you prefer a more comprehensive and user-friendly approach to test the speed of your SSD on a Mac, you can utilize third-party apps specifically designed for this purpose. These apps provide detailed performance analysis and often offer additional features and benchmarking capabilities.
Here are a few popular third-party apps you can consider:
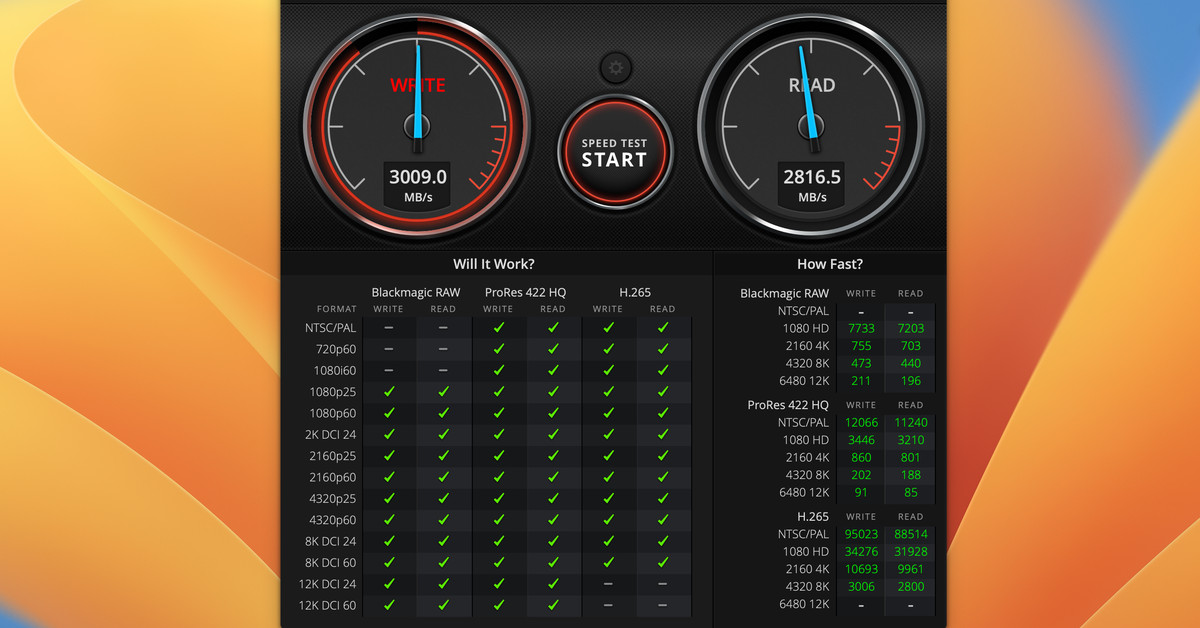
- Blackmagic Disk Speed Test: This app is widely used for measuring the read and write speeds of storage devices, including SSDs. It provides a simple and intuitive interface, allowing you to select your SSD and run the speed test with ease. The results are displayed in real-time and can be saved for future reference.
- ATTO Disk Benchmark: ATTO is another popular app for evaluating the performance of your SSD. It offers customizable test parameters and provides detailed graphical representations of your SSD’s read and write speeds. This app is often utilized by professionals to perform comprehensive benchmarking and analysis.
- Blackmagic Speed Test: Similar to the Blackmagic Disk Speed Test, this app is specifically designed for SSDs connected via Thunderbolt or USB-C. It assesses the sustained transfer speeds of your SSD and provides results in an easy-to-understand format.
To use these third-party apps, you simply need to download them from their respective websites or the Mac App Store, install them on your Mac, and follow the on-screen instructions to start the speed test. Each app has its own unique features and user interface, so feel free to explore and choose the one that best suits your requirements.
By utilizing third-party apps, you can gain extensive insights into the performance of your SSD, including not just the read and write speeds, but also other parameters like latency, random access speed, and more. These apps can help you compare your SSD’s performance with industry standards and make informed decisions regarding your Mac’s storage requirements.
Now that you have learned about different methods to test the speed of your SSD using third-party apps, let’s conclude our guide.
Conclusion
Testing the speed of your SSD on a Mac is essential to understand its performance and optimize your system’s overall efficiency. By assessing the read and write speeds of your SSD, you can identify any potential bottlenecks and take necessary steps to enhance your Mac’s performance.
In this guide, we explored various methods to test the speed of your SSD. You learned how to check for supported SSDs, use the Disk Speed Test app, utilize the Terminal for a more hands-on approach, and take advantage of third-party apps for comprehensive analysis.
Remember, while testing your SSD’s speed provides valuable insights into its current performance, it’s important to consider that speed can vary due to factors like the health of your SSD and the workload on your Mac. Regularly monitoring the speed and health of your SSD can help you identify any potential issues and ensure optimal performance.
Whether you choose to use built-in tools like Terminal or third-party apps, make sure to follow the instructions carefully and interpret the results with consideration. Additionally, keep in mind that industry benchmarks and comparative data can help you understand how your SSD’s speed stacks up against other models.
Now that you have the knowledge and tools to test the speed of your SSD, go ahead and give it a try. Measure the read and write speeds, analyze the results, and make informed decisions to optimize your Mac’s performance. Enjoy the speed and efficiency that your SSD brings!


