Introduction
Are you struggling to share your Wi-Fi connection with your Mac? Fortunately, it’s a fairly straightforward process that can be done in just a few simple steps. Whether you need to share your Wi-Fi connection with a colleague, friend, or family member, this guide will walk you through the process and have you up and running in no time.
Sharing your Wi-Fi with your Mac is particularly useful in situations where you have a limited number of devices that can connect to the internet or when you want to provide access to a guest without sharing your regular Wi-Fi password. By following the steps outlined in this guide, you’ll be able to create a separate Wi-Fi network on your Mac that others can easily connect to.
In this article, we will provide a step-by-step guide on how to share your Wi-Fi connection with your Mac. From opening the System Preferences to enabling Internet Sharing, we’ll cover each step in detail to ensure a seamless and hassle-free setup process. So, grab your Mac and let’s get started on setting up your shared Wi-Fi network!
Step 1: Open the System Preferences
The first step in sharing your Wi-Fi connection with your Mac is to open the System Preferences. To do this, click on the Apple logo located in the top-left corner of your screen and select “System Preferences” from the drop-down menu.
Once the System Preferences window appears, you’ll see various icons representing different settings options. Look for the icon labeled “Sharing” and click on it to proceed to the next step.
Alternatively, you can also open the System Preferences by using the Spotlight search. Simply press the Command + Space keys on your keyboard to activate Spotlight, type in “System Preferences,” and press Enter to open the application.
Opening the System Preferences gives you access to a wide range of customization options for your Mac. From changing your desktop background to adjusting your display settings, it’s a powerful tool that allows you to fine-tune your user experience.
Now that you’ve successfully opened the System Preferences window, it’s time to move on to the next step and click on the “Sharing” option.
Step 2: Click on the Sharing option
After opening the System Preferences window, the next step in sharing your Wi-Fi connection with your Mac is to locate and click on the “Sharing” option. In the System Preferences window, you’ll find the “Sharing” icon, which resembles a blue folder with a white “S” on it. Simply click on this icon to proceed.
The “Sharing” option allows you to configure various sharing settings on your Mac, including sharing your internet connection, files, printers, and more. By choosing this option, you’ll be able to set up your Mac as a Wi-Fi hotspot, enabling other devices to connect to the internet through your Mac’s internet connection.
Upon clicking on the “Sharing” icon, a new window will appear with different sharing services listed on the left side. These services include File Sharing, Screen Sharing, Remote Login, and more. For our purpose of sharing the Wi-Fi connection, we need to focus on the “Internet Sharing” service, which we’ll explore further in the next step.
The “Sharing” option in the System Preferences gives you full control over what you choose to share and who you choose to share it with. It allows you to customize your sharing settings based on your specific needs, ensuring a secure and efficient sharing experience.
Now that you’ve successfully located and clicked on the “Sharing” option, it’s time to move on to the next step and select the “Internet Sharing” service.
Step 3: Select Internet Sharing
Once you’ve clicked on the “Sharing” option in the System Preferences window, you’ll now need to select the “Internet Sharing” service. This service allows you to share your Mac’s internet connection with other devices.
In the Sharing window, you’ll notice a list of services on the left-hand side. Look for the “Internet Sharing” option and click on it to proceed. When selected, you’ll see a checkmark appear next to the Internet Sharing service, indicating that it’s enabled.
By choosing to enable Internet Sharing, you’re essentially turning your Mac into a wireless hotspot, allowing other devices to connect to the internet using your Mac’s internet connection. It’s a convenient way to share your Wi-Fi connectivity with other devices, such as smartphones, tablets, or even other computers, without the need for additional routers or access points.
However, before we can proceed with sharing the internet connection, there are a few more steps to configure and customize the settings. In the next steps, we’ll explore how to select your desired connection and enable specific sharing options to ensure a seamless and secure Wi-Fi sharing experience.
Now that you’ve successfully selected the “Internet Sharing” option, let’s move on to the next step and choose the desired connection from the “Share your connection from” menu.
Step 4: Choose the desired Connection from the Share Your Connection menu
After selecting the “Internet Sharing” option in the Sharing window, it’s time to choose the desired connection that you want to share with other devices. This step is crucial as it determines which internet source will be shared with the devices connecting to your Mac’s hotspot.
In the Internet Sharing section of the Sharing window, you’ll find a dropdown menu labeled “Share your connection from.” Click on this menu to view the available internet connection options on your Mac.
Depending on your Mac’s configuration, you’ll see various connection options listed, such as Ethernet, Wi-Fi, Bluetooth PAN, or even iPhone USB. Select the connection that you want to share from the list. For example, if you want to share your Wi-Fi connection, select the Wi-Fi option from the menu.
By choosing the desired connection, you’re telling your Mac to share that particular internet source with other devices that connect to its hotspot. It means that the devices connecting to your Mac will be able to access the internet using the chosen connection.
In some cases, you might have multiple internet sources available on your Mac, such as both Ethernet and Wi-Fi connections. In such situations, it’s essential to select the connection that you want to share based on its availability and stability. Consider choosing a connection with a stable and reliable internet connection to ensure a seamless sharing experience.
Now that you’ve successfully chosen the desired connection from the “Share your connection from” menu, it’s time to proceed to the next step and check the box beside Wi-Fi to configure the Wi-Fi sharing options.
Step 5: Check the box beside Wi-Fi
Once you’ve selected the desired internet connection in the “Share your connection from” menu, the next step in sharing your Wi-Fi with your Mac is to check the box beside Wi-Fi. This step allows you to configure the Wi-Fi sharing options and set up your Wi-Fi network for other devices to connect to.
By checking the box beside Wi-Fi, you’re indicating that you want to share the selected internet connection via a Wi-Fi network. This will enable other devices to connect to your Mac’s Wi-Fi hotspot and access the internet using the shared internet connection.
After checking the box beside Wi-Fi, you’ll notice that the Wi-Fi options button becomes clickable. Click on this button to continue configuring your Wi-Fi network settings.
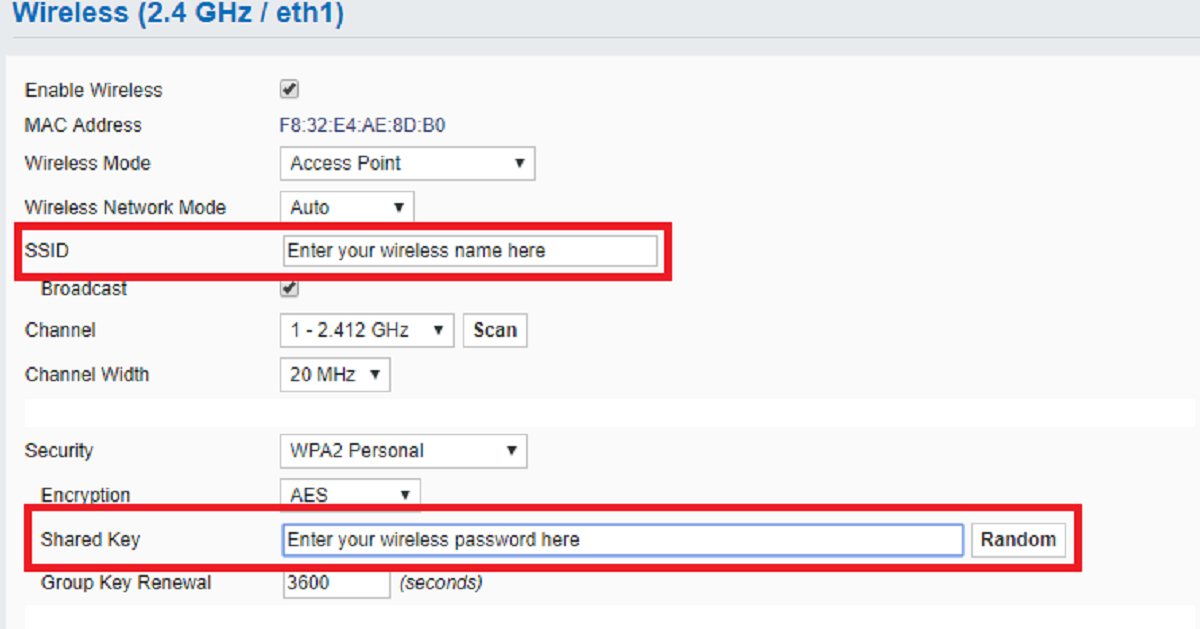
When configuring the Wi-Fi options, you have the flexibility to set your network name (SSID), security type, and password. It is recommended to choose a unique, easily recognizable network name and a strong, secure password to protect your network from unauthorized access.
Additionally, you can also choose your network’s channel and enable additional security features such as encryption and MAC address filtering. These options provide an extra layer of security and help ensure that only authorized devices can connect to your Wi-Fi network.
Once you have configured all the necessary Wi-Fi options, click on the OK button to save the settings and proceed with the next steps. Don’t worry if you need to make changes later; you can always come back and modify your Wi-Fi network settings in the Sharing preferences.
Now that you’ve successfully checked the box beside Wi-Fi and configured your Wi-Fi network options, it’s time to move on to the next step and enable Internet Sharing, turning your Mac into a Wi-Fi hotspot for other devices to connect to.
Step 6: Click on the Wi-Fi Options button
After checking the box beside Wi-Fi and indicating your intention to share your selected internet connection via a Wi-Fi network, it’s time to configure the specific settings for your Wi-Fi network. To do this, you’ll need to click on the Wi-Fi Options button.
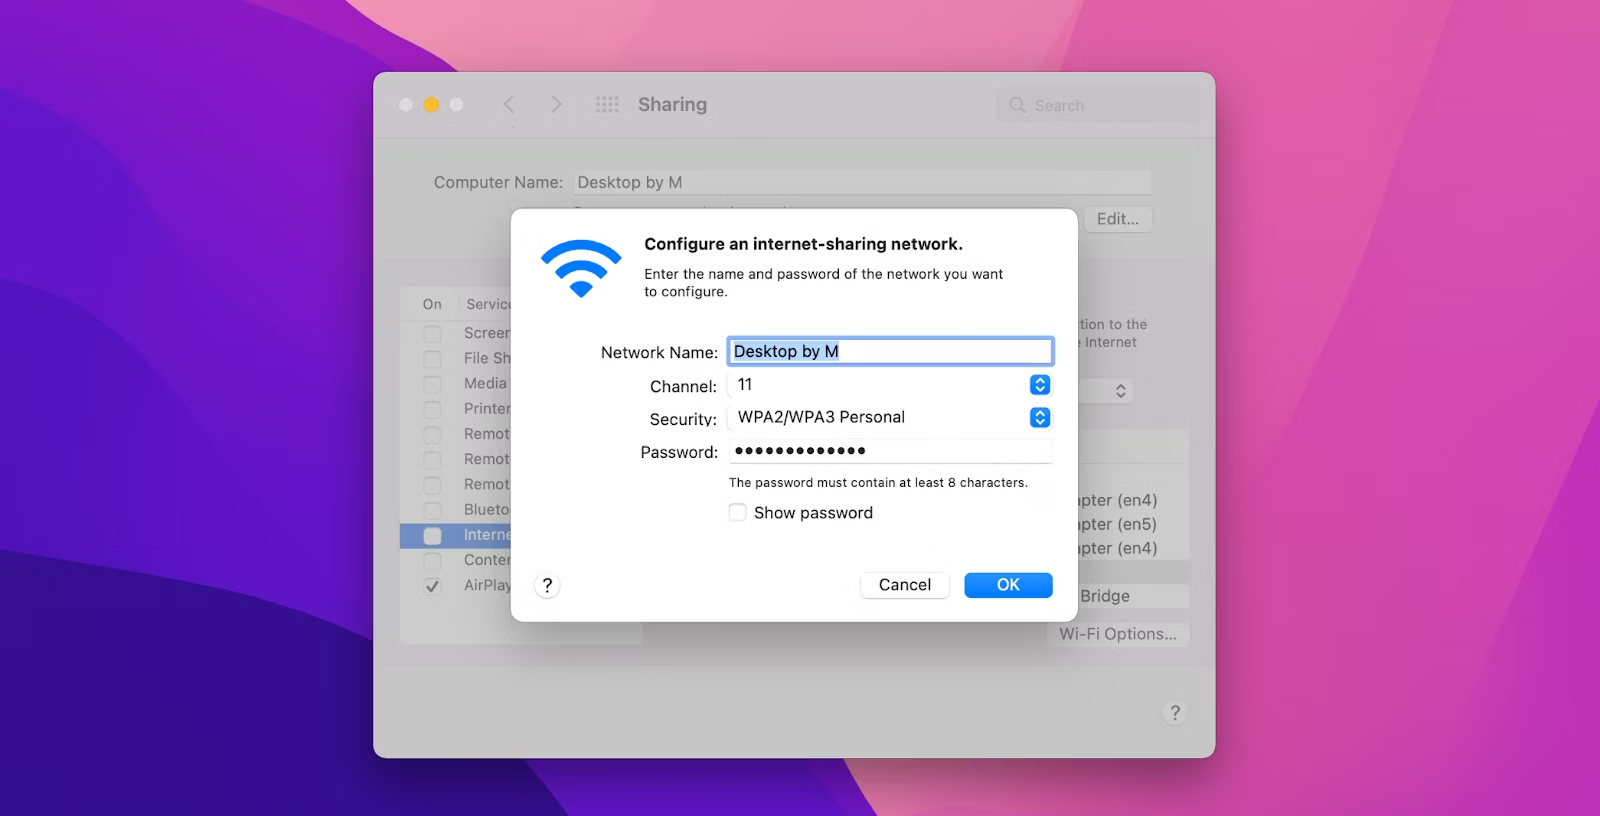
Clicking on the Wi-Fi Options button will open a new window where you can set up the details of your Wi-Fi network. This includes customizing your network name (SSID), choosing a security type, and setting a password for your Wi-Fi network.
When setting up your network name, choose a name that is unique and easily identifiable. A good network name makes it easy for others to recognize your Wi-Fi network when they want to connect to it. It’s recommended to avoid using any personal information or sensitive details in your network name for security reasons.
In terms of security, you have the option to choose different security types for your Wi-Fi network, such as WPA2 Personal or WPA/WPA2 Personal. It is advisable to select the highest security type available (typically WPA2 Personal) to ensure the privacy and integrity of your network.
After selecting the security type, set a strong password for your Wi-Fi network. A strong password should be a combination of uppercase and lowercase letters, numbers, and symbols. Avoid using common or easily guessable passwords to prevent unauthorized access to your network.
In addition to these basic settings, you may also have the option to customize the channel and enable other security features like encryption and MAC address filtering. These additional settings can provide added layers of security and help enhance the overall safety of your Wi-Fi network.
Once you have configured all the necessary Wi-Fi network options, click on the OK button to save the settings and proceed with enabling Internet Sharing. Keep in mind that you can always return to the Wi-Fi Options window later if you need to make any changes or adjustments.
Now that you’ve successfully clicked on the Wi-Fi Options button and customized your Wi-Fi network settings, let’s move on to the next step and enable Internet Sharing to activate your Wi-Fi hotspot.
Step 7: Set up your Wi-Fi network details
Now that you’ve clicked on the Wi-Fi Options button, it’s time to set up the specific details for your Wi-Fi network. This step allows you to customize your network name (SSID) and set a password for secure access.
In the Wi-Fi Options window, you’ll see a field labeled “Network Name” or “SSID.” This is where you can enter a unique name for your Wi-Fi network. It’s recommended to choose a name that is easily recognizable and distinguishable from other nearby networks. A creative and memorable network name can make it easier for others to identify and connect to your Wi-Fi network.
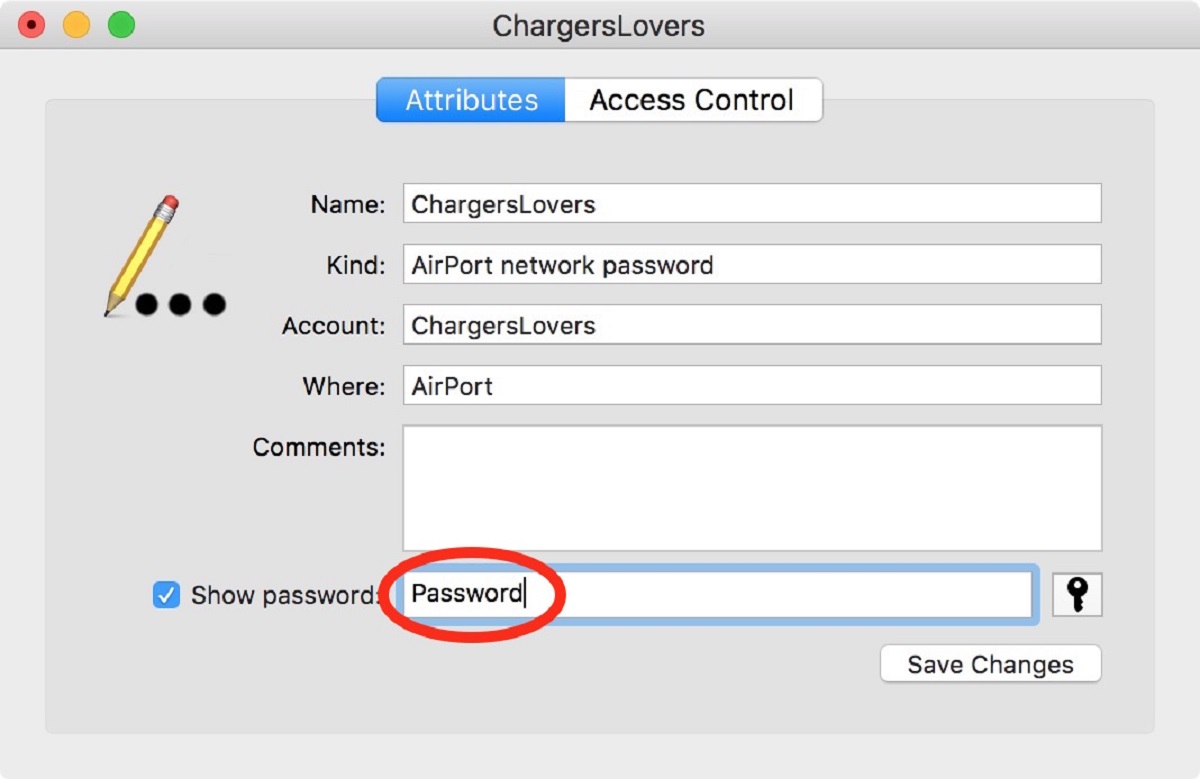
Next, you’ll need to set a password for your Wi-Fi network. This ensures that only authorized individuals can connect to your network. In the Wi-Fi Options window, locate the field labeled “Password” or “Security Key” and enter a strong, secure password. A strong password typically consists of a combination of uppercase and lowercase letters, numbers, and symbols. Avoid using common words or personal information in your password to improve its security.
Creating a secure Wi-Fi network is important to prevent unauthorized access and protect your internet connection. By setting a strong password, you can ensure that only individuals with the password can connect to your network, helping safeguard your data and privacy.
Additionally, you may have the option to customize other settings such as the security type and encryption method for your Wi-Fi network. It’s recommended to choose the most secure options available, such as WPA2 encryption and AES (Advanced Encryption Standard) security. These settings provide a higher level of protection against potential threats.
Remember to save your Wi-Fi network details once you have set them to ensure they take effect. This will allow other devices to connect to your Wi-Fi hotspot using the provided network name and password.
With the Wi-Fi network details properly configured and saved, you can move on to the next step, which involves enabling Internet Sharing and activating your Wi-Fi hotspot for other devices to connect to.
Step 8: Click on the OK button
After setting up your Wi-Fi network details, it’s time to finalize the configuration by clicking on the OK button in the Wi-Fi Options window. This step saves your settings and prepares your Mac to share its internet connection via the newly created Wi-Fi hotspot.
By clicking on the OK button, you confirm and apply the changes you’ve made to your Wi-Fi network settings. This ensures that your network name (SSID), password, and other preferences are saved and will be used when other devices attempt to connect to your Mac’s Wi-Fi hotspot.
Before clicking the OK button, it’s a good idea to double-check your Wi-Fi network details to ensure they are accurate and meet your requirements. Review the network name for clarity and make sure the password is strong and secure. By doing so, you’ll help prevent any potential issues down the line and ensure a seamless and secure Wi-Fi sharing experience.
Once you’ve clicked on the OK button, you can proceed to the next step, which involves enabling Internet Sharing. This will activate your Wi-Fi hotspot, allowing other devices to connect to your Mac’s internet connection.
Remember that you can always revisit the Wi-Fi Options window and modify your network details if needed. Simply open the Sharing preferences again, select the Internet Sharing option, and click on the Wi-Fi Options button to make any necessary changes. Having the flexibility to adjust your Wi-Fi network settings ensures that you can adapt to different situations and requirements.
With your Wi-Fi network details set up and saved, you’re now ready to move on to the final step of enabling Internet Sharing. This will establish your Mac as a Wi-Fi hotspot, enabling other devices to connect to the internet through your shared connection.
Step 9: Enable Internet Sharing
After setting up your Wi-Fi network details and saving your changes, the final step to share your Wi-Fi connection with your Mac is to enable Internet Sharing. This step activates your Mac as a Wi-Fi hotspot and allows other devices to connect and use your shared internet connection.
In the Sharing window of the System Preferences, you’ll see a checkbox next to “Internet Sharing.” Check this box to enable the feature. A confirmation prompt may appear, asking you to confirm your action. Click on the “Start” or “Enable” button in the prompt to proceed.
Once you’ve enabled Internet Sharing, your Mac will start broadcasting a Wi-Fi signal using the network name and password you set up earlier. Other devices within range will be able to detect your Wi-Fi hotspot and connect to it.
It’s important to note that while Internet Sharing is enabled, your Mac will prioritize sharing the internet connection over other tasks. This means that your Mac may have a reduced or limited internet speed as it provides a portion of its bandwidth to the connected devices.
To ensure a smooth and uninterrupted Wi-Fi sharing experience, ensure that your Mac remains powered on and connected to the internet. If you need to pause or disable Internet Sharing at any time, simply uncheck the “Internet Sharing” box in the Sharing preferences.
Enabling Internet Sharing gives you the ability to provide internet access to other devices, such as smartphones, tablets, or even other computers. It allows you to extend your internet connection to those who may not have access or provide a separate network for guests without compromising the security of your main Wi-Fi network.
With Internet Sharing enabled, you have successfully shared your Wi-Fi connection with your Mac. Other devices can now connect to your Wi-Fi hotspot using the network name and password that you set up. Enjoy the convenience and flexibility of having a shared Wi-Fi network on your Mac!
Conclusion
In this guide, we’ve walked through the step-by-step process of sharing your Wi-Fi connection with your Mac. By following the instructions and configuring the necessary settings, you can easily create a Wi-Fi hotspot that allows other devices to connect and use your shared internet connection.
Sharing your Wi-Fi connection with your Mac is a convenient way to provide internet access to other devices, whether it’s for a colleague, friend, or family member. It removes the need for additional routers or access points and allows you to extend your internet connection to those who may not have access.
Throughout the process, we’ve covered essential steps such as opening the System Preferences, selecting the Sharing option, enabling Internet Sharing, and configuring your Wi-Fi network details. By clicking on the necessary buttons and fields, you can smoothly set up your Wi-Fi hotspot and share your internet connection.
Remember, when setting up your Wi-Fi network details, it’s crucial to choose a unique network name (SSID) and a strong, secure password. This helps protect your network from unauthorized access and ensures the privacy and integrity of your internet connection.
Lastly, once you’ve enabled Internet Sharing, your Mac will be broadcasting a Wi-Fi signal that other devices can connect to. Keep in mind that your Mac’s internet speed may be slightly affected as it prioritizes providing the shared connection to connected devices.
By following this guide, you now have the knowledge and tools to share your Wi-Fi connection with your Mac effectively. Enjoy the flexibility and convenience of having a Wi-Fi hotspot on your Mac, providing internet access to those who need it.