Introduction
Voicemail is a convenient feature of modern smartphones that allows callers to leave voice messages when you are unable to answer a call. Setting up voicemail on your Android smartphone is a simple process that ensures you never miss an important message.
Whether you’re a beginner or an experienced Android user, this guide will walk you through the steps to set up voicemail on your Android smartphone. By following these instructions, you’ll be able to personalize your voicemail greetings, record a professional message, and customize voicemail settings to meet your specific needs.
Keep in mind that the steps outlined below may vary slightly depending on the make and model of your Android smartphone, as well as the version of the operating system you are using. However, the general process remains the same.
So, without further ado, let’s dive into the step-by-step instructions to set up voicemail on your Android smartphone and ensure that you never miss an important message again!
Step 1: Open the Phone App
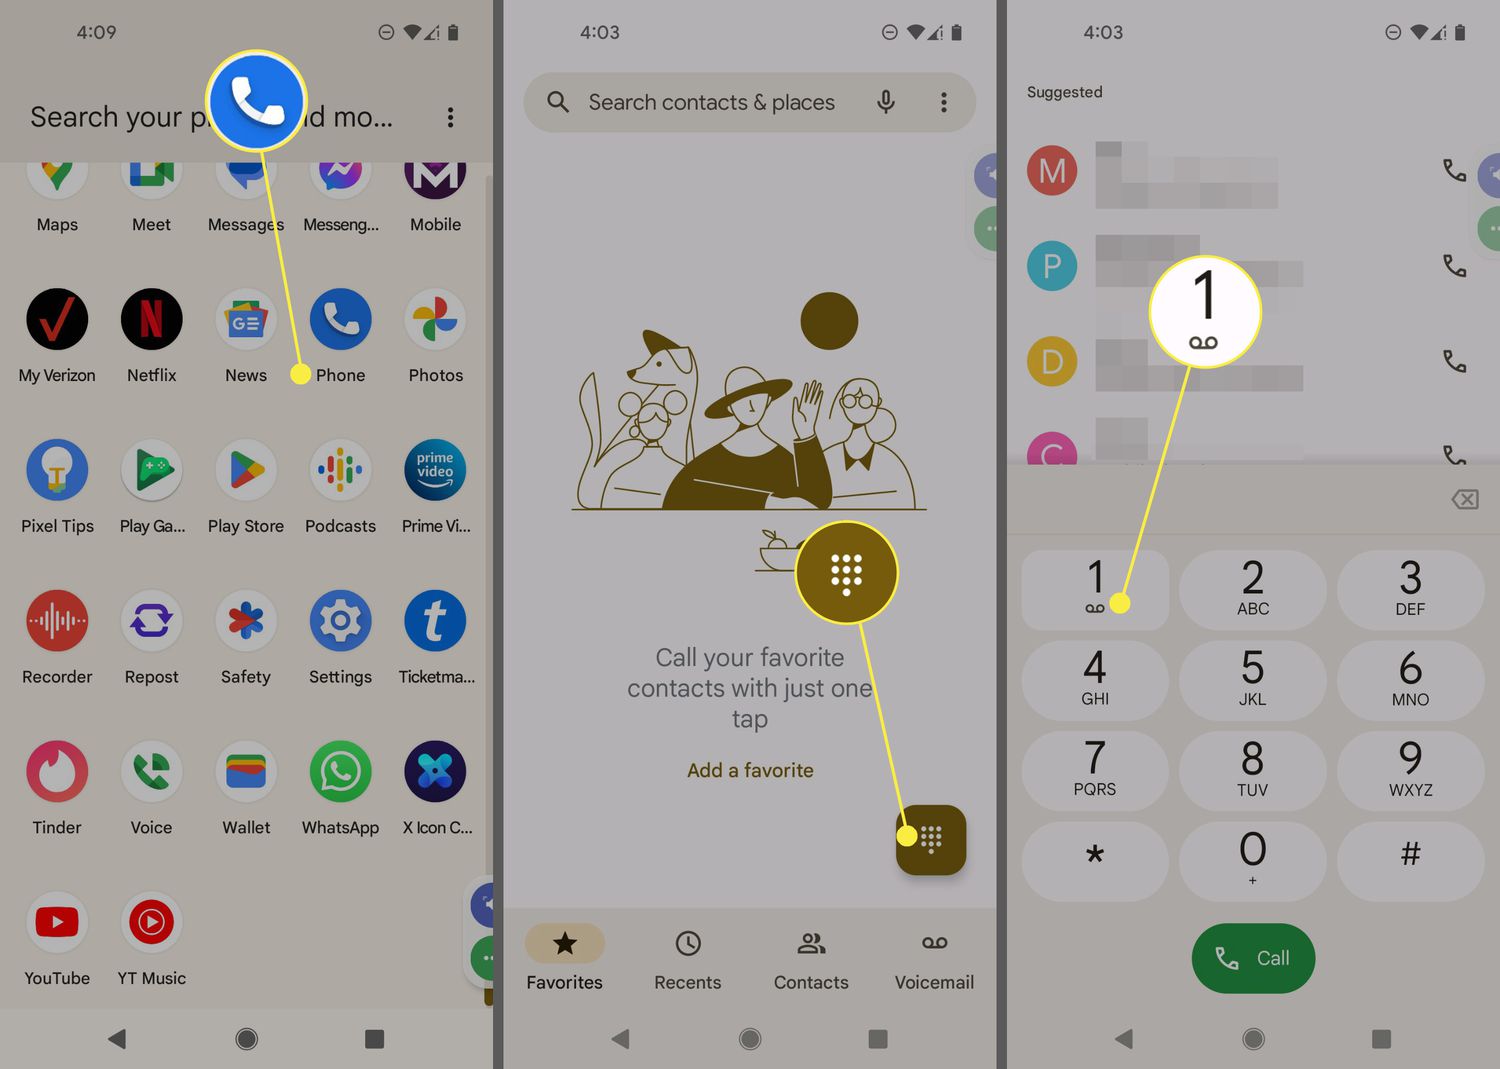
The first step in setting up voicemail on your Android smartphone is to open the Phone app. This app is typically represented by an icon that looks like a phone receiver and can usually be found on your device’s home screen or in the app drawer.
Once you locate the Phone app, tap on it to open it. The Phone app will be the gateway to accessing your voicemail settings.
It’s worth noting that the appearance and arrangement of the Phone app may vary depending on the manufacturer and the version of Android you are running. However, the basic functionality remains the same across most devices.
If you are having trouble finding the Phone app, you can also try searching for it in the app drawer or using the device’s built-in search function. Simply swipe down on your home screen or access your app drawer and enter “phone” or “dialer” in the search bar to locate the app.
Once you have successfully opened the Phone app, you are ready to proceed to the next step in setting up your voicemail on Android.
Step 2: Access the Voicemail Settings
After opening the Phone app, the next step is to access the voicemail settings. The location of these settings may vary slightly depending on the version of Android you are using and the specific modifications made by the manufacturer of your device. However, in most cases, the voicemail settings can be easily accessed by following these steps:
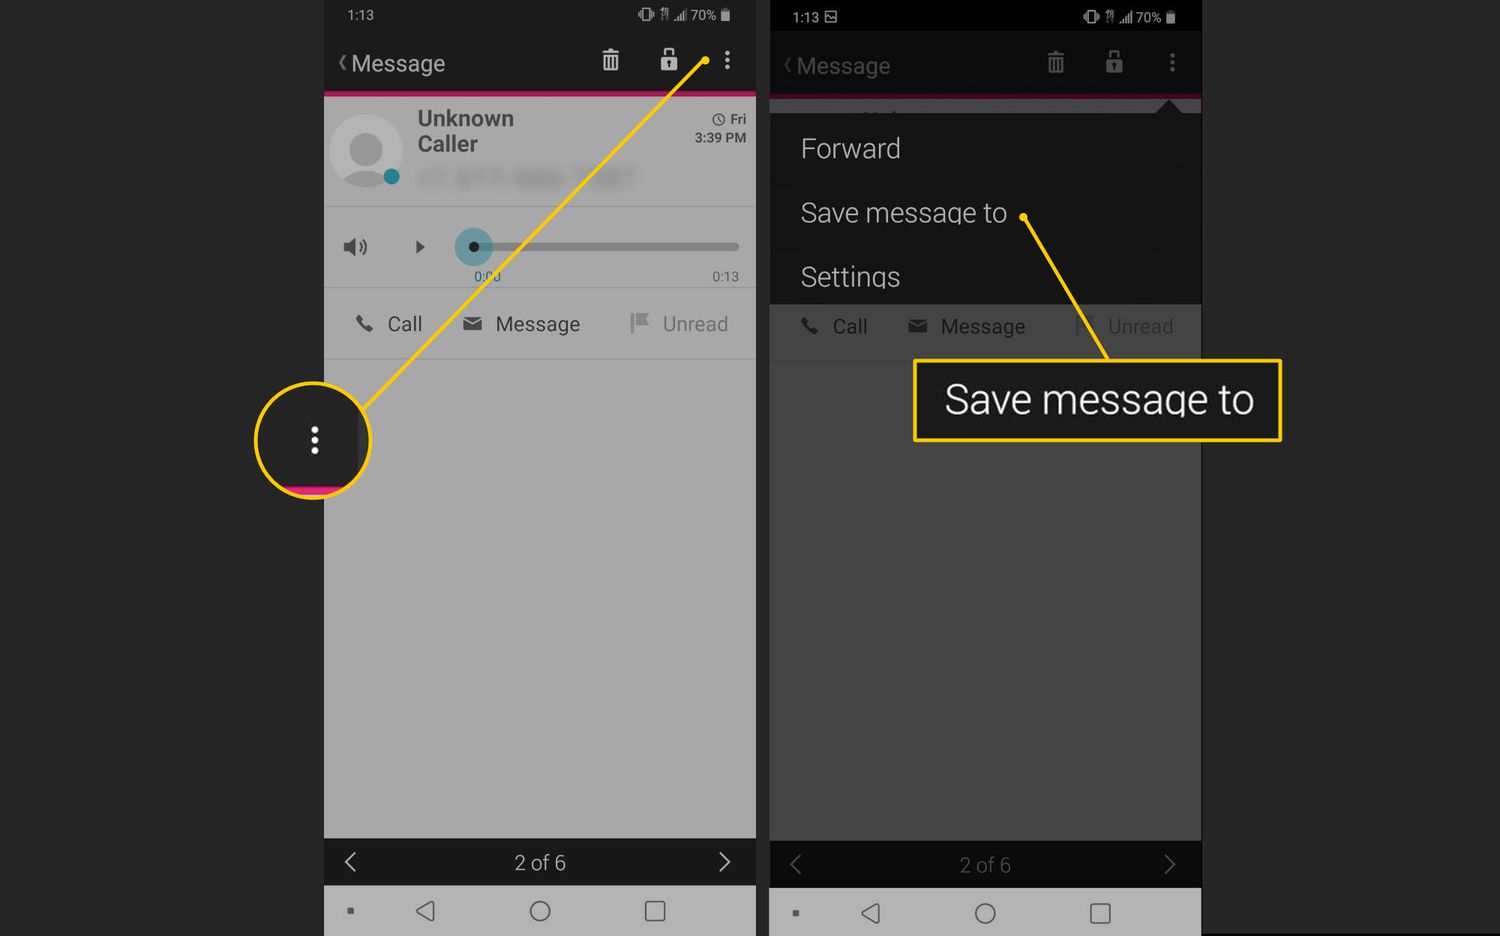
1. Look for the Menu or More Options icon: In the Phone app, look for a button or icon that resembles three dots, three lines, or a More Options menu. This icon is usually located in the top-right or bottom-right corner of the screen. Tapping on this icon will open a dropdown menu with additional options.
2. Locate the Voicemail option: In the dropdown menu, search for an option labeled “Voicemail” or “Voicemail Settings.” This option may be located under a sub-menu, such as “Settings,” “Call Settings,” or “Advanced Settings.”
3. Tap on Voicemail Settings: Once you have found the Voicemail option, tap on it to access the voicemail settings. This will open a new screen with various options and settings related to your voicemail.
If you are unable to locate the voicemail settings using the above steps, you can also try accessing them through the device’s main Settings app. Open the Settings app, then select “Apps” or “Applications” and look for the Phone or Dialer app. Tap on the Phone app, then locate and select the “Voicemail” or “Voicemail Settings” option.
Once you successfully access the voicemail settings, you can proceed to the next step of setting up your voicemail on Android.
Step 3: Set Up Your Voicemail Greeting
Setting up a personalized voicemail greeting adds a professional and personal touch to your voicemail. It allows callers to hear a brief message from you before leaving their message. To set up your voicemail greeting, follow these steps:
1. Navigate to the Voicemail Greetings section: Once you are in the voicemail settings, look for an option called “Voicemail Greetings” or something similar. This section allows you to customize your voicemail greeting.
2. Choose a default greeting or create a custom one: Depending on your device, you may have the option to select a pre-recorded default greeting or create a custom greeting. A default greeting is a generic message provided by your carrier, while a custom greeting allows you to record a personalized message.
3. Select the custom greeting option and tap on the record button: If you want to record a custom greeting, select the option to create a custom greeting and tap on the record button. This will allow you to record your own voicemail message.
4. Record your voicemail greeting: When prompted, speak clearly and record your voicemail greeting. You can include information such as your name, a brief message, and instructions for the caller to leave their message. Make sure to follow any guidelines and time limits provided by your carrier.
5. Review and save your greeting: After recording your voicemail greeting, listen to it to ensure it sounds just the way you want it. If you are satisfied with the recording, save it by following the on-screen instructions. If not, you can re-record your greeting until you are happy with the result.
Remember, the voicemail greeting is the first impression callers will have when reaching your voicemail, so make sure to convey the tone and information that best represents you and your preferences.
Once you have successfully set up your voicemail greeting, you are ready to move on to the next step and record your voicemail message.
Step 4: Record Your Voicemail Message
Now that you have set up your voicemail greeting, it’s time to record your voicemail message. Your voicemail message is what callers will hear after listening to your personalized greeting. Here’s how you can record your voicemail message:
1. Access the Voicemail Message section: Within the voicemail settings, there should be an option called “Voicemail Message” or something similar. This is where you can record and manage your voicemail message.
2. Tap on the record button: In the Voicemail Message section, tap on the record button to start recording your voicemail message. You will be prompted to begin speaking once the recording starts.
3. Speak clearly and concisely: When recording your voicemail message, speak clearly and provide any necessary information or instructions to the caller. For example, you can ask them to leave their name, contact number, and a brief message.
4. Keep it professional and informative: Your voicemail message should be professional and reflect your style. Avoid using overly casual language or inappropriate jokes. Remember, this message represents you when you are unable to answer the phone.
5. Review and save your voicemail message: After recording your message, listen to it to ensure it sounds clear and meets your satisfaction. If you are content with the recording, save it according to the on-screen instructions. If not, you can re-record your voicemail message until you are pleased with the result.
By recording a concise and informative voicemail message, callers will have a better understanding of what you expect from them when leaving a message. It also helps ensure that you receive the necessary information to respond to their needs effectively.
Once you have successfully recorded your voicemail message, you can proceed to the next step and customize your voicemail settings to suit your preferences.
Step 5: Customizing Voicemail Settings
Customizing your voicemail settings allows you to personalize and optimize your voicemail experience. Android smartphones offer various options to customize these settings to suit your needs. Follow the steps below to customize your voicemail settings:
1. Access the Voicemail Settings menu: In the voicemail settings, look for an option labeled “Settings” or “Advanced Settings.” Tap on this option to access the customization menu.
2. Review and modify notification preferences: The notification preferences allow you to choose how you receive notifications for new voicemails. You can select options like sound alerts, vibration, or silent notifications. Customize it to fit your preferences and lifestyle.
3. Set up voicemail transcription (if available): Some Android devices offer voicemail transcription services that convert your voicemail messages into text. If this feature is available, you can choose to enable or disable it in the voicemail settings.
4. Enable or disable voicemail forwarding: Voicemail forwarding allows you to redirect your voicemails to another phone number or email address. If you want to forward your voicemails, select this option and provide the desired forwarding details. Otherwise, you can disable this feature.
5. Set up voicemail storage preferences: In this section, you can specify how long you want to keep your voicemail messages. Most devices offer options to store voicemails for a specific number of days or delete them automatically after a certain period.
6. Configure voice recognition (if available): On some Android devices, you can enable voice recognition for voicemail access. This feature allows you to use your voice to navigate and access your voicemail messages.
7. Customize other voicemail settings: Depending on your device, there may be additional customization options available. These might include options to change the language, adjust playback speed, or integrate your voicemail with other messaging apps.
Take the time to explore the different options and customize your voicemail settings according to your preferences. By customizing these settings, you can optimize your voicemail experience and make it more convenient for yourself and the callers.
Once you have customized your voicemail settings, you are ready to move on to the final step of testing your voicemail to ensure everything is functioning correctly.
Step 6: Testing Your Voicemail
After setting up and customizing your voicemail, it’s crucial to test it to ensure that everything is functioning correctly. Testing your voicemail will help you verify that callers can leave messages and that you can properly access and listen to those messages. Follow these steps to test your voicemail:
1. Ask someone to call and leave a voicemail: Reach out to a friend, family member, or colleague and request their assistance in testing your voicemail. Ask them to call your phone number and leave a brief message, including their name and phone number.
2. Allow the caller to leave a voicemail: Let the call go to voicemail and instruct the caller to leave a message. It’s essential to ensure that the caller is directed to the voicemail system, rather than your phone ringing endlessly or being sent to another service.
3. Check for a voicemail notification: Once the caller has left a message, your Android smartphone should notify you of a new voicemail. Look for a message or icon on your device’s notification bar or home screen indicating that you have a new voicemail.
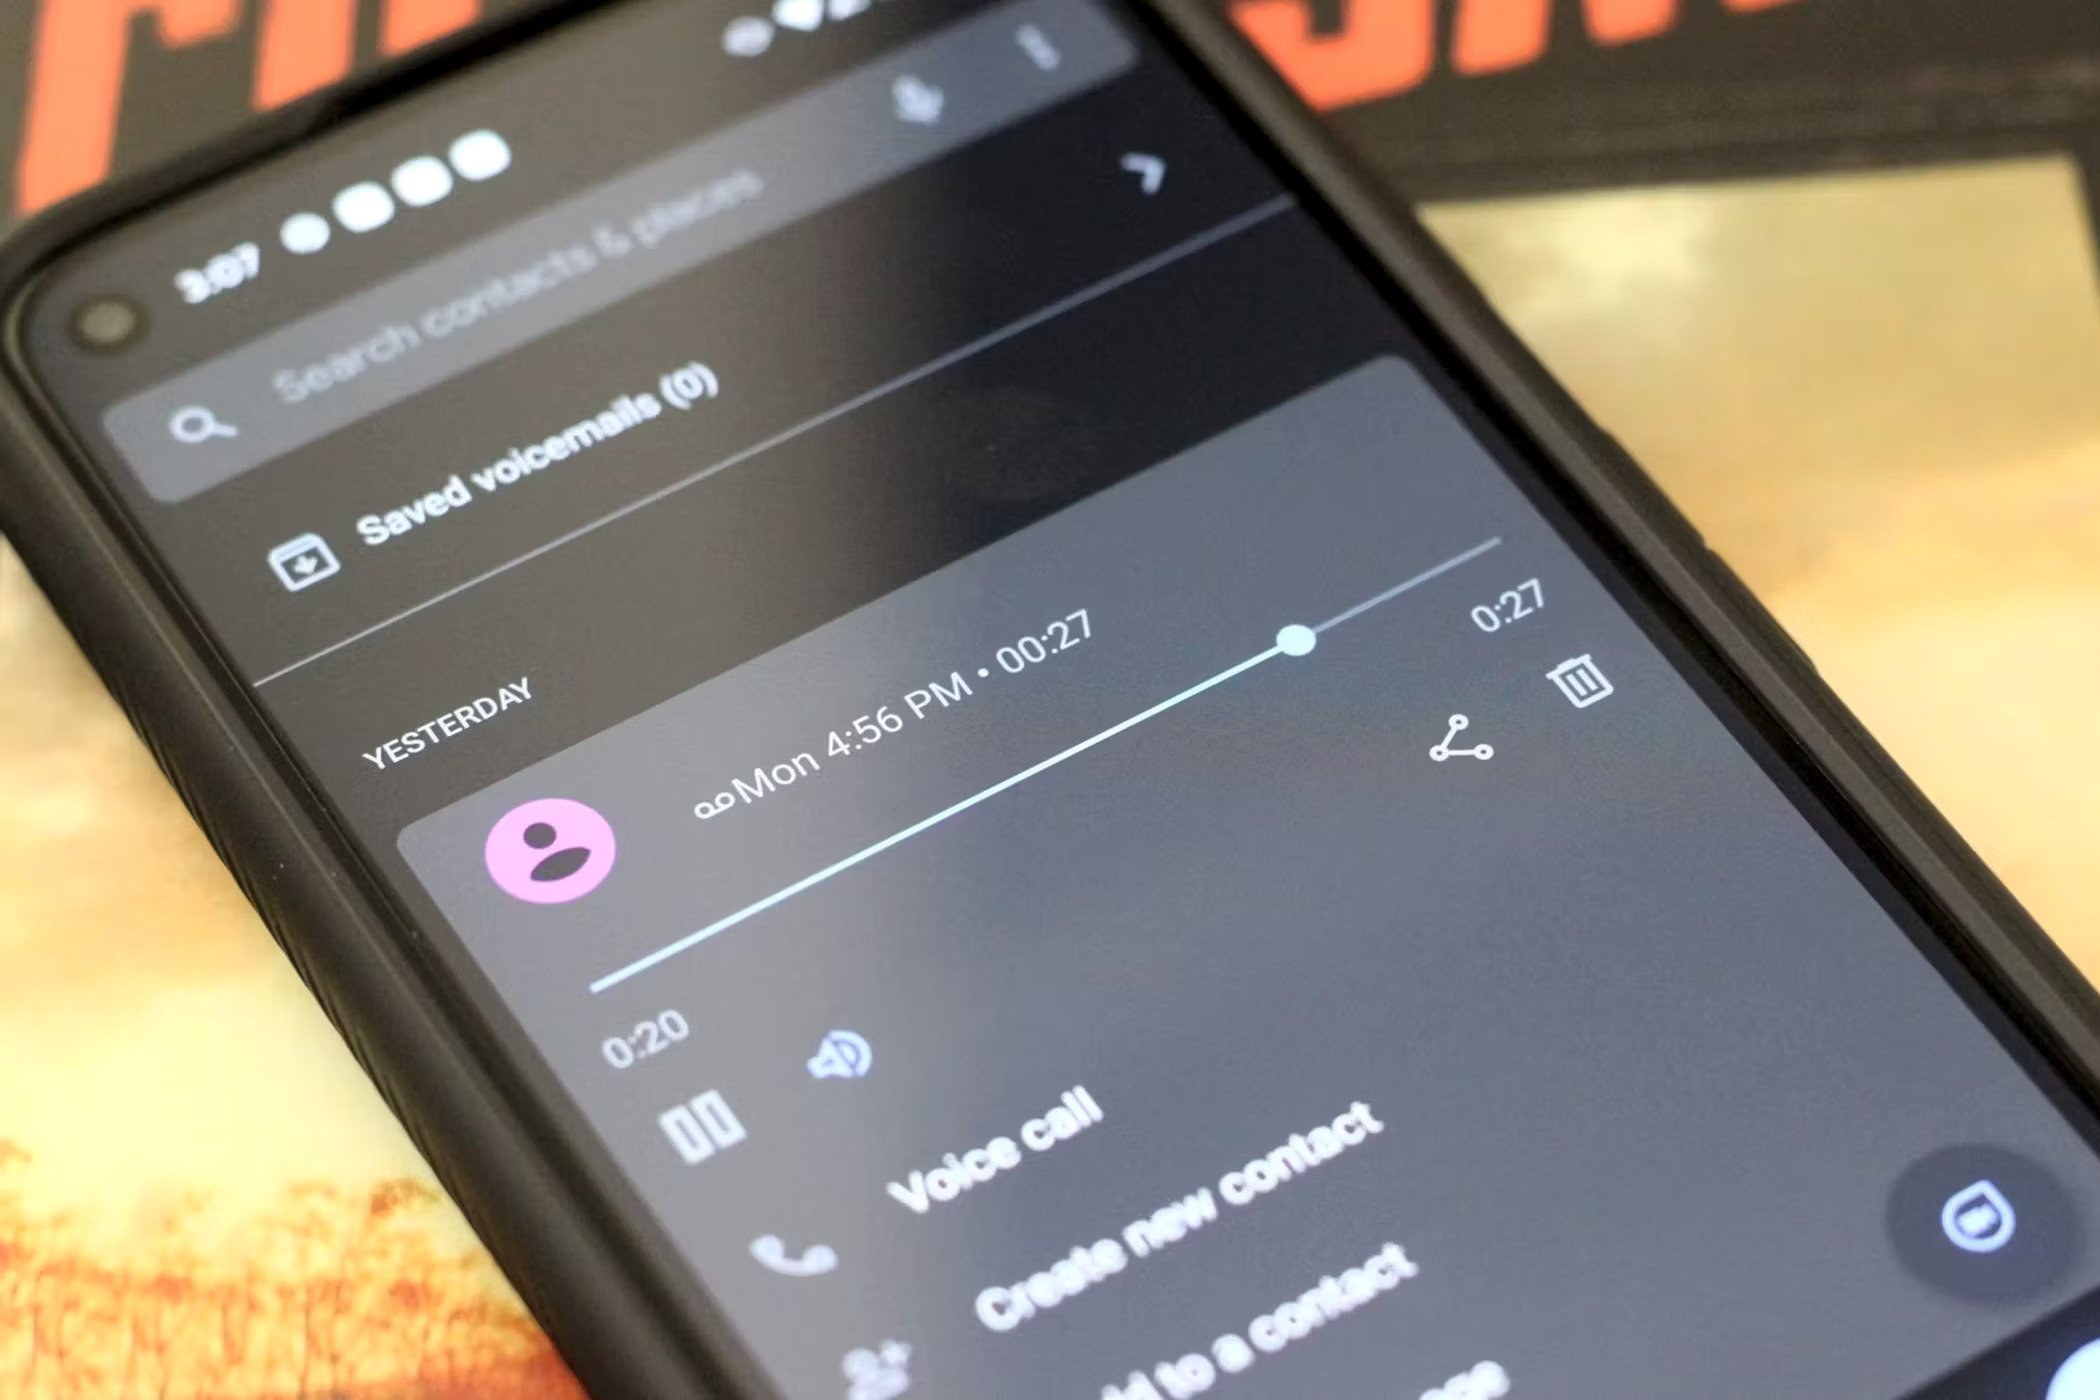
4. Access your voicemail: Open the Phone app on your Android smartphone. Look for the voicemail icon or navigate to its location as you did in previous steps. Tap on the voicemail option to access the voicemail system.
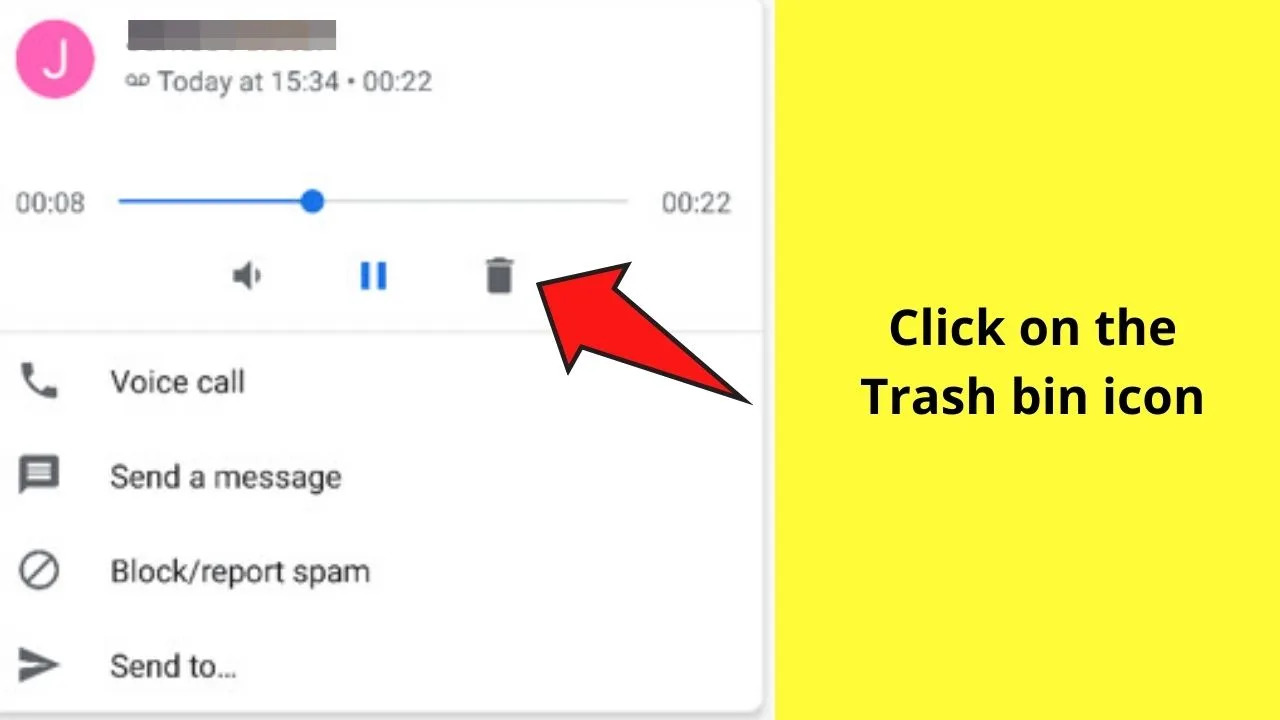
5. Listen to the voicemail message: Open the voicemail system and locate the new voicemail message. Tap on the message to listen to it. Ensure that the message playback is clear and that you can hear the caller’s voice and the information they provided.
6. Take note of any issues or problems: During the testing process, pay attention to any issues or problems that arise. For example, if the voicemail notification doesn’t appear, or if you are unable to access or listen to the voicemail message, there may be a configuration issue that needs to be addressed.
If you encounter any issues during the testing process, refer back to the previous steps and verify that you have correctly set up and customized your voicemail. You can also consult the user manual or contact your phone’s manufacturer or service provider for further assistance.
By testing your voicemail, you can ensure that it is fully operational and functioning as intended. This will help you stay connected with callers and retrieve important messages when you are unable to answer your phone.
Conclusion
Setting up voicemail on your Android smartphone is a straightforward process that ensures you never miss crucial messages when you cannot answer a call. By following the step-by-step instructions outlined in this guide, you can personalize your voicemail greetings, record a professional message, and customize voicemail settings to meet your specific requirements.
Remember, the first impression callers have when reaching your voicemail is your personalized greeting. Take the time to record a clear and concise message that sets the right tone and provides any necessary instructions for callers.
Customizing your voicemail settings allows you to optimize your voicemail experience further. You can choose notification preferences, enable voicemail transcription, forward voicemails, set storage preferences, and more. Take advantage of these customization options to personalize your voicemail system to suit your needs and preferences.
Once you have set up and customized your voicemail, it is crucial to test it to ensure everything is functioning correctly. Ask someone to call and leave a voicemail, then check for voicemail notifications, access the message, and listen to it. If any issues arise during the testing process, refer back to the steps and ensure that you have correctly followed each one.
By setting up and testing your voicemail, you can ensure that callers have a seamless experience when leaving messages, and you can easily access and respond to those messages. Voicemail is a valuable tool that allows you to stay connected and never miss important information, ensuring effective communication even when you are unavailable to answer calls.
So, what are you waiting for? Follow the steps in this guide, set up your voicemail, and enjoy the peace of mind that comes with knowing you are always reachable, even when you can’t answer your phone.