Introduction
Setting Firefox as your default browser allows you to enjoy a seamless browsing experience with your preferred browser taking the helm whenever you click on a link. Whether you’re using a Windows PC, a Mac, or a Linux machine, Firefox offers a simple and straightforward process to make it your default browser.
Firefox, known for its speed, security, and user-friendly interface, has a loyal user base who appreciate its customizable features and extensive library of add-ons and extensions. If you’re one of those Firefox enthusiasts and want to make it your default browser, you’ve come to the right place.
In this guide, we’ll walk you through the step-by-step process of setting Firefox as your default browser on various operating systems, including Windows, macOS, and Linux. By the end of this article, you’ll be able to seamlessly launch links and open webpages using Firefox as your default browser.
So, without further ado, let’s dive in and get Firefox set as your default browser!
Step 1: Open Firefox Browser
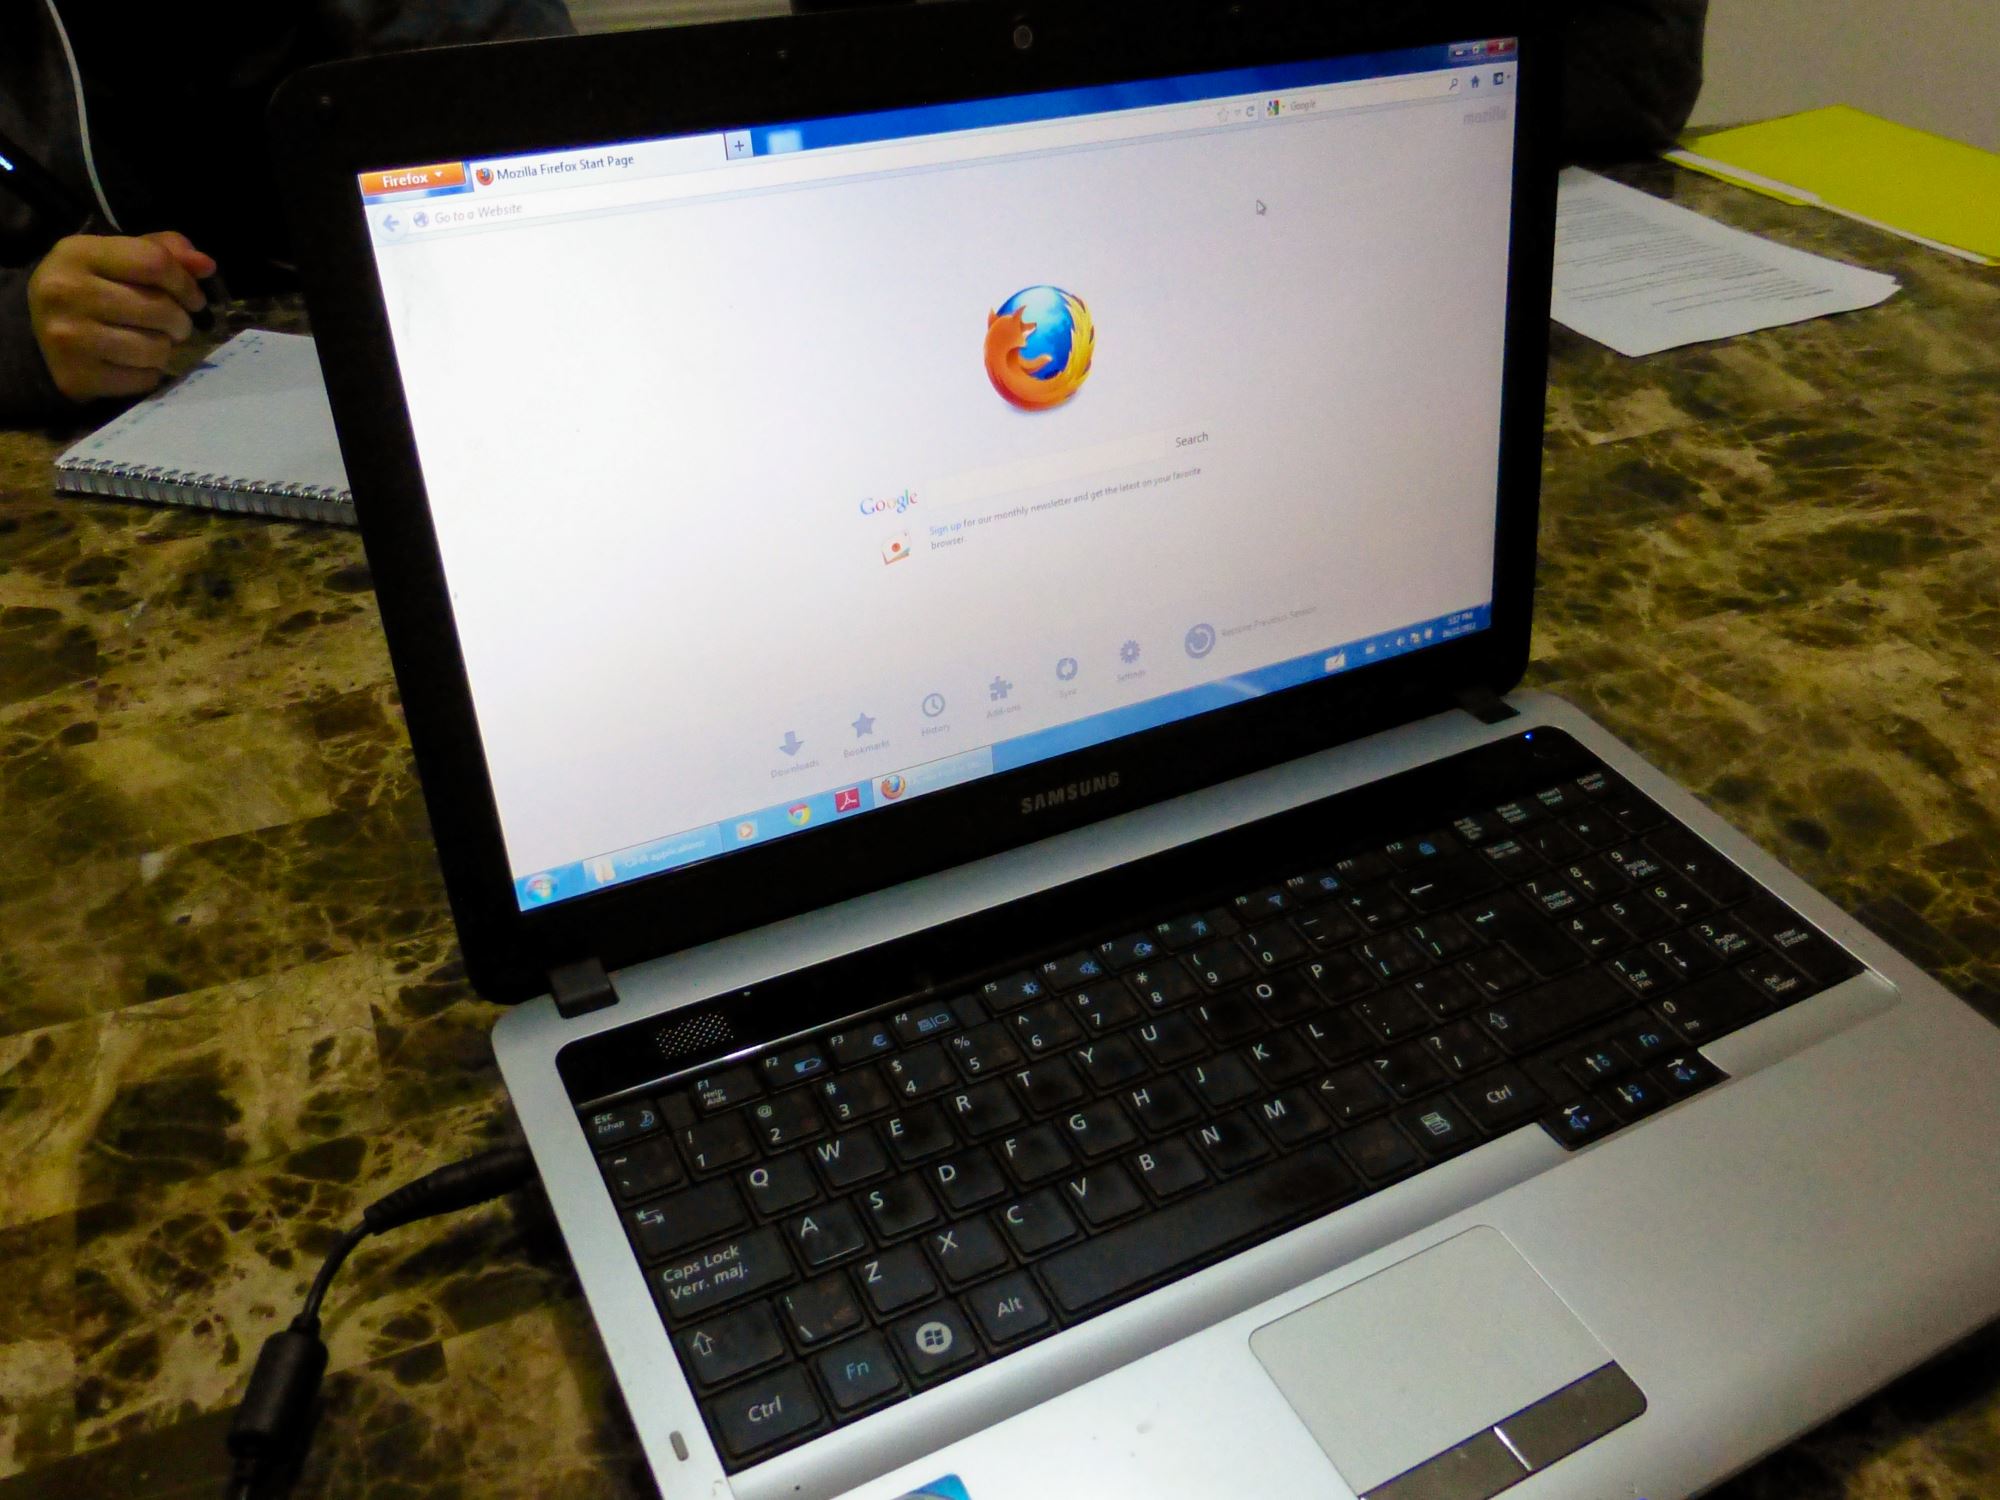
The first step in setting Firefox as your default browser is to open the Firefox browser itself. If you don’t have Firefox installed on your computer, you can download it for free from the official Mozilla website.
Once you have Firefox installed, follow these steps to open the browser:
- Locate the Firefox icon on your desktop or in your applications folder and double-click on it.
- If Firefox is not already set as your default browser, you may see a prompt asking if you want to set it as the default. You can simply click “Yes” to proceed.
- If the prompt does not appear or if you want to manually set Firefox as your default browser, continue to the next step.
By following these steps, you will have successfully opened the Firefox browser on your computer. Now, let’s move on to the next step and access the settings menu in Firefox.
Step 2: Access the Settings Menu
Once you have Firefox open on your computer, the next step is to access the settings menu. From the settings menu, you’ll be able to make the necessary changes to set Firefox as your default browser. Here’s how you can access the settings menu:
- Look for the three horizontal lines in the top-right corner of the Firefox window. This is the menu button.
- Click on the menu button to open a dropdown menu.
- In the dropdown menu, locate and click on the “Options” or “Preferences” tab. The exact wording may vary depending on your operating system version.
Alternatively, you can also access the settings menu by typing “about:preferences” or “about:options” in the address bar and pressing Enter.
Once you’ve accessed the settings menu, you’re ready to proceed to the next step where we’ll explore how to set Firefox as the default browser on Windows.
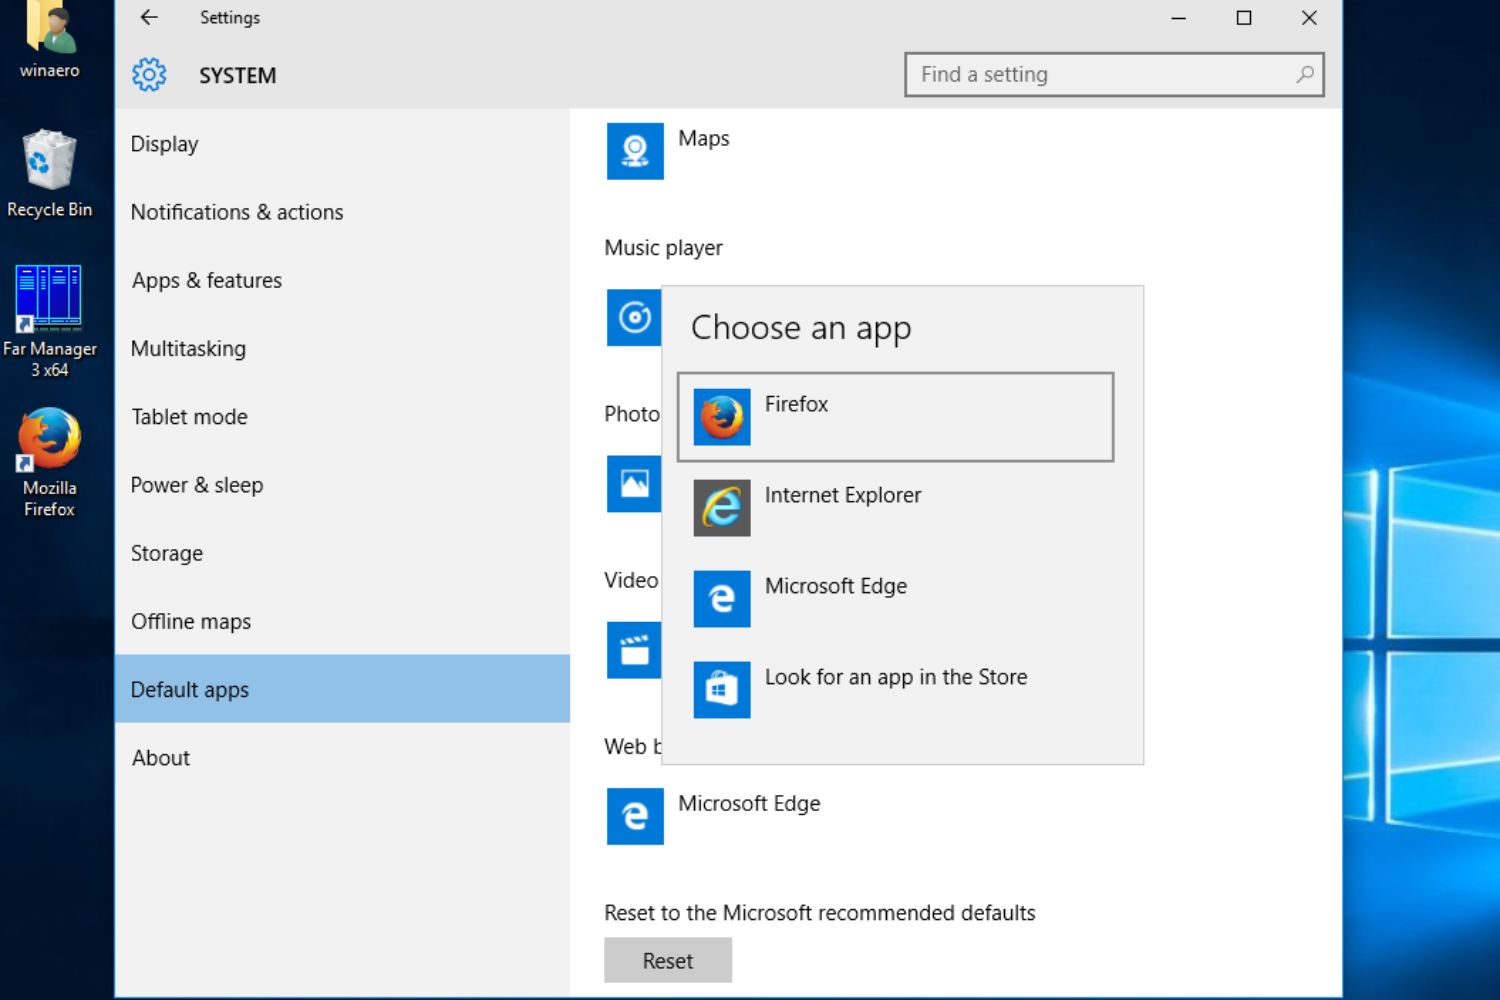
Step 3: Set Firefox as the Default Browser on Windows
If you’re using a Windows computer, follow these steps to set Firefox as your default browser:
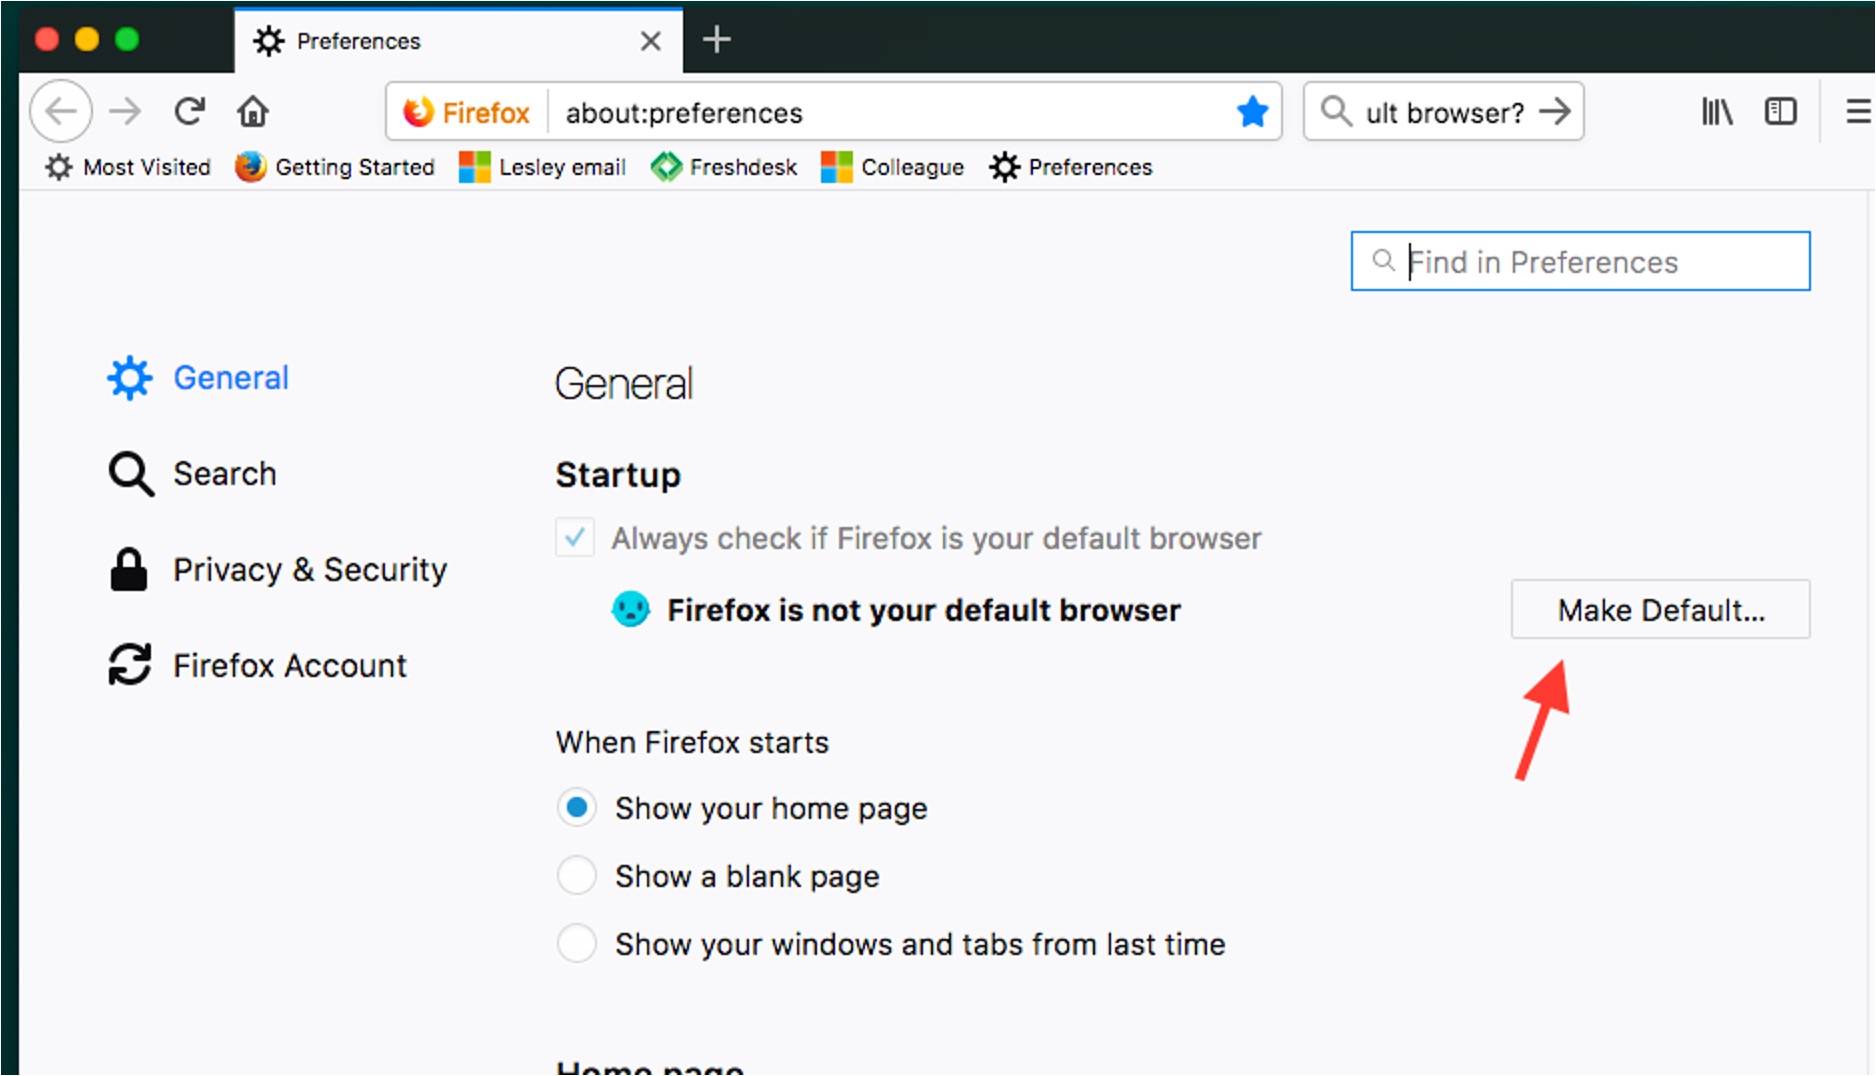
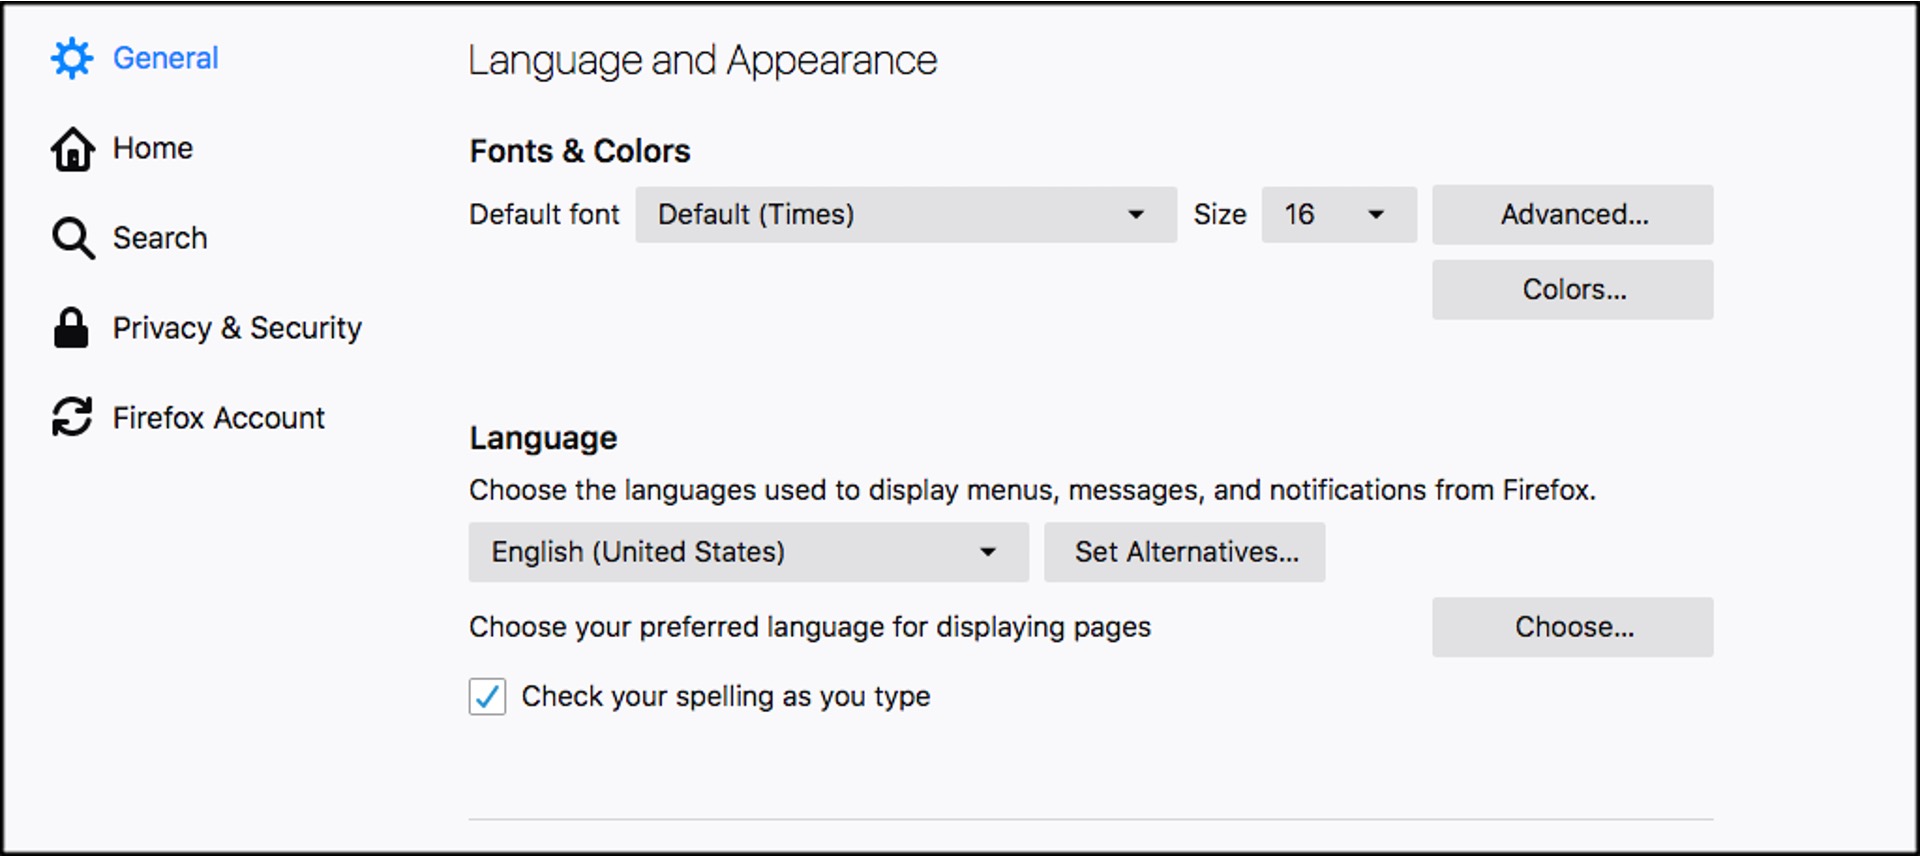
- In the Firefox options menu, click on the “General” tab located on the left-hand side.
- Scroll down to the “Startup” section and look for the heading that says “Default Browser”.
- Under the “Default Browser” heading, click on the “Make Default” button.
- A prompt will appear asking if you want to set Firefox as your default browser. Click on “Yes” to confirm your choice.
- Once selected, Firefox will be set as your default browser on Windows.
That’s it! Firefox is now your default browser on Windows. Whenever you click on a link, it will automatically open in Firefox. You can continue browsing with Firefox as your primary browser and enjoy its features and functionalities.
Now, let’s move on to the next step and explore how to set Firefox as the default browser on macOS.
Step 4: Set Firefox as the Default Browser on macOS
If you’re using a Mac and want to set Firefox as your default browser, follow these steps:
- In the Firefox options menu, click on the “General” tab located on the left-hand side.
- Scroll down to the “Default Browser” section.
- Click on the “Make Firefox the Default Browser” button.
- A window will appear asking if you want to set Firefox as your default browser. Click on “Use Firefox” to confirm your choice.
- Firefox will now be set as your default browser on macOS.
That’s it! You’ve successfully made Firefox your default browser on your Mac. From now on, any links you click on will automatically open in Firefox.
Now that you’ve set Firefox as your default browser on macOS, let’s move on to the next step and learn how to do the same on Linux.
Step 5: Set Firefox as the Default Browser on Linux
If you’re using a Linux operating system, follow these steps to set Firefox as your default browser:
- Open a terminal window by pressing
Ctrl+Alt+Ton your keyboard. - Type the following command in the terminal and press Enter:
xdg-settings set default-web-browser firefox.desktop - This command sets Firefox as the default browser for your Linux system.
Great! Firefox is now your default browser on Linux. Whenever you open a link, it will automatically launch in Firefox.
With Firefox set as your default browser on Linux, you can now enjoy a seamless browsing experience with your favorite features and extensions.
Now, let’s move on to the final step and verify that Firefox is indeed set as the default browser.
Step 6: Verify Firefox as the Default Browser
After setting Firefox as your default browser, it’s a good idea to verify that the changes have been successfully applied. Here’s how you can do it:
- Open any link from an external source, such as an email or a document.
- Wait for the link to open in a browser.
- Check if the browser that opens is Firefox.
- If Firefox opens, congratulations! It means that Firefox is now your default browser.
- If a different browser opens, you may need to repeat the steps mentioned earlier or double-check your system’s default browser settings.
Verifying Firefox as the default browser ensures that you can seamlessly browse the web using Firefox as your primary browser.
Now that you’ve verified Firefox as the default browser, you’re all set to enjoy a faster, more secure, and personalized browsing experience with Firefox.
Congratulations on successfully setting Firefox as your default browser!
Conclusion
Setting Firefox as your default browser is a simple process that allows you to enjoy a seamless browsing experience with your preferred browser. In this guide, we have walked through the step-by-step process of setting Firefox as your default browser on Windows, macOS, and Linux.
By following the instructions outlined in this article, you can easily open links and access webpages using Firefox as your default browser. Whether you’re attracted to Firefox’s speed, security, or customization options, making it your default browser ensures that you can fully take advantage of its features and functionalities.
Remember to access the settings menu in Firefox, set it as the default browser on your specific operating system, and verify the changes to ensure that Firefox is successfully set as the default browser.
Now that you have Firefox as your default browser, you can explore its extensive library of add-ons, personalize your browsing experience, and enjoy its user-friendly interface.
Thank you for following this guide. We hope you found it helpful and that you enjoy using Firefox as your default browser!