Introduction
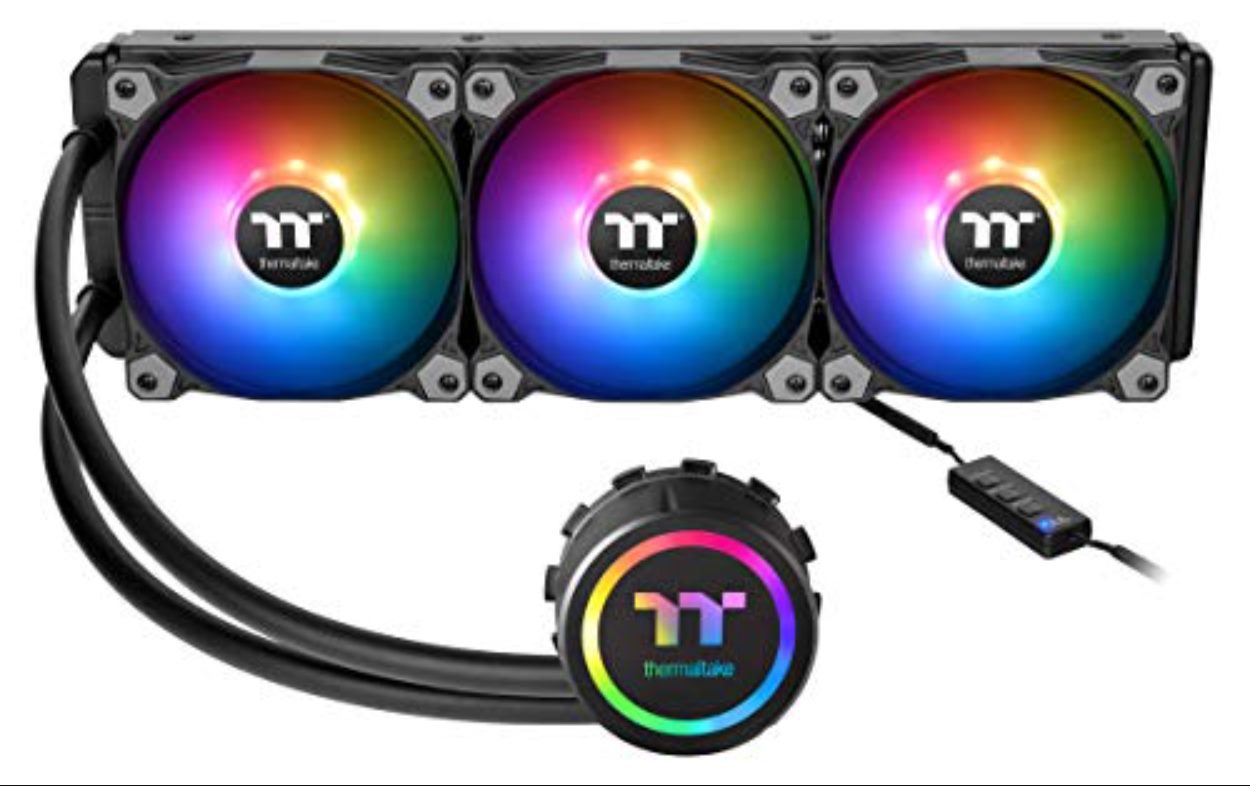
Welcome to our comprehensive guide on how to replace the water in a Thermaltake CPU cooler. Over time, the water in your CPU cooler can become dirty or lose its effectiveness, affecting the cooling performance of your computer system. By replacing the water, you can ensure optimal cooling and prolong the lifespan of your CPU.
In this article, we will walk you through the step-by-step process of replacing the water in your Thermaltake CPU cooler, providing you with all the information and guidance you need to successfully complete the task. Whether you’re a seasoned PC enthusiast or a novice user looking to gain some technical skills, this guide is designed to be accessible to individuals of all experience levels.
Before we delve into the steps involved, it’s important to note that replacing the water in your Thermaltake CPU cooler requires careful attention to detail and proper handling of computer components. We recommend that you read through the entire guide before you begin the process to familiarize yourself with the steps and ensure a smooth and hassle-free experience.
This guide assumes that you already have a basic understanding of computer hardware and are comfortable working with PC components. If you have any doubts or concerns, we recommend seeking assistance from a professional or experienced individual.
Now, without further ado, let’s dive into the process of replacing the water in your Thermaltake CPU cooler and give your computer the cooling performance it deserves.
Step 1: Gather the necessary tools and materials
Before getting started, it’s important to ensure that you have all the required tools and materials to successfully replace the water in your Thermaltake CPU cooler. Here’s a list of what you’ll need:
- A screwdriver set (usually Phillips or hex) to remove the CPU cooler from the computer
- An antistatic wrist strap or mat to prevent static electricity damage
- A clean, lint-free cloth for wiping down the CPU cooler components
- Isopropyl alcohol (70% or higher) to clean the CPU cooler
- A new bottle of distilled water to fill the CPU cooler
- Thermal paste to reapply to the CPU
- A small container to hold the removed CPU cooler water
Make sure you have all these items readily available before proceeding with the replacement process. It’s important to work in a clean and well-lit area to avoid any accidents or damage to your computer hardware.
If you’re unsure about the specific tools or materials required, consult the user manual for your Thermaltake CPU cooler or visit the manufacturer’s website for detailed information. It’s always better to be prepared and have everything you need on hand before you begin.
Once you have gathered all the necessary tools and materials, you’re ready to move on to the next step – turning off and unplugging your computer.
Step 2: Turn off and unplug your computer
Before you start working on your Thermaltake CPU cooler, it’s essential to turn off your computer and unplug it from the power source. This step ensures your safety and prevents any potential damage to your hardware.
Follow these steps to properly turn off and unplug your computer:
- Save any ongoing work and close all open programs to avoid data loss.
- Click on the Start menu and select “Shut Down” or “Power Off”. Allow your computer to shut down completely.
- Once the computer is powered off, unplug the power cord from the wall outlet or power strip.
- Locate the power switch on the back of your computer’s tower or on the front of an all-in-one system. Make sure it is switched off.
By turning off and unplugging your computer, you eliminate the risk of electric shock and protect your components from accidental damage during the water replacement process. Always remember to handle computer components with care and take appropriate precautions.
Note: Some residual power may still be present in your system even after it is turned off and unplugged. To discharge any remaining power, press and hold the power button on your computer for a few seconds before proceeding.
Now that your computer is turned off and safely unplugged, it’s time to move on to the next step – removing the old water from your Thermaltake CPU cooler.
Step 3: Remove the old water from the Thermaltake CPU cooler
Now that your computer is powered off and unplugged, it’s time to remove the old water from your Thermaltake CPU cooler. Follow these steps carefully:
- Locate the CPU cooler in your computer system. It’s typically mounted on top of the CPU, with hoses or tubes connected to it.
- Using a screwdriver, carefully remove any screws or fasteners holding the CPU cooler in place. Keep track of the screws, as you will need them for reassembly later.
- Gently detach the hoses or tubes from the CPU cooler. Be cautious not to exert too much force and damage any components.
- Place a small container beneath the CPU cooler to collect the old water as it drains out.
- Hold the CPU cooler over the container and carefully tilt it to allow the old water to drain completely. Be patient, as it may take a few moments for all the water to empty out.
- Once the CPU cooler is empty, set it aside in a safe place for now. Dispose of the old water responsibly, following your local regulations for proper waste disposal.
With the old water removed from your Thermaltake CPU cooler, you’re one step closer to completing the water replacement process. However, before proceeding further, it’s crucial to clean the CPU cooler components to prevent any buildup or residue that may affect its performance.
In the next step, we will guide you through the process of cleaning the CPU cooler components thoroughly.
Step 4: Clean the CPU cooler components
Now that you have removed the old water from your Thermaltake CPU cooler, it is important to clean the CPU cooler components to ensure optimal performance. Follow these steps to effectively clean the CPU cooler:
- Take a clean, lint-free cloth and dampen it with isopropyl alcohol (70% or higher).
- Gently wipe down the external surfaces of the CPU cooler, removing any dust, dirt, or residue. Pay attention to the fins, radiator, and fan blades.
- For the inside of the CPU cooler, use a can of compressed air to blow away any trapped dust or debris.
- If there are any stubborn stains or buildup on the CPU cooler components, dampen the cloth with isopropyl alcohol and gently scrub the affected areas.
- Ensure that all the components are thoroughly dry before proceeding to the next step. You can air dry them for a few minutes or use a hairdryer on a low, cool setting.
Cleaning the CPU cooler components is an essential step to maintain optimal heat dissipation and prevent any blockages that could restrict airflow. By removing any dust or debris, you can improve the performance and longevity of your Thermaltake CPU cooler.
Note: Make sure not to apply excessive force or use abrasive materials while cleaning, as this can damage the delicate components of the CPU cooler.
Once you have cleaned and dried the CPU cooler components, you’re ready to proceed to the next step – preparing the new water for installation. This will ensure that the cooling system functions efficiently and effectively.
Step 5: Prepare the new water for installation
With the CPU cooler components cleaned and dry, it’s time to prepare the new water for installation in your Thermaltake cooler. Follow these steps to ensure a smooth and successful replacement process:
- Get a fresh bottle of distilled water. It’s important to use distilled water as it doesn’t contain impurities or minerals that could potentially clog the CPU cooler.
- Inspect the bottle for any signs of damage or tampering. Ensure that the lid is sealed properly before opening it.
- Before opening the bottle, make sure to wash your hands thoroughly to avoid introducing any contaminants.
- Once you’re ready, carefully open the bottle of distilled water, taking care not to spill any of it.
- It’s recommended to pour the distilled water into a clean and dry container with a spout or nozzle for easier pouring.
- If the bottle has a cap with an inner seal, remove the inner seal before pouring the water to prevent it from falling into the CPU cooler.
- Be cautious while pouring the distilled water into the container, ensuring that there is enough water to fill the CPU cooler adequately.
- Close the bottle of distilled water tightly and store it in a cool, dry place for future use.
By properly preparing the new water, you ensure that there are no contaminants or impurities that could potentially affect the performance of your CPU cooler. Using distilled water reduces the risk of mineral buildup, corrosion, and clogging, which can negatively impact heat dissipation.
Once you have prepared the new water for installation, you’re ready to move on to the next step – filling the CPU cooler with the fresh water.
Step 6: Fill the CPU cooler with the new water
Now that you have prepared the new water, it’s time to fill your Thermaltake CPU cooler with the fresh water. Follow these steps carefully to ensure a successful installation:
- Locate the fill port or opening on your Thermaltake CPU cooler. This is where the water will be poured into.
- Using a steady hand, begin pouring the distilled water into the fill port. Take your time and avoid any spills or overfilling.
- Monitor the water level in the CPU cooler as you pour. Ideally, you want to fill it to about 80-90% capacity.
- As you fill the CPU cooler, be cautious of any air bubbles that may form. Gently tap or shake the cooler to dislodge any trapped air.
- Continue filling the CPU cooler until you’ve reached the desired water level. Do not exceed the recommended capacity to prevent any leaks or overflow.
- Once you’ve filled the CPU cooler, securely close the fill port to prevent any water from leaking out during operation.
It’s important to note that the exact method for filling the CPU cooler may vary depending on the specific model of your Thermaltake cooler. Refer to the manufacturer’s instructions or consult the user manual for any specific guidelines or precautions.
Note: Avoid using excessive force when closing the fill port to prevent damage to the CPU cooler. Check for any signs of leakage before proceeding to the next step.
With the CPU cooler filled with the new water, you’re one step closer to completing the process. However, before you can start using your computer again, you need to reassemble the CPU cooler and conduct some tests to ensure everything is operating correctly. Keep reading to learn more in the next step.
Step 7: Reassemble and test the CPU cooler
Now that you have filled your Thermaltake CPU cooler with the new water, it’s time to reassemble the cooler and conduct some tests to ensure everything is working properly. Follow these steps to complete the process:
- Carefully reattach the hoses or tubes to the appropriate connectors on the CPU cooler. Make sure they are securely fastened, but avoid applying excessive force.
- Align the CPU cooler back onto the CPU, ensuring that it sits properly and evenly. Use the screwdriver to reattach the screws or fasteners, tightening them in a diagonal pattern to ensure even pressure.
- Double-check all the connections and ensure that everything is properly secured before proceeding to the next step.
- Connect the power cable of the CPU cooler to the appropriate fan header on your motherboard.
- Before powering on your computer, refer to the instructions that came with your CPU cooler to apply a pea-sized amount of thermal paste onto the CPU. This helps to optimize heat transfer.
- Carefully lower the CPU heatsink onto the CPU, ensuring that the thermal paste spreads evenly.
- Secure the CPU heatsink in place using the provided screws or fasteners. Just like before, tighten the screws in a diagonal pattern for even pressure.
Once you have reassembled the CPU cooler and ensured that it is securely attached to the CPU, it’s time to test its functionality.
- Plug your computer back into the power source and turn it on.
- Listen for any unusual noises coming from the CPU cooler. If you hear any grinding or loud vibrations, immediately turn off your computer and investigate the issue.
- Monitor the CPU temperature using software or BIOS readings. Ensure that the temperature remains within acceptable ranges under different loads.
- Run stress tests or intense applications to put a significant load on the CPU and test the cooling performance of the CPU cooler.
If everything appears to be working correctly, and the CPU temperature is within acceptable ranges, you can consider the CPU cooler successfully reassembled and tested.
Now you can proceed to the final step – monitoring the CPU temperature for ongoing performance.
Step 8: Monitor the CPU temperature
After successfully reassembling and testing your Thermaltake CPU cooler, it’s crucial to monitor the CPU temperature to ensure that it stays within safe operating limits. Follow these steps to effectively monitor the temperature:
- Download and install a reliable temperature monitoring software, such as HWMonitor, Core Temp or SpeedFan. These programs provide real-time temperature readings for your CPU.
- Open the temperature monitoring software and keep it running in the background while using your computer.
- Monitor the CPU temperature during various tasks, such as gaming, heavy multitasking, or running demanding applications. Pay attention to the temperature fluctuations and ensure that it doesn’t exceed the recommended maximum temperature provided by the CPU manufacturer.
- If you notice unusually high CPU temperatures or if the temperature rises above the safe limit, it may indicate an issue with the CPU cooler installation or other factors. In such cases, you may need to conduct further investigations or seek professional assistance.
- Regularly check the CPU cooler for any signs of leaks, unusual noises, or performance issues. This includes examining the tubes or hoses for any cracks, ensuring the fans are spinning properly, and verifying that the CPU heatsink is firmly attached.
- Make it a habit to clean the CPU cooler and surrounding components regularly to prevent dust or debris buildup that can affect cooling performance.
Monitoring the CPU temperature is essential for maintaining the stability and longevity of your computer system. By keeping a close eye on the temperature, you can promptly identify and rectify any cooling-related issues and ensure that your CPU operates optimally.
Note: CPU temperatures may vary depending on factors such as ambient temperature, workload, and CPU model. Consult the CPU manufacturer’s specifications or online resources for the recommended operating temperature range.
Congratulations! By following these steps and effectively monitoring the CPU temperature, you have successfully replaced the water in your Thermaltake CPU cooler and optimized cooling performance for your computer system.
Conclusion
Replacing the water in your Thermaltake CPU cooler is an important maintenance task to ensure optimal cooling performance and prolong the lifespan of your computer system. By following the step-by-step guide outlined in this article, you can successfully complete the water replacement process and enjoy the benefits of a properly functioning CPU cooler.
We began by gathering the necessary tools and materials, including a screwdriver set, antistatic wrist strap or mat, clean cloth, isopropyl alcohol, distilled water, thermal paste, and a container for the old water. Next, we turned off and unplugged our computer to ensure safety during the process.
We then proceeded to remove the old water from the Thermaltake CPU cooler, being careful not to damage any components. After that, we thoroughly cleaned the CPU cooler components to remove any dust, dirt, or residue that could affect cooling performance.
In the subsequent steps, we prepared and filled the CPU cooler with fresh distilled water, ensuring we followed proper procedures for pouring and avoiding spills. We reassembled the CPU cooler, tested its functionality, and monitored the CPU temperature to ensure everything was working within safe operating limits.
Finally, we emphasized the importance of regularly monitoring the CPU temperature and inspecting the CPU cooler for any signs of leaks or performance issues. Regular maintenance and cleaning will help maintain the efficiency and longevity of your Thermaltake CPU cooler.
By following these steps and practicing proper maintenance, you can ensure that your CPU operates at optimal temperatures and your computer system runs smoothly and reliably.
Remember, if you encounter any difficulties or are unsure about any step in the process, it’s always a good idea to consult the user manual for your specific Thermaltake CPU cooler or seek assistance from a professional technician.
Maintaining a properly functioning CPU cooler is crucial for the overall performance and stability of your computer system. By investing the time and effort into replacing the water and practicing good maintenance habits, you can enjoy the benefits of a cool and efficient CPU for years to come.


