Introduction
Welcome to the guide on how to reformat a Seagate External Hard Drive for Mac. If you’ve recently purchased a Seagate External Hard Drive and want to use it with your Mac, you may need to reformat it to ensure compatibility. By reformatting the Seagate External Hard Drive, you can optimize it for use with macOS, enabling seamless data storage and retrieval.
Reformatting a hard drive involves erasing all existing data on the drive and configuring it to a specific file system. In this case, we’ll be formatting the Seagate External Hard Drive to the Mac OS Extended (Journaled) file system, which is the default file system used by macOS.
It’s important to note that reformatting the Seagate External Hard Drive will permanently delete all data stored on it. Therefore, it’s crucial to back up your important files before proceeding with the reformatting process. This ensures that you won’t lose any data during the reformatting process.
In this step-by-step guide, we’ll walk you through the process of reformatting your Seagate External Hard Drive for Mac. Whether you’re new to Mac or just need assistance with the reformatting process, this guide will provide you with all the necessary information to help you successfully reformat your hard drive.
Before we begin, make sure you have your Seagate External Hard Drive and your Mac computer ready. You’ll also need to connect the hard drive to your Mac using the appropriate cable or adapter. Once you’re ready, let’s dive into the step-by-step process of reformatting your Seagate External Hard Drive for Mac.
Step 1: Connect the Seagate External Hard Drive to Your Mac
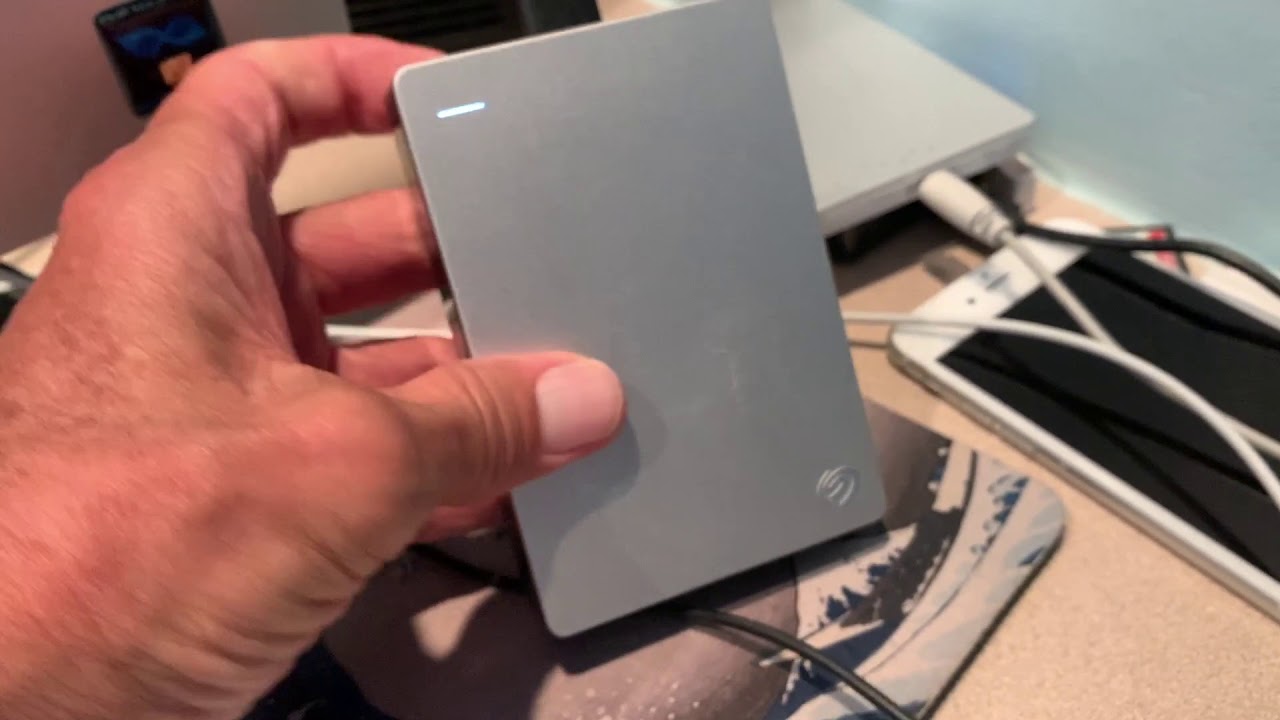
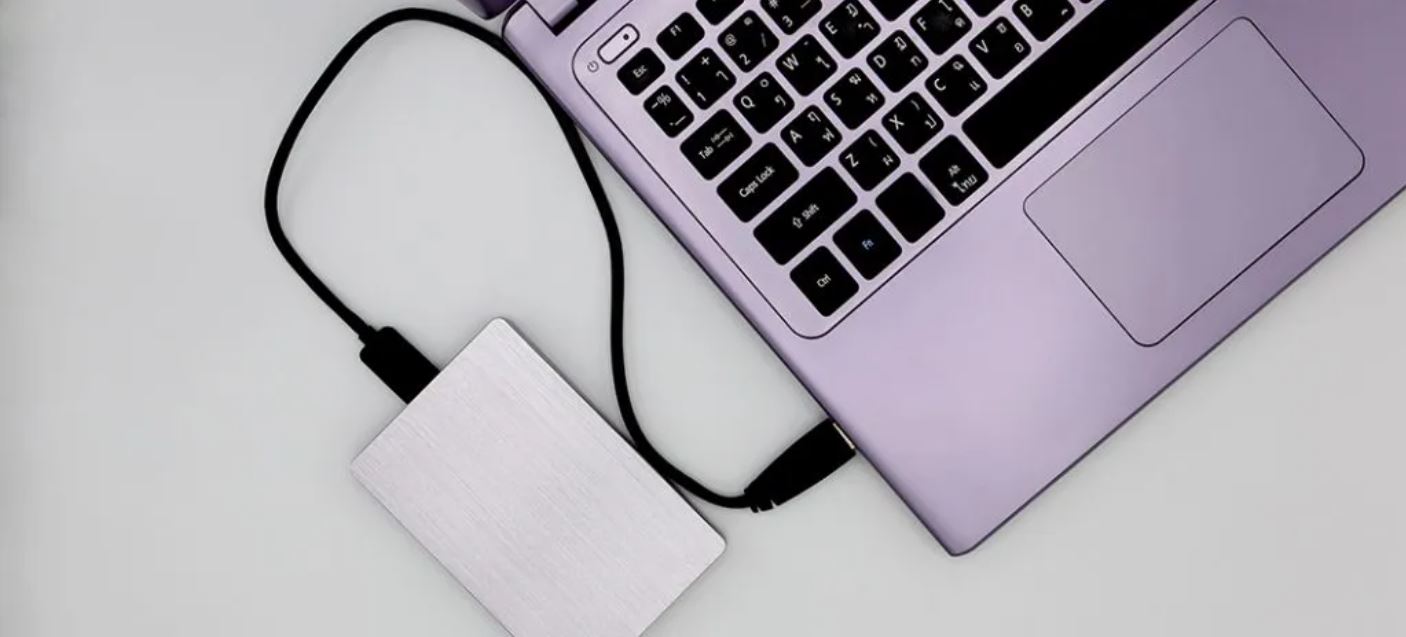
The first step in reformatting your Seagate External Hard Drive for Mac is to connect it to your computer. Depending on the model of your Seagate External Hard Drive and your Mac, you may need to use a specific type of cable or adapter.
Start by locating the appropriate cable that came with your Seagate External Hard Drive. This could be a USB-A to USB-A cable, USB-A to USB-C cable, or another type of connector, depending on the model of the hard drive and your Mac computer.
Next, take one end of the cable and plug it into the USB port of your Seagate External Hard Drive. Ensure that it is securely connected and snugly fitted. Then, take the other end of the cable and connect it to an available USB port on your Mac computer.
Once connected, your Mac should detect the Seagate External Hard Drive and it should appear on your desktop or in the Finder sidebar. You may also hear a sound or see a notification indicating that a new drive has been connected to your computer.
If the Seagate External Hard Drive doesn’t appear on your desktop or in the Finder sidebar, try the following troubleshooting steps:
- Check the cable connections: Make sure the cable is securely plugged into both the hard drive and your Mac.
- Restart your Mac: Sometimes, a simple restart can resolve connectivity issues.
- Try a different USB port: If you have multiple USB ports on your Mac, try connecting the hard drive to a different port to see if it appears.
- Test with a different cable: If you have another compatible cable, try using it to connect the hard drive to see if the issue lies with the cable.
- Update software: Make sure your Mac’s operating system is up to date, as outdated software can sometimes cause compatibility issues.
Once you’ve successfully connected the Seagate External Hard Drive to your Mac, you’re ready to proceed to the next step – backing up your important files.
Step 2: Backup Your Important Files
Before proceeding with the reformatting process, it is crucial to back up any important files and data stored on your Seagate External Hard Drive. Reformatting erases all existing data on the drive, so creating a backup ensures that you don’t lose any valuable information during the process.
Start by identifying the files that you want to back up. These could include documents, photos, videos, music, or any other data that you don’t want to lose. Organize these files in a designated folder on your Mac’s internal hard drive, an external hard drive, or even in cloud storage services like iCloud, Google Drive, or Dropbox.
Here are some recommended methods for backing up your important files:
- Manual File Transfer: Connect your Seagate External Hard Drive and drag and drop the selected files to a backup location on your Mac. This method is suitable for a small number of files and folders.
- Time Machine: Use Apple’s built-in Time Machine feature to create a full backup of your Mac, including all connected external drives. Connect your Seagate External Hard Drive and set it as the backup destination for Time Machine.
- Third-Party Backup Software: Consider using third-party backup software like Carbon Copy Cloner, SuperDuper, or Backblaze to create a comprehensive backup of your entire system or specific files and folders.
Ensure that your backup process is completed successfully before proceeding. Verify that all your important files are securely backed up and can be accessed without any issues.
Backing up your data is a crucial precautionary measure. It ensures that, in case of any unforeseen circumstances or errors during the reformatting process, your precious files remain safe and can be easily restored once the Seagate External Hard Drive is reformatted for Mac compatibility.
Once you’ve verified that your important files are securely backed up, you’re now ready to move on to the next step – opening Disk Utility.
Step 3: Open Disk Utility
In order to reformat your Seagate External Hard Drive for Mac, you will need to use Disk Utility, a built-in utility on macOS that allows you to manage and configure storage devices.
To open Disk Utility, follow these steps:
- Go to the Apple menu in the top-left corner of your screen and select “System Preferences”.
- In the System Preferences window, click on the “Disk Utility” icon.
- The Disk Utility window will open, displaying a list of all connected storage devices, including your Seagate External Hard Drive.
If you prefer using Spotlight, you can simply press Cmd + Space to open Spotlight, and then type “Disk Utility” into the search bar. Click on the Disk Utility app that appears in the search results to open it.
Alternatively, you can also open Disk Utility using Finder:
- Open a Finder window by clicking on the Finder icon in your dock or by pressing Cmd + N.
- In the Finder menu, click on “Go” and select “Utilities”.
- In the Utilities folder, scroll down and double-click on “Disk Utility”.
Once Disk Utility is open, you will be able to see a list of all connected storage devices in the left sidebar. Your Seagate External Hard Drive should be listed here, typically with the model name or a label that you assigned to it.
Now that you have successfully opened Disk Utility, you can proceed to the next step, where we will select the Seagate External Hard Drive for reformatting.
Step 4: Select the Seagate External Hard Drive
After opening Disk Utility, the next step in reformatting your Seagate External Hard Drive for Mac is to select the drive you want to reformat. Follow these steps to do so:
- In Disk Utility, locate the list of storage devices on the left sidebar. Look for the name of your Seagate External Hard Drive. It should be displayed with its corresponding size and model information.
- Click on the name of your Seagate External Hard Drive to select it. This will highlight the drive and display its information in the main panel.
Double-check that you have selected the correct drive before proceeding. You don’t want to accidentally reformat the wrong drive and lose important data.
If you are unsure which drive is the Seagate External Hard Drive, you can verify it by looking at its size or checking the label or name you assigned to it. If necessary, you can also disconnect and reconnect the drive to refresh the list in Disk Utility.
Once you have successfully selected your Seagate External Hard Drive, you are ready to move on to the next step – erasing the drive. Keep in mind that erasing the drive will permanently delete all data on it, so make sure you have already backed up any important files.
In the next step, we will guide you through the process of erasing the Seagate External Hard Drive in preparation for reformatting it for Mac compatibility.
Step 5: Erase the Seagate External Hard Drive
Now that you have selected the Seagate External Hard Drive in Disk Utility, the next step is to erase the drive. Erasing the drive will delete all existing data on it and prepare it for the reformatting process. Follow these steps to erase the Seagate External Hard Drive:
- In the Disk Utility window, click on the “Erase” button located at the top of the window.
- A new dialog box will appear, allowing you to configure the erasing options for the drive.
- Start by entering a name for the drive. You can choose any name you prefer. This name will be used to identify the drive on your Mac.
- Next, select the desired format for the Seagate External Hard Drive. For Mac compatibility, choose “Mac OS Extended (Journaled)” as the format.
- If you plan to use the drive exclusively with Macs running macOS Catalina or later, you may select “APFS” as the format. However, keep in mind that this format may not be compatible with older versions of macOS.
- For Scheme, select “GUID Partition Map” for Intel-based Macs or “Apple Partition Map” for PowerPC-based Macs. If you’re unsure, the “GUID Partition Map” option is usually the recommended choice.
- Once you have selected the desired options, double-check that everything is correct, as erasing the drive will irreversibly delete all data. Make sure you have backed up any important files.
- Finally, click on the “Erase” button to start the erasing process. A progress bar will appear, indicating the status of the erasing process.
Once the erasing process is complete, the Seagate External Hard Drive will be completely wiped and ready for reformatting. Congratulations! You have successfully erased the drive.
In the next step, we will guide you through the process of selecting the format for the Seagate External Hard Drive for optimal compatibility with your Mac.
Step 6: Choose the Format for the Seagate External Hard Drive
After erasing the Seagate External Hard Drive, the next step is to choose the format that will be used for the drive. The format determines how the drive will be organized and how it will interact with your Mac.
Follow these steps to select the format for the Seagate External Hard Drive:
- In Disk Utility, ensure that the Seagate External Hard Drive is selected.
- Click on the “Format” dropdown menu located in the Erase dialog box.
- Choose the format you want to use from the available options:
- Mac OS Extended (Journaled): This format is the most common and is recommended for general use. It offers compatibility with all versions of macOS.
- APFS: This format is optimized for solid-state drives (SSDs) and offers improved performance and efficiency. It is compatible with macOS High Sierra or later.
- ExFAT: This format allows for compatibility with both Mac and Windows systems, making it a good option if you need to use the drive on different operating systems.
- MS-DOS (FAT): This format is compatible with both Mac and Windows systems, but it has limitations such as file size restrictions.
- Choose the appropriate format based on your needs and the intended use of the Seagate External Hard Drive.
- Once you have selected the format, click on the “Erase” button to proceed.
It’s important to note that the chosen format will determine the compatibility of the Seagate External Hard Drive with other devices and operating systems. Consider the devices you will be using the drive with and select the format accordingly.
Once the format is selected and the erasing process is complete, the Seagate External Hard Drive will be reformatted with the chosen configuration. In the next step, we will discuss how to customize the name and scheme of the drive, which is optional but can be helpful for organization and identification purposes.
Step 7: Customize the Name and Scheme (optional)
At this stage, you have successfully chosen the format for your Seagate External Hard Drive. The next step is to customize the name and scheme of the drive, although this is an optional step.
Here’s how you can customize the name and scheme of the Seagate External Hard Drive:
- In Disk Utility, ensure that the Seagate External Hard Drive is still selected.
- In the Erase dialog box, you will find the option to enter a new name for the drive. Click on the text field next to the “Name” label.
- Provide a descriptive and unique name for the drive. This will help you identify the drive when it is connected to your Mac.
- If you want to customize the scheme of the drive, click on the “Scheme” dropdown menu in the Erase dialog box.
- Choose the appropriate scheme for your specific needs:
- GUID Partition Map: This scheme is compatible with Intel-based Mac computers and is recommended for most users.
- Apple Partition Map: This scheme is compatible with PowerPC-based Mac computers and is less commonly used.
- Select the desired scheme or leave it as the default if you are unsure.
- Once you have customized the name and scheme (if necessary), double-check that all the settings are correct.
- Click on the “Erase” button to proceed with the customization process.
Customizing the name and scheme of your Seagate External Hard Drive is optional but can be beneficial for organization and identification purposes. Choosing a descriptive name and the appropriate scheme will enable you to easily recognize and manage the drive on your Mac.
Once you have completed customizing the name and scheme (if desired) and clicked the “Erase” button, Disk Utility will proceed with the reformatting process and apply the chosen configurations to the Seagate External Hard Drive.
Now that you have successfully customized the name and scheme (if desired), you can move on to the next and final step, where you will confirm the reformatting process.
Step 8: Confirm the Reformatting Process
After customizing the name and scheme of your Seagate External Hard Drive (if applicable), you have reached the final step – confirming the reformatting process. This step ensures that all the selected configurations are correct before proceeding with the reformatting.
Follow these steps to confirm the reformatting process:
- In Disk Utility, carefully review the information displayed in the Erase dialog box.
- Verify that the name, format, and scheme of the Seagate External Hard Drive are as desired.
- Double-check that you have backed up any important files, as the reformatting process will permanently delete all data on the drive.
- Ensure that you have selected the correct drive for reformatting.
- If everything is in order and you are ready to proceed, click on the “Erase” button to confirm the reformatting process.
- A warning message will appear, informing you that all data on the drive will be erased. Read the message carefully to ensure you understand the consequences.
- Once you have read the warning message and are certain you want to proceed, click on the “Erase” button again to initiate the reformatting process.
During the reformatting process, a progress bar will indicate the status of the process. The duration of the reformatting will depend on the size of the drive.
Once the reformatting process is complete, you will receive a confirmation message indicating that the Seagate External Hard Drive has been successfully reformatted according to the selected configurations.
Congratulations! You have successfully reformatted your Seagate External Hard Drive for Mac. It is now ready to be used with your Mac computer, providing you with optimized performance and compatibility.
Remember to properly eject the Seagate External Hard Drive before disconnecting it from your Mac to avoid data loss or corruption. You can do this by right-clicking on the drive’s icon on the desktop or in the Finder sidebar, and selecting “Eject”.
Now that you have completed the reformatting process, you can enjoy using your Seagate External Hard Drive on your Mac with confidence.
Conclusion
Congratulations on successfully reformatting your Seagate External Hard Drive for Mac! By following the step-by-step guide provided, you have optimized the drive for use with macOS, ensuring seamless data storage and retrieval.
Throughout this process, you’ve learned how to connect the Seagate External Hard Drive to your Mac, backup your important files, open Disk Utility, select the drive for reformatting, erase the drive, choose the appropriate format, and optionally customize the name and scheme of the drive. Finally, you confirmed the reformatting process and completed the necessary configurations.
Remember, when reformatting your drive, it is essential to back up any important files beforehand to prevent data loss. Take the time to double-check your choices before confirming the reformatting process, as it erases all existing data on the drive.
Now that your Seagate External Hard Drive is reformatted, you can enjoy efficient and reliable data storage for your Mac. It is recommended to properly eject the drive before disconnecting it to maintain data integrity.
If you encounter any issues during the reformatting process or need further assistance, consider reaching out to Seagate’s customer support or consulting technical resources online.
We hope this guide has been helpful in ensuring the compatibility of your Seagate External Hard Drive with your Mac. Enjoy the enhanced functionality and performance that a properly reformatted drive provides, allowing you to conveniently store and manage your data.
Thank you for following this guide, and best of luck with your newly reformatted Seagate External Hard Drive!