Introduction
Welcome to this comprehensive guide on how to program the Logitech Harmony 650 remote. If you’re tired of having multiple remotes cluttering your living room or struggling to find the right remote for each device, the Harmony 650 is here to simplify your home entertainment experience. This versatile remote allows you to control up to 8 devices with just one controller, saving you time and eliminating the frustration of juggling multiple remotes.
Whether you’re a tech enthusiast or someone who just wants a hassle-free way to control their entertainment system, this step-by-step guide will walk you through the process of setting up and programming your Harmony 650 remote. You don’t need to be a programming genius or have any prior technical knowledge – the Harmony software and our easy-to-follow instructions will make the process a breeze.
In this guide, we will cover everything from gathering the necessary tools to troubleshooting common issues that you may encounter along the way. By the end of this article, you will have a fully programmed Harmony 650 remote that can control all of your devices, including your TV, Blu-ray player, sound system, and more.
So, let’s dive in and get started with programming your Logitech Harmony 650 remote!
Step 1: Gather the Necessary Tools
Before you begin programming your Logitech Harmony 650 remote, it’s essential to gather all the necessary tools for a smooth setup process. Here’s what you’ll need:
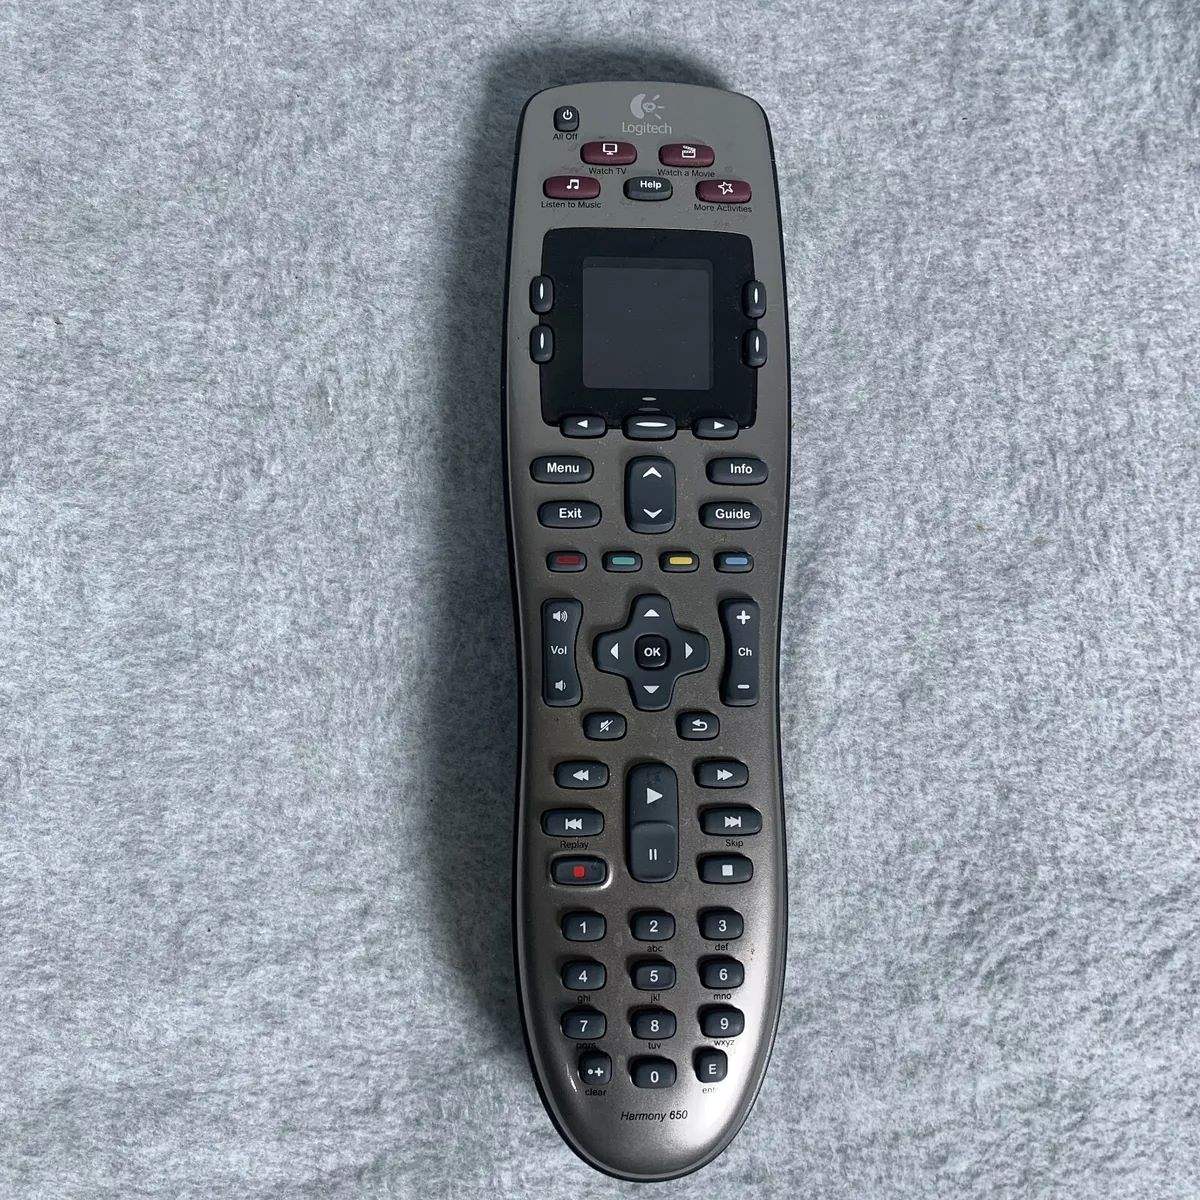
- Logitech Harmony 650 remote: Of course, you’ll need the Harmony 650 remote itself. Make sure you have it handy, along with the included USB cable.
- Computer with internet access: To program the Harmony 650 remote, you’ll need a computer or laptop with an internet connection. The Harmony software requires internet access to download device configurations and updates.
- USB port: Your computer should have an available USB port to connect the Harmony 650 remote. Make sure the USB port is in working order.
- Compatible devices: Identify the devices you want to control with the Harmony 650 remote. This can include your TV, cable/satellite box, sound system, Blu-ray player, and more. Ensure that your devices are compatible with the Harmony 650.
- Manufacturer and model numbers: Take note of the manufacturer and model numbers of each device you want to program. These details will be required during the setup process to ensure the correct device configurations are downloaded.
It’s important to have all these tools ready and easily accessible before you proceed with programming. This will save you time and ensure a smooth setup experience. Once you have everything ready, you’re all set to move on to the next step.
Step 2: Set Up the Harmony 650 Remote
Now that you have gathered all the necessary tools, it’s time to set up your Logitech Harmony 650 remote. Follow these steps to get started:
- Insert the batteries: Open the battery compartment on the back of the Harmony 650 remote and insert the provided batteries. Make sure to align the batteries correctly according to the polarity markings.
- Turn on the remote: Press and hold the power button on the remote until the screen lights up. This indicates that the remote is powered on and ready to be set up.
- Choose your language: Use the navigation buttons on the remote to select your preferred language. Press the “OK” button to confirm your selection.
- Select your geographical location: The remote will prompt you to choose your geographical location. Use the navigation buttons to select the appropriate location and press the “OK” button to confirm.
- Set up your devices: The remote will now guide you through a series of setup questions to identify the devices you want to control. Follow the on-screen instructions and use the navigation buttons to select the device types and enter the manufacturer and model numbers.
- Test the remote: Once you have finished setting up your devices, the remote will prompt you to test its functionality. Follow the on-screen instructions to verify that the remote can control your devices properly.
- Complete the setup: If the remote successfully controls your devices, you can proceed to complete the setup process. The remote will prompt you to set up Activities, which are custom combinations of commands for different tasks, such as “Watch TV” or “Listen to Music.”
Setting up the Harmony 650 remote is a straightforward process thanks to its intuitive interface and step-by-step instructions. If you encounter any issues during setup, refer to the troubleshooting section or consult Logitech’s support resources for assistance. Once you have completed the setup, you are ready to move on to the next steps of programming your Harmony remote.
Step 3: Connect the Harmony 650 to Your Computer
In order to properly program the Logitech Harmony 650 remote, you need to establish a connection between the remote and your computer. Follow these steps to connect your Harmony 650 remote:
- Locate the USB port: Ensure that your computer has an available USB port to connect the Harmony 650 remote. The USB port is typically located on the side or back of your computer.
- Connect the USB cable: Take the USB cable that came with your Harmony 650 remote and plug one end into the remote’s USB port. Then, plug the other end of the cable into the USB port on your computer. Make sure the connections are secure.
- Wait for the computer to recognize the remote: Once the Harmony 650 is connected to your computer, it may take a moment for the computer to recognize the remote and install any necessary drivers. Be patient and wait for the “device connected” notification to appear on your computer screen.
- Launch the Harmony software: Once the remote is connected and recognized by your computer, launch the Logitech Harmony software. If you haven’t installed the software yet, refer to Step 4 for instructions on how to install it.
- Follow the on-screen instructions: The software will guide you through the initial setup process and prompt you to log in or create a new account. Follow the on-screen instructions to proceed.
- Verify the remote connection: After logging in, the software should detect the connected Harmony 650 remote automatically. Verify that the remote is recognized by the software and proceed to the next steps of programming.
Establishing a connection between your Harmony 650 remote and your computer is crucial for programming the remote and syncing it with your devices. Make sure to follow these steps carefully to ensure a successful connection. If you encounter any issues, double-check the cable connections and consult the troubleshooting section for further assistance.
Step 4: Install the Logitech Harmony Software
In order to program and configure your Logitech Harmony 650 remote, you’ll need to install the Logitech Harmony software on your computer. The software provides a user-friendly interface to customize your remote settings and activities. Follow these steps to install the software:
- Visit the Logitech website: Open your preferred web browser and navigate to the Logitech website. Go to the Support section and search for the Harmony software.
- Download the software: Locate the Harmony software download page and click on the download link that corresponds to your operating system. The software is available for both Windows and Mac.
- Run the installer: Once the software download is complete, locate the downloaded installer file on your computer and double-click on it to run the installer.
- Follow the installation wizard: The installer will guide you through the installation process. Follow the on-screen instructions to proceed with the installation.
- Agree to the terms and conditions: During the installation, you may be prompted to review and accept the terms and conditions. Read through the terms and conditions and click on the “Agree” or “Accept” button to proceed.
- Complete the installation: Once the installation process is complete, you will receive a confirmation message. Click on the “Finish” or “Close” button to exit the installer.
After installing the Logitech Harmony software, you’re one step closer to programming your Harmony 650 remote. Make sure to keep the software up to date by regularly checking for updates on the Logitech website. Now that the software is installed, you can proceed to the next steps and set up your Harmony remote according to your preferences.
Step 5: Create an Account and Set Up Your Remote
In order to fully customize and program your Logitech Harmony 650 remote, you’ll need to create an account and set up your remote using the Harmony software. Follow these steps to get started:
- Launch the Harmony software: Open the Logitech Harmony software on your computer. If you haven’t installed the software yet, refer to Step 4 for instructions on how to install it.
- Sign in or create a new account: If you already have a Logitech Harmony account, sign in using your credentials. If not, click on the “Create Account” or “New User” option to register for a new account. Follow the on-screen instructions to complete the account creation process.
- Enter your device and location information: Once logged in, the software will prompt you to enter details about your devices and your location. Provide accurate information about the devices you want to control with your Harmony 650 remote, including the manufacturer and model numbers. This will ensure that the software downloads the correct device configurations.
- Create Activities: After entering your device information, the software will guide you through the process of creating Activities. Activities are combinations of commands that allow you to control multiple devices with a single button press. For example, you can set up an “Watch TV” activity that turns on your TV, cable box, and sound system simultaneously.
- Customize button assignments: In addition to Activities, you can also customize the button assignments on your Harmony 650 remote. This allows you to assign specific commands or functions to different buttons on the remote based on your preferences.
- Save and sync your remote: Once you have set up your remote and customized the settings according to your needs, save your changes and proceed to sync your Harmony 650 remote. This will transfer the programmed commands and settings from the software to your physical remote.
By creating an account and setting up your remote using the Harmony software, you have full control over personalizing your Logitech Harmony 650 remote to suit your unique home entertainment needs. Take your time to configure your remote and explore the various customization options available. Once you’re satisfied with your settings, you’re ready to enjoy the convenience and simplicity of controlling all your devices with just one remote.
Step 6: Add Devices and Activities
Now that you have set up your Logitech Harmony 650 remote and created an account, it’s time to add your devices and activities. Follow these steps to customize your remote to control all your devices:
- Add devices: From the Harmony software, click on the “Devices” tab or section. Click the “Add Device” button and follow the prompts to select the device type and enter the manufacturer and model numbers. Repeat this process for each device you want to add to your Harmony remote.
- Create activities: After adding your devices, navigate to the “Activities” tab or section in the Harmony software. Click on the “Add Activity” button and choose the type of activity you want to create, such as “Watch TV” or “Listen to Music.” Follow the on-screen instructions to select the devices involved in the activity and customize the settings based on your preferences.
- Customize activity buttons: Once you have created an activity, you can customize the buttons on your remote to perform specific functions for that activity. For example, you can assign the volume buttons to control your sound system during the “Watch TV” activity. Use the Harmony software’s customization options to define the button assignments for each activity.
- Test your activities: After setting up your devices and activities, it’s important to test them to ensure they work as intended. Click on the “Sync” button in the Harmony software to transfer the settings to your Harmony 650 remote. With the remote in hand, test each activity to verify that the right devices turn on and off, and that the button assignments work as expected.
Adding devices and creating activities allows you to streamline your home entertainment experience. With just a press of a button, you can control multiple devices simultaneously and perform complex tasks with ease. Take your time to configure and customize your devices and activities to match your preferences and needs.
Remember, you can always revisit the Harmony software in the future if you need to add or remove devices, modify activities, or change button assignments. The software provides a user-friendly interface to make any necessary adjustments to your Logitech Harmony 650 remote, ensuring that it continues to meet your evolving home entertainment requirements.
Step 7: Customize Button Assignments
One of the great features of the Logitech Harmony 650 remote is the ability to customize button assignments according to your preferences. By customizing the button assignments, you can have quick and convenient access to the functions you use most frequently. Here’s how you can customize the button assignments:
- Access button customization: Open the Harmony software on your computer and navigate to the “Button Customization” or “Button Assignments” section.
- Select the device or activity: Choose the device or activity for which you want to customize the button assignments. This could be a specific device like your TV or an activity like “Watch TV.”
- Choose the button to customize: Once you have selected the device or activity, you will see a list of buttons on the screen. Click on the button you want to customize.
- Assign the desired function: From the available options, select the function or command you want to assign to the chosen button. For example, you can assign the “Volume Up” function to a button for easy access.
- Save the changes: After customizing the button assignment, save the changes by clicking the “Save” or “OK” button in the software.
- Sync the changes to your remote: To transfer the customized button assignments from the Harmony software to your Logitech Harmony 650 remote, click the “Sync” button. This will ensure that your remote reflects the updated button configurations.
By customizing the button assignments on your Harmony 650 remote, you can tailor its functionality to match your specific needs. Whether you want to control the volume, change channels, switch between inputs, or access other frequently used functions, customizing the button assignments provides you with personalized convenience.
Don’t hesitate to experiment with different button configurations to find what works best for you. You can always revisit the Harmony software to modify the button assignments if your needs change over time. Enjoy the flexibility and ease-of-use that comes with customizing the button assignments on your Logitech Harmony 650 remote.
Step 8: Sync the Harmony 650 Remote
After you have customized your Logitech Harmony 650 remote with your preferred settings, it’s time to sync the remote with the Harmony software. This process transfers the programmed commands, device configurations, and button assignments from the software to your physical remote. Follow these steps to sync your Harmony 650 remote:
- Ensure the remote is in sync mode: Press the “Sync” button on the Harmony software to put the remote in sync mode. This prepares the remote to receive the updated settings from the software.
- Connect the remote to your computer: Use the provided USB cable to connect your Logitech Harmony 650 remote to your computer. Ensure that the connections are secure and the remote is properly recognized by the computer.
- Click the “Sync” button: In the Harmony software, click the “Sync” button to initiate the synchronization process. The software will transfer the customized settings and configurations to your Harmony 650 remote.
- Wait for the sync to complete: The synchronization process may take a few moments to complete. Make sure not to disconnect the remote or interrupt the syncing process during this time.
- Verify the remote settings: After the sync is finished, verify that the programmed commands and customized settings have been successfully transferred to your Harmony 650 remote. Test the remote to ensure that it functions properly and controls your devices as intended.
- Disconnect the remote: Once the sync is complete and everything is working correctly, safely disconnect the Logitech Harmony 650 remote from your computer by removing the USB cable.
The synchronization process is vital to ensure that the settings you have customized in the Harmony software are reflected in your physical Harmony 650 remote. By syncing the remote, you can enjoy the convenience of controlling all your devices with just one remote, tailored to your preferences.
If you ever make changes to your settings or add new devices in the future, you can repeat the sync process to update your remote with the latest configurations. Keep the Harmony software updated and make any necessary adjustments to ensure that your Harmony 650 remote remains in sync with your entertainment system.
Step 9: Troubleshooting Common Issues
While setting up and using your Logitech Harmony 650 remote, you may encounter some common issues. Don’t worry, as there are solutions to these problems. Here are some troubleshooting steps to help you overcome common issues:
- Remote not turning on: If your remote does not power on, ensure that the batteries are inserted correctly and have enough charge. Try replacing the batteries with fresh ones and check if the remote powers on.
- Devices not responding: If your devices are not responding to the remote, verify that they are properly connected to power and turned on. Ensure that the Harmony software has the correct device configurations, and try re-syncing the remote to update the settings.
- Activity not working: If an activity does not work as expected, double-check that the devices involved in the activity are connected and set up correctly. Verify that the button assignments for the activity are configured properly in the Harmony software.
- Buttons not working: If specific buttons on the remote are not functioning, check the button settings in the Harmony software. Make sure that the desired functions are assigned correctly to the respective buttons. If necessary, double-check the device configurations and re-sync the remote.
- Software connection issues: If you encounter issues connecting the Harmony software to your remote or your computer, try restarting your computer and unplugging/reconnecting the USB cable. Ensure that your computer’s USB ports and remote’s USB port are in working order. You may also want to verify that you have a stable internet connection.
- Software update problems: If you experience issues with software updates, make sure that your computer meets the system requirements for the Harmony software. Disable any firewalls or antivirus software temporarily, as they may interfere with the update process. If the problem persists, check the Logitech support website for any specific troubleshooting steps related to software updates.
If you encounter any issues that cannot be resolved through troubleshooting, consult the Logitech support resources for further assistance. The Logitech website provides helpful support articles, forums, and customer support contacts where you can find answers to specific issues or seek professional help if needed.
By addressing common issues and finding solutions, you can ensure that your Logitech Harmony 650 remote operates smoothly and efficiently, giving you the best home entertainment experience with seamless control over your devices.
Conclusion
Congratulations! You have successfully learned how to program and configure your Logitech Harmony 650 remote. With this versatile remote in your hands, you can now control all your entertainment devices with just one controller, simplifying your home entertainment experience.
In this guide, we covered the step-by-step process of setting up your Harmony 650 remote, from gathering the necessary tools to troubleshooting common issues. By following these steps, you were able to connect your remote to your computer, add devices, create activities, customize button assignments, and sync your remote with the Harmony software.
The Logitech Harmony software proved to be an indispensable tool in programming your remote, allowing you to personalize your device configurations, button assignments, and activities according to your preferences. By syncing your remote with the software, you ensured that all your customized settings were reflected in your physical remote.
Remember, as you continue to use your Logitech Harmony 650 remote, you may encounter new devices, make changes to your setup, or have different preferences over time. The Harmony software remains your go-to tool for any future adjustments or customizations you may want to make.
If you ever encounter any issues or need further assistance, don’t hesitate to consult the Logitech support resources, including their website, support articles, forums, or contacting their customer support. They are there to help you troubleshoot and resolve any challenges you may face.
Now that you have successfully programmed your Harmony 650 remote, you can enjoy the convenience and simplicity of controlling all your entertainment devices with just one device. Sit back, relax, and immerse yourself in your favorite movies, TV shows, music, and more, all at the touch of a button on your Logitech Harmony 650 remote.