Introduction
If you own a Western Digital external hard drive and want to access its internal components or perform a repair, you may be wondering how to open the enclosure. Opening a Western Digital external hard drive requires specific steps and tools to ensure safe and successful access to the internal components.
Whether you are looking to upgrade the hard drive, recover data, or troubleshoot an issue, this guide will walk you through the process of safely opening a Western Digital external hard drive.
It’s important to note that opening the enclosure of your Western Digital external hard drive may void the warranty. Therefore, it’s recommended to check the warranty status and consider the potential risks before proceeding with the steps outlined in this guide.
In this article, we will provide you with a step-by-step guide on how to open a Western Digital external hard drive, the tools required, and precautions to keep in mind.
Before we begin, please ensure that you have a good understanding of the process and feel comfortable handling the delicate internal components of the external hard drive. If not, it may be best to seek assistance from a professional technician to avoid causing any unnecessary damage.
Step 1: Gather the necessary tools
Before you start opening your Western Digital external hard drive, it’s important to gather the necessary tools to ensure a smooth and efficient process. Having the right tools on hand will make the task easier and minimize the risk of damaging the enclosure or the internal components.
Here are the tools you will need:
- A suitable screwdriver: The type of screwdriver you’ll need depends on the type of screws used in the external hard drive enclosure. Most Western Digital external hard drives typically use Phillips head screws. Make sure you have the correct size and type of screwdriver to avoid damaging the screws during removal.
- Anti-static wrist strap: Static electricity can harm the sensitive electronic components inside the hard drive. Using an anti-static wrist strap will help discharge any static electricity from your body, preventing it from transferring to the hard drive.
- A clean and static-free work surface: Find a safe and clean area to work on your external hard drive. A grounded work surface, such as an anti-static mat or a wooden table, can help prevent static discharge and protect the hard drive from accidental damage.
- Optional: Plastic pry tools or plastic spudger: These tools can be helpful when opening the external hard drive enclosure without scratching or damaging the plastic casing. They allow you to gently pry open the enclosure without using excessive force.
By ensuring you have these tools ready before you begin, you’ll be well-prepared for the process of opening your Western Digital external hard drive.
Step 2: Disconnect the external hard drive from your computer
Before you proceed with opening the Western Digital external hard drive, it is essential to disconnect it from your computer to avoid any potential data loss or damage during the process. Follow these steps to safely disconnect the external hard drive:
- Save and close any open files or applications that are accessing the external hard drive. This ensures that no data is being transferred or modified during the disconnection process.
- If you are using a Windows computer, locate the Safely Remove Hardware icon on the taskbar in the bottom right corner of your screen. It looks like a small USB plug with a green checkmark. If you are using a Mac computer, click on the Finder icon in the Dock, then locate and select the external hard drive in the sidebar.
- Click on the Safely Remove Hardware icon for Windows or choose the Eject option for Mac. This will notify the operating system that you want to safely disconnect the external hard drive.
- Wait for the system to display a confirmation message indicating that it is safe to disconnect the external hard drive. It may take a few seconds for the message to appear.
- Once you see the confirmation message, gently unplug the USB cable or disconnect the appropriate interface from the computer. Ensure that you do not yank the cable or apply excessive force, as this can damage the connectors.
By following these steps, you can safely disconnect your Western Digital external hard drive from your computer, preparing it for the next stages of the process.
Step 3: Locate the screws on the external hard drive enclosure
Now that you have safely disconnected your Western Digital external hard drive from your computer, it’s time to locate the screws on the external hard drive enclosure. These screws hold the enclosure in place and need to be removed in order to open the enclosure and access the internal components.
Follow these steps to locate the screws on the external hard drive enclosure:
- Examine the exterior of the external hard drive enclosure. Look for any visible screws that are securing the enclosure. They are usually located on the sides or at the back of the enclosure.
- Inspect the bottom side of the enclosure as well. Some Western Digital external hard drives may have screws hidden underneath rubber feet or labels. Carefully peel back any rubber feet or remove any labels to check if screws are concealed underneath.
- Use a magnifying glass or flashlight if necessary to ensure you don’t miss any hidden screws. Depending on the model of the Western Digital external hard drive, there may be different screw configurations, so be thorough in your examination.
Once you have located the screws on the external hard drive enclosure and ensured you have identified all of them, you are ready to move on to the next step: removing the screws using a suitable screwdriver.
Step 4: Remove the screws using a suitable screwdriver
With the screws located on the external hard drive enclosure, it’s time to remove them using a suitable screwdriver. Properly removing the screws will allow you to open the enclosure and access the internal components of your Western Digital external hard drive.
Follow these steps to remove the screws:
- Choose a screwdriver that matches the type and size of the screws located on the external hard drive enclosure. Most Western Digital external hard drives use Phillips head screws, so a Phillips screwdriver is usually the appropriate choice.
- Insert the screwdriver firmly into the head of the first screw. Make sure the screwdriver is properly aligned with the screw to avoid stripping the head.
- Rotate the screwdriver counterclockwise to loosen and remove the screw. Apply gentle but firm pressure, ensuring that the screwdriver is fully engaged with the screw head for maximum grip.
- Place the removed screw in a secure place, such as a small container or a labeled bag, to prevent loss or confusion.
- Repeat the process for each screw on the external hard drive enclosure, carefully removing them one by one. Be sure to keep track of the exact location of each screw, as different screws may have different lengths or positions.
Once you have successfully removed all the screws from the external hard drive enclosure, you are now ready to proceed to the next step: opening the external hard drive enclosure carefully.
Step 5: Open the external hard drive enclosure carefully
After removing the screws from the external hard drive enclosure, it’s time to open it carefully to access the internal components. Opening the enclosure requires caution and precision to avoid damaging the casing or any internal parts of your Western Digital external hard drive.
Follow these steps to open the external hard drive enclosure:
- Hold the external hard drive enclosure firmly with both hands, ensuring a secure grip. Make sure your hands are clean and dry to prevent slippage during the process.
- Look for any seams, notches, or tabs around the edges of the enclosure. These are usually designed to provide access points for opening the enclosure.
- Using your fingers or plastic pry tools, carefully apply gentle pressure to these access points. Start at one corner or edge of the enclosure and work your way along the perimeter.
- As you apply pressure, you should feel the enclosure starting to separate or pop open. Be patient and gentle, making sure not to force or rush the process.
- Continue applying even pressure and working your way around the enclosure until you have fully opened it and exposed the internal components. Take your time and be mindful of any resistance or areas that may require additional care.
Once the external hard drive enclosure is open, it’s important to handle the internal components with caution. Take a moment to familiarize yourself with the layout and organization of the internal components before proceeding to the next step of the process.
Step 6: Access the internal components of the Western Digital hard drive
Now that you have successfully opened the external hard drive enclosure, you can proceed to access the internal components of your Western Digital hard drive. This step allows you to perform various tasks such as upgrading the hard drive, troubleshooting issues, or retrieving data if needed.
Follow these steps to access the internal components of the Western Digital hard drive:
- Before touching any internal components, ground yourself by wearing an anti-static wrist strap or by touching a grounded metal object. This helps to discharge any static electricity that could potentially damage the sensitive electronic components.
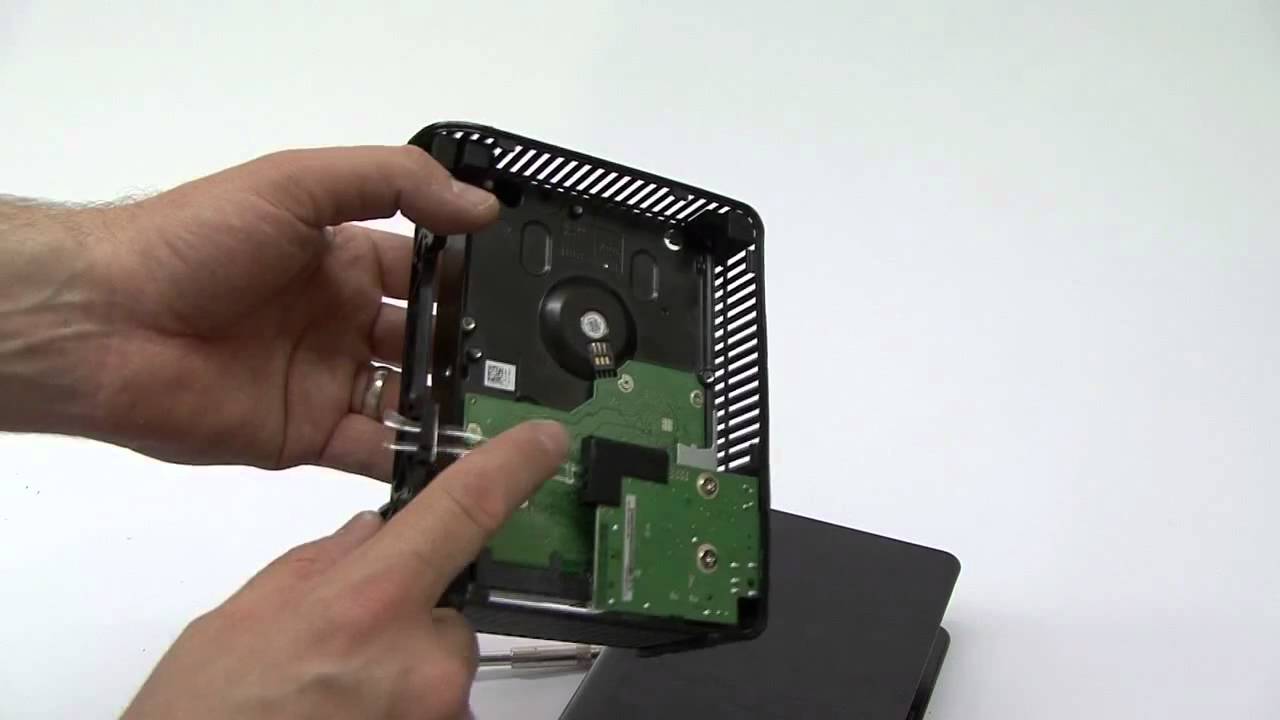
- Observe the internal layout of the Western Digital hard drive. Take note of the different components such as the hard drive itself, the circuit board, and any other cables or connectors.
- If your intention is to upgrade the hard drive, locate the existing hard drive within the enclosure. Determine whether it is held in place by screws or brackets, and proceed accordingly to remove it.
- If you need to troubleshoot an issue or retrieve data, inspect the circuit board and cables for any signs of damage or loose connections. Use a gentle touch and avoid applying excessive force to prevent any accidental damage.
- If necessary, disconnect and remove any cables or connectors that are connected to the internal components. Take note of their respective positions and orientations to ensure proper reassembly later.
Remember to handle the internal components of the Western Digital hard drive with care and avoid touching any exposed circuitry. If you are unsure about any specific tasks or require further guidance, it is recommended to consult a professional or refer to the manufacturer’s documentation.
Step 7: Handle the internal components with caution
When accessing the internal components of your Western Digital hard drive, it is crucial to handle them with great care to avoid causing any damage or compromising the functionality of the device. This step emphasizes the importance of proper handling techniques and precautions to ensure a successful and safe process.
Here are some key points to consider when handling the internal components:
- Wear an anti-static wrist strap or ground yourself before touching any internal components. This helps to prevent any static electricity discharge that could potentially harm the sensitive electronic parts.
- Avoid touching the exposed circuitry or delicate components directly with your fingers. Oils, dirt, or debris from your skin can hinder the functionality of the device or potentially cause damage. If necessary, use clean and non-marring tools or wearing protective gloves.
- Take note of the proper orientation and placement of cables and connectors before disconnecting them. It is essential to remember their positions to ensure correct reassembly later on. Consider taking pictures or labeling them if needed.
- If you are removing the hard drive itself, hold it by the edges and avoid touching the exposed circuit board or any metallic parts. Always place it on a secure and static-free surface.
- When inspecting or troubleshooting the circuit board, avoid applying pressure or using excessive force. Delicate electronic components can easily be damaged by rough handling.
- If you encounter any resistance or are unsure about a particular task, it is wise to seek professional assistance or consult the manufacturer’s documentation. Improper handling can lead to irreversible damage or void the device’s warranty.
By adhering to these precautions and handling the internal components with caution, you can minimize the risk of damage and ensure a successful access to the internal components of your Western Digital hard drive.
Step 8: Close the external hard drive enclosure
After you have finished accessing the internal components of your Western Digital hard drive, it’s time to close the external hard drive enclosure. Properly securing the enclosure ensures the protection of the internal components and maintains the integrity of your hard drive.
Follow these steps to close the external hard drive enclosure:
- Ensure that all cables and connectors are properly positioned and reconnected to their respective ports on the internal components. Verify that everything is securely attached to avoid any loose connections or potential issues.
- Carefully align the two halves of the external hard drive enclosure, ensuring that no cables or components are trapped or pinched between them. Take your time to ensure a proper fit.
- Gently press the two halves of the enclosure together, applying even pressure along the edges. Ensure that they are aligned and that there are no gaps or misalignments.
- If your enclosure uses screws to secure the casing, insert them into their respective screw holes. Begin by tightening the screws loosely first, and then go around tightening them in a diagonal pattern until they are all securely fastened.
- Double-check that all the screws are tightened, but be careful not to over-tighten them as it may cause damage to the enclosure or strip the threads.
Once the external hard drive enclosure is closed and secured, you have successfully completed the process. You can now proceed to reconnect the external hard drive to your computer and resume using it for storage, backup, or any other intended purposes.
Remember that if you have made any changes to the internal components, such as replacing the hard drive, ensure that you properly format and set up the drive before using it again.
Step 9: Reconnect the external hard drive to your computer
After successfully closing the external hard drive enclosure, you are now ready to reconnect the device to your computer. By following this final step, you can ensure that your Western Digital external hard drive is recognized and accessible for data storage or other purposes.
Follow these steps to reconnect the external hard drive to your computer:
- Locate the USB cable or appropriate interface cable that connects the external hard drive to your computer.
- Ensure that both ends of the cable are clean and free from any debris or damage.
- Find an available USB port or interface on your computer and insert the corresponding end of the cable firmly.
- Apply gentle pressure to ensure a secure connection, but avoid using excessive force that could potentially damage the USB port or the cable.
- Once the cable is securely connected, your computer should detect the external hard drive and automatically recognize it.
- If your computer does not automatically recognize the external hard drive, you may need to manually initialize or format the drive through the disk management utility on your operating system.
- Once recognized by your computer, you can now access the external hard drive and use it for your desired purposes, such as storing files, performing backups, or transferring data.
It’s important to remember that after reconnection, it may take a few moments for the computer to recognize and configure the external hard drive. Be patient and allow the necessary time for the process to complete.
By following these steps, you have successfully reconnected your Western Digital external hard drive to your computer, and it is now ready for use.
Conclusion
Opening a Western Digital external hard drive may seem like a daunting task, but by following the steps outlined in this guide, you can safely access the internal components and perform tasks such as upgrading the hard drive or troubleshooting issues. Taking the necessary precautions and using the right tools will help ensure success and minimize the risk of damage.
Remember to always disconnect the external hard drive from your computer before proceeding with any disassembly. Additionally, gather the necessary tools, including a suitable screwdriver and an anti-static wrist strap, to ensure a smooth and efficient process.
Locate and remove the screws on the external hard drive enclosure, being careful not to strip them or lose track of their placement. Once the screws are removed, open the enclosure with caution, taking note of the internal components and handling them with care.
When handling the internal components, be mindful of static electricity and avoid touching exposed circuitry or applying excessive force. Properly reconnect the components, align the enclosure halves, and secure the enclosure by tightening the screws.
Finally, reconnect the external hard drive to your computer, ensuring a solid connection. If needed, initialize or format the drive to make it recognizable to your operating system. Once connected, you can access the external hard drive and use it for storage, backup, or any other intended purposes.
Remember that opening the external hard drive enclosure may void your warranty, so it’s important to check the warranty status and consider the potential risks before proceeding with any modifications.
By following these steps and handling the process with care, you can successfully open your Western Digital external hard drive and access its internal components. Enjoy the freedom and flexibility to upgrade, troubleshoot, or retrieve data as needed.