Introduction
Welcome to our step-by-step guide on how to open a Cyber Power PC case. Whether you need to upgrade your hardware, clean the components, or troubleshoot any issues, knowing how to properly open your PC case is essential. With a few simple tools and careful instructions, you’ll be able to access the inner workings of your computer and perform necessary maintenance or upgrades.
A Cyber Power PC case is designed to house and protect the internal components of your computer, including the motherboard, graphics card, power supply, and storage devices. Opening the case allows you to access these components for various purposes, such as installing additional RAM, replacing a faulty hard drive, or connecting additional peripherals.
Before we dive into the step-by-step process, it’s important to note that opening your PC case should be done with caution and care. Make sure to follow these instructions carefully and be mindful of static electricity, which can damage sensitive computer components. It’s also advisable to take proper precautions, such as wearing an anti-static wrist strap and working on a grounded surface.
In this guide, we will walk you through the process of opening a Cyber Power PC case, providing you with the necessary tools, step-by-step instructions, and tips to ensure a successful and safe experience. So let’s get started and unlock the world of possibilities within your computer!
Before we begin, make sure you have the following tools on hand:
- Screwdriver (typically a Phillips head)
- Anti-static wrist strap (optional, but recommended)
- Clean, lint-free cloth
Gather these tools to ensure you have everything you need to proceed with confidence. Now, let’s move on to the first step of the process: powering down the computer.
Tools Required
Before we begin opening your Cyber Power PC case, it’s important to gather the necessary tools. These tools will help ensure a smooth and efficient process:
- Screwdriver: You’ll need a screwdriver to remove the screws that secure the side panel of the PC case. Most PC cases require a Phillips head screwdriver, so make sure you have one that fits the screws on your specific case.
- Anti-static wrist strap: While this tool is optional, it’s highly recommended to prevent any static electricity buildup. An anti-static wrist strap helps in grounding yourself and protects your computer’s sensitive components from electrostatic discharge (ESD).
- Clean, lint-free cloth: Having a clean cloth on hand will allow you to wipe away any dust or debris that may have accumulated on the components or inside the case. A lint-free cloth is ideal to avoid leaving any fibers behind.
By ensuring you have these tools readily available, you’ll be prepared for the task ahead and can confidently proceed with opening your Cyber Power PC case. Before we move on, make sure you have these tools within reach.
Now that we’ve gathered our tools, it’s time to begin the process by powering down the computer. This step is crucial to ensure the safety of both yourself and the components of your PC. Let’s move on to the next step.
Step 1: Power down the computer
Before we can start working on opening the Cyber Power PC case, it’s important to properly power down the computer. This step ensures the safety of both yourself and the internal components of your PC. Follow these instructions to power down your computer:
- Save your work and close all applications: Make sure you save any unsaved work and close all running applications before shutting down your computer. This will prevent any data loss or issues when you power up your PC again.
- Click on the “Start” button: In the bottom left corner of your screen, you’ll find the “Start” button. Click on it to open the Start menu.
- Select “Power”: From the Start menu, select the “Power” option. A submenu will appear with various power options.
- Choose “Shut down”: Select the “Shut down” option from the submenu. This will initiate the shut down process.
- Wait for the computer to turn off: Give your computer some time to fully shut down. You may notice lights and fans turning off as the process completes.
- Unplug the power cord: Once the computer is fully powered down, unplug the power cord from the back of the computer or the power outlet. This will ensure that there is no electrical current flowing through the system.
By following these steps, you have successfully powered down your computer, making it safe to proceed with opening the Cyber Power PC case. Now that the computer is powered off, we can move on to the next step, which involves removing any external cables connected to the computer.
Step 2: Remove any external cables
After powering down your computer, the next step in opening the Cyber Power PC case is to remove any external cables that are connected to your computer. This step ensures that you have a clear and unobstructed path to the case and prevents any potential damage to the cables or ports. Follow these instructions to remove the external cables:
- Identify the external cables: Take a moment to visually inspect your computer and identify the external cables connected to it. This can include cables for the monitor, keyboard, mouse, speakers, USB devices, and any other peripherals.
- Trace the cables to their sources: Follow each cable from your computer to its respective source. For example, trace the cable from the back of your monitor to the video output port on your computer, and so on.
- Disconnect the cables: Carefully unplug each cable from its corresponding port. Hold the connector firmly and gently wiggle it from side to side while pulling it straight out to avoid damaging the port or cable.
- Organize and store the cables: As you disconnect each cable, take a moment to neatly coil or bundle them together. This helps prevent tangles and makes it easier to reconnect them later. If possible, label each cable for easy identification.
By following these steps, you have successfully removed the external cables from your computer. This ensures that there are no obstructions when it comes time to open the Cyber Power PC case. Now that the external cables are disconnected, we can proceed to the next step, which involves removing the side panel of the case.
Step 3: Remove the side panel
Now that the external cables are disconnected, we can move on to removing the side panel of the Cyber Power PC case. This step will allow us to access the internal components of the computer. Follow these instructions to remove the side panel:
- Locate the screws: Take a close look at the back or side of the PC case to locate the screws that secure the side panel in place. These screws may be Philips-head or thumbscrews, depending on the specific case model.
- Remove the screws: Using a screwdriver (or your fingers, if the case has thumbscrews), carefully remove the screws that hold the side panel in place. Set the screws aside in a safe location so that you don’t lose them.
- Slide or swing out the panel: Once the screws are removed, gently slide or swing out the side panel. Some cases may have a latch or release mechanism that needs to be pressed or pulled to fully remove the side panel.
- Place the side panel in a safe location: Find a clean and safe area to place the side panel. Make sure it is kept in a position where it won’t accidentally get damaged or cause any tripping hazards.
With the side panel removed, you now have access to the internal components of your Cyber Power PC. Take a moment to familiarize yourself with the layout and configuration of the components inside the case. This will help you navigate and perform any necessary tasks more efficiently.
Now that the side panel is removed and you’re ready to work on the internals of your computer, we can move on to the next step: finding and removing the screws that secure the components in place.
Step 4: Locate and Remove the Screws
With the side panel of your Cyber Power PC case removed, it’s time to locate and remove the screws that secure the components inside. These screws hold the various hardware components, such as the graphics card, hard drive, and RAM, in place. Follow these instructions to locate and remove the screws:
- Identify the screws: Take a look inside your computer case and locate the screws that secure the components. These screws may vary in size and shape depending on the specific hardware and case design.
- Refer to the manual: If you’re unsure about which screws to remove, consult the user manual that came with your Cyber Power PC or visit the manufacturer’s website for specific instructions. The manual will provide guidance on the types of screws used and where they are located.
- Use a screwdriver: Select the appropriate screwdriver for the screws in your computer case. Most PC screws require a Phillips head screwdriver, but some may require a different type, such as a Torx or flathead screwdriver.
- Remove the screws: Carefully unscrew and remove each screw that secures a component. Place the screws aside in a safe location, keeping them organized if there are multiple types of screws used.
- Track the location of each screw: As you remove each screw, take note of its location and which component it was securing. This will make it easier to reassemble your PC later without any confusion.
By following these steps, you have successfully located and removed the screws that hold the components in place within your Cyber Power PC. With the screws removed, we can now proceed to the next step, which involves opening the case and gaining access to the internal components of the computer.
Step 5: Open the Case
Now that you have removed the screws securing the components, it’s time to open the case of your Cyber Power PC and gain access to the internal components. Follow these instructions to open the case:
- Locate the latches or release mechanisms: Take a close look at the case to identify any latches, release buttons, or mechanisms that hold the case together. These vary depending on the specific model and design of your Cyber Power PC.
- Release the latches or press the release buttons: Use your fingers or a tool to release the latches or press the release buttons to unlock the case. This may involve sliding, pulling, or pressing certain parts of the case.
- Gently open the case: Once the latches or release mechanisms are disengaged, carefully open the case. Depending on the design, you may need to slide the panel to one side, lift it up, or remove it completely.
- Secure the case panel: If the case panel is removable, set it aside in a safe place. If it is attached to the case, ensure that it is properly secured in an open position and won’t accidentally close while you work inside the PC.
With the case open, you now have direct access to the internal components of your Cyber Power PC. Take a moment to familiarize yourself with the layout and organization of the components inside the case. This will make it easier for you to navigate and work on the internals of your computer.
Now that the case is open and you have unhindered access to the internal components, we can move on to the next step: accessing and performing tasks on the specific hardware components of your Cyber Power PC.
Step 6: Access the Components
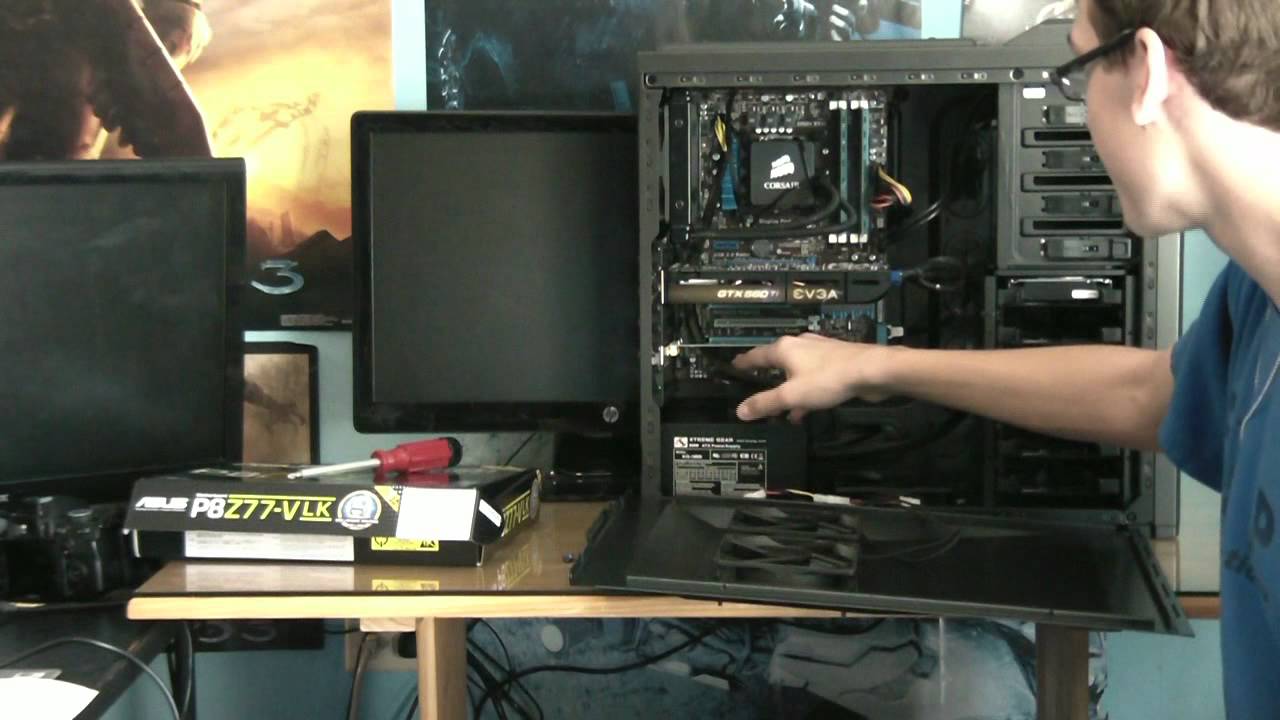
With the case of your Cyber Power PC open, you now have the opportunity to access and work on the internal components of your computer. This step will allow you to perform various tasks, such as upgrading hardware, cleaning the components, or troubleshooting any issues. Follow these instructions to access the components:
- Familiarize yourself with the layout: Take a moment to observe and familiarize yourself with the layout of the components inside the case. Identify the motherboard, graphics card, RAM slots, storage devices, and any other hardware components present.
- Handle components with care: When accessing the components, it’s important to handle them with caution. Avoid touching any gold contacts or delicate circuitry directly. Instead, hold components by the edges or use an anti-static wrist strap to prevent any electrostatic discharge.
- Perform tasks as required: Depending on your specific needs, you can now perform tasks such as installing additional RAM, replacing a graphics card, cleaning dust from the fans, or connecting additional peripherals.
- Follow proper procedures: When working with hardware components, it’s crucial to follow proper procedures. Consult the user manual or online resources specific to your components to ensure that you are performing the tasks correctly and safely.
- Take note of cable connections: Pay attention to the cables and connectors attached to the components. This will help you efficiently disconnect and reconnect them when needed. Consider taking pictures or labeling cables to ease the reassembly process.
By following these steps, you can access the components within your Cyber Power PC and perform various tasks to upgrade, clean, or troubleshoot your computer. Remember to proceed with caution and refer to the user manual or online resources for specific instructions relating to your components.
Now that you have accessed the components, we can move on to the final step of the process: closing the case and ensuring everything is properly secured.
Step 7: Close the Case
After you have finished working on the components inside your Cyber Power PC, it’s time to close the case and ensure that everything is properly secured. Follow these instructions to close the case:
- Reconnect any cables: Before closing the case, make sure to reconnect any cables that you disconnected earlier. This includes power cables, data cables, and any other peripheral connections.
- Align the side panel: Position the side panel back onto the case, making sure it aligns correctly with any hooks, tabs, or grooves. Take care not to trap any cables or components between the case and the panel.
- Slide or swing the panel into place: Once the panel is aligned, gently slide or swing it back into its original position. Ensure that it fits snugly and securely without any gaps or misalignments.
- Secure the panel with screws: If the panel requires screws to secure it, use the appropriate screwdriver to tighten them back into place. Make sure not to overtighten, as this could potentially damage the case or strip the screws.
- Double-check the closure: After securing the panel, give it a gentle shake or press it lightly to ensure that it is securely closed. This will help prevent any rattling or movement that could potentially damage the components inside.
- Reconnect the external cables: Finally, reconnect all the external cables to their respective ports on the back of the computer. Double-check that each cable is securely plugged in and that there are no loose connections.
By following these instructions, you have successfully closed the case of your Cyber Power PC and ensured that everything is properly secured. Take a moment to appreciate the clean and organized appearance of your computer before moving on to power it back on.
With the case closed and all cables reconnected, you can now proceed to power on your computer and enjoy the enhanced performance or benefits of any upgrades or maintenance you have performed.
Conclusion
Congratulations! You have successfully learned how to open a Cyber Power PC case. By following the step-by-step instructions outlined in this guide, you can confidently access the internal components of your computer. Whether you need to upgrade hardware, clean the components, or troubleshoot any issues, having the knowledge and skills to open your PC case is invaluable.
Throughout this guide, we emphasized the importance of taking precautions, such as powering down the computer and using anti-static measures, to ensure a safe working environment. It’s crucial to handle the components with care, follow proper procedures, and refer to the manufacturer’s instructions whenever necessary.
Opening your Cyber Power PC case gives you the freedom to customize and maintain your computer to suit your unique needs. From installing additional RAM for better performance to replacing a faulty component, you now have the ability to enhance the functionality and longevity of your PC.
Remember, whenever you work on your computer, take your time and be patient. If you encounter any difficulties or are unsure about a specific task, it’s always a good idea to seek additional resources or consult a professional for guidance.
We hope that this guide has provided you with the necessary knowledge and confidence to open your Cyber Power PC case and explore the inner workings of your computer. By doing so, you can unleash the full potential of your PC and enjoy a seamless and optimized computing experience.
Now that you have successfully closed the case and completed the necessary tasks, it’s time to power on your computer and enjoy the benefits of your maintenance or upgrades. Happy computing!