Introduction
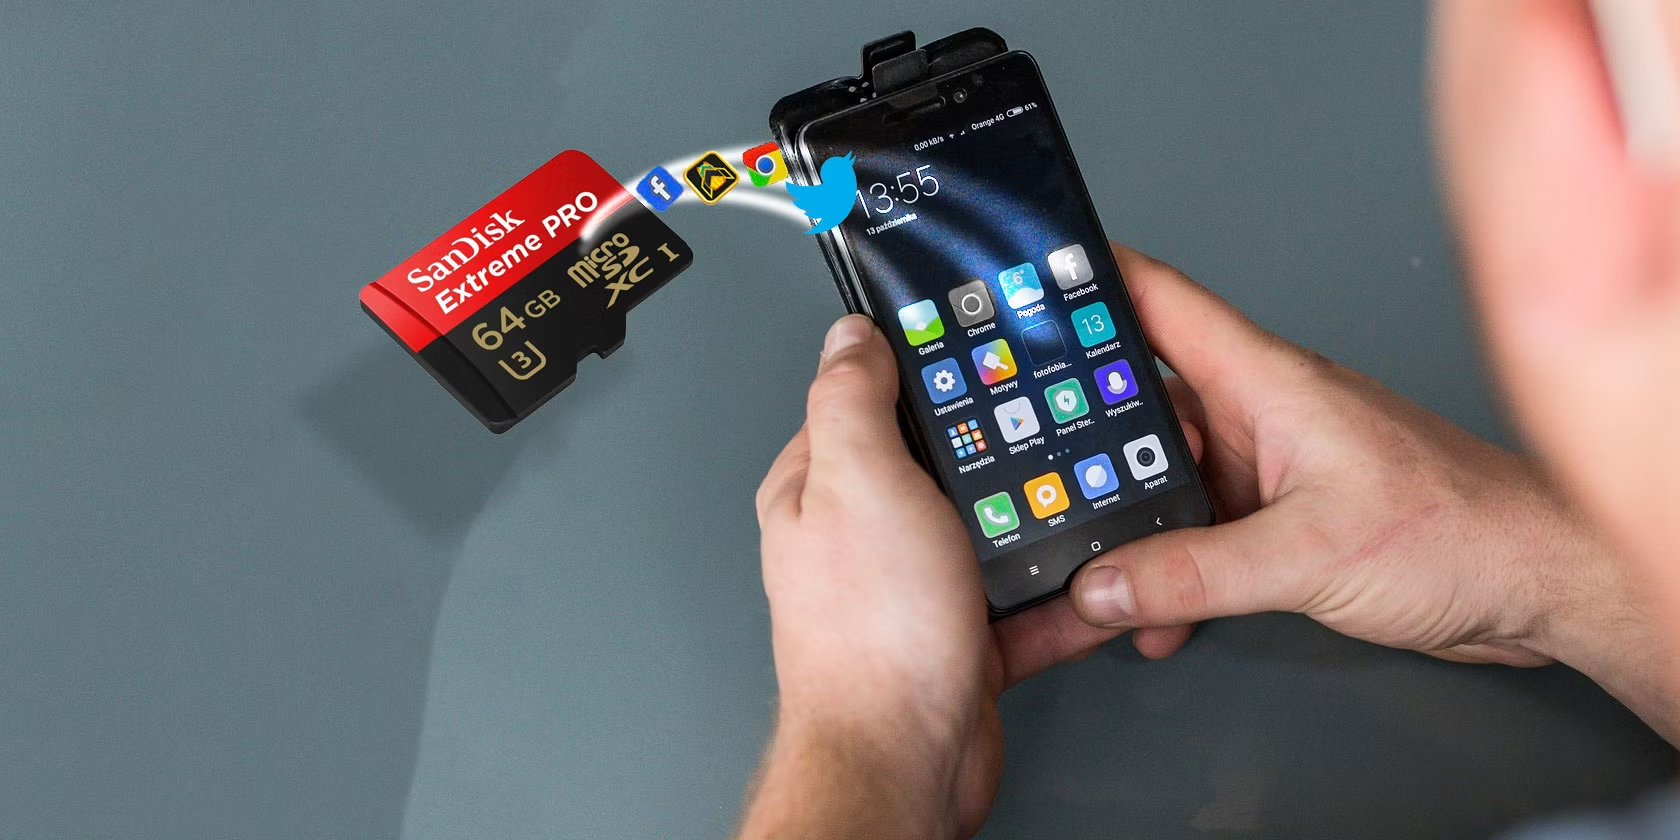
Android 6.0 Marshmallow introduced a highly anticipated feature that allows users to move apps from the internal storage to an SD card. This feature is especially beneficial for devices with limited internal storage, as it allows users to free up space and store apps on an external SD card.
By moving apps to the SD card, users can also enjoy faster app installation and updates, as well as smoother app performance. Furthermore, this feature gives users more control over their storage options, enabling them to prioritize important apps and files.
However, it’s worth noting that not all Android devices running on Marshmallow support this feature. It largely depends on the device manufacturer and their implementation of the operating system. In this guide, we will discuss the steps to check if your device supports moving apps to the SD card, as well as the process of moving apps and managing them afterwards.
Whether you’re running low on internal storage or simply want to optimize your device’s performance, learning how to move apps to the SD card can greatly enhance your Android experience. So, let’s dive into the world of SD cards and explore how to make the most of this convenient feature on your Android 6.0 device.
Understanding the Android 6.0 Marshmallow feature
Android 6.0 Marshmallow introduced the ability to move apps from the internal storage to an SD card, bringing greater flexibility and storage options for users. This feature is particularly useful for devices that have limited internal storage capacity.
When you move an app to the SD card, the app’s code and data are transferred from the device’s internal storage to the external storage. This frees up valuable space on the internal storage, allowing you to install more apps, download files, and capture photos and videos without worrying about running out of space.
It’s important to note that not all apps can be moved to the SD card. System apps and some pre-installed apps are typically locked on the internal storage and cannot be moved. However, most user-installed apps can be moved, giving you the flexibility to allocate storage according to your preferences.
By default, when you install an app on your Android device, it is stored in the internal storage. This is because the internal storage provides faster read and write speeds compared to external storage. However, the option to move apps to the SD card gives you the freedom to prioritize certain apps that you don’t use frequently, allowing you to reserve the faster internal storage for apps that require optimal performance.
It’s important to note that there may be some trade-offs when using the SD card for app storage. While the SD card provides additional space, it may not offer the same level of performance as the internal storage. Some apps may experience slightly slower loading times when accessed from the SD card. However, this trade-off is often worth it for users who prioritize storage capacity over performance.
Understanding this feature and its implications will help you make informed decisions about which apps to move to the SD card and how to manage your storage effectively. Being aware of these considerations ensures that you can optimize your device’s storage and performance without compromising on usability.
Checking if your device supports moving apps to the SD card
Before you can move apps to the SD card on your Android device running Android 6.0 Marshmallow, it’s important to check if your device supports this feature.
To check if your device supports moving apps to the SD card, follow these steps:
- Go to Settings: Open the Settings app on your Android device. You can usually find it in the app drawer or by swiping down from the top of the screen and tapping on the gear-shaped icon.
- Find the Storage option: Look for the “Storage” or “Storage & USB” option in the Settings menu. The location may vary depending on the device or the Android OS skin used by the manufacturer.
- Check for the option to move apps: In the Storage menu, look for an option like “Internal storage” or “Device storage.” Tap on it to access the storage settings.
- Look for the option to move apps to the SD card: Scroll through the storage settings and see if there is an option to move apps to the SD card. This option may be labeled as “Move apps to SD card” or “Default write disk.” If you find this option, it indicates that your device supports moving apps to the SD card.
If you are unable to find the option to move apps to the SD card in the storage settings, it means that your device does not support this feature. In such cases, you may need to consider alternative methods to free up space on your device, such as uninstalling unused apps, clearing cache files, or transferring files to a computer or cloud storage.
It’s worth noting that even if your device supports moving apps to the SD card, not all apps can be moved. Some apps are designed to work only on the internal storage, and they cannot be moved to external storage. In such cases, the option to move the app to the SD card will be grayed out or unavailable.
Now that you have checked if your device supports moving apps to the SD card, you can proceed with installing an SD card and learning how to move apps effectively.
Installing an SD card in your Android device
Before you can start moving apps to an SD card on your Android device, you need to ensure that an SD card is properly installed in your device.
Here are the steps to install an SD card in your Android device:
- Locate the SD card slot: Most Android devices have a dedicated slot for inserting an SD card. The location of the slot may vary depending on the device model, so refer to your device’s user manual or manufacturer’s website to find the exact location.
- Turn off your device: It is recommended to turn off your Android device before inserting or removing the SD card. This helps protect the card and prevent any data corruption or damage.
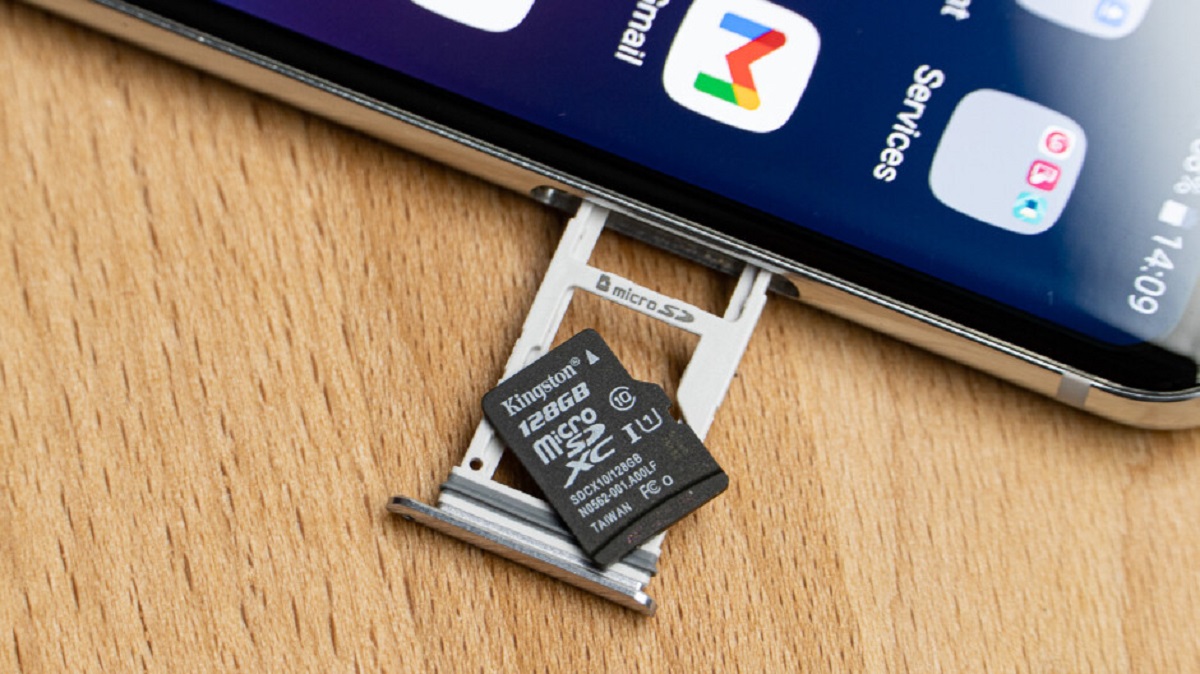
- Open the SD card slot: Use a SIM card ejector tool or a small paperclip to gently push into the small hole next to the SD card slot. This will release the latch and allow you to access the slot.
- Insert the SD card: Carefully insert the SD card into the slot, ensuring that the metal contacts on the card align with the contacts inside the slot. Push the card in until it is firmly seated in the slot. Be careful not to force it in or insert it upside down, as this can damage the card or the device.
- Close the SD card slot: Once the SD card is inserted, push the slot back into the device until it is securely closed. You should hear a click or feel a small resistance when the slot is fully closed.
- Power on your device: Turn on your Android device and wait for it to boot up. Once it is powered on, the device will detect the SD card and prepare it for use.
It’s important to note that some devices may require you to format the SD card before using it. If prompted, follow the on-screen instructions to format the card as portable storage or internal storage, depending on your device’s capabilities and your storage needs.
Once the SD card is successfully installed in your Android device, you can proceed with moving apps to the SD card and enjoying the benefits of increased storage capacity.
Moving apps to the SD card
Now that you have confirmed that your device supports moving apps to the SD card and have installed an SD card in your Android device, you can start moving apps to the external storage to free up space on your internal storage.
Here’s how to move apps to the SD card:
- Open the Settings app: Locate the Settings app on your Android device. You can usually find it in the app drawer or by swiping down from the top of the screen and tapping on the gear-shaped icon.
- Access the Apps or Applications menu: In the Settings menu, look for an option called “Apps” or “Applications.” Tap on it to access the app settings.
- Select the app you want to move: From the list of installed apps, find the app that you want to move to the SD card. Tap on the app to open its settings.
- Tap on the “Storage” option: In the app settings, look for an option called “Storage” or “Storage & cache.” Tap on it to access the storage settings for the selected app.
- Initiate the app transfer: If the app can be moved to the SD card, you will see an option like “Change” or “Transfer to SD card.” Tap on this option to initiate the app transfer process.
- Confirm the app transfer: A confirmation dialog will appear, explaining that moving the app to the SD card may affect its performance. Read the dialog carefully and tap “OK” or “Move” to confirm the transfer.
- Wait for the transfer to complete: The app transfer process may take a few moments, depending on the size of the app and the speed of your SD card. Make sure not to interrupt the process or remove the SD card while the transfer is in progress.
- Repeat the process for other apps: If you have multiple apps that you want to move to the SD card, repeat the above steps for each app individually.
It’s important to note that not all apps can be moved to the SD card. Some apps are designed to work only on the internal storage and cannot be transferred. In such cases, the option to move the app to the SD card will be grayed out or unavailable in the app settings.
By moving apps to the SD card, you can free up valuable space on your device’s internal storage and ensure that your device operates smoothly. However, keep in mind that some apps may experience slightly slower loading times when accessed from the SD card due to the difference in read and write speeds.
Now that you have successfully moved apps to the SD card, you can take advantage of the increased storage capacity and enjoy a more optimized Android experience.
Changing the default storage location for new apps
By default, when you install new apps on your Android device, they are stored in the internal storage. However, if you want to save space on your internal storage or prioritize the SD card for app installations, you can change the default storage location for new apps.
Here’s how to change the default storage location for new apps:
- Open the Settings app: Locate and open the Settings app on your Android device.
- Access the Apps or Applications menu: In the Settings menu, look for an option called “Apps” or “Applications.” Tap on it to access the app settings.
- Tap on the three-dot menu: Look for a three-dot menu icon at the top right corner of the app settings screen. Tap on it to reveal additional options.
- Select “Default Apps” or “App Manager”: From the menu options, select “Default Apps” or “App Manager” to access the default app settings.
- Find the option to change default install location: Scroll through the list of options and look for an option like “Default install location” or “Install location.” Tap on it to access the storage settings for new app installations.
- Select the SD card as the default storage: In the storage settings, you will usually find two options: “Internal storage” and “SD card.” Select the “SD card” option to change the default storage location for new app installations.
- Confirm your selection: A confirmation dialog may appear, warning you that changing the default install location may affect app performance. Read the dialog carefully and tap “OK” or “Confirm” to save your selection.
Once you have changed the default storage location for new apps, any future app installations will be directed to the SD card instead of the internal storage. This helps you save space on your device’s internal storage and ensures a smoother app installation process.
It’s important to note that not all apps can be installed directly on the SD card, even when you change the default storage location. Some apps are intended to be installed on the internal storage for optimal performance. In these cases, the app installation will still take place on the internal storage.
By customizing the default storage location for new apps, you have greater control over your Android device’s storage management. You can prioritize the SD card for app installations, allowing you to maximize your device’s available storage space and enhance its performance.
Managing apps on the SD card
Now that you have successfully moved apps to the SD card and changed the default storage location for new apps, it’s important to understand how to effectively manage the apps stored on your SD card.
Here are some tips for managing apps on the SD card:
- Regularly check for app updates: Just like apps stored on the internal storage, apps on the SD card may require updates to fix bugs or introduce new features. Make it a habit to check for app updates through the Google Play Store and install them as necessary, ensuring that your apps stay up to date.
- Monitor app performance: Keep an eye on the performance of apps stored on the SD card. Some apps may experience slightly slower loading times compared to when they are stored on the internal storage. If you notice any significant lag or performance issues, consider moving the app back to the internal storage (if supported) or uninstalling it if it’s not essential.
- Manage app cache and data: Over time, apps on the SD card may accumulate cache files and data, which can take up storage space. Regularly clear app cache and data for apps on the SD card by going to Settings > Apps > [App Name] > Storage. Tap on “Clear cache” and “Clear data” to free up space and improve app performance.
- Uninstall unnecessary apps: Periodically review the apps stored on the SD card and uninstall any apps that you no longer use or need. This helps free up space and keeps your device clutter-free.
- Be cautious when removing the SD card: If you need to remove the SD card from your device, make sure to follow proper procedures. Go to Settings > Storage and tap on “Unmount SD card” before physically removing it. This ensures that all data is safely ejected and prevents any potential data loss or corruption.
Additionally, it’s worth noting that if you reset your device to factory settings or format the SD card, any apps or data stored on the SD card will be deleted and cannot be recovered. Therefore, it’s essential to regularly backup important data and apps to a separate location, such as your computer or cloud storage, to prevent data loss.
By effectively managing apps on the SD card, you can ensure optimal performance, efficient storage usage, and a hassle-free Android experience.
Troubleshooting common issues
While moving apps to the SD card can be a convenient way to manage storage on your Android device, you may encounter some common issues along the way. Here are some troubleshooting tips for resolving these issues:
- App performance issues: If you notice that an app stored on the SD card is experiencing slow loading times or performance issues, consider moving it back to the internal storage (if supported). Some apps may not function optimally when stored on the SD card due to the difference in read and write speeds.
- App not movable: If you encounter an app that cannot be moved to the SD card, it means the app developer has designated it to work only on the internal storage. Unfortunately, there is no workaround for this issue, as it is a limitation set by the app developer.
- SD card not detected: If your Android device fails to detect the SD card, check if it is properly inserted. Remove the SD card and reinsert it securely into the device’s SD card slot. If the issue persists, try using a different SD card to determine whether the problem lies with the card or the device.
- SD card compatibility: Ensure that the SD card you are using is compatible with your Android device. Check the device specifications or consult the manufacturer’s website to see which types and capacities of SD cards are supported. Using an incompatible SD card can lead to performance issues or cause the card to not be recognized by your device.
- App data loss: When moving an app to the SD card, it is possible that some app data may be lost or become inaccessible. This can occur if the app is uninstalled, the SD card is removed, or the device is reset to factory settings. To prevent data loss, regularly backup important app data to a separate location, such as cloud storage or your computer.
If you continue to experience issues with moving apps to the SD card or have any other concerns, it’s recommended to reach out to the device manufacturer’s support or consult community forums where fellow users may have encountered and resolved similar issues.
By troubleshooting common issues, you can ensure a smooth and seamless experience when managing apps on the SD card, optimizing storage, and maximizing the potential of your Android device.
Conclusion
Moving apps to the SD card on your Android 6.0 Marshmallow device can greatly enhance your storage options and overall device performance. By freeing up space on your internal storage, you can install more apps, download files, and capture photos and videos without worrying about running out of storage.
We discussed the process of checking if your device supports moving apps to the SD card and how to install an SD card in your Android device. We also explored how to move apps to the SD card, change the default storage location for new apps, and effectively manage apps stored on the SD card.
While managing apps on the SD card can bring numerous benefits, it’s important to keep in mind that not all apps can be moved. Some apps may be locked on the internal storage for performance reasons or due to the restrictions imposed by the app developers.
If you encounter any issues, such as app performance problems or SD card detection difficulties, refer to the troubleshooting tips provided in this guide. Ensuring SD card compatibility, properly inserting the SD card, and regularly backing up important app data are key steps in maximizing your device’s potential.
By following the steps outlined in this guide and being mindful of the limitations and troubleshooting tips, you can effectively manage your Android device’s storage, enjoy smoother app performance, and optimize your overall Android experience.