Introduction
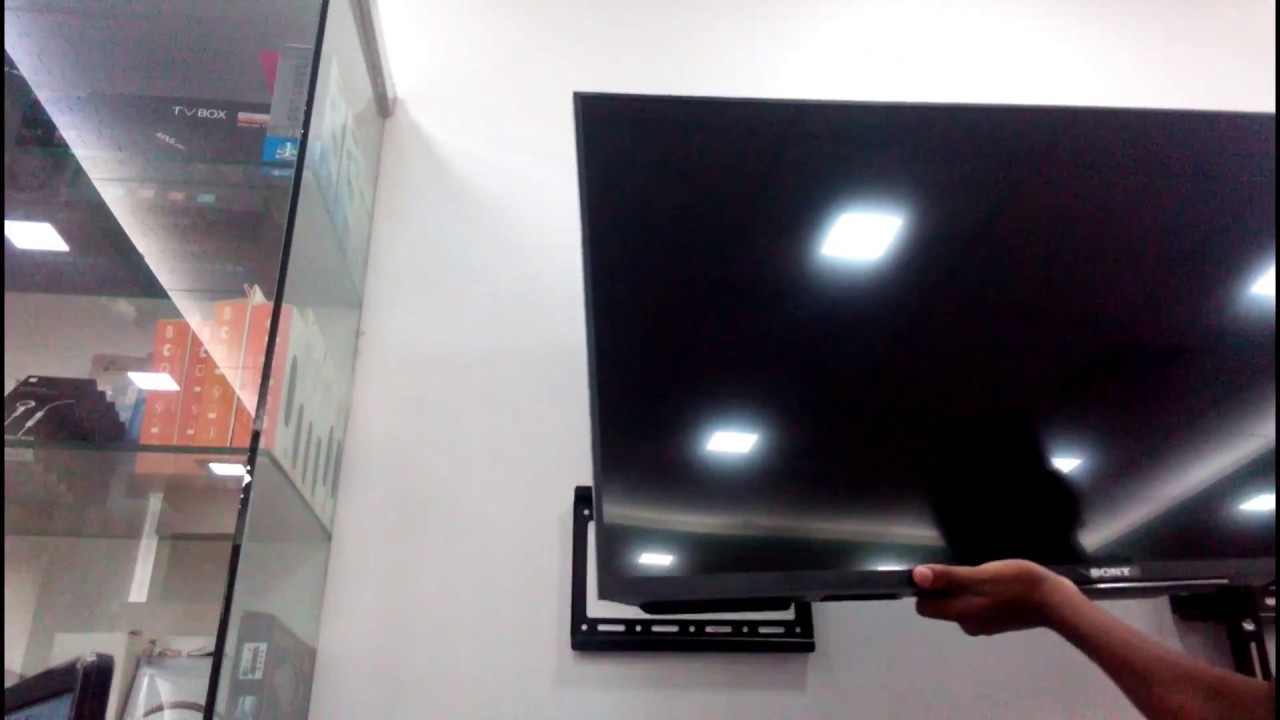
Mounting a Sony Bravia LED TV on the wall can be a great way to save space and enhance your viewing experience. Not only does it create a sleek and modern look, but it also allows for better positioning and eliminates the need for a bulky TV stand. However, it’s important to know the proper steps and tools required to ensure a successful installation.
In this guide, we will walk you through the process of mounting a Sony Bravia LED TV on the wall. From choosing the right wall mount to concealing the cables, we will cover all the necessary steps to help you achieve a professional and secure installation.
Before we dive into the steps, it’s essential to gather the necessary tools and materials. You will need a stud finder, a drill with drill bits, a screwdriver, a level, measuring tape, and the wall mount kit that is compatible with your Sony Bravia LED TV.
Additionally, it’s crucial to have another person to assist you, as mounting a TV on the wall can require some physical strength and coordination.
Now that we have our tools ready, let’s move on to the first step: choosing the right wall mount for your Sony Bravia LED TV.
Tools and Materials Needed
Before you begin mounting your Sony Bravia LED TV on the wall, make sure you have all the necessary tools and materials at hand. Here’s a list of what you’ll need:
- Stud finder: This tool is essential for locating the studs in your wall. It will help you find the most secure spots for attaching the wall mount.
- Drill with drill bits: You’ll need a drill to create pilot holes in the wall for the mounting screws. Make sure to have a variety of drill bits suitable for your wall type.
- Screwdriver: A screwdriver will be needed to tighten the screws when attaching the wall mount and securing the TV.
- Level: Ensuring that your TV is level is crucial for a professional-looking installation. A level tool will help you achieve perfect alignment.
- Measuring tape: Accurate measurements are essential for positioning the TV correctly on the wall. A measuring tape will help you determine the ideal height and distance from other furniture or fixtures.
- Wall mount kit: It is important to choose a wall mount kit that is compatible with your Sony Bravia LED TV. Be sure to check the weight and size specifications to ensure a secure fit.
- Helper: Having another person to assist you during the installation process is highly recommended. Mounting a TV on the wall can be a two-person job, especially when it comes to lifting and positioning the TV.
By having these tools and materials ready, you’ll be well-prepared to safely and efficiently mount your Sony Bravia LED TV on the wall. Let’s move on to the first step, where we will guide you on choosing the right wall mount for your TV.
Step 1: Choose the Right Wall Mount
Choosing the right wall mount for your Sony Bravia LED TV is crucial to ensure a secure and stable installation. Here are some factors to consider when selecting the wall mount:
- TV Compatibility: Make sure the wall mount is compatible with your Sony Bravia LED TV. Check the specifications provided by the manufacturer to ensure a proper fit.
- Weight Capacity: Consider the weight capacity of the wall mount. The mount should be able to support the weight of your Sony Bravia TV. It is always recommended to choose a wall mount with a higher weight capacity than the actual weight of your TV.
- VESA Standards: VESA (Video Electronics Standards Association) standards refer to the mounting hole pattern on the back of your TV. Ensure that the wall mount you choose matches the VESA standards of your Sony Bravia TV. This information can usually be found in the TV’s user manual.
- Motion Options: Determine if you want a fixed wall mount or one with articulating arms that allows for swivel, tilt, and extension. Consider your viewing preferences and the layout of your room when making this decision. Keep in mind that a wall mount with articulating arms will provide more flexibility in adjusting the TV’s position.
- Installation Difficulty: Consider your own DIY skills and comfort level. Some wall mounts may be more challenging to install, especially if you have limited experience with this type of project. If you’re a beginner, opt for a wall mount that comes with clear instructions and is easier to install.
- Budget: Set a budget for your wall mount. Prices can vary depending on the features and quality of the mount. Keep in mind that while it’s important to stay within your budget, investing in a sturdy and reliable wall mount is crucial to ensure the safety of your TV.
Once you’ve considered these factors, research different options, read reviews, and compare prices before making your final decision. Take your time to find the right wall mount that meets your specific needs and preferences.
Now that you have chosen the right wall mount, let’s move on to the next step: determining the mount location on your wall.
Step 2: Determine the Mount Location
Before you start drilling any holes, it’s important to determine the ideal mount location for your Sony Bravia LED TV. Here are some considerations to keep in mind when choosing the placement:
- Optimal Viewing Height: Determine the optimal viewing height for your TV. The center of the screen should be at eye level when you are sitting in your usual viewing position. This will ensure a comfortable and immersive viewing experience.
- Room Layout: Take into account the layout of your room. Consider the placement of furniture, windows, and other fixtures that might obstruct your view or limit the available wall space for mounting the TV.
- Avoiding Glare: Position the TV in a way that minimizes glare from windows or lighting sources. Glare can negatively impact the visibility and picture quality of your TV, so find a spot that allows for optimal viewing without excessive reflections.
- Stud Availability: Locate the studs in your wall. Mounting the TV on a stud provides the strongest support and stability. Use a stud finder to easily locate the studs. Alternatively, if you are unable to mount directly into a stud, be sure to use appropriate wall anchors for added support.
- Cable Management: Consider the location of power outlets and how you plan to manage the cables. Ensure that there are nearby outlets for powering the TV and any additional devices. You may want to invest in cable management solutions, such as wall-mounted conduit or cable raceways, to neatly conceal and organize the cables.
Once you have taken these factors into account, use a pencil or masking tape to mark the desired mount location on the wall. Double-check the placement to ensure it meets your preferences and needs.
Remember to measure and mark the exact height at which the center of the TV will be positioned, based on your preferred viewing height. This will serve as a guide when it comes time to mount the TV.
With the mount location determined, we can now move on to the next step: finding the studs in the wall.
Step 3: Find the Studs
Locating the studs in your wall is essential for a secure and stable TV installation. Here’s how you can find the studs:
- Use a Stud Finder: The easiest and most accurate way to locate studs is by using a stud finder. Start by placing the stud finder against the wall and sliding it horizontally. The stud finder will detect changes in density and indicate the presence of a stud. Make note of the edges of the stud for reference.
- Visual Clues: In some cases, you can visually identify studs. Look for slight variations in wall texture, nails or screws, or electrical outlet and switch boxes, as these are often attached to studs. Use a small nail or pin to confirm the presence of a stud before proceeding.
- Knocking Technique: Another method is gently tapping on the wall and listening for differences in sound. Studs will produce a solid sound, while empty spaces between studs will sound hollow. This technique is less reliable than using a stud finder but can be used as a secondary method.
Once you have identified the studs, mark their locations on the wall with a pencil or masking tape. These marks will guide you during the mounting process and ensure that the wall mount is securely attached.
In cases where the studs are not in an ideal location for mounting your TV, it may be necessary to use additional support, such as wall anchors or toggle bolts. These should be used with caution and only if the wall is strong enough to support the weight of the TV and the mount.
Now that you have located the studs, we can move on to the next step: marking the mount holes on the wall.
Step 4: Mark the Mount Holes
After finding the studs, the next step is to mark the mount holes on the wall. This will ensure precise placement and alignment of the wall mount. Here’s what you need to do:
- Hold the Wall Mount: Take the wall mount and position it against the wall, aligning it with the previously marked stud locations. Make sure it is level by using a bubble level.
- Mark the Hole Locations: Once the wall mount is level, use a pencil or marker to mark the hole locations on the wall through the mount’s screw holes. You can also use a center punch to make an indentation for a more precise marking.
- Double-Check the Measurements: Measure twice and mark once. It’s important to double-check all measurements and hole placements before proceeding. Verify that the distance between the holes aligns with the VESA standards of your Sony Bravia LED TV.
- Additional Holes: If your wall mount has additional holes or slots for adjustment, mark those as well. These holes can be used to fine-tune the position of the TV after the initial mounting.
- Remove the Wall Mount: Once all the hole locations are marked, carefully remove the wall mount from the wall. Set it aside for now.
By marking the mount holes accurately, you will ensure that the TV is mounted securely and level on the wall. These marked points will serve as a guide when it’s time to drill the pilot holes.
Now that the mount holes are marked, we can proceed to the next step: drilling pilot holes in the wall.
Step 5: Drill Pilot Holes
Now that you have marked the mount hole locations, it’s time to drill pilot holes in the wall. These pilot holes will guide the screws and ensure a straight and secure installation. Follow these steps to drill the pilot holes:
- Select the Right Drill Bit: Choose a drill bit that is slightly smaller than the diameter of the screws provided with the wall mount. The pilot holes should be wide enough to accommodate the screws, but not too wide to compromise their grip.
- Attach the Drill Bit to the Drill: Insert the selected drill bit into the drill chuck and tighten it securely.
- Drill the Pilot Holes: Position the drill’s tip on one of the marked hole locations and hold the drill perpendicular to the wall. Apply steady pressure and drill slowly, allowing the bit to penetrate the wall gradually. Continue drilling until you reach the desired depth, usually around 1-2 inches.
- Repeat for Remaining Holes: Move to the remaining marked hole locations and repeat the drilling process. Ensure that the drill bit is at the same angle and depth for each hole.
- Remove Dust and Debris: Once all the pilot holes are drilled, use a brush or cloth to remove any dust or debris from the holes. Cleanliness is important to achieve a secure and tight fit when attaching the wall mount.
Drilling pilot holes will make it easier to screw in the mounting screws later on and prevent any potential damage to the wall. Take your time and be cautious, especially if you’re drilling into a harder material like concrete or brick.
With the pilot holes drilled, we can now move on to the next step: attaching the wall mount to the wall.
Step 6: Attach the Wall Mount
Now that the pilot holes are drilled and the wall is prepared, it’s time to attach the wall mount. Follow these steps to securely fasten the wall mount to the wall:
- Retrieve the Wall Mount: Take the wall mount and align it with the pilot holes on the wall. Make sure the mount aligns perfectly with the marked hole locations.
- Insert Screws into Wall Mount: Take the mounting screws provided with the wall mount and insert them into the corresponding holes on the wall mount. Do not fully tighten the screws just yet.
- Attach Wall Mount to the Wall: While holding the wall mount firmly against the wall, start screwing in the mounting screws. Use a screwdriver or drill to rotate the screws clockwise, gradually securing the wall mount to the wall. Keep an eye on the level to ensure the mount is straight and aligned.
- Tighten the Screws: Once all the screws are inserted, use a screwdriver or drill to tighten them completely. Be careful not to overtighten, as this may damage the wall or strip the screws.
- Double-Check Alignment: After tightening the screws, double-check the alignment of the wall mount. Make sure it is level and secure. Adjust if necessary.
Attaching the wall mount is a critical step, as it will serve as the foundation for mounting your Sony Bravia LED TV. Take your time to ensure that the mount is securely and straightly attached to the wall.
With the wall mount securely in place, we can now move on to the next step: mounting the TV onto the wall mount.
Step 7: Mount the TV
With the wall mount securely attached to the wall, it’s time to mount your Sony Bravia LED TV onto the wall mount. Follow these steps to safely and efficiently mount the TV:
- Prepare the TV: Before lifting the TV, remove any attached stands or feet. Refer to the TV’s user manual for instructions on detaching the stand.
- Enlist Assistance: Mounting a TV onto the wall can be a two-person job due to its size and weight. Ask someone to assist you in lifting and aligning the TV.
- Align the TV: Carefully lift the TV and align its mounting holes with the corresponding holes on the wall mount. Ensure that the TV is level and aligned properly.
- Attach the TV to the Wall Mount: Once the TV is aligned, insert the mounting screws through the TV’s mounting holes and into the corresponding holes on the wall mount. Use a screwdriver or drill to tighten the screws, securing the TV to the wall mount. Be cautious not to overtighten, as this may damage the TV or strip the screws.
- Double-Check Secure Attachment: After attaching the TV to the wall mount, give it a gentle tug to ensure it is securely in place. Check that the TV is level and aligned properly with the wall mount.
Mounting the TV onto the wall requires precision and care. Take your time to ensure that the TV is securely mounted and that all connections are properly aligned.
Now that the TV is mounted, we can move on to the next step: adjusting and securing the TV in its desired position.
Step 8: Adjust and Secure the TV
Once the TV is mounted onto the wall, it’s time to adjust its position and secure it in place. Follow these steps to ensure the TV is properly adjusted and securely held by the wall mount:
- Level the TV: Use a bubble level to check if the TV is level. Make any necessary adjustments by slightly loosening the mounting screws and repositioning the TV. Once the TV is level, tighten the screws securely.
- Tilt or Swivel the TV (if applicable): If your wall mount allows for tilting or swiveling, adjust the TV to your desired angle. Follow the manufacturer’s instructions to make these adjustments, ensuring a comfortable viewing experience from different positions in the room.
- Secure the TV with Locking Mechanisms (if applicable): Some wall mounts have additional mechanisms to lock the TV in place. Follow the manufacturer’s instructions to engage these locking features, providing extra security and preventing any accidental movement or shifting.
- Perform a Test Run: Power on the TV and test the viewing angles from various points in the room. Verify that the TV is securely positioned and that the picture is clear and free from any distortion caused by an improper placement. Make any necessary adjustments if needed.
Adjusting and securing the TV ensures that it remains in its desired position, providing you with the best viewing experience. Take the time to make these adjustments carefully and ensure that all locking mechanisms are engaged to prevent any accidental movement or dislodging of the TV.
With the TV adjusted and securely held by the wall mount, we can now move on to the next step: concealing the cables for a clean and tidy look.
Step 9: Concealing the Cables
One final step in mounting your Sony Bravia LED TV on the wall is to conceal the cables for a clean and organized look. Here’s how you can achieve this:
- Identify Cable Paths: Determine the path you want the cables to follow from the TV to their respective sources, such as the power outlet, cable box, or gaming console. Take into account the location of existing cable outlets or wall plates for a neater installation.
- Use Cable Management Solutions: There are several cable management solutions available to help conceal the cables. Some options include adhesive cable clips, cable raceways, or wall-mounted conduit. Choose the solution that best suits your needs and aesthetics.
- Secure Cables: Place the cables within the chosen cable management solution, ensuring they are neatly tucked away and hidden from view. Use adhesive clips or ties to secure the cables in place and prevent them from dangling or becoming tangled.
- Test Connections: After concealing the cables, double-check that all connections are secure and properly plugged into the respective devices. Test the TV, cable, and any other connected devices to ensure everything is functioning correctly.
Concealing the cables not only improves the overall appearance of your mounted TV but also reduces the risk of accidents caused by tripping over loose wires. Take the time to organize and secure the cables properly to achieve a clutter-free and visually appealing setup.
With the cables concealed, your Sony Bravia LED TV is now ready to be enjoyed in its sleek and modern wall-mounted position.
Conclusion
Mounting your Sony Bravia LED TV on the wall can transform your living space, save valuable floor space, and provide a sleek and modern look. By following the steps outlined in this guide, you can achieve a secure and professional installation.
From choosing the right wall mount to concealing the cables, each step is crucial for a successful installation. Remember to gather the necessary tools and materials, locate the studs in the wall, and mark the mount holes accurately. Take your time to drill pilot holes, attach the wall mount securely, and mount the TV with proper adjustments.
Additionally, ensure that all cables are concealed using appropriate cable management solutions. This will not only improve the aesthetics but also eliminate the hazards of exposed wires.
It’s important to seek assistance and follow safety precautions throughout the process, as mounting a TV can be a two-person job that requires physical strength and coordination.
By following these steps, your Sony Bravia LED TV will be securely mounted on the wall, providing an enhanced viewing experience and a clean, organized living space.
Now, sit back, relax, and enjoy your favorite shows and movies on your wall-mounted Sony Bravia LED TV!


