Introduction
Connecting your MacBook to an external monitor can expand your workspace and improve your productivity. Whether you need a larger screen for editing photos, designing graphics, or simply want a dual-monitor setup for multitasking, the process of hooking up your MacBook to a monitor is relatively straightforward. By following a few simple steps, you can enjoy a bigger display and take full advantage of the capabilities of your MacBook.
In this guide, we will walk you through the necessary steps to connect your MacBook to a monitor and configure the display settings. We’ll also provide troubleshooting tips for common issues you may encounter during the setup process.
Before we dive into the technical details, it’s important to ensure that you have the necessary hardware. You will need a compatible monitor that supports the appropriate cable or adapter connection for your MacBook. Different MacBook models may have different ports, so it is crucial to check the ports on both your MacBook and monitor before proceeding.
Whether you’re a creative professional, a student, or an office worker, connecting your MacBook to a monitor can greatly enhance your workflow, allowing you to work more efficiently and comfortably. So, let’s get started and learn how to hook up your MacBook to a monitor!
Step 1: Check the ports on your MacBook and monitor
Before connecting your MacBook to a monitor, it is essential to examine the ports available on both your MacBook and the monitor. Different MacBook models may have different ports, so it is essential to ensure compatibility.
First, take a look at your MacBook. Some common ports you may find include:
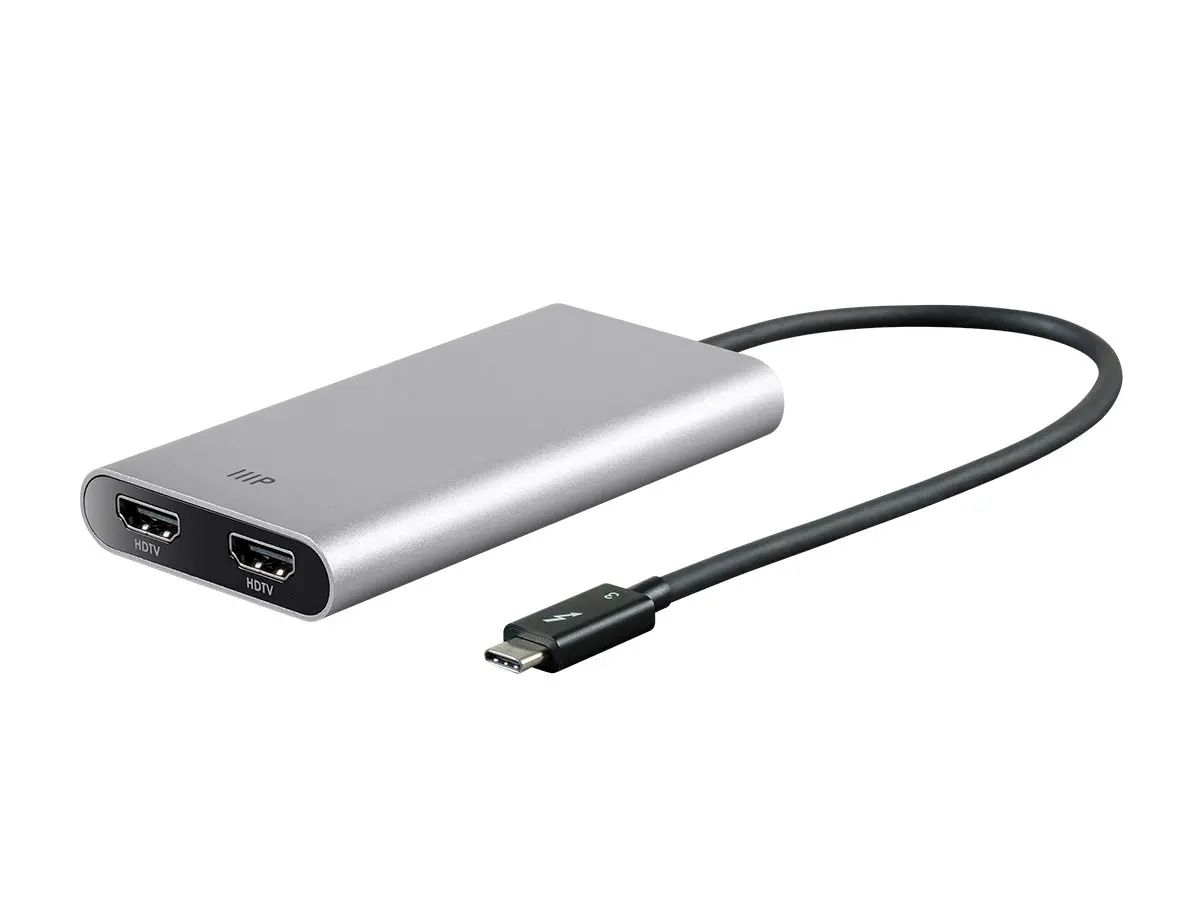
- Thunderbolt 3 (USB-C): This is the most common port found on newer MacBook models. It supports high-speed data transfer and video output, making it ideal for connecting to a monitor.
- HDMI: Some MacBook models may have an HDMI port, which is another popular option for connecting to a monitor.
- Mini DisplayPort: Older MacBook models may feature a Mini DisplayPort, which is another common video output port.
- USB-C: Some older MacBook models may have USB-C ports that can be used for video output, but they may not support charging or high-speed data transfer.
Next, examine the ports on your monitor. The most common video input ports found on monitors include:
- HDMI: This is the most widely used video input port and can support high-definition video and audio signals.
- DisplayPort: DisplayPort is another popular video input port that offers high-quality audio and video output.
- VGA: While VGA is an older video input port, some monitors may still have this option.
- DVI: DVI is another older video input port that provides a digital video signal.
Once you have identified the available ports on both your MacBook and monitor, it is crucial to ensure that you have the necessary cables or adapters to make the connection. For example, if your MacBook has a Thunderbolt 3 (USB-C) port, and your monitor only has an HDMI port, you will need a Thunderbolt 3 to HDMI adapter or cable.
By checking the ports on your MacBook and monitor and ensuring compatibility, you can proceed to the next step of connecting your MacBook to the monitor and configuring the display settings.
Step 2: Configure display settings on your MacBook
After checking the ports and ensuring compatibility, the next step is to configure the display settings on your MacBook. By doing so, you can optimize the display output to suit your preferences and make the most of the external monitor.
To configure the display settings on your MacBook, follow these steps:
- Connect your MacBook to the monitor using the appropriate cable or adapter. Ensure that both ends are securely plugged in.
- Once the connection is established, go to the Apple menu on your MacBook and select “System Preferences.”
- In the System Preferences window, click on “Displays.”
- You will see a window with multiple tabs. The “Display” tab should be selected by default.
- On the Display tab, you can adjust various settings such as resolution and scaling. Select the desired resolution for the external monitor. Higher resolutions generally provide a crisper and more detailed display.
- You can also arrange the position of the external monitor relative to your MacBook’s built-in display. Drag and drop the displays to organize them according to your preference.
- Additionally, you can enable or disable mirroring, depending on whether you want the external monitor to show the same content as your MacBook’s built-in display or act as an extended desktop.
- Explore other tabs in the Display window to modify additional settings such as brightness, color calibration, and more.
Once you have configured the display settings to your liking, close the System Preferences window. Your MacBook should now be ready to utilize the external monitor effectively.
Keep in mind that the available display settings may vary depending on your MacBook model and the macOS version you are using. If you encounter any issues or limitations during the configuration process, troubleshooting steps will be covered in a later section.
Step 3: Connect the MacBook to the monitor using cables or adapters
Once you have checked the ports on your MacBook and monitor, and configured the display settings, it’s time to physically connect your MacBook to the monitor using the appropriate cables or adapters. The specific cable or adapter you need will depend on the available ports on both devices.
Follow these steps to connect your MacBook to the monitor:
- Turn off both your MacBook and the monitor before making the connection.
- Locate the appropriate cable or adapter that can establish a connection between the available ports on your MacBook and the monitor.
- Connect one end of the cable or adapter to the MacBook’s video output port and the other end to the corresponding video input port on the monitor.
- Ensure that the connection is secure by gently pushing the cable or adapter into place.
- Turn on both your MacBook and the monitor.
- Your MacBook should automatically detect the external monitor. If not, you can navigate to the “System Preferences” menu on your MacBook, open the “Displays” tab, and click on the “Detect Displays” button to initiate the detection process.
- Once the MacBook recognizes the external monitor, you may need to select the appropriate display mode, such as mirroring or extended desktop, depending on your needs.
- Make sure to adjust the display settings on the monitor itself, such as brightness and contrast, to achieve the desired picture quality.
With the MacBook connected to the monitor, you can now enjoy the expanded screen real estate and take advantage of the additional display for improved productivity and multitasking.
If you encounter any issues during the connection process, refer to the troubleshooting section later in this guide for possible solutions.
Step 4: Adjust display settings on the monitor
After connecting your MacBook to the monitor, it is important to adjust the display settings on the monitor itself to ensure optimal visual quality and performance. Most monitors offer various customization options that can enhance your viewing experience.
Follow these steps to adjust the display settings on the monitor:
- Access the on-screen display (OSD) menu of your monitor. This is usually done by pressing the menu button located on the monitor itself.
- Using the navigation buttons on the monitor, navigate through the OSD menu to find the display settings section.
- Adjust the brightness and contrast settings to your preference. These settings can significantly impact the overall visual quality of the monitor.
- If available, explore additional settings such as color temperature, gamma, sharpness, and saturation. These settings allow you to fine-tune the display output according to your specific needs.
- Save the changes and exit the OSD menu.
- It is recommended to run a display calibration process to ensure accurate and consistent colors. Many operating systems, including macOS, provide built-in tools for monitor calibration.
- If desired, you can also consider utilizing monitor-specific software or applications provided by the monitor manufacturer to further customize the display settings.
By adjusting the display settings on the monitor, you can optimize the visual output to enhance your viewing experience and ensure that the colors and brightness are accurate.
Keep in mind that the available display settings may vary depending on the monitor model and manufacturer. It is recommended to consult the user manual or visit the manufacturer’s website for specific instructions and guidance on adjusting the settings for your particular monitor.
Step 5: Troubleshooting common issues
While connecting your MacBook to a monitor is generally a straightforward process, you may encounter occasional issues or challenges. Fear not! Here are some common problems that you might come across, along with troubleshooting tips to help you resolve them:
- No display on the external monitor: Ensure that the cable or adapter is securely connected to both the MacBook and the monitor. Try disconnecting and reconnecting the cable, restarting your MacBook, and selecting the appropriate display mode in the System Preferences.
- Low resolution on the external monitor: Check the display settings on your MacBook and make sure that you have selected the desired resolution. Some older monitors may have limitations on resolution capabilities. If needed, update the graphics drivers on your MacBook.
- Unresponsive external monitor: Verify that the monitor is powered on and receiving a signal from your MacBook. If the monitor has multiple input options, ensure that the correct input source is selected. Restart your MacBook and try connecting the monitor again.
- Zoomed-in or cropped display: Adjust the overscan settings on the monitor if available. This will prevent any content from being cut off or magnified. Alternatively, explore the display options in the System Preferences and adjust the scaling settings to fit the monitor properly.
- Audio not working on the external monitor: If you are using an HDMI connection, check the audio output settings on your MacBook and ensure that the correct audio output source is selected. Additionally, verify that the monitor’s built-in speakers or audio output is not muted or turned off.
If you encounter persisting issues that cannot be resolved through the troubleshooting tips above, consult the user manual for both your MacBook and the monitor or contact the manufacturer’s customer support for further assistance.
Remember, troubleshooting may vary based on your specific MacBook model, monitor brand, and the operating system you are using.
Conclusion
Connecting your MacBook to an external monitor can dramatically enhance your productivity and provide a more immersive computing experience. By following the steps outlined in this guide, you can easily hook up your MacBook to a monitor and configure the display settings to suit your needs.
Remember to check the ports on your MacBook and monitor to ensure compatibility. Use the appropriate cables or adapters to establish the physical connection. Take advantage of the display settings on both your MacBook and the monitor to optimize the visual output.
If you run into any issues during the setup process, refer to the troubleshooting section for possible solutions. Don’t hesitate to consult the user manuals or reach out to customer support for further assistance if needed.
Whether you’re a creative professional, a student, or a business user, connecting your MacBook to a monitor can transform your workflow and provide a more immersive and efficient work environment. Enjoy the benefits of an expanded screen real estate, improved multitasking capabilities, and enhanced visual quality.
Now that you have the knowledge and steps required, it’s time to set up your MacBook with an external monitor and unlock its full potential. Happy screen extending!