Introduction
Have you ever wished that your web browser could do more? That it could enhance your online experience and make your life easier? Look no further than Google Chrome extensions. These handy little tools can transform your browsing experience by adding new features and functionalities to your favorite web browser.
Chrome extensions are small software programs that you can install to customize and enhance your browsing experience on Google Chrome. Whether you want to block ads, take screenshots, manage your passwords, or boost your productivity, there’s an extension for almost anything you can think of.
With thousands of Chrome extensions available, it’s like having a vast marketplace at your fingertips. And the best part? Most of them are free to download and use. No wonder Chrome extensions have become so popular among internet users.
In this article, we will guide you through the world of Chrome extensions. We’ll show you how to access the Chrome Web Store, browse for extensions, install and manage them, and even recommend some popular ones to get you started.
So, if you’re ready to take your browsing experience to the next level, let’s dive in and discover the exciting world of Chrome extensions.
What are Chrome Extensions?
Chrome extensions are small software programs that you can install on your Google Chrome web browser to add new functionality and customize your browsing experience. These extensions are like mini-apps that work within your browser, allowing you to do things that Chrome alone cannot.
Think of Chrome extensions as tools or plugins that expand the capabilities of your browser. They can add features such as ad blockers, social media integration, language translation, productivity tools, and much more. These extensions can significantly enhance your online experience and make your browsing more convenient and efficient.
Chrome extensions are developed using web technologies such as HTML, CSS, and JavaScript, making them easy to create and customize. Thousands of developers from all around the world contribute to the Chrome Web Store, where you can find a vast selection of extensions to choose from.
Extensions can be installed directly from the Chrome Web Store, which serves as a centralized hub for all available extensions. Once installed, they appear as icons in your browser’s toolbar, allowing you to access their features with a single click.
Another advantage of Chrome extensions is that they sync across devices. If you’re signed in to Chrome with your Google account, your installed extensions will be available on all your devices, including desktop and mobile devices.
It’s important to note that while most Chrome extensions are free, some may offer additional premium features or require a small fee to unlock advanced functionalities. However, there are plenty of excellent free options available, making it easy to find extensions that suit your needs without breaking the bank.
In the next sections, we’ll explore how to access the Chrome Web Store, browse, install, manage, and update Chrome extensions. We’ll also provide some popular and recommended extensions to help you get started. So, let’s dive in and discover the world of Chrome extensions.
How to Access the Chrome Web Store
To search for and install Chrome extensions, you’ll need to access the Chrome Web Store. Here’s how you can do it:
- Open Google Chrome on your computer. Ensure that you have the latest version installed to access all the features of the Chrome Web Store.
- In the address bar, type “chrome://extensions” and press Enter. This will take you to the extensions page within Chrome.
- Alternatively, you can also click on the three dots at the top-right corner of the browser window, then choose “More Tools” from the dropdown menu, followed by “Extensions.”
- Once you’re on the extensions page, you’ll see a button labeled “Open Chrome Web Store”. Click on it to open the Chrome Web Store in a new tab.
- Voila! You’re now on the Chrome Web Store, where you can explore and discover a wide range of extensions.
Alternatively, you can also access the Chrome Web Store directly through the following link: chrome.google.com/webstore
On the Chrome Web Store, you’ll find various categories such as Productivity, Social & Communication, Shopping, and more, allowing you to easily navigate and find extensions that align with your specific needs.
Remember, the Chrome Web Store is not just limited to extensions. You can also find themes to customize the appearance of your browser, as well as apps that function within the Chrome browser.
Now that you know how to access the Chrome Web Store, let’s move on to the next section, where we’ll explore how to browse for and search for Chrome extensions.
Browsing and Searching for Chrome Extensions
Once you’re on the Chrome Web Store, you can start exploring the vast collection of extensions and find the ones that suit your needs. Here’s how you can browse and search for Chrome extensions:
- On the Chrome Web Store homepage, you’ll see various curated collections and featured extensions. These can give you a good starting point to discover popular and highly-rated extensions.
- Scroll down the page to explore different categories such as Productivity, Social & Communication, Shopping, and more. Click on a category that interests you to see a list of extensions within that category.
- If you already have a specific extension in mind, you can use the search bar at the top of the page. Type the name or keywords related to the extension you’re looking for and press Enter.
- The search results page will display matching extensions. You can further refine your search using the filters on the left side, such as the number of users, rating, or relevance.
- Click on an extension’s listing to view more details, description, reviews, and screenshots. This will give you a better understanding of what the extension offers and how it can benefit you.
- Pay attention to the rating and reviews of an extension to get an idea of its quality and user experience. You can also read other users’ feedback and see if the extension is regularly updated.
- Once you’ve found an extension you want to install, click on the “Add to Chrome” button located on the extension’s page.
- A pop-up will appear, providing you with additional information about the extension’s permissions. Review the permissions, and if you’re comfortable, click on “Add extension” to install it.
- The extension will be downloaded and installed, and its icon will appear in your browser’s toolbar, ready for use.
Remember to only install extensions from trusted sources and consider reading reviews and ratings to make an informed decision. Additionally, it’s a good practice to periodically review and remove any extensions that you no longer use or need, as having too many extensions installed can impact browser performance.
Now that you know how to browse and search for Chrome extensions, let’s move on to the next section, where we’ll explore how to install and add extensions to your browser.
Installing and Adding Chrome Extensions
Once you’ve found an extension you want to install from the Chrome Web Store, adding it to your browser is a simple process. Here’s how you can install and add Chrome extensions:
- On the extension’s page in the Chrome Web Store, click on the “Add to Chrome” button.
- A pop-up window will appear, providing you with information about the extension’s permissions. Take a moment to review the permissions, ensuring that you’re comfortable with the access the extension requires.
- If you’re satisfied with the permissions, click on the “Add extension” button to proceed with the installation.
- Chrome will now download and install the extension, which should only take a few seconds. You’ll see a notification appear in the top-right corner of your browser when the installation is complete.
- The extension’s icon will also appear in your browser’s toolbar, typically located to the right of the address bar. You can now click on the icon to access the extension’s features and settings.
- Some extensions may require additional setup or configuration. If this is the case, you’ll usually be prompted to do so upon installation. Follow the on-screen instructions to set up the extension according to your preferences.
- You can rearrange the position of the extension’s icon in the toolbar by dragging and dropping it to your desired location.
- To manage the extension’s settings, right-click on its icon and choose “Options” or a similar option from the context menu. This will open a settings page where you can customize the extension’s behavior.
It’s important to note that some extensions may require you to sign in with an account or create an account specific to that extension’s service. Make sure to follow the instructions provided by the extension during the installation process.
Remember, it’s always a good practice to only install extensions from trusted sources and to read reviews and ratings before installing. Be cautious of extensions that request excessive permissions or seem suspicious.
Now that you know how to install and add Chrome extensions to your browser, let’s move on to the next section, where we’ll explore how to manage and organize your installed extensions.
Managing and Organizing Chrome Extensions
As you start installing more Chrome extensions, it’s important to know how to manage and organize them to ensure a clutter-free browsing experience. Here’s how you can manage and organize your installed Chrome extensions:
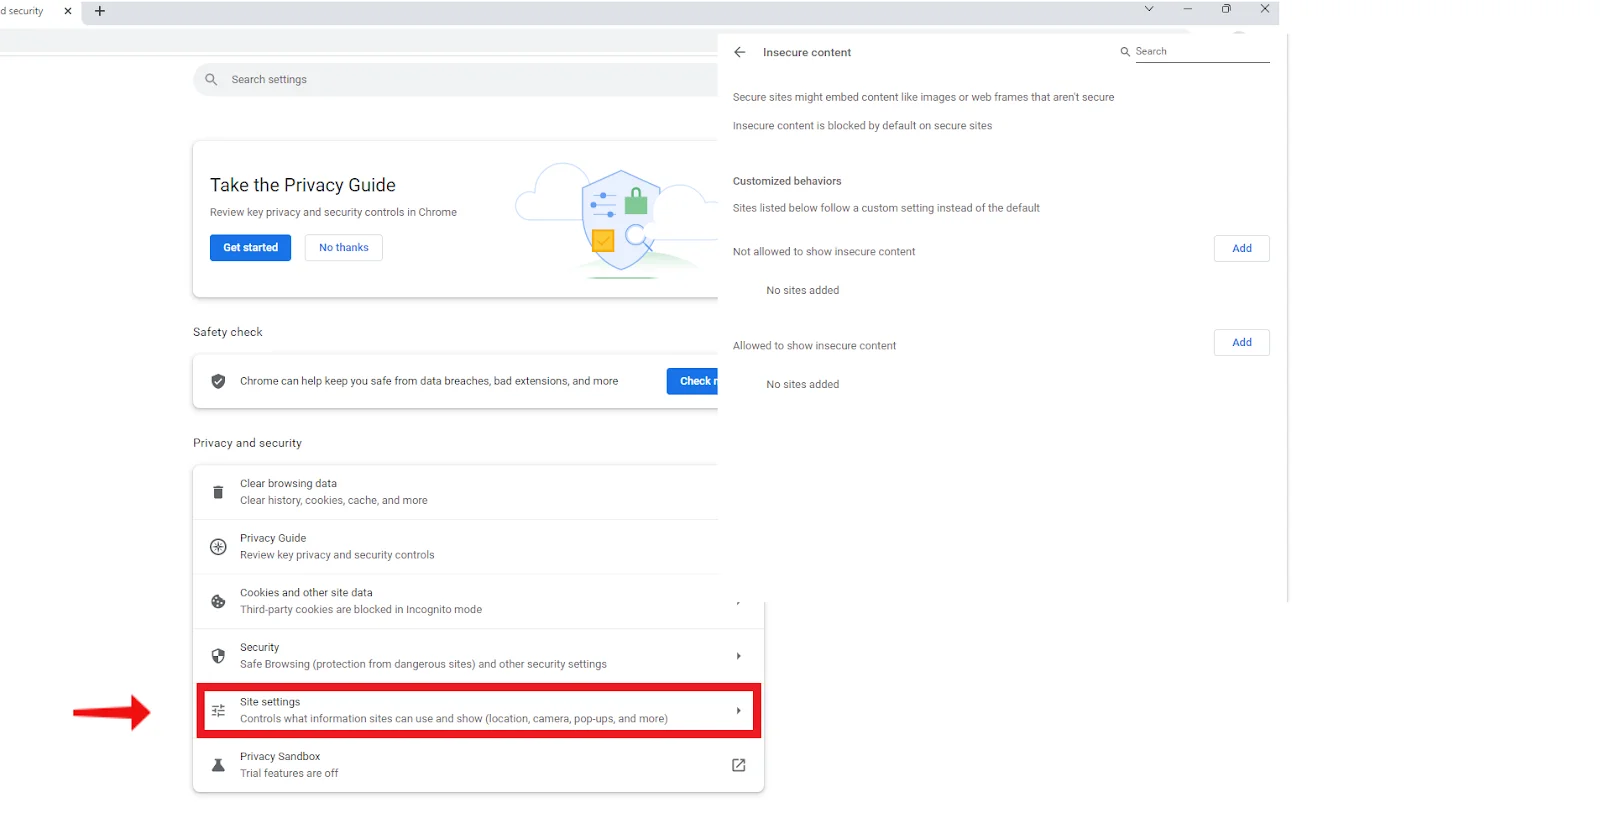
- Access the extensions page in Chrome by clicking on the three dots at the top-right corner of the browser window, then selecting “More Tools” and “Extensions”.
- Alternatively, you can type “chrome://extensions” in the address bar and press Enter.
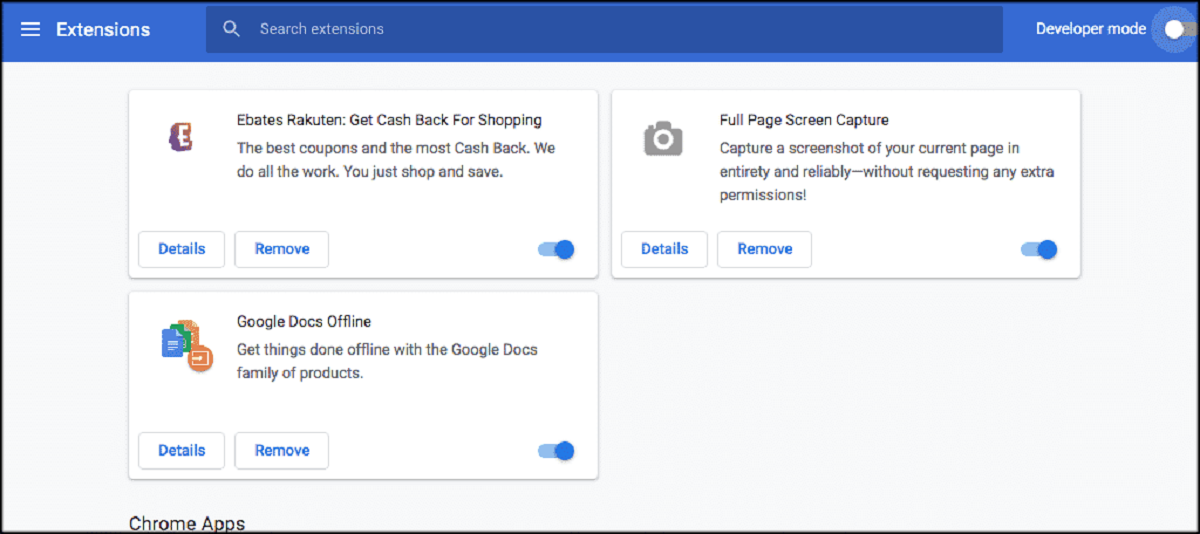
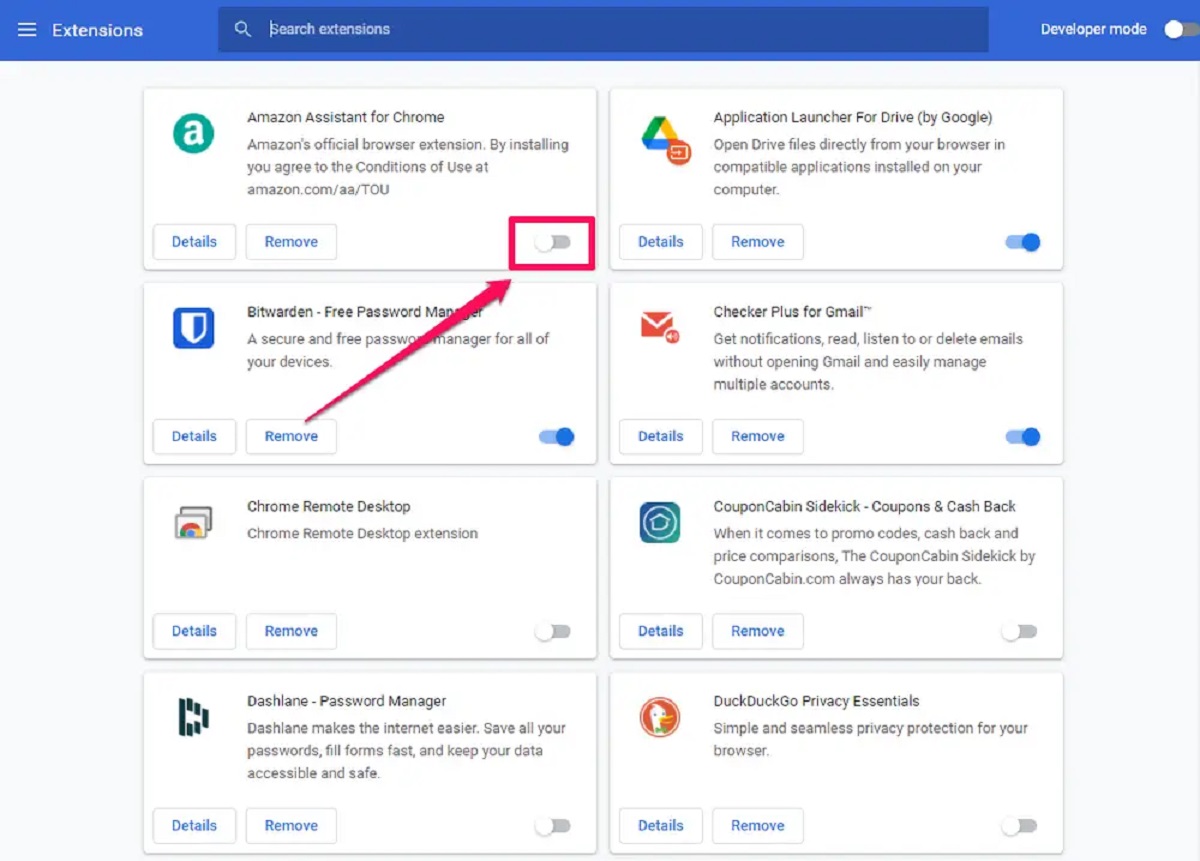
- On the extensions page, you’ll see a list of all your installed extensions, along with their icons, names, and a toggle switch to enable or disable them.
- To disable an extension temporarily, simply toggle off the switch next to its name. This will deactivate the extension without uninstalling it.
- If you no longer need an extension, you can uninstall it by clicking on the “Remove” button next to its name. Confirm the removal when prompted.
- To quickly access an extension’s settings, click on the “Details” button under its name. This will open a new tab where you can configure the extension’s options.
- To organize your extensions, you can drag and drop their icons in the toolbar to rearrange their order. This allows you to prioritize the extensions you use most frequently.
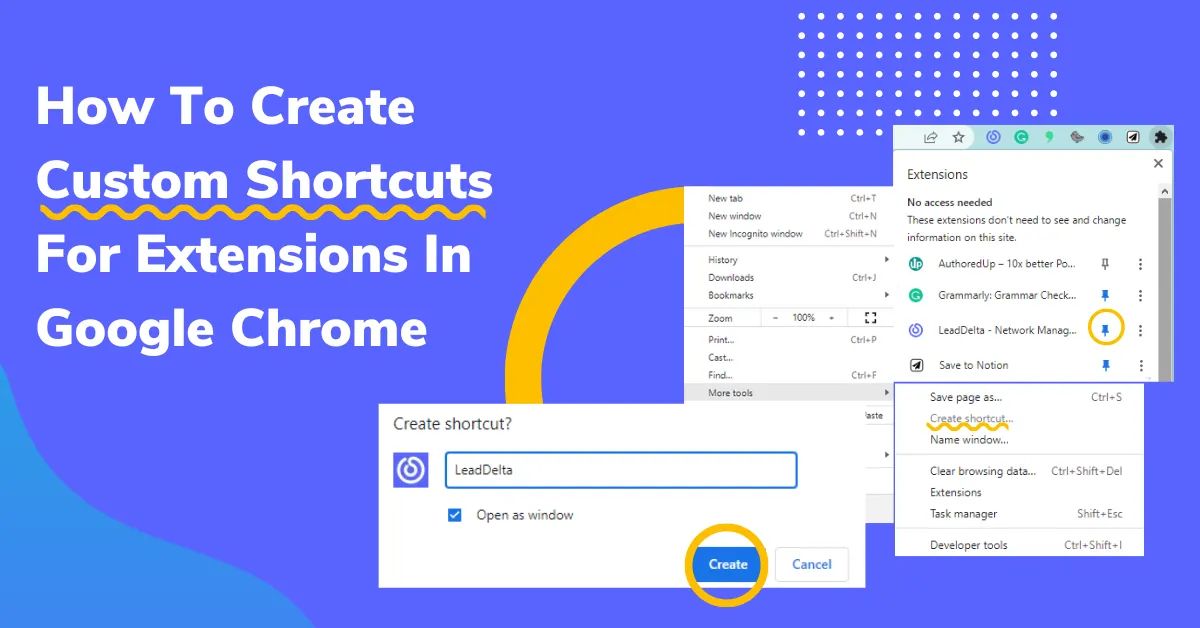
- If you have many extensions installed and want to reduce clutter in your toolbar, you can click on the puzzle piece icon at the right end of the toolbar. This opens a dropdown menu that lists all your installed extensions.
- From the dropdown menu, you can pin an extension’s icon to the toolbar by clicking on the pin icon next to its name. Pinned extensions will always stay visible in the toolbar.
- You can also remove clutter by clicking on the “Manage extensions” option at the bottom of the dropdown menu. This will take you to the extensions page, where you can disable or uninstall extensions as needed.
Regularly reviewing your installed extensions and keeping only the ones you actively use can improve browser performance and reduce clutter. It’s a good practice to uninstall extensions that you no longer find useful.
Now that you know how to manage and organize your Chrome extensions, let’s move on to the next section, where we’ll explore how to update and remove extensions.
Updating and Removing Chrome Extensions
Keeping your Chrome extensions up to date is essential for ensuring that you have the latest features and bug fixes. Additionally, periodically removing unused or unnecessary extensions can help declutter your browser. Here’s how you can update and remove Chrome extensions:
- Updating Chrome extensions is typically handled automatically by the browser. Whenever a new version of an extension is available, Chrome will automatically download and install the update.
- You can manually check for updates by accessing the extensions page in Chrome. Click on the three dots at the top-right corner of the browser window, select “More Tools,” and then “Extensions.”
- On the extensions page, you’ll see a list of your installed extensions. If updates are available, you’ll see a blue “Update” button next to the extension’s name. Click on the button to update the extension.
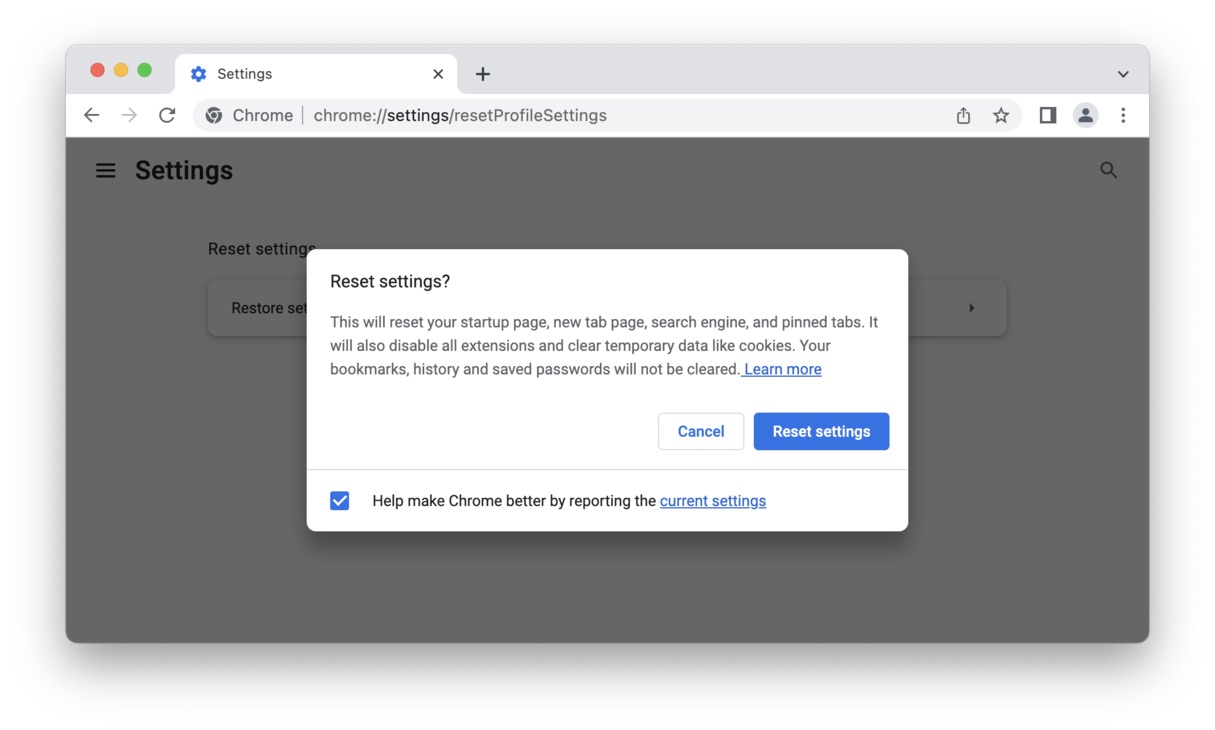
- If an extension hasn’t received updates for a long time or is causing compatibility issues, it may be a good idea to remove it from your browser. To remove an extension, click on the “Remove” button next to its name on the extensions page.
- You’ll be prompted to confirm the removal. Click “Remove” to uninstall the extension from Chrome.
- Alternatively, you can right-click on an extension’s icon in the toolbar and select “Remove from Chrome” from the context menu. Confirm the removal when prompted.
- Remember, removing an extension will permanently delete its settings and data. If you plan on reinstalling the extension in the future, consider exporting any important data or settings beforehand.
Regularly updating your extensions and removing unnecessary ones can help maintain a smooth browsing experience. It’s also a good security practice to keep your extensions up to date, as developers often release updates to address vulnerabilities.
Now that you know how to update and remove Chrome extensions, let’s move on to the next section, where we’ll explore some popular and recommended Chrome extensions.
Popular and Recommended Chrome Extensions
With thousands of Chrome extensions available, it can be overwhelming to choose which ones to install. To make things easier for you, here are some popular and highly recommended Chrome extensions that can enhance your browsing experience:
1. Adblock Plus: This widely-used extension blocks annoying ads, pop-ups, and banners, providing a cleaner and faster browsing experience.
2. LastPass: A robust password manager that securely stores your passwords and autofills them across websites, making it easier to manage and secure your online accounts.
3. Grammarly: A must-have for anyone who writes online. Grammarly checks your spelling, grammar, and punctuation, helping you write error-free content.
4. Pocket: With Pocket, you can save articles, videos, and web pages to read later. It syncs across devices, allowing you to access your saved content anytime, anywhere.
5. Honey: Honey automatically finds and applies coupon codes when you shop online, helping you save money by finding the best deals.
6. Evernote Web Clipper: This extension lets you clip and save web pages, articles, and text for future reference. It also allows you to add notes and organize your clipped content.
7. HTTPS Everywhere: This extension ensures that you always use a secure HTTPS connection when browsing websites, enhancing your online privacy and security.
8. Momentum: Momentum replaces your new tab page with a beautiful and inspiring dashboard. It displays a personalized greeting, to-do list, weather, and an inspiring quote to help you stay focused and motivated.
9. OneTab: OneTab saves your open tabs into a list, reducing tab clutter and saving memory. You can easily restore individual tabs or restore them all at once.
10. Pinterest Save Button: This extension allows you to save images, ideas, and articles to your Pinterest boards with just a click, making it easy to organize and curate content.
These are just a few examples of the many Chrome extensions available. Explore the Chrome Web Store to discover extensions that align with your specific interests and needs.
Remember to read reviews, check for regular updates, and ensure that the extension comes from a trusted source before installing. Keeping your extensions updated and removing unused ones can help optimize your browsing experience.
Now that you have some popular and recommended Chrome extensions to consider, feel free to explore and enhance your browsing experience!
Conclusion
Chrome extensions are powerful tools that can enhance your browsing experience by adding new features and functionalities to your Google Chrome web browser. With thousands of extensions available in the Chrome Web Store, you can easily customize your browsing experience to suit your specific needs and preferences.
In this article, we explored what Chrome extensions are and how they can be accessed through the Chrome Web Store. We discussed how to browse and search for extensions, as well as how to install and add them to your browser. We also covered valuable information on managing and organizing your installed extensions, and the importance of updating and removing them when necessary.
Additionally, we provided a list of popular and recommended Chrome extensions that can enhance your productivity, security, and overall browsing experience.
Remember, while Chrome extensions can be incredibly useful, it’s important to only install extensions from trusted sources and to regularly review and uninstall any unnecessary ones to maintain optimal browser performance and security.
Now that you have a better understanding of Chrome extensions, feel free to explore the Chrome Web Store, discover new extensions, and tailor your browsing experience to your liking. Enjoy the world of endless possibilities that Chrome extensions offer!