Introduction
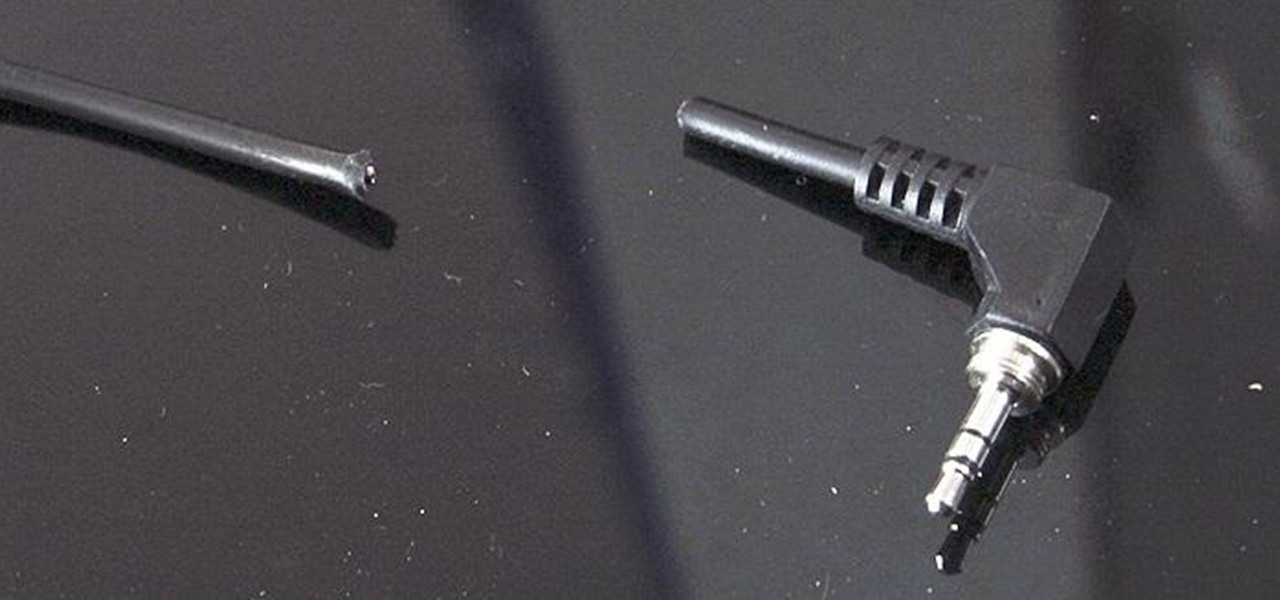
Welcome to our guide on how to get a broken headphone jack out of a tablet! It’s an all too common scenario – you’re enjoying your favorite music or watching a movie on your tablet, and suddenly, disaster strikes. The headphone jack breaks off, leaving you unable to listen to audio through your headphones. Don’t worry though, because we’ve got you covered! In this article, we will walk you through several methods to safely and effectively remove a broken headphone jack from your tablet.
A broken headphone jack can be frustrating, especially if you rely on your tablet for entertainment, communication, or work purposes. However, there are a variety of techniques you can try to remove the broken piece without causing further damage to your device. From using simple household tools and materials to seeking professional help, we will explore a range of solutions so that you can choose the method that suits you best.
It is important to remember that these methods might not work for every situation, as each scenario can be unique depending on the type of tablet and the extent of the damage. If you are uncomfortable attempting these methods or have concerns about potentially damaging your device, it is always wise to consult a professional technician who can safely remove the broken headphone jack for you.
Now, without further ado, let’s dive into the various methods you can try to salvage your tablet and regain the ability to enjoy your favorite audio content with headphones!
Method 1: Using Superglue
If the broken headphone jack is protruding from the tablet’s audio port, you may be able to remove it using superglue. Here’s a step-by-step guide:
- Start by cleaning the broken end of the headphone jack and the area around the audio port using a cotton swab and some rubbing alcohol. This will help ensure a better bond between the superglue and the broken piece.
- Apply a small amount of superglue to the end of a toothpick or a similarly thin and pointed object.
- Gently insert the toothpick with the superglue into the broken headphone jack and press it against the edges to create a bond with the broken piece.
- Hold the toothpick in place for a few minutes to allow the superglue to dry and secure the broken piece.
- Once the superglue has completely dried, slowly and carefully pull out the toothpick, gently removing the broken headphone jack from the audio port.
It’s important to note that this method may not work if the broken piece is lodged too deep inside the audio port or if there are any other obstructions preventing the superglue from bonding effectively. Additionally, exercise caution to avoid getting the superglue on any other parts of the tablet, as it can cause damage.
If the headphone jack is still stuck after attempting this method, it’s time to explore alternative solutions. Don’t worry, we’ve got you covered with more methods to try!
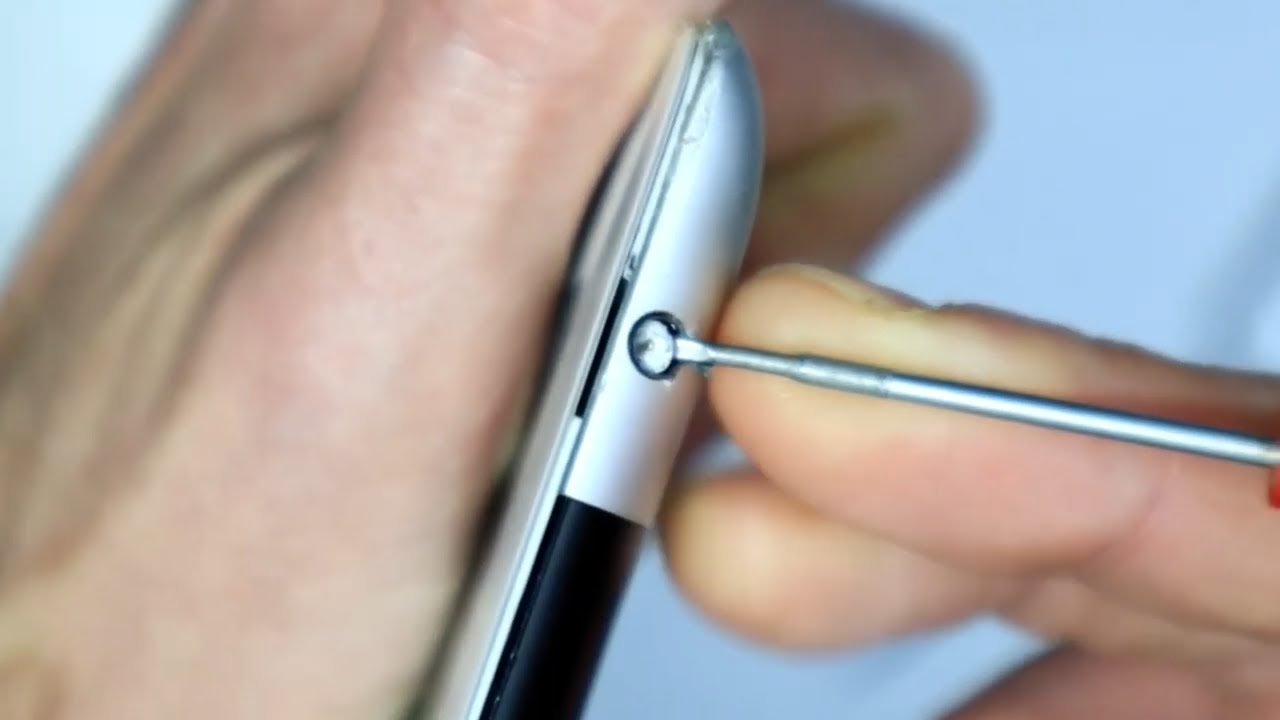
Method 2: Using a Toothpick or Needle
If the broken headphone jack is lodged inside the tablet’s audio port, you can try using a toothpick or needle to carefully remove it. Follow these steps:
- Ensure that the tablet is turned off to avoid any electrical issues or accidental button presses.
- Select a toothpick or a thin needle that is small enough to fit into the audio port without causing any damage.
- Gently insert the toothpick or needle into the audio port and carefully maneuver it around the broken headphone jack.
- Apply gentle pressure and try to hook the broken piece with the toothpick or needle.
- Once you feel the broken headphone jack has looped around the toothpick or needle, carefully pull it out of the audio port.
This method requires patience and a steady hand, as forcing or pushing too hard may cause further damage to the audio port or the tablet itself. If the broken piece is stuck firmly or you encounter resistance, it may be best to proceed with another method or seek professional assistance.
Remember to be cautious while attempting this method and to avoid bending or breaking the toothpick or needle inside the audio port.
If the broken headphone jack still remains stuck, don’t lose hope! Keep reading to explore more techniques that can help you remove the broken piece successfully.
Method 3: Using a Super Magnet
If the broken headphone jack is made of metal, you can try using a super magnet to remove it from the audio port. Here’s how to do it:
- Locate a strong, small-sized super magnet. You can find these magnets in hardware stores or online.
- Hold the super magnet close to the audio port and move it around in a circular motion to create a magnetic field.
- Allow the magnetic field to attract the broken headphone jack, pulling it towards the magnet.
- Once you feel the broken piece has been attracted to the magnet, slowly and carefully remove the magnet, taking the broken headphone jack with it.
It’s important to note that this method may not always be effective, especially if the broken piece is not magnetic or if it is lodged too deeply inside the audio port. Additionally, exercise caution to avoid placing the magnet near sensitive components of the tablet, as it may cause damage.
If the super magnet method does not work for you, don’t worry! There are still more methods to explore. Keep reading to find the one that suits your situation.
Method 4: Using a Vacuum Cleaner
Another method you can try to remove a broken headphone jack from a tablet is by using a vacuum cleaner. Follow these steps:
- Turn off the tablet and ensure it is no longer connected to any power source.
- Attach a small nozzle or crevice tool to the vacuum cleaner, ensuring a tight seal.
- Hold the nozzle close to the audio port and create a seal around it.
- Turn on the vacuum cleaner and apply gentle suction to the audio port.
- Let the vacuum cleaner draw air from the audio port, which may dislodge the broken headphone jack.
- If the broken piece becomes loose, stop the vacuum cleaner and carefully remove it from the audio port.
Be careful not to use excessive suction or place the vacuum cleaner directly on the audio port, as this can potentially cause damage to the sensitive internal components of the tablet.
Keep in mind that this method may not be effective if the broken headphone jack is stuck too firmly or if there are any obstructions preventing the vacuum’s suction from working effectively. If this is the case, proceed to the next method for a different approach.
Stay positive! There are still more methods to explore. Continue reading to find the one that works best for your situation.
Method 5: Using a Hot Glue Gun
If the broken headphone jack is slightly protruding from the audio port, you can try using a hot glue gun to remove it. Follow these steps:
- Ensure the tablet is turned off and disconnected from any power source.
- Plug in the hot glue gun and allow it to heat up according to the manufacturer’s instructions.
- Apply a small amount of hot glue to the end of the broken headphone jack, covering it completely.
- Wait for the hot glue to cool and harden, which will create a makeshift grip on the broken headphone jack.
- Gently and slowly pull on the cooled hot glue, attempting to remove the broken piece from the audio port.
- If the piece does not come out easily, do not force it. Repeat the process with a new layer of hot glue until you can successfully remove the broken headphone jack.
Exercise caution while using the hot glue gun to avoid burning yourself or accidentally getting hot glue on other parts of the tablet.
If the broken headphone jack remains stubbornly stuck, don’t fret! There are still more methods to explore. Keep reading to discover other techniques that may be successful in your situation.
Method 6: Using a Paperclip or Safety Pin
If the broken headphone jack is lodged inside the audio port, you can attempt to remove it with a paperclip or a safety pin. Follow these steps:
- Turn off the tablet and ensure it is not connected to any power source.
- Select a sturdy paperclip or a small safety pin.
- Carefully straighten the paperclip or open up the safety pin to create a long, thin, and pointed tool.
- Gently insert the paperclip or safety pin into the audio port and navigate it around the broken headphone jack.
- Try to latch onto the broken piece with the edge of the paperclip or safety pin.
- Once you feel a secure connection, slowly and carefully pull out the paperclip or safety pin, bringing the broken headphone jack along with it.
Exercise patience and caution while attempting this method to avoid causing further damage to the audio port or other parts of the tablet.
If the broken headphone jack remains stubbornly stuck and this method is not successful, don’t worry! There are still more methods to try. Keep reading to explore alternative techniques that may help you remove the broken piece from your tablet.
Method 7: Seeking Professional Help
If all else fails and you are unable to remove the broken headphone jack from your tablet using the previous methods, it may be time to consider seeking professional assistance. Professional technicians have the expertise and specialized tools to safely remove the broken piece without causing any further damage to your device. Here’s what you can do:
- Research reputable repair shops or device service centers in your area that specialize in tablet repairs.
- Contact the service centers to inquire about their expertise in removing broken headphone jacks and their pricing for the service.
- Schedule an appointment and bring your tablet to the chosen repair center for assessment and repair.
By seeking professional help, you can ensure that your tablet is in capable hands and increase the chances of successfully removing the broken headphone jack without risking any further damage yourself. It’s important to keep in mind that this option may incur some cost, but it can be worth it to have your tablet working properly again.
Remember to back up any important data on your tablet before taking it for repair, as a precautionary measure.
If you decide to explore this option, it’s essential to choose a reputable and experienced professional to ensure a satisfactory outcome. Read reviews, ask for recommendations, and select a technician or repair center with a proven track record in tablet repairs.
With the assistance of professionals, you can have peace of mind knowing your tablet is in good hands and that the broken headphone jack will be expertly removed.
Conclusion
Dealing with a broken headphone jack in your tablet can be frustrating, but remember that there are several methods you can try to remove the broken piece. From using superglue and toothpicks to magnets and vacuum cleaners, each method offers a different approach to tackle the issue. However, it’s important to exercise caution and not force any technique that might cause further damage to your device. If attempts to remove the broken headphone jack are unsuccessful, seeking professional help from experienced technicians is a wise choice.
Before attempting any method, ensure that your tablet is turned off and disconnected from any power source to minimize the risk of electrical damage. Additionally, make sure to follow the specific instructions provided for each method to maximize your chances of success.
Remember, if you are uncomfortable or unsure about attempting these methods yourself, it is always recommended to seek professional assistance. Professional technicians have the knowledge, expertise, and specialized tools needed to safely remove the broken headphone jack, minimizing any potential risks.
We hope that this guide has provided you with the information you need to tackle the issue of a broken headphone jack in your tablet. Whether you opt for a DIY approach or seek professional help, we wish you the best of luck in resolving the problem and enjoying your audio experience once again!