Introduction
In the ever-evolving digital world, where online privacy is increasingly important, using a Virtual Private Network (VPN) has become essential. A VPN allows you to securely connect to the internet and protect your sensitive information from prying eyes. While there are numerous VPN providers available, many of them come with a price tag. However, there are also options to get a free VPN without compromising on security or functionality.
Using a VPN offers a wide range of benefits. Firstly, it encrypts your internet connection, ensuring that your data remains private and secure. This is particularly crucial when accessing public Wi-Fi networks, which are often vulnerable to hackers. Additionally, a VPN allows you to bypass geographical restrictions and access content that may be blocked in your region. Whether it’s streaming your favorite TV series or accessing websites banned in your country, a VPN provides you with the freedom to explore the internet without limitations.
Finding a reliable and reputable free VPN provider can be a challenge, as there are many options available, but not all of them offer the same level of security and performance. It is important to choose a VPN service that not only offers a free plan but also takes your privacy seriously and does not compromise on your online security.
In this article, we will guide you through the steps to get a free VPN. We will cover the research process for choosing a trustworthy VPN provider, signing up for a free VPN account, downloading and installing the VPN software, setting up the VPN connection, and testing the connection to ensure its functionality. Additionally, we will provide some valuable tips for using a free VPN effectively and maximizing its benefits.
So, if you’re ready to explore the world of VPNs and enjoy the benefits of a secure and unrestricted internet experience, let’s dive into the process of obtaining a free VPN.
Why Use a VPN?
In today’s digital age, where our lives are increasingly interconnected and our online presence is constantly expanding, the need for a VPN has become more crucial than ever before. Here are several compelling reasons why using a VPN is essential:
- Security and Privacy: One of the primary reasons to use a VPN is to enhance your online security and protect your privacy. When you connect to a VPN, your internet traffic is encrypted, ensuring that your sensitive information, such as passwords, financial data, and personal details, remain safe from hackers and cybercriminals. VPNs also shield your IP address, making it difficult for third parties to track your online activities and invade your privacy.
- Public Wi-Fi Protection: Public Wi-Fi networks, such as those found in coffee shops, airports, and hotels, are often unsecured and vulnerable to attacks. By using a VPN when connected to a public Wi-Fi network, you create a secure encrypted tunnel that prevents hackers from intercepting your data and gaining unauthorized access to your devices. This is crucial for protecting your sensitive information from being compromised.
- Bypassing Geographical Restrictions: Many streaming platforms, social media platforms, and websites restrict access to certain content based on your geographical location. With a VPN, you can easily overcome these restrictions by connecting to a server in a different country. This allows you to access geo-blocked content, such as Netflix shows, music streaming services, and online games, no matter where you are in the world.
- Anonymity and Online Freedom: By using a VPN, you can browse the internet anonymously and enjoy online freedom. Your true IP address is masked, making it difficult for websites, advertisers, and government agencies to track your online activities. This enables you to explore the internet without being subjected to targeted ads, censorship, or surveillance.
- Remote Access and Business Use: VPNs provide a secure way for businesses and individuals to access their private networks remotely. This is especially useful for employees who need to work from home or while traveling. By connecting to a VPN, they can securely access company files, resources, and tools, ensuring that sensitive business information remains protected.
With the ever-increasing risks associated with online privacy and security, using a VPN is a proactive measure to safeguard your digital presence. Now that we understand the importance of a VPN, let’s explore how to find reliable free VPN options and get started with using one.
Finding Reliable Free VPNs
While there are numerous free VPN providers available, not all of them offer the same level of security, performance, and reliability. It is crucial to choose a trustworthy VPN service that respects your privacy and maintains high standards of functionality. Here are some factors to consider when finding reliable free VPNs:
- Reputation: Start by researching the reputation of the VPN provider. Look for reviews, ratings, and user experiences to gauge the reliability of the service. Keep an eye out for any red flags, such as privacy concerns or frequent connection issues.
- Privacy Policy: Carefully review the VPN provider’s privacy policy to understand how they handle your personal data. Look for providers with a strict no-logs policy, which means they do not store any information about your online activities.
- Security Features: Check if the VPN offers strong encryption protocols, such as OpenVPN or IKEv2. Additionally, look for features like a kill switch, which automatically disconnects your internet connection if the VPN connection drops, to ensure your data remains protected.
- Server Locations: Determine the number and locations of the VPN provider’s servers. The more server locations available, the more options you have for bypassing geographical restrictions and maintaining fast connection speeds.
- Data Limitations: Some free VPNs impose data limitations on their users, which can be problematic if you engage in activities that require significant bandwidth, such as streaming or file sharing. Ensure that the VPN you choose offers sufficient data allowances or, alternatively, consider providers with affordable upgrade options.
- Customer Support: Look for VPN providers that offer responsive and reliable customer support. Check if they provide multiple channels of communication, such as live chat, email support, or a knowledge base, to assist you in case of any issues.
It is important to remember that free VPNs may have limitations compared to their paid counterparts. While they offer basic functionality and security, free VPNs may have slower connection speeds, fewer server options, or limited customer support. However, if you prioritize privacy and are willing to accept certain limitations, a free VPN can still be a valuable tool for enhancing your online security and accessing restricted content.
Now that we understand the key factors to look for in a reliable free VPN, let’s proceed to the next section, where we will outline the steps to get a free VPN and start enjoying its benefits.
Steps to Get a Free VPN
Getting a free VPN is a straightforward process that involves several key steps. By following these steps, you can secure your internet connection and enjoy the benefits of a VPN. Let’s dive into the process:
Step 1: Researching and Choosing a VPN Provider
Begin by researching different VPN providers that offer free plans. Consider factors such as reputation, security features, server locations, and data limitations. Look for a reliable provider that aligns with your privacy and security needs.
Step 2: Sign up for a Free VPN Account
Visit the website of your chosen VPN provider and sign up for a free account. This typically requires providing your email address and creating a password. Some VPN providers may also request additional details, such as your name or location.
Step 3: Downloading and Installing the VPN Software
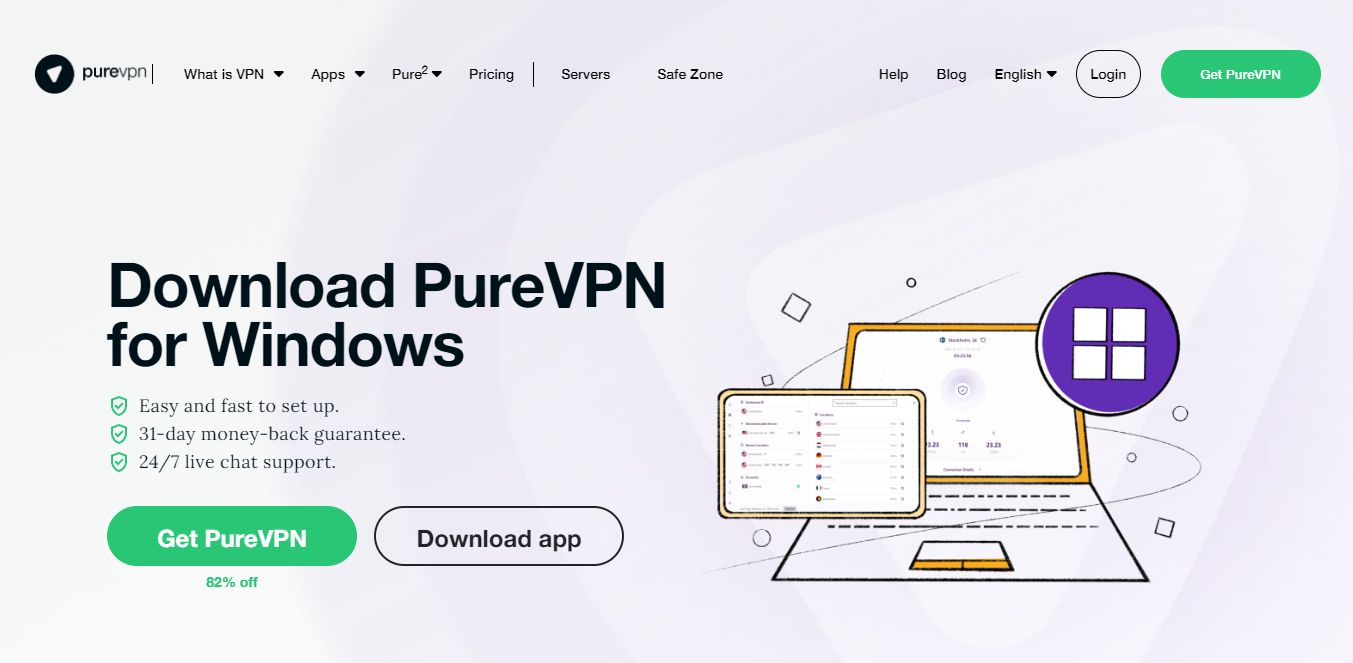
Once you have successfully signed up for a free account, navigate to the ‘Downloads’ or ‘Apps’ section on the VPN provider’s website. Select the appropriate software for your operating system, such as Windows, macOS, Android, or iOS. Download and install the VPN software on your device according to the provided instructions.
Step 4: Setting up the VPN Connection
Launch the VPN software on your device and log in using the credentials you created during sign-up. Depending on the software, you may be presented with a list of server locations. Choose a server based on your desired location or specific requirements, such as bypassing geo-restricted content or optimizing for faster speeds.
Step 5: Testing the VPN Connection
To ensure that your VPN connection is working effectively, visit a website that displays your IP address, such as whatismyip.com, before and after connecting to the VPN. The IP address displayed after connecting should be different from your original IP address, indicating that the VPN is functioning correctly.
Congratulations! You have successfully acquired a free VPN and set up a secure connection. Now you can enjoy a safer and more private browsing experience, access restricted content, and protect your data from prying eyes.
While using a free VPN, it is important to keep in mind certain tips and considerations to make the most out of your VPN experience. Let’s explore some valuable tips in the next section to ensure a smooth and secure VPN usage.
Step 1: Researching and Choosing a VPN Provider
The first step in getting a free VPN is to research and choose a reliable VPN provider. With numerous options available, it is essential to select a provider that offers both a free plan and the necessary security measures to protect your data. Here are some factors to consider during your research:
- Reputation: Start by checking the reputation of different VPN providers. Look for trusted names in the industry and read reviews and feedback from users. This will give you an idea of their reliability and dependability.
- Security Features: Prioritize VPN providers that offer robust security measures. Look for features like strong encryption protocols (e.g., OpenVPN), DNS leak protection, and a kill switch. These features ensure your online activities and data remain secure and private.
- Server Locations: Consider the server locations offered by the VPN provider. More server locations mean greater flexibility in choosing the location you want to connect to. It is especially useful if you want to bypass geographic restrictions or access content specific to certain regions.
- Data Limitations: Free VPNs often come with data limitations or bandwidth caps. Evaluate your internet usage needs and find a VPN provider that offers sufficient data allowances for your requirements. Some providers may also offer ways to earn additional data or provide affordable upgrade options.
- User-Friendly Interface: Look for a VPN provider that offers an intuitive and user-friendly interface. This will make it easier for you to install, set up, and use the VPN software on your device.
- Customer Support: It’s essential to choose a VPN provider with reliable customer support. Check if they offer multiple support channels, such as live chat, email, or a knowledge base. This will ensure that you can seek assistance promptly if you encounter any issues or have questions.
By considering these factors, you can narrow down your options and find a VPN provider that best suits your needs. Remember, it’s crucial to choose a VPN provider that takes your privacy seriously and maintains a secure and stable network. While using a free VPN, keep in mind that there may be limitations compared to paid plans, but you can still enjoy significant benefits and enhance your online security and privacy.
Once you have selected a VPN provider, you can proceed to the next step, which involves signing up for a free VPN account. This will enable you to access the VPN service and start using it to protect your online activities and enjoy a safer internet experience.
Step 2: Sign up for a Free VPN Account
After researching and selecting a VPN provider that meets your requirements, the next step is to sign up for a free VPN account. This process allows you to create a username and password that you will use to access the VPN service. Here’s how you can sign up for a free VPN account:
- Visit the VPN Provider’s Website: Go to the official website of the VPN provider you have chosen. Make sure you are on the correct website to avoid scams or phishing attempts.
- Find the Sign-Up Page: Look for a sign-up or registration page on the website. Providers usually have a prominent “Sign Up” or “Get Started” button on their homepage.
- Choose the Free Plan: On the sign-up page, you will typically see different plans available. Look for the option to sign up for a free plan. Select it to proceed with the registration process.
- Fill in the Required Information: The registration form may ask for your email address, a chosen username, and a password. Some VPN providers may require additional details, such as your name or location. Fill in the necessary information accurately.
- Agree to the Terms and Conditions: Read and review the terms and conditions or user agreement provided by the VPN provider. Make sure you understand and agree to the terms before proceeding.
- Complete the Registration Process: Once you have filled in the required information and agreed to the terms, click on the “Sign Up” or “Create Account” button to complete the registration process.
- Validate Your Email (If Required): Some VPN providers may ask you to validate your email address by clicking on a verification link sent to your email inbox. Follow the instructions provided in the email to validate your account.
By signing up for a free VPN account, you gain access to the VPN service and can begin using it to secure your internet connection and protect your online activities. Remember to choose a strong password for your account and keep it confidential to ensure the security of your VPN account.
Now that you have successfully signed up for a free VPN account, you can move on to the next step, which involves downloading and installing the VPN software onto your device.
Step 3: Downloading and Installing the VPN Software
Once you have signed up for a free VPN account, the next step is to download and install the VPN software onto your device. The VPN software is what allows you to connect to the VPN server and establish a secure connection. Follow these steps to download and install the VPN software:
- Visit the VPN Provider’s Website: Go to the official website of the VPN provider you have chosen. Look for a “Downloads” or “Apps” section on their website.
- Choose the Correct Software: Select the appropriate software version for your operating system. VPN providers usually offer software for Windows, macOS, Android, and iOS.
- Click on the Download Button: Once you have selected the correct software version, click on the download button to start the download process.
- Wait for the Software to Download: Depending on your internet connection speed, the download may take a few moments. Be patient while the software is being downloaded.
- Open the Downloaded File: Once the download is complete, locate the downloaded file on your device and open it. This will initiate the installation process.
- Follow the Installation Instructions: The installation process may vary depending on your operating system. Follow the on-screen instructions provided by the software to install it correctly.
- Launch the VPN Software: After the installation is complete, launch the VPN software on your device. You may need to locate the installed software in your applications or programs folder.
Once you have successfully installed the VPN software, it is ready to be used. Keep in mind that you may need to log in to the software using the username and password you created during the sign-up process. Launch the software and enter your credentials to gain access to the VPN service.
By downloading and installing the VPN software, you are one step closer to securing your internet connection and protecting your online activities. The next step is to set up the VPN connection, which we will cover in the next section.
Step 4: Setting up the VPN Connection
After downloading and installing the VPN software, the next step is to set up the VPN connection. This involves configuring the VPN software with the necessary settings to establish a secure and encrypted connection to the VPN server. Follow these steps to set up the VPN connection:
- Launch the VPN Software: Open the VPN software on your device. You should see the application window or interface.
- Log in to Your VPN Account: If prompted, enter your VPN account credentials, such as your username and password, to log in to your VPN account within the software.
- Select a Server Location: Inside the VPN software, you will typically find a list of server locations to choose from. Click on the server location you want to connect to. You may choose a server based on specific requirements, such as bypassing geo-restrictions or optimizing for better speeds.
- Connect to the VPN Server: Once you have selected a server location, click on the “Connect” or “Start” button within the VPN software to establish the VPN connection. The software will attempt to connect to the VPN server.
- Wait for the Connection to be Established: The VPN software will display the connection status while it establishes a secure connection to the chosen server. This process usually takes a few moments.
- Confirm the Connection: Once the VPN connection is established, you will typically see a notification or icon in the VPN software indicating a successful connection.
Congratulations! You have successfully set up the VPN connection. Your internet traffic is now routed through the VPN server, providing you with a secure and encrypted connection. It is important to note that some VPN software may allow you to customize additional settings, such as protocols or additional security features. Feel free to explore these options based on your preferences and requirements.
Keep in mind that the steps for setting up the VPN connection may vary slightly depending on the VPN provider and the software interface. If you encounter any difficulties during the setup process, refer to the provider’s documentation or customer support resources for assistance.
In the next step, we will test the VPN connection to ensure its functionality and effectiveness. This will help verify that your internet traffic is securely routed through the VPN server.
Step 5: Testing the VPN Connection
Once you have set up the VPN connection, it is important to test its functionality to ensure that your internet traffic is indeed being securely routed through the VPN server. This step will help you verify that the VPN connection is working as intended. Follow these steps to test the VPN connection:
- Open a Web Browser: Launch a web browser on your device to begin the testing process.
- Check Your Original IP Address: Before connecting to the VPN, visit a website that displays your IP address (e.g., whatismyip.com). Take note of the IP address displayed on the website, as this is your original IP address.
- Connect to the VPN Server: In the VPN software, click on the connected server location or the “Connect” button to initiate the VPN connection. Wait for the software to establish the connection to the chosen server.
- Check Your New IP Address: After the VPN connection is established, revisit the same website that displays your IP address. Verify if the IP address displayed on the website is different from your original IP address. If the IP address has changed, it indicates that your internet traffic is now being routed through the VPN server.
- Test Website Access: While connected to the VPN, test accessing websites or online services that were previously inaccessible due to geo-restrictions. For example, try accessing content from another country on a streaming platform or accessing geo-blocked websites. If you can access previously restricted content, it confirms that the VPN is successfully bypassing geographic restrictions.
By completing these steps, you can verify the functionality and effectiveness of your VPN connection. Remember to check your IP address both before and after connecting to the VPN to ensure that your traffic is being securely routed through the VPN server. Additionally, test accessing restricted content to confirm that the VPN is bypassing geo-restrictions successfully.
If you encounter any issues during testing or if the VPN connection does not seem to be working correctly, refer to the VPN provider’s documentation or contact their customer support for assistance. They can help troubleshoot any potential connection problems and ensure that you can fully utilize the benefits of the VPN service.
Now that you have successfully tested the VPN connection, you can enjoy a more secure and private internet experience. In the next section, we will provide some valuable tips for using a free VPN effectively and maximizing its benefits.
Tips for Using a Free VPN
Using a free VPN can greatly enhance your online security and provide you with access to restricted content. However, there are a few tips to keep in mind to ensure you get the most out of your VPN experience. Here are some valuable tips for using a free VPN effectively:
- Choose a Trustworthy VPN Provider: Stick to reputable and trustworthy VPN providers that prioritize your privacy and maintain high-security standards. Avoid lesser-known or suspicious providers as they may compromise your data.
- Understand the Limitations: Free VPNs often come with limitations like limited bandwidth or slower speeds compared to paid options. Be aware of these limitations and assess if they align with your browsing needs.
- Opt for Wired Connections: Whenever possible, use a wired internet connection instead of relying on Wi-Fi when using a VPN. Wired connections tend to offer more stable and faster speeds.
- Connect to Nearby Servers: To minimize latency and ensure better performance, connect to a VPN server located closest to your physical location. This can help improve connection speeds and overall performance.
- Enable Kill Switch: A kill switch is a valuable feature that immediately halts your internet connection if the VPN connection drops. This prevents your IP address and browsing activities from being exposed when the VPN is not active.
- Regularly Update the VPN Software: Keep your VPN software updated to ensure you have the latest security patches and fixes. VPN providers often release updates to address vulnerabilities and enhance performance.
- Test for IP Leaks: Periodically check for IP leaks by using websites or tools that identify your IP address. This helps ensure that your true IP is masked and your online activities remain private.
- Be Wary of Free VPN Scams: Be cautious of free VPN providers that offer too-good-to-be-true features or ask for excessive personal information. These providers may collect and sell your data or expose you to security risks.
- Consider Upgrading if Needed: If you frequently exceed data limits or require faster speeds, consider upgrading to a paid VPN plan. Paid plans often offer additional features and greater flexibility.
- Read the Terms of Service: Before using a free VPN, carefully read and understand the provider’s terms of service. Pay attention to privacy policies, data logging practices, and any limitations imposed on free accounts.
By following these tips, you can enhance your free VPN usage and ensure a more secure and reliable online experience. Remember, while free VPNs offer many benefits, they may have limitations compared to their paid counterparts. Assess your needs and determine if a free plan adequately meets your requirements or if upgrading to a paid plan is more suitable for you.
Now that you are equipped with these tips, you can confidently utilize your free VPN to protect your privacy, bypass restrictions, and enjoy a safer online experience.
Conclusion
In this article, we have discussed the process of obtaining a free VPN and outlined the steps to get started. We explored the importance of using a VPN to enhance your online security, bypass restrictions, and protect your privacy. We also delved into the factors to consider when finding reliable free VPNs, the steps to sign up for a free VPN account, download and install the VPN software, set up the VPN connection, and test its functionality.
While using a free VPN, it is important to keep in mind certain tips and considerations to ensure optimal usage. Choosing a trustworthy VPN provider, understanding the limitations, optimizing server choices, and enabling essential features like a kill switch are just a few ways to make the most out of your free VPN experience.
Remember, free VPNs can be a valuable tool for enhancing your online security and accessing restricted content, but they may have certain limitations compared to paid options. It is crucial to choose a reputable VPN provider and familiarize yourself with their terms of service to ensure your privacy and security are protected.
By following the steps outlined in this article and implementing the provided tips, you can confidently enjoy the benefits of a free VPN. Remember, the internet can be a vast and ever-changing landscape, but with a reliable VPN, you can navigate it safely and securely.
Now that you have the knowledge and tools to acquire and use a free VPN, take the necessary steps to secure your online activities, protect your privacy, and enjoy a more unrestricted browsing experience.


