Introduction
The Samsung T7 SSD is a high-performance external storage device that offers impressive speeds and advanced security features. Designed for both personal and professional use, the T7 SSD provides ample storage space and blazing-fast data transfer rates.
Whether you’re a graphic designer working on large projects, a photographer dealing with thousands of high-resolution images, or simply need a reliable backup solution, the Samsung T7 SSD is a versatile option.
In this article, we will guide you through the process of formatting the Samsung T7 SSD for use with your Mac. Formatting the SSD ensures that it is compatible with the Mac operating system and ready to store and access your files efficiently.
Before we jump into the steps of formatting the Samsung T7 SSD, it’s important to note that this process will erase all the data on the drive. Therefore, it’s crucial to back up any important files to another storage device before proceeding with the formatting.
Now, let’s dive into the details of connecting, checking compatibility, and formatting your Samsung T7 SSD to get it ready for seamless use on your Mac.
Understanding the Samsung T7 SSD
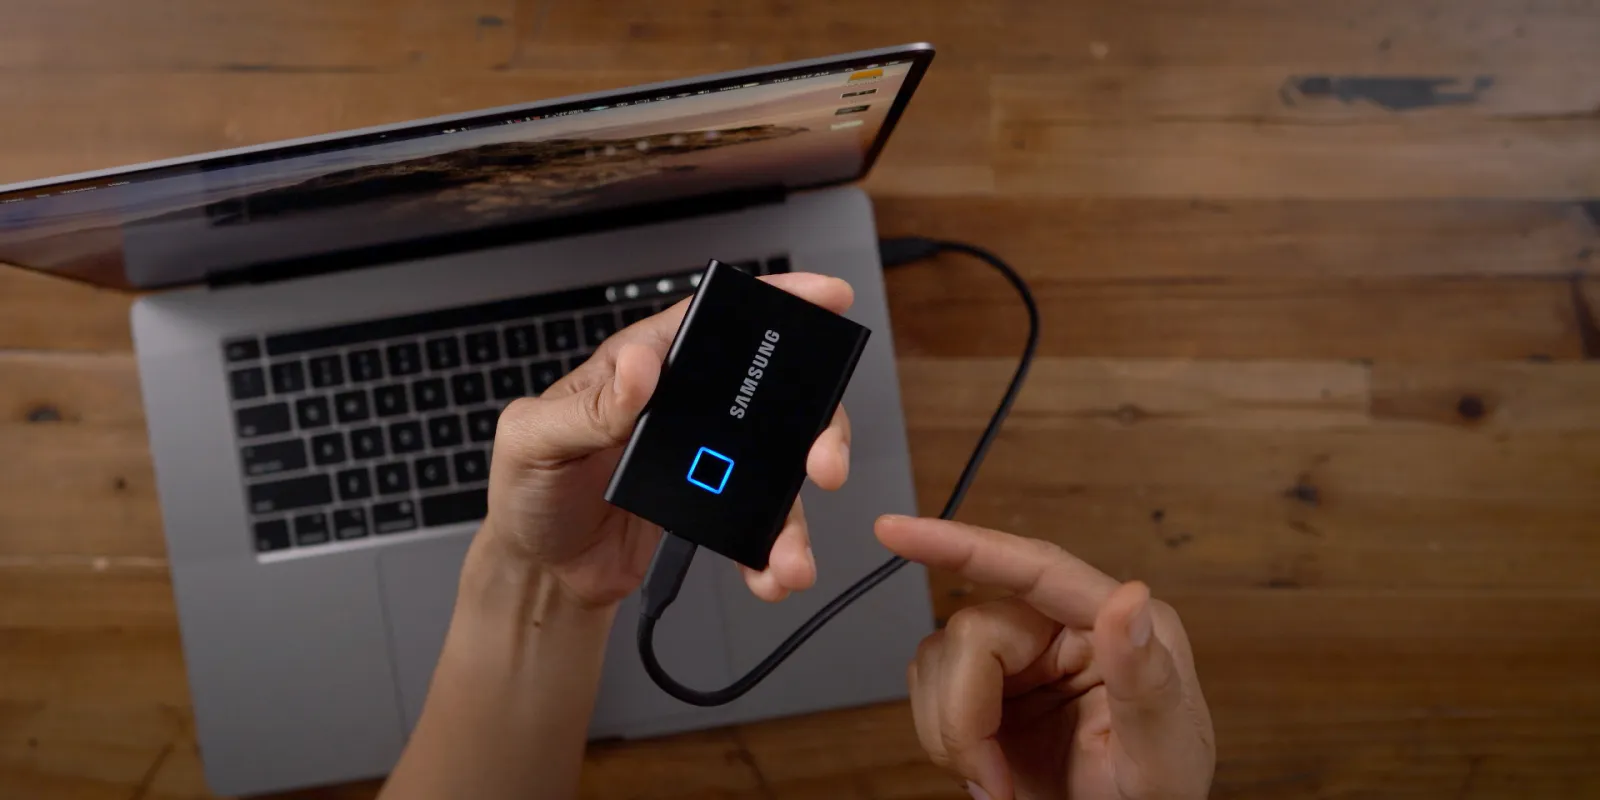
The Samsung T7 SSD is a compact and portable solid-state drive that offers exceptional speed and reliable performance. It utilizes the latest NVMe technology, which enables faster data transfer rates and reduced latency compared to traditional hard drives.
This sleek and lightweight SSD is equipped with a USB 3.2 Gen 2 interface, allowing for blazing-fast read and write speeds of up to 1,050 MB/s and 1,000 MB/s, respectively. With these impressive performance capabilities, the Samsung T7 SSD provides a seamless experience when transferring large files, editing multimedia, or running resource-intensive applications.
In addition to its exceptional speed, the Samsung T7 SSD offers advanced security features to safeguard your data. It includes built-in hardware encryption and password protection, ensuring that your files remain private and protected from unauthorized access. This level of security is essential for professionals who deal with sensitive client information or individuals who prioritize the safety of their personal data.
The Samsung T7 SSD is compatible with both Mac and Windows operating systems, making it a versatile choice for users with different devices or platforms. Whether you’re using it with a MacBook, iMac, or Mac Mini, the T7 SSD delivers seamless performance and compatibility.
Furthermore, the Samsung T7 SSD comes in different storage capacities, ranging from 500GB to a whopping 2TB, allowing you to choose the size that best suits your needs. Whether you require additional storage for work, gaming, or media storage, this SSD offers ample space to store your files, documents, photos, videos, and more.
With its sleek design, exceptional speed, advanced security features, and compatibility with various operating systems, the Samsung T7 SSD is an excellent choice for those seeking reliable and high-performance external storage.
In the next sections, we will guide you through the process of connecting, checking compatibility, and formatting the Samsung T7 SSD for your Mac, ensuring that it operates seamlessly and efficiently with your system.
Step 1: Connecting the Samsung T7 SSD to your Mac
Before you can begin formatting the Samsung T7 SSD, you need to establish a physical connection between the SSD and your Mac. Follow these steps to ensure a secure and reliable connection:
- Start by locating the USB-C to USB-C or USB-C to USB-A cable that comes with the Samsung T7 SSD. Make sure your Mac has the corresponding port(s) for the cable you have.
- Connect one end of the cable to the USB-C port on the Samsung T7 SSD.
- If your Mac has a USB-C port, connect the other end of the cable directly to your Mac. If your Mac has a USB-A port, use an appropriate USB-C to USB-A adapter to connect the cable to your Mac.
- Ensure that the connection is secure on both ends.
- Once the Samsung T7 SSD is connected to your Mac, you should see it appear as an external drive on your desktop or in the Finder sidebar.
It’s worth noting that the Samsung T7 SSD is designed to be backward compatible with older USB standards. However, to fully utilize its high-speed capabilities, make sure to connect it to a USB 3.2 Gen 2 port on your Mac. This will ensure the fastest data transfer rates and optimal performance.
Now that you have successfully connected the Samsung T7 SSD to your Mac, you can proceed to the next step: checking compatibility and ensuring you have the necessary software requirements.
Step 2: Checking Compatibility and Software Requirements
Before formatting the Samsung T7 SSD, it’s crucial to ensure that your Mac meets the compatibility requirements and has the necessary software to work with the SSD. Here’s what you need to check:
- Compatibility: The Samsung T7 SSD is compatible with Mac computers running macOS 10.10 or later. Verify that your Mac meets this requirement to ensure smooth compatibility between the SSD and your system.
- Software: To format the Samsung T7 SSD, you will need to use the built-in Disk Utility application, which is included with macOS. Disk Utility allows you to manage and format storage devices on your Mac. Ensure that your Mac has Disk Utility installed and make sure it is up to date.
- Internet Connection: Although not mandatory, having an active internet connection during the formatting process is recommended. This allows Disk Utility to download any necessary updates and ensures you have the latest features and bug fixes when working with your Samsung T7 SSD.
Checking compatibility and software requirements is essential to ensure a seamless formatting process and prevent any potential issues. Once you’ve confirmed that your Mac meets these criteria, you are ready to move on to the next step: formatting the Samsung T7 SSD using Disk Utility.
Step 3: Formatting the Samsung T7 SSD using Disk Utility
Formatting the Samsung T7 SSD using Disk Utility is a straightforward process that ensures the SSD is compatible with your Mac and ready for use. Follow these steps to format the SSD:
- Open Disk Utility on your Mac. You can find it in the Applications > Utilities folder or by searching for it using Spotlight.
- In the Disk Utility window, you should see a list of connected storage devices. Locate and select the Samsung T7 SSD in the sidebar.
- Click on the “Erase” button at the top of the Disk Utility window.
- A new window will appear, allowing you to configure the formatting settings for the Samsung T7 SSD.
- In the “Name” field, you can enter a name for the SSD. Choose a descriptive and easily recognizable name.
- Next, select the desired file system format. For maximum compatibility with both Mac and Windows systems, choose “ExFAT.” If you only intend to use the SSD with your Mac, you can select “Mac OS Extended (Journaled)” or “APFS” if your Mac is running macOS 10.13 or later.
- Confirm the chosen file system format and click on the “Erase” button.
- Wait for the formatting process to complete. The time required may vary depending on the size of the SSD.
- Once the formatting is finished, Disk Utility will display a confirmation message.
After completing these steps, the Samsung T7 SSD will be formatted according to your preferences. You can now use the SSD to store and access your files on your Mac.
It’s important to note that formatting the Samsung T7 SSD will erase all data on the drive. Therefore, make sure that you have backed up any important files before proceeding with the formatting process.
Now that you’ve successfully formatted the Samsung T7 SSD, you can proceed to the next steps to choose the partition scheme, label the SSD, and confirm the successful formatting of the drive.
Step 4: Selecting the File System Format
When formatting the Samsung T7 SSD, you have the option to choose the file system format that best suits your needs. The file system format determines how data is organized and stored on the SSD. Follow these steps to select the appropriate file system format:
- After clicking the “Erase” button in Disk Utility and entering a name for the SSD, you will see a dropdown menu labeled “Format.”
- Click on the dropdown menu to view the available file system format options.
- For maximum compatibility between Mac and Windows systems, select “ExFAT.” This format allows the SSD to be read and written on both operating systems.
- If you intend to use the SSD exclusively with your Mac, you can choose “Mac OS Extended (Journaled)” or “APFS” if your Mac is running macOS 10.13 or later.
- Consider the type of files you will be storing and which operating systems you’ll be accessing the SSD from when making your selection. Choose the file system format that best suits your specific requirements.
ExFAT is a popular choice as it offers wide compatibility with various devices and operating systems, making it convenient for sharing files between Mac and Windows machines. However, if you primarily use a Mac and want to take advantage of Apple’s latest file system technology, APFS is a solid option.
Keep in mind that changing the file system format in the future may require reformatting the SSD, which will erase all data. Therefore, carefully consider your needs and choose the appropriate format from the start.
Once you’ve selected the file system format, proceed to the next step to choose the partition scheme for your SSD.
Step 5: Choosing the Partition Scheme
After selecting the file system format for the Samsung T7 SSD, the next step is to choose the partition scheme. The partition scheme determines how the SSD is divided and organized into separate sections or partitions. Follow these steps to choose the appropriate partition scheme:
- After selecting the desired file system format in Disk Utility, you will see a dropdown menu labeled “Scheme.”
- Click on the dropdown menu to view the available partition scheme options.
- If you plan to use the SSD with only one operating system, such as macOS, you can choose the “GUID Partition Map” (also known as GPT) option. This is the recommended partition scheme for most Mac users.
- If you require compatibility with both Mac and Windows systems, choose the “Master Boot Record” (MBR) partition scheme. Keep in mind that MBR has limitations regarding the maximum partition size it can support, so it may not be suitable for larger SSDs.
- Consider your specific needs and the operating system(s) you’ll be using when choosing the partition scheme.
It’s important to note that once you’ve chosen and applied a partition scheme, it is not easily changeable without reformatting the SSD and erasing all data. Therefore, carefully consider your requirements and select the appropriate partition scheme from the beginning.
Once you’ve chosen the partition scheme, you can proceed to the next step to label the SSD and set the desired scheme for the Samsung T7 SSD.
Step 6: Labeling the SSD and Setting the Scheme
After selecting the appropriate partition scheme for the Samsung T7 SSD, the next step is to label the SSD and set the desired scheme. Follow these steps to complete this process:
- In Disk Utility, after selecting the file system format and partition scheme, you will see an option to enter a name for the SSD. This is where you can label the SSD for easy identification.
- Choose a descriptive and recognizable name for the SSD. You can enter any name you prefer, such as “Samsung T7” or a name that reflects the intended use of the SSD.
- Double-check that the chosen partition scheme and other formatting options are correct before proceeding.
- Once you have entered the SSD name and made sure all the settings are accurate, click on the “Erase” button to apply the changes.
Labeling the SSD helps in quickly identifying it among other storage devices and makes it easier to locate when connecting or managing multiple drives.
Setting the desired scheme ensures that the Samsung T7 SSD is formatted to meet your specific requirements, whether you need compatibility with a single operating system or multiple systems.
Once you have labeled the SSD and set the desired scheme, proceed to the next step to confirm that the formatting process is executed successfully.
Step 7: Confirming the Formatting Process
After labeling the Samsung T7 SSD and setting the desired scheme, the next step is to confirm that the formatting process is executed successfully. Follow these steps to ensure that the SSD has been properly formatted:
- Wait for Disk Utility to complete the formatting process. The time required may vary depending on the size of the SSD.
- Once the formatting process is finished, Disk Utility will display a confirmation message indicating that the process was successful.
- Review the information provided in the confirmation message to ensure that it matches the chosen formatting options, including the file system format, partition scheme, and SSD name.
- Verify that the Samsung T7 SSD is listed in the Disk Utility sidebar without any formatting errors or warnings.
- If the confirmation message and SSD listing in Disk Utility reflect the chosen formatting options accurately and indicate a successful formatting process, you can proceed with confidence. The Samsung T7 SSD is now ready for use on your Mac.
Confirming the formatting process is essential to ensure that the Samsung T7 SSD is properly formatted and ready to store and access your files. By double-checking the details and ensuring that no errors or warnings are present, you can ensure the integrity and reliability of the SSD.
Now that you have confirmed the successful formatting process, you can begin using the Samsung T7 SSD for your storage needs on your Mac.
Step 8: Verifying the Successful Formatting
Once you have completed the formatting process for the Samsung T7 SSD, it is important to verify that the formatting was successful. This step ensures that your SSD is ready to be used and that it is recognized by your Mac. Follow these steps to verify the successful formatting:
- Eject the Samsung T7 SSD from your Mac by right-clicking on its icon on the desktop or in the Finder sidebar, then selecting “Eject.”
- Disconnect the USB-C or USB-A cable from the SSD and your Mac.
- Reconnect the Samsung T7 SSD to your Mac using the same USB-C or USB-A cable.
- Wait for a few moments to allow your Mac to recognize the SSD after reconnecting it.
- Look for the Samsung T7 SSD icon on your desktop or in the Finder sidebar. It should appear as a mounted external drive.
- Double-click on the SSD icon to open it and verify that you can access the drive and view its contents.
- Try copying a small file to the Samsung T7 SSD and then copying it back to your Mac to test the read and write capabilities of the SSD.
- If you can access the Samsung T7 SSD, view its contents, and perform file operations without any issues, the formatting process has been successful.
Verifying the successful formatting ensures that the Samsung T7 SSD is functioning correctly and that it is recognized by your Mac’s operating system. It gives you peace of mind knowing that you can start using the SSD for your storage needs.
If you encounter any issues during the verification process, such as the SSD not appearing or being inaccessible, double-check the formatting steps and repeat them if necessary. If the problem persists, you may need to seek technical assistance or contact customer support for further assistance.
By verifying the successful formatting of the Samsung T7 SSD, you can confidently utilize its storage capacity and benefit from its speedy performance for your Mac.
Conclusion
Formatting the Samsung T7 SSD for use with your Mac is a crucial step to ensure compatibility and optimize performance. By following the steps outlined in this guide, you can successfully format the SSD and get it ready for storing and accessing your files.
We started by understanding the capabilities of the Samsung T7 SSD, including its impressive speeds, advanced security features, and compatibility with Mac and Windows operating systems. Then, we went through the step-by-step process of connecting the SSD to your Mac, checking compatibility and software requirements, and formatting the SSD using Disk Utility.
We discussed how to select the appropriate file system format, choose the partition scheme, label the SSD, and set the desired scheme. Finally, we emphasized the importance of verifying the successful formatting by ejecting and reconnecting the SSD, checking its recognition and access, and performing file operations.
Remember that formatting the Samsung T7 SSD will erase all existing data, so always back up important files before proceeding. Additionally, ensure that your Mac meets the compatibility requirements and has the necessary software, such as Disk Utility, for formatting the SSD.
By successfully formatting your Samsung T7 SSD, you can take full advantage of its exceptional speed, security, and storage capacity. Whether you’re a professional working on large projects or an individual needing reliable external storage, the Samsung T7 SSD provides the performance and convenience you require.
Now that you’re equipped with the knowledge to format the Samsung T7 SSD for your Mac, you can confidently enjoy the benefits of this powerful external storage solution. Ensure your SSD is properly formatted and start leveraging its capabilities for seamless file storage and retrieval on your Mac.