Introduction
The orientation of a projector image plays a crucial role in ensuring optimal viewing experience. Whether you need to flip the image due to mounting the projector upside down or if the image appears mirrored, being able to adjust the image orientation is essential. Fortunately, modern projectors offer various methods to easily flip or rotate the image to match your setup requirements. In this article, we will explore different techniques and options for flipping a projector image.
Understanding how to flip a projector image is particularly important for scenarios such as presentations, movie screenings, or gaming sessions where the projected content needs to be properly aligned and legible. By having a clear understanding of the various methods available, you can save time and effort in achieving the desired image orientation.
In the following sections, we will discuss different approaches to flipping a projector image, starting with checking and adjusting the image orientation settings on the projector itself. We will then move on to explore how to adjust the image orientation using projection settings on a computer. Additionally, we will delve into using projector controls and external devices to flip the image if necessary. Finally, we will address common issues that may arise when attempting to flip a projector image and provide troubleshooting tips.
By the end of this article, you will have a comprehensive understanding of how to flip a projector image and be able to confidently adjust the image orientation to suit your needs. So let’s dive in and explore the various methods available to flip a projector image!
Understanding Projector Image Orientation
Before we delve into the different methods of flipping a projector image, it is essential to understand the concept of projector image orientation. When a projector displays an image, it follows a specific orientation – either upright or flipped/mirrored. The default orientation of the image depends on the projector model and setup.
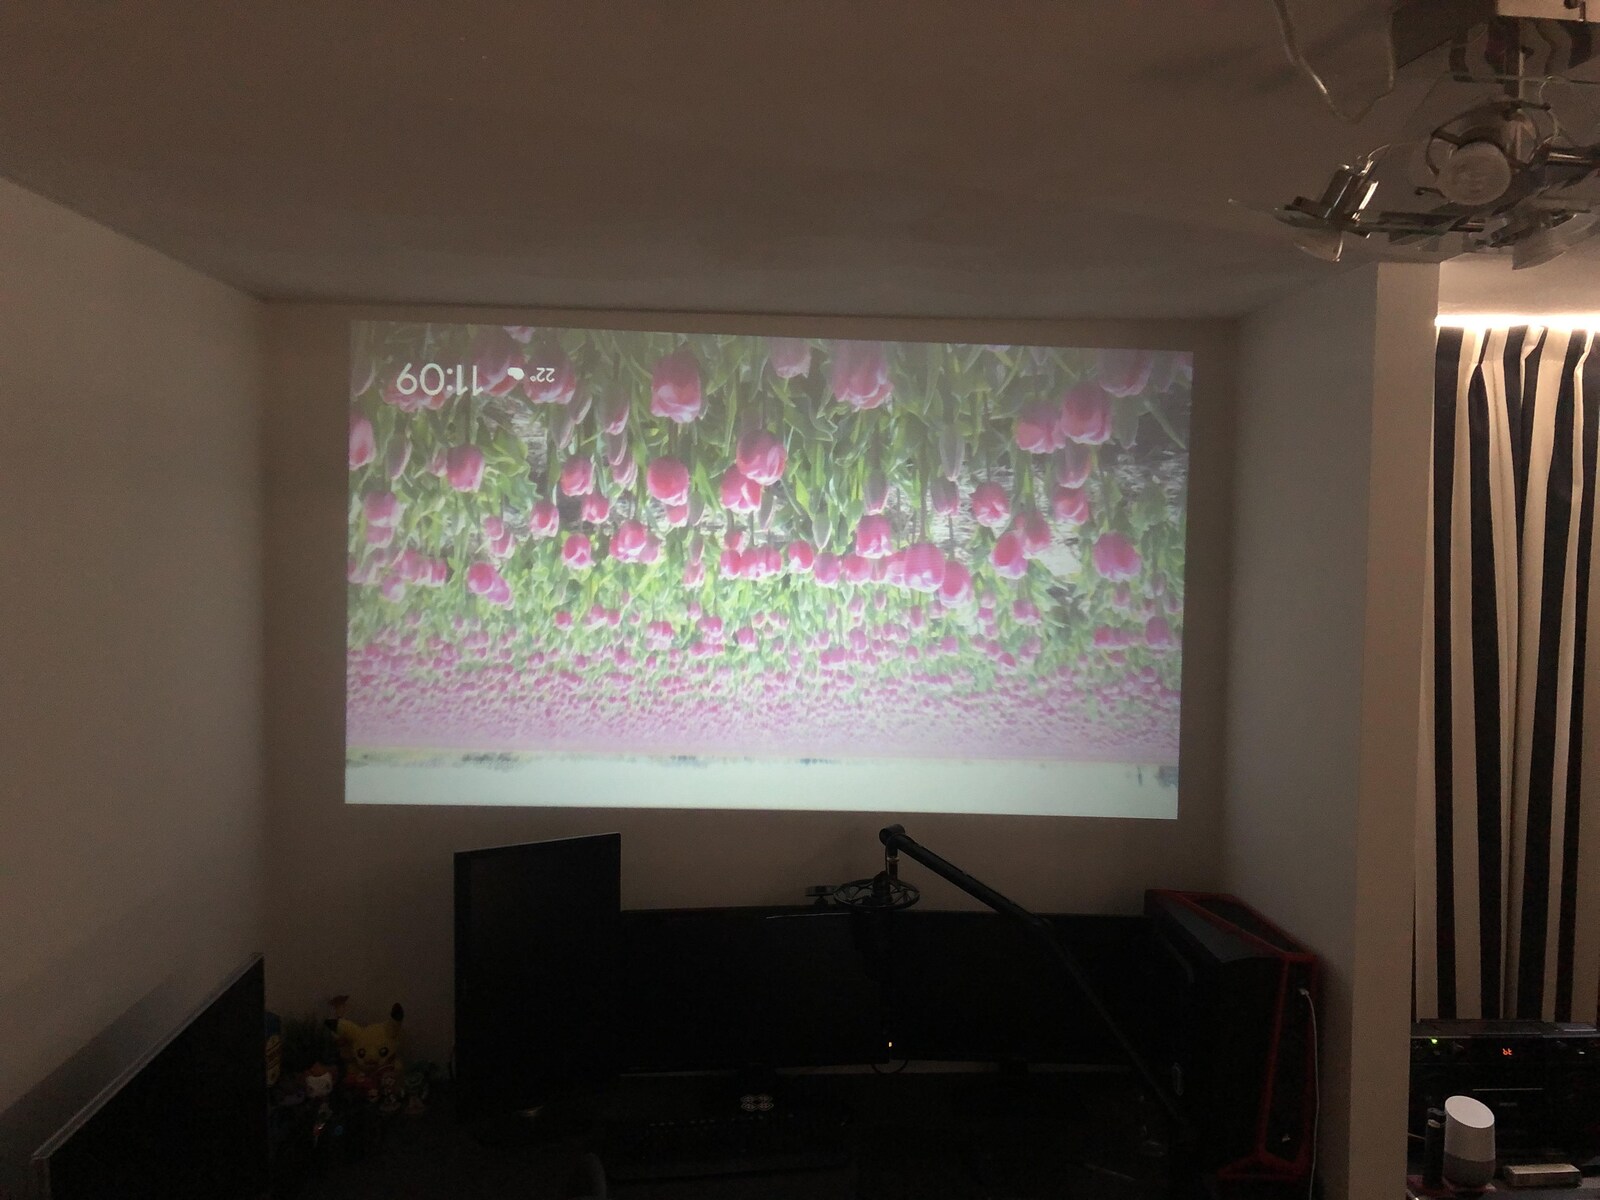
Typically, projectors are designed to project an upright image when placed on a flat surface and positioned in a standard configuration. This means that if you mount a projector on a ceiling or place it on a table with its lens facing upwards, the projected image may appear inverted or upside down. Additionally, some projectors may mirror the image horizontally or vertically by default, depending on the intended usage.
Understanding the default orientation of your projector’s image is crucial to determine whether flipping is necessary. For example, if you have mounted the projector on the ceiling and the image appears upside down, you will need to flip it to ensure proper alignment on the screen.
It’s worth noting that not all projectors have the same default orientation and flipping capabilities. Some projectors have built-in features that allow users to easily adjust the image orientation, while others may require external devices or manual adjustments to achieve the desired result.
By knowing the specific orientation of your projector and understanding how it affects the image, you can effectively choose the appropriate method for flipping the projector image. In the following sections, we will explore different techniques and options available to ensure that your projected image displays correctly.
Checking Image Orientation Settings on the Projector
Before jumping into complex adjustments, it’s important to check the image orientation settings on your projector itself. Many projectors have built-in options to easily flip or rotate the projected image, saving you from having to make adjustments through external devices or software.
To begin, consult your projector’s user manual to locate the settings menu. Usually, you can access the settings by using the buttons on the projector itself or a remote control provided with the projector.
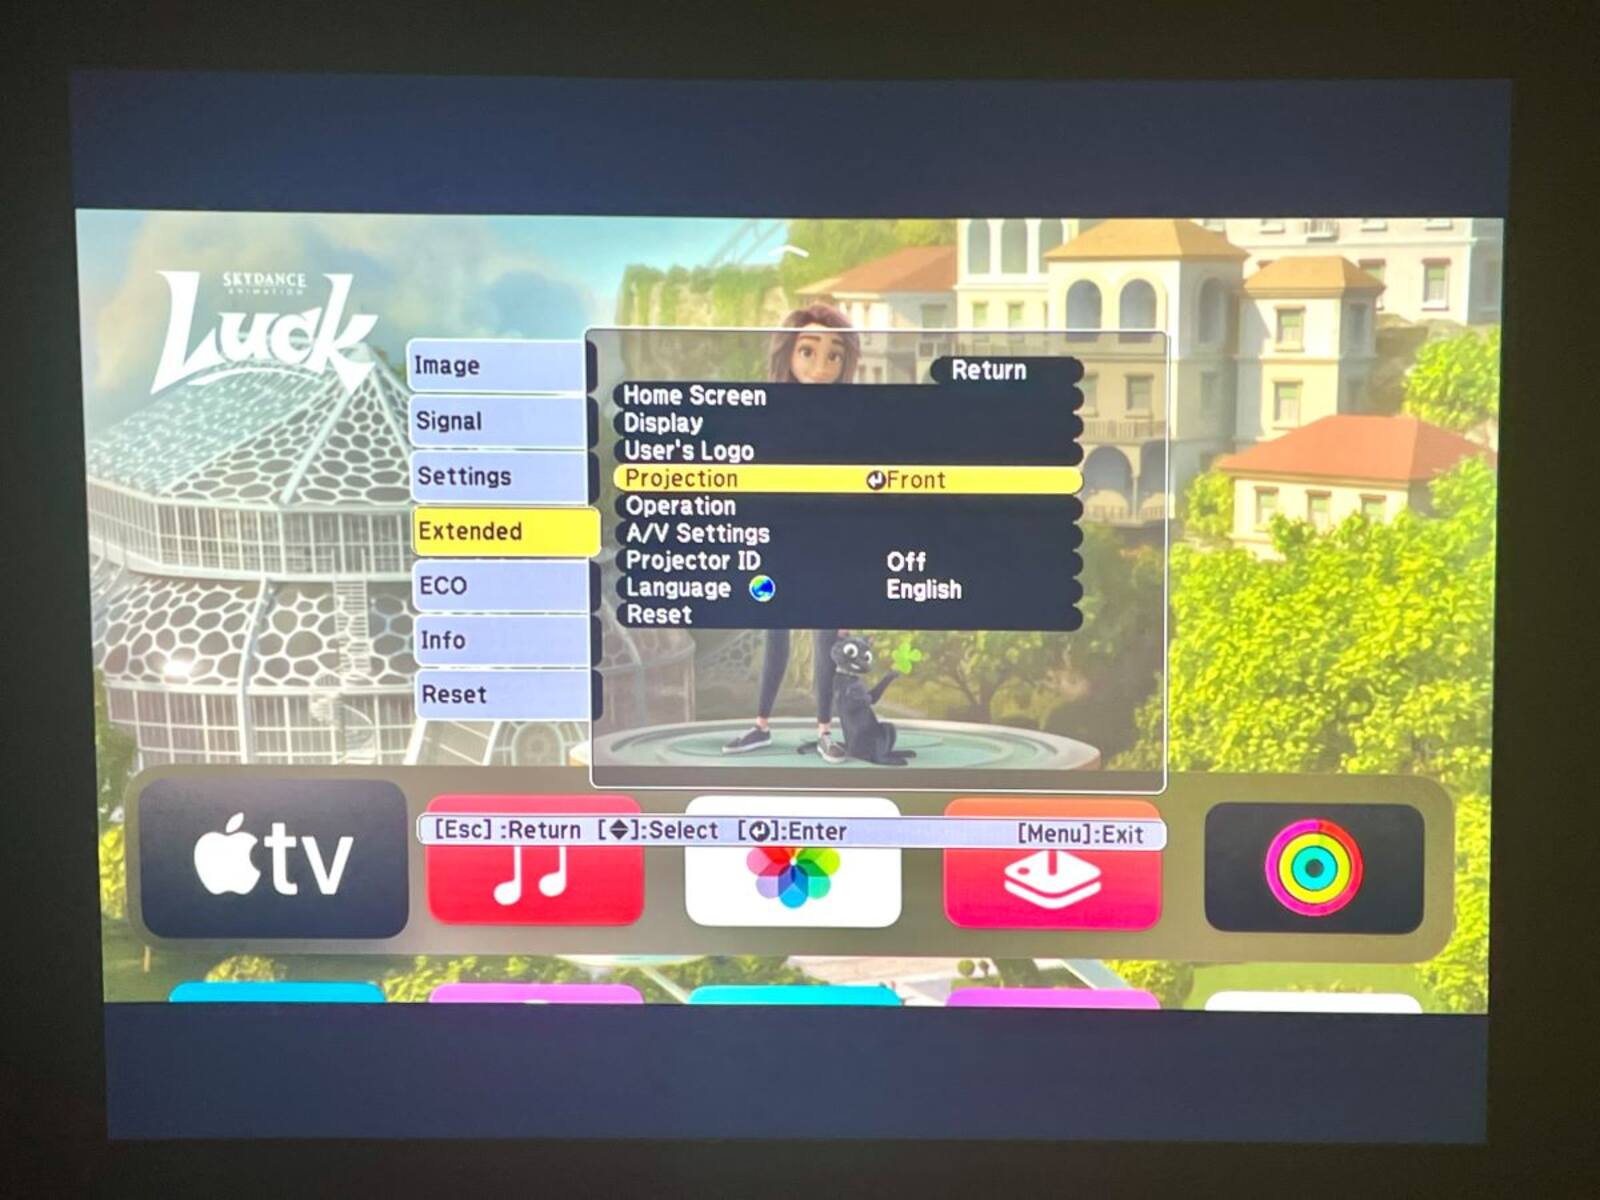
Once you have accessed the settings menu, look for options related to image orientation. These options may be labeled as “image flip,” “ceiling mode,” or “screen rotation.” The specific terminology might differ based on the brand and model of your projector.
If the image appears upside down or mirrored, try enabling the corresponding setting. For example, if you have mounted the projector on the ceiling and the image appears inverted, enabling the “ceiling mode” option will flip the image to the correct orientation.
After modifying the image orientation settings, test the projection to ensure the changes have been applied successfully. If the image is now displayed correctly, you have successfully adjusted the image orientation using the projector’s built-in settings.
However, if your projector does not have image orientation settings or if the available options do not produce the desired result, you may need to explore alternative methods for flipping the projector image, which we will discuss in the upcoming sections.
Now that we have explored the first method of checking image orientation settings on the projector itself, let’s move on to the next section where we will discuss adjusting the image orientation via projection settings on a computer.
Adjusting Image Orientation via Projection Settings on a Computer
If your projector does not have built-in options to adjust the image orientation, you can utilize projection settings on your computer to flip or rotate the image before it is projected onto the screen. This method allows you to make the necessary adjustments without needing additional external devices.
To begin, connect your computer to the projector using the appropriate video cable (such as HDMI or VGA). Ensure that both the computer and the projector are powered on and properly connected.
Next, access the display settings on your computer. The steps to access these settings may vary depending on the operating system you are using.
If you are using Windows, right-click on the desktop and select “Display settings” or “Screen resolution.” In the display settings, you will find options to adjust the orientation, including “landscape,” “portrait,” “flipped landscape,” or “flipped portrait.” Select the desired orientation that corresponds to the orientation you need for the projector image.
If you are using macOS, go to the Apple menu and select “System Preferences,” then click on “Displays.” In the displays settings, navigate to the “Display” tab and look for the “Rotation” or “Orientation” drop-down menu. From there, you can choose the desired orientation to flip or rotate the image.
After making the necessary adjustments in the display settings, the image on your computer screen should appear correctly oriented. Now, when you project the image, it will be flipped or rotated to match the desired orientation on the screen.
It’s essential to note that adjusting the image orientation via projection settings on your computer affects the image only when it is projected. This means that the orientation of your computer screen itself remains unchanged.
If adjusting the image orientation through your computer’s projection settings does not yield the desired results, don’t worry. In the next section, we will explore how to flip the projector image using the controls located directly on the projector.
Flipping the Projector Image Using Projector Controls
If your projector has physical controls or a remote, you can often utilize these built-in features to flip or rotate the image directly. This method allows for quick adjustments without the need for external devices or computer settings.
Start by locating the control panel on the projector or using the remote control that came with it. Look for buttons or options specifically related to image orientation or flipping.
Common options on projector controls may include “image orientation,” “flip,” “mirror,” or arrows representing the direction of rotation. The specific labeling and location of these controls depend on the projector’s brand and model.
To flip the projector image using the controls, follow these general steps:
- Turn on the projector and ensure it is displaying an image.
- Access the control panel or use the remote control to navigate to the image orientation settings.
- Select the appropriate option to flip or rotate the image. This may involve pressing a specific button or using navigation arrows to change the orientation.
- After making the adjustment, observe the projected image to confirm that it has been flipped or rotated according to your desired orientation.
Remember to consult your projector’s user manual for detailed instructions and specifics about the image orientation controls for your particular model. Different projectors may have varying methods of accessing and adjusting these settings.
Flipping the projector image using projector controls is often a straightforward and convenient option. However, if your projector does not have these controls or if they do not produce the desired result, there are alternative methods available, as we’ll discuss in the next section.
Now that we have explored using projector controls to flip the image, let’s move on to the next section where we will discuss using external devices to achieve the desired image orientation.
Using External Devices to Flip the Projector Image
If your projector lacks built-in options or controls for flipping the image, you can still achieve the desired orientation by using external devices. These devices provide additional flexibility and control over the image projection, allowing you to flip or rotate it as needed.
One popular external device used for flipping projector images is an HDMI switch or converter. These devices support image rotation and flipping functionalities, allowing you to modify the orientation of the image before it reaches the projector. Simply connect your video source, such as a computer or media player, to the HDMI switch or converter and then connect the output to the projector. Using the device’s controls or software, you can adjust the image orientation to match your requirements.
Another option is to use a media player or laptop with screen mirroring capabilities. By utilizing screen mirroring apps or features, you can mirror your device’s screen onto the projector and adjust the image orientation on your device. This method provides a convenient way to control the projector image directly from your device.
Some projectors also support wireless connectivity and have companion apps that allow you to control and adjust the image orientation remotely. Check if your projector model offers this feature and explore the corresponding app or software to see if it includes options for flipping or rotating the image.
Additionally, if you are using a computer or laptop for projection, you can install third-party software that offers image rotation features. These software applications allow you to rotate or flip the image before it is displayed through the projector.
When using external devices to flip the projector image, it’s important to read the instructions provided with the devices or software and familiarize yourself with their features and settings. This will ensure that you can efficiently adjust the image orientation according to your specific needs.
In the next section, we will address common issues that may arise when flipping a projector image and provide troubleshooting tips to help resolve them.
Troubleshooting Common Issues with Flipping Projector Image
While flipping a projector image is usually a straightforward process, there may be instances where you encounter issues or unexpected results. Let’s explore some common problems that may arise when flipping a projector image and provide possible troubleshooting solutions:
1. Image appearing inverted or upside down: If the projected image is flipped vertically or appears upside down after attempting to adjust the orientation, check the projector’s settings menu or controls to ensure that the correct image flip option is enabled. Additionally, make sure that the projector is mounted or positioned in the correct orientation based on its design.
2. Image appearing mirrored or horizontally flipped: If the projected image appears mirrored or flipped horizontally, adjust the projector’s settings or controls to disable any mirroring or horizontal flip options. Double-check the settings on your computer or external devices to make sure they are not contributing to the issue.
3. Image not aligning properly: If the flipped image does not align properly on the screen, check the projector’s keystone correction feature, which allows for adjustments to keystone distortion. Use the keystone correction controls to fine-tune the image’s alignment vertically or horizontally to achieve a squared and proportionate display.
4. External device connectivity issues: If you are using external devices or software to flip the projector image, ensure that all connections are secure and properly configured. Make sure the cables are inserted correctly and that any required drivers or software are up to date.
5. Limited image adjustment options: Some projectors may have limited or no built-in options for adjusting image orientation. In such cases, consider using external devices, computer settings, or software solutions discussed earlier in this article to achieve the desired result.
6. Image quality degradation: In rare cases, flipping the projector image may result in a decrease in image quality. To mitigate this, ensure that you are using high-quality video cables and that the projector is positioned properly to maintain optimal signal strength. Additionally, check for any software or firmware updates available for your projector to ensure optimal performance.
Remember to consult your projector’s user manual and the documentation provided with any external devices or software for specific troubleshooting steps and recommendations.
By addressing these common issues and following the troubleshooting tips provided, you can overcome any challenges that may arise when flipping a projector image.
Conclusion
Flipping a projector image is a fundamental skill for ensuring optimal viewing experience in various scenarios. Whether you need to adjust the image orientation due to mounting the projector on a ceiling, using a specific screen setup, or addressing a mirroring issue, understanding the different methods available is crucial for a successful projection.
In this article, we have explored several techniques for flipping a projector image. These include checking image orientation settings on the projector itself, adjusting the image orientation via projection settings on a computer, utilizing projector controls, and using external devices for image manipulation. By understanding these methods, you can confidently adjust the projector image to suit your requirements.
It’s essential to note that each projector model may have different features and capabilities, so it’s crucial to consult the user manual and documentation specific to your equipment for accurate instructions and troubleshooting guidance.
Remember to experiment and test the adjustments to ensure the desired image orientation is achieved. Additionally, be mindful of the image quality and alignment during the flipping process, making any necessary adjustments to maintain optimal viewing quality.
With a comprehensive understanding of how to flip a projector image and the various techniques at your disposal, you can tailor the projected image to match the desired orientation for presentations, movie screenings, gaming sessions, and more.
Now, armed with this knowledge, go ahead and confidently flip that projector image to create an immersive and visually appealing viewing experience!


