Introduction
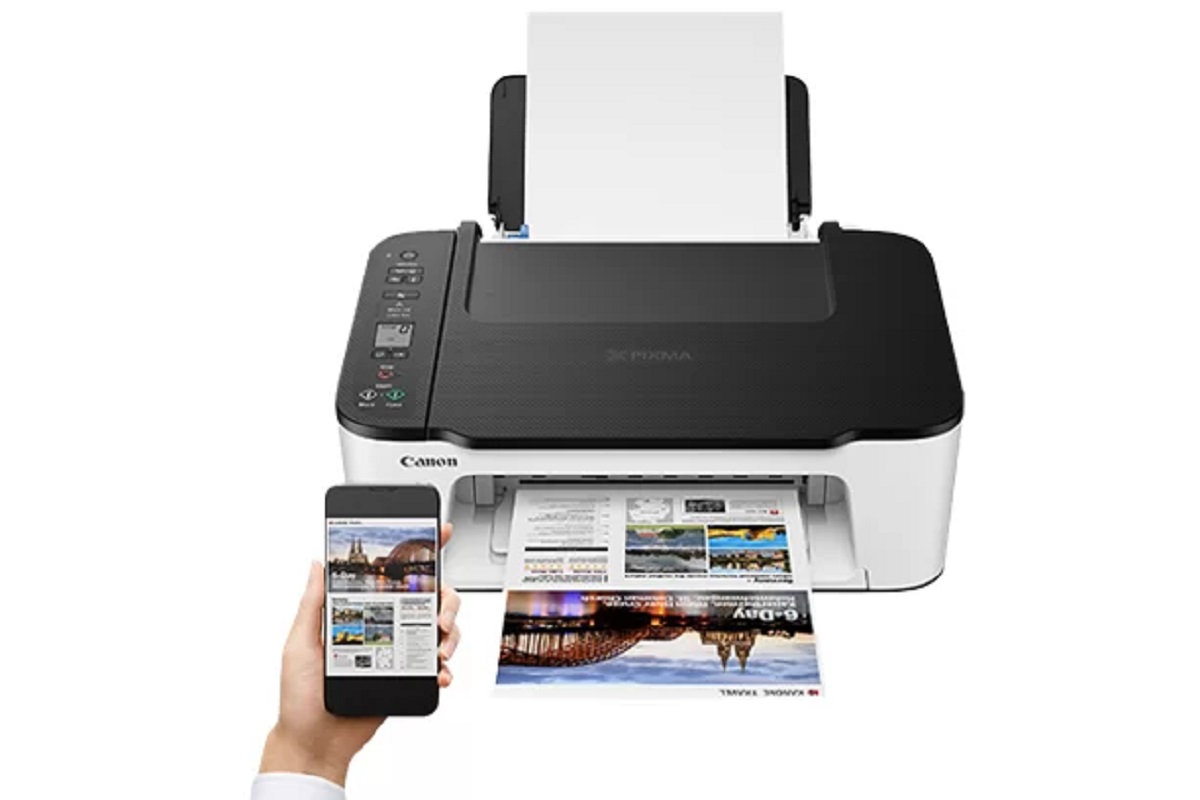
Welcome to this guide on how to connect your Canon Pixma printer to Wi-Fi. In today’s fast-paced, wireless world, it is essential to have a printer that can effortlessly connect to your home or office network. By connecting your Canon Pixma printer to Wi-Fi, you can print wirelessly from multiple devices without the hassle of connecting cables or transferring files. Whether you want to print documents, photos, or other important materials, this guide will walk you through the step-by-step process to ensure a seamless connection.
Connecting your printer to Wi-Fi offers several advantages. Firstly, it eliminates the need for direct physical connections between your printer and computer, allowing you the freedom to print from any device connected to the same network. This means that you can print from your laptop, smartphone, or tablet without having to transfer files or switch devices. Additionally, Wi-Fi connectivity enables you to take advantage of the wide range of printing options and features offered by your Canon Pixma printer, such as mobile printing and cloud printing.
Before we dive into the step-by-step instructions, it is important to check if your Canon Pixma printer is compatible with Wi-Fi connectivity. Not all models support wireless printing, so it’s crucial to ensure that your printer has built-in Wi-Fi capabilities. Consult the user manual or visit the Canon website to confirm the Wi-Fi compatibility of your specific model. If your printer does not support Wi-Fi, there may be alternative methods, such as using a USB cable or a printer server, to enable wireless printing.
Once you have confirmed the Wi-Fi compatibility of your Canon Pixma printer, you can proceed with the setup process. This guide will provide detailed instructions on how to connect your printer to the Wi-Fi network, install the necessary printer software, and troubleshoot any potential connection issues that you may encounter. By following these steps, you will be able to enjoy the convenience and flexibility of wireless printing on your Canon Pixma printer.
Step 1: Check Wi-Fi Compatibility
Before you start the process of connecting your Canon Pixma printer to Wi-Fi, it is crucial to ensure that your printer model supports wireless printing. While most modern Canon Pixma printers are equipped with built-in Wi-Fi capabilities, it is always a good idea to double-check. The following steps will guide you through checking the Wi-Fi compatibility of your printer:
- Refer to the user manual: The user manual that came with your Canon Pixma printer is a valuable resource that provides detailed information about the printer’s features and specifications. Look for a section that mentions Wi-Fi or wireless connectivity. If your printer supports wireless printing, it will be clearly indicated in the manual.
- Visit the Canon website: The Canon website is another reliable source to confirm the Wi-Fi compatibility of your printer. Navigate to the support section of the website and search for your specific printer model. Look for information regarding wireless connectivity or network compatibility. You may find a list of supported networks or instructions on how to connect your printer to Wi-Fi.
- Contact customer support: If you are still unsure whether your Canon Pixma printer is compatible with Wi-Fi, don’t hesitate to reach out to Canon’s customer support. They will be able to provide you with accurate information regarding the wireless capabilities of your printer model. You can contact customer support via phone, email, or live chat.
It is important to note that if your printer does not have built-in Wi-Fi capabilities, you may still be able to enable wireless printing using alternative methods. For example, you can connect your printer to a Wi-Fi-enabled computer and share the printer over the network. Alternatively, you can use a printer server device that allows you to connect your printer to the Wi-Fi network. These methods may require additional setup and configuration, so refer to the user manual or contact customer support for guidance.
Once you have confirmed the Wi-Fi compatibility of your Canon Pixma printer, you are ready to proceed with the setup process. In the next step, we will guide you through the necessary preparations before connecting to your Wi-Fi network. So let’s move on to Step 2: Prepare for Wi-Fi Setup.
Step 2: Prepare for Wi-Fi Setup
Now that you have confirmed the Wi-Fi compatibility of your Canon Pixma printer, it’s time to prepare for the Wi-Fi setup. Before connecting to your Wi-Fi network, there are a few important things to consider and steps to follow:
- Ensure Wi-Fi network availability: Make sure that your Wi-Fi network is up and running. Check that the router is turned on and broadcasting a stable signal. If you’re not sure about the network status, try connecting another device (such as a smartphone or laptop) to the Wi-Fi network to ensure it is functioning properly.
- Gather network information: Take note of your Wi-Fi network’s name (sometimes called the SSID) and password (also known as the network security key or passphrase). This information will be needed during the printer setup process.
- Get a USB cable: Although the ultimate goal is to establish a wireless connection, some Canon Pixma printers require an initial USB connection to complete the setup process. Check the user manual or Canon’s website to determine if your specific printer model requires a USB cable. If so, make sure you have a compatible USB cable on hand.
- Clear a space near the printer: Ensure that there is sufficient space near your printer for the setup process. This will allow you to access the printer and any buttons or controls that may be necessary during the Wi-Fi setup.
- Power on the printer: Ensure that your Canon Pixma printer is properly powered on. If it has a power button, press it to turn on the printer. Check that the printer’s control panel or display is functioning correctly.
By completing these preparations, you will be ready to move on to the next step: connecting your Canon Pixma printer to your Wi-Fi network. In the following section, we will guide you through the process of establishing the wireless connection. So let’s proceed to Step 3: Connect to Wi-Fi Network.
Step 3: Connect to Wi-Fi Network
Now that you have completed the necessary preparations, it’s time to connect your Canon Pixma printer to your Wi-Fi network. Follow the step-by-step instructions below to establish the wireless connection:
- Access the printer’s control panel: Locate the control panel or display on your Canon Pixma printer. You may need to refer to the user manual for specific instructions on accessing the control panel.
- Navigate the settings menu: Using the buttons or touchscreen on the control panel, navigate to the Wi-Fi or Network settings menu. The exact location and labeling of this menu may vary depending on your printer model.
- Select Wi-Fi setup: Within the Wi-Fi or Network settings menu, look for an option labeled “Wi-Fi Setup” or a similar variation. Select this option to begin the Wi-Fi setup process.
- Choose a Wi-Fi network: Your Canon Pixma printer will now scan for available Wi-Fi networks. A list of detected networks will be displayed on the control panel or screen. Select your desired Wi-Fi network from the list.
- Enter Wi-Fi network password: If your Wi-Fi network is secured with a password, you will be prompted to enter the network security key or passphrase. Use the control panel or touchscreen to input the password. Double-check that you have entered the password correctly to avoid any connection issues.
- Confirm network settings: Once you have entered the Wi-Fi network password, your printer will attempt to establish a connection to the network. It may take a few moments for the connection to be established. Once connected, your printer will display a confirmation message or symbol on the control panel.
Congratulations! You have successfully connected your Canon Pixma printer to your Wi-Fi network. This means you can now enjoy the convenience of wireless printing from any device connected to the same network. However, before you start printing, there is one more crucial step to complete: installing the necessary printer software.
In the next section, we will guide you through the installation process, ensuring that your printer is ready to print wirelessly. So let’s move on to Step 4: Install Printer Software.
Step 4: Install Printer Software
After successfully connecting your Canon Pixma printer to your Wi-Fi network, the next step is to install the printer software. The printer software includes the necessary drivers and utilities to enable seamless communication between your devices and the printer. Follow the steps below to install the printer software:
- Visit the Canon website: Open a web browser and go to the official Canon website. Navigate to the support section of the website and search for your specific printer model.
- Find the driver downloads: Look for a section on the Canon website that provides driver downloads for your printer model. Ensure that you select the correct operating system of your computer.
- Download and run the driver installer: Once you have found the appropriate driver download, click on it to initiate the download. After the download is complete, locate the downloaded file and double-click it to run the installer.
- Follow the installation prompts: The driver installer will guide you through the installation process step by step. Follow the on-screen instructions to complete the installation. You may be asked to agree to the terms and conditions and select a destination folder for the software.
- Connect the printer (if necessary): Depending on your specific Canon Pixma printer model, you may be prompted to connect the printer to your computer during the installation process. If this is the case, follow the instructions provided to connect the printer using a USB cable.
- Complete the installation: Once the installation is complete, you will receive a notification or confirmation message. At this point, you can disconnect the USB cable from the printer if it was required for the installation.
By installing the printer software, you have ensured that your Canon Pixma printer is fully set up and ready to print wirelessly. The software will allow your computer and other devices to communicate seamlessly with the printer, enabling you to easily send print jobs over the Wi-Fi network.
In the next step, we will guide you through testing the connection and troubleshooting any potential issues that may arise. So let’s proceed to Step 5: Test Connection and Troubleshoot.
Step 5: Test Connection and Troubleshoot
Now that your Canon Pixma printer is connected to your Wi-Fi network and the printer software is installed, it’s time to test the connection and troubleshoot any potential issues. Follow the steps below to ensure that your printer is functioning correctly:
- Print a test page: Open a document or image on your computer that you want to print. Choose the print option from the software application you are using. Select your Canon Pixma printer from the list of available printers and choose the desired print settings. Click on the “Print” button to initiate the print job. If the printer successfully prints the document, this indicates that the wireless connection is functioning correctly.
- Check the printer status: If the test page fails to print, or if you encounter any other printing issues, check the status of your printer. Look for any error messages or warning lights on the printer’s control panel. Consult the user manual or Canon’s website for troubleshooting guidance specific to your printer model.
- Restart the printer and computer: Sometimes, a simple restart can help resolve connectivity issues. Power off your Canon Pixma printer and computer, wait for a few seconds, and then power them back on. Once both devices have restarted, try printing the test page again.
- Ensure Wi-Fi signal strength: If you experience weak or intermittent Wi-Fi signal, it may affect the printing performance. Make sure that your printer is within range of the Wi-Fi router and that there are no physical or electronic barriers obstructing the signal. Consider relocating the printer or the router if necessary.
- Update driver and software: Check for any available updates for the printer driver and software. Visit the Canon website and download the latest driver updates for your printer model. Keeping the driver and software up to date can help resolve compatibility issues and improve overall performance.
- Contact customer support: If you have followed all the troubleshooting steps above and are still experiencing issues with your Canon Pixma printer’s wireless connection, it is recommended to contact Canon’s customer support for further assistance. They will be able to provide specific troubleshooting guidance based on your printer model and help resolve any unresolved issues.
By following these steps, you can identify and address any potential issues in the wireless connection between your Canon Pixma printer and your devices. Remember to refer to the user manual and Canon’s website for detailed troubleshooting guidance tailored to your specific printer model.
With a successfully connected and properly functioning Canon Pixma printer, you can now enjoy the convenience of wireless printing from any device on your Wi-Fi network. So go ahead and start printing your documents, photos, and more with ease.
Conclusion
Connecting your Canon Pixma printer to Wi-Fi opens up a world of convenience and flexibility in your printing experience. By following the step-by-step process outlined in this guide, you have successfully established a wireless connection between your printer and your Wi-Fi network. As a result, you can now print wirelessly from any device on the same network, eliminating the need for direct physical connections or file transfers.
Throughout the process, it is important to ensure that your Canon Pixma printer is compatible with Wi-Fi connectivity. Check the user manual, visit the Canon website, or reach out to customer support to confirm the wireless capabilities of your specific printer model. If your printer does not support Wi-Fi, there may be alternative methods available to enable wireless printing, such as using a USB cable or printer server.
Additionally, proper preparation and following the steps for Wi-Fi setup, installing the printer software, and testing the connection are crucial for a successful wireless printing experience. By gathering network information, clearing space near the printer, and powering on the printer, you set the stage for a smooth setup process. Installing the necessary printer software ensures seamless communication between your devices and the printer.
If any troubleshooting is required, refer to the user manual, check for software updates, or contact Canon’s customer support for guidance specific to your printer model. They can provide assistance in resolving any connectivity issues and ensuring optimal performance.
Now that your Canon Pixma printer is connected to Wi-Fi, you can print documents, photos, and more without the hassle of cables or transfers. Enjoy the convenience and freedom of wireless printing from all your devices, making your printing experience more efficient and productive.
So go ahead, start printing wirelessly, and explore the endless possibilities that come with the convenience of a connected Canon Pixma printer.