Introduction
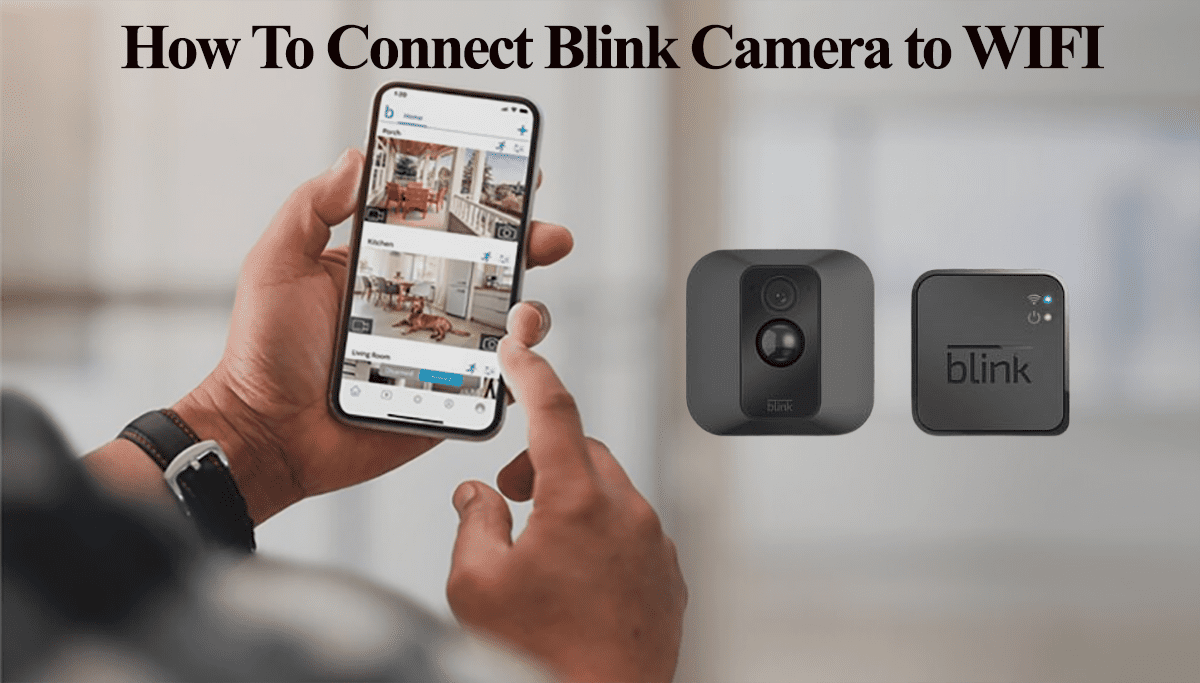
Welcome to the comprehensive guide on how to connect your Blink camera to Wi-Fi. Blink is a popular home security system that allows you to monitor your home remotely using wireless cameras. With Blink, you can keep an eye on your property, loved ones, and pets from anywhere in the world.
Setting up your Blink camera and connecting it to your Wi-Fi network is a crucial step in ensuring that it functions properly. By connecting your Blink camera to Wi-Fi, you can access live video feeds, receive motion alerts, and customize settings through the Blink app on your smartphone or tablet.
In this step-by-step guide, we will walk you through the process of connecting your Blink camera to Wi-Fi. Whether you are new to Blink or just need a refresher, this guide will provide you with all the necessary information to get your camera up and running in no time.
We will cover each step in detail, from gathering the necessary equipment to adding your Blink camera to the Blink app. Rest assured, even if you are not tech-savvy, this guide will make the setup process easy to understand and follow.
Before we dive into the steps, make sure you have all the required equipment and a stable Wi-Fi connection. It’s essential to have these ready to avoid any delays during the setup process. So, let’s get started on connecting your Blink camera to Wi-Fi!
Step 1: Gather the necessary equipment
Before you begin the process of connecting your Blink camera to Wi-Fi, it’s important to gather all the necessary equipment. This will ensure a smooth and hassle-free setup. Here’s a list of the equipment you will need:
- Blink camera: Make sure you have the Blink camera itself. This is the main device that will capture and transmit the video feed.
- Wi-Fi router: Ensure that you have a working Wi-Fi router with an internet connection. The Blink camera relies on a stable Wi-Fi network to function properly.
- Smartphone or tablet: To complete the setup process and access the Blink app, you will need a smartphone or tablet. The Blink app is available for both iOS and Android devices.
- Batteries or power adapter: Depending on the model of your Blink camera, you will need either AA lithium batteries or a power adapter. Check the specifications of your camera to determine the power source.
- Mounting kit (optional): If you plan to mount your Blink camera on a wall or ceiling, you may require a mounting kit. This typically includes screws, anchors, and brackets to securely attach the camera.
Make sure that all the equipment is in good working condition and readily accessible. If you need any additional components, such as batteries or a power adapter, ensure that you have them before you proceed with the setup. Having everything prepared beforehand will save you time and frustration during the installation process.
Once you have gathered all the necessary equipment, you are ready to move on to the next step: downloading the Blink app. Stay tuned for the next section, where we will guide you through the process of downloading the app and creating a Blink account.
Step 2: Download the Blink app
To connect your Blink camera to Wi-Fi, you will need to download and install the Blink app on your smartphone or tablet. The Blink app is available for both iOS and Android devices. Follow the steps below to download the app:
- Open the App Store (for iOS) or Google Play Store (for Android) on your device.
- In the search bar, type “Blink Home Monitor” and tap on the search icon.
- The Blink app should appear as one of the top results. Tap on it to open the app page.
- On the app page, tap the “Install” or “Get” button to begin the download and installation process.
- Wait for the app to download and install on your device. The time it takes may vary depending on your internet connection speed.
- Once the app is installed, tap on “Open” to launch it.
Congratulations! You have successfully downloaded the Blink app to your smartphone or tablet. The next step is to create a Blink account, which will allow you to access and manage your Blink camera.
It’s important to note that the Blink app requires certain permissions to function correctly. During the installation process, you may be prompted to grant permissions for accessing your device’s camera, microphone, and location. It’s necessary to allow these permissions to ensure the full functionality of your Blink camera and app.
In the next section, we will guide you through the process of creating a Blink account. The Blink account is essential for connecting and managing your Blink camera. Stay tuned as we move forward in the setup process!
Step 3: Create a Blink account
In order to connect your Blink camera to Wi-Fi and access its features, you need to create a Blink account. Follow the steps below to create your Blink account:
- Open the Blink app on your smartphone or tablet.
- On the welcome screen, tap on the “Sign Up” option.
- Enter your email address in the provided field. Make sure to use a valid email address as this will be used for account verification and future communication.
- Create a strong, unique password for your Blink account. It’s recommended to use a combination of uppercase and lowercase letters, numbers, and special characters to ensure the security of your account.
- Tap on the “Create Account” button to proceed.
- Check your email inbox for a verification email from Blink. Open the email and click on the verification link to confirm your account.
- Once your account is verified, return to the Blink app and sign in using your email address and password.
- You may be prompted to enter additional information, such as your name and phone number. Fill in the required details and tap on “Save” to proceed.
- Congratulations! You have successfully created a Blink account.
Your Blink account will serve as a central hub for managing your Blink camera and accessing its features. With your Blink account, you can view live video feeds, receive motion alerts, customize camera settings, and more.
It’s important to keep your Blink account credentials secure and not share them with anyone. This ensures the privacy and security of your Blink camera and personal information.
In the next step, we will guide you through the process of connecting your Blink camera to the Blink app. Stay tuned as we move forward in the setup process!
Step 4: Connect the Blink camera
Now that you have created a Blink account, it’s time to connect your Blink camera to the Blink app. Follow the steps below to complete the camera connection:
- Ensure that your Blink camera is powered on and within range of your Wi-Fi router.
- Open the Blink app on your smartphone or tablet and sign in to your Blink account.
- Tap on the “+” icon or the “Add Device” button to start the camera connection process.
- On the camera setup screen, you will see a QR code. This code is used to pair your Blink camera with the Blink app. Make sure your smartphone or tablet’s camera is facing the QR code.
- The app will automatically scan the QR code. If the scan is successful, you will see a notification that your camera has been detected.
- If the QR code scan fails, you can manually enter the Blink serial number. This can be found on the back of your Blink camera or on the packaging.
- Once your camera is detected, you will be prompted to name your camera and choose an icon to represent it. This step is optional but can help you easily identify the camera in the app.
- Tap on the “Next” button to continue.
- The app will attempt to connect your Blink camera to your Wi-Fi network. Wait for the app to complete the connection process. This may take a few moments.
- If the connection is successful, you will see a confirmation message that your camera has been added to your Blink account.
- Congratulations! You have successfully connected your Blink camera to the Blink app.
It’s important to ensure that your Blink camera and Wi-Fi router are in close proximity during the connection process. This will ensure a strong and stable connection between the camera and the app.
In the next step, we will guide you through the process of connecting your Blink Hub to Wi-Fi. Stay tuned as we move forward with the setup process!
Step 5: Connect Blink Hub to Wi-Fi
To ensure that your Blink camera functions properly, it is important to connect your Blink Hub to your Wi-Fi network. The Blink Hub serves as the central control unit for all your Blink cameras. Follow the steps below to connect your Blink Hub to Wi-Fi:
- Ensure that your Blink Hub is powered on and within range of your Wi-Fi router.
- Open the Blink app on your smartphone or tablet and sign in to your Blink account.
- Tap on the “Settings” tab at the bottom right corner of the app.
- Select the “Manage Sync Modules” option.
- Tap on the “+” icon or the “Add Sync Module” button to start the process.
- The app will guide you through the process of connecting your Blink Hub to Wi-Fi. Follow the on-screen instructions to proceed.
- You will be prompted to enter your Wi-Fi network name (SSID) and password. Make sure to enter the correct information to ensure a successful connection.
- Wait for the app to establish a connection between your Blink Hub and the Wi-Fi network. This may take a few moments.
- If the connection is successful, you will see a confirmation message that your Blink Hub is connected to Wi-Fi.
- Congratulations! You have successfully connected your Blink Hub to Wi-Fi.
It is crucial to have a stable and strong Wi-Fi connection during this step to ensure optimal performance of your Blink camera and Hub. If you encounter any issues during the connection process, make sure to check your Wi-Fi network and password.
In the next step, we will guide you through adding your Blink camera to the Blink app. Stay tuned as we move forward in the setup process!
Step 6: Add Blink camera to the Blink app
Now that you have connected your Blink camera and Blink Hub to Wi-Fi, it’s time to add your Blink camera to the Blink app. By adding your camera to the app, you will be able to access its live video feed, customize settings, and receive motion alerts. Follow the steps below to add your Blink camera to the Blink app:
- Open the Blink app on your smartphone or tablet and sign in to your Blink account.
- Tap on the “Home” tab at the bottom of the app interface.
- Under the “Devices” section, you should see your Blink Hub listed. Tap on it to open the device menu.
- Select the “Add a Device” option.
- The app will scan for any Blink cameras that are within range of the Blink Hub. Wait for the scan to complete.
- If the scan is successful, you will see a list of available Blink cameras. Tap on the camera you want to add to the app.
- Follow the on-screen instructions to complete the camera setup. This may involve entering a camera-specific PIN code or manually selecting the camera from the list.
- Once the camera setup is complete, you will see a confirmation message that the camera has been successfully added to the Blink app.
- Repeat the above steps if you have multiple Blink cameras to add to the app.
After adding your Blink camera to the Blink app, you can now access its features and customize settings according to your preferences. You can view live video feeds, set up motion detection zones, configure recording schedules, and much more.
In the next step, we will guide you through testing the connection to ensure that your Blink camera is functioning correctly. Stay tuned as we move forward in the setup process!
Step 7: Test the connection
After completing the setup process and adding your Blink camera to the Blink app, it’s important to test the connection to ensure that everything is functioning properly. Follow the steps below to test the connection:
- Open the Blink app on your smartphone or tablet and sign in to your Blink account.
- Tap on the “Home” tab at the bottom of the app interface.
- Under the “Devices” section, you should see your Blink camera listed. Tap on it to access the camera view.
- Wait for the live video feed from your Blink camera to appear on the app. This may take a few seconds, depending on your internet connection.
- Check the video feed to ensure that it is clear and without any lag or distortion. You should be able to see a live view of the area monitored by your Blink camera.
- Test the motion detection feature by moving in front of the camera. You should receive motion alerts on the app and see the recorded clip in the “Clip Roll” section.
- If you have multiple Blink cameras, repeat the above steps to test each camera individually.
During the testing phase, it’s important to pay attention to the quality of the video feed, the responsiveness of the motion detection feature, and any potential issues or delays. If you encounter any problems, ensure that your Wi-Fi connection is stable and that your Blink camera is within range of the Blink Hub.
By performing these tests, you can ensure that your Blink camera is properly connected and ready to provide you with the security and convenience you need.
With the successful completion of the testing phase, your Blink camera is now ready for action. Feel free to explore the various settings and features available in the Blink app to customize your camera according to your preferences.
Conclusion
Congratulations on successfully connecting your Blink camera to Wi-Fi! Through this step-by-step guide, you have learned how to gather the necessary equipment, download the Blink app, create a Blink account, connect the Blink camera, connect the Blink Hub to Wi-Fi, add the Blink camera to the app, and test the connection. Now, you can enjoy the benefits of monitoring your home remotely and ensuring the security of your loved ones and property.
Remember to keep your Wi-Fi network secure and have a stable internet connection for optimal performance. Additionally, regularly check for firmware updates for your Blink camera to ensure you have the latest features and security enhancements.
Explore the various features in the Blink app, such as live video feeds, motion detection settings, and customizing recording schedules, to fully maximize the functionality of your Blink camera. The app provides you with the convenience of accessing your camera’s feed and settings from anywhere in the world.
If you encounter any issues or have further questions, consult the Blink support documentation or reach out to their customer support for assistance. They will be able to provide you with the necessary guidance to troubleshoot and resolve any challenges you may face.
Enjoy the peace of mind that comes with your Blink camera, knowing that you can always keep an eye on what matters most to you, no matter where you are.