Introduction
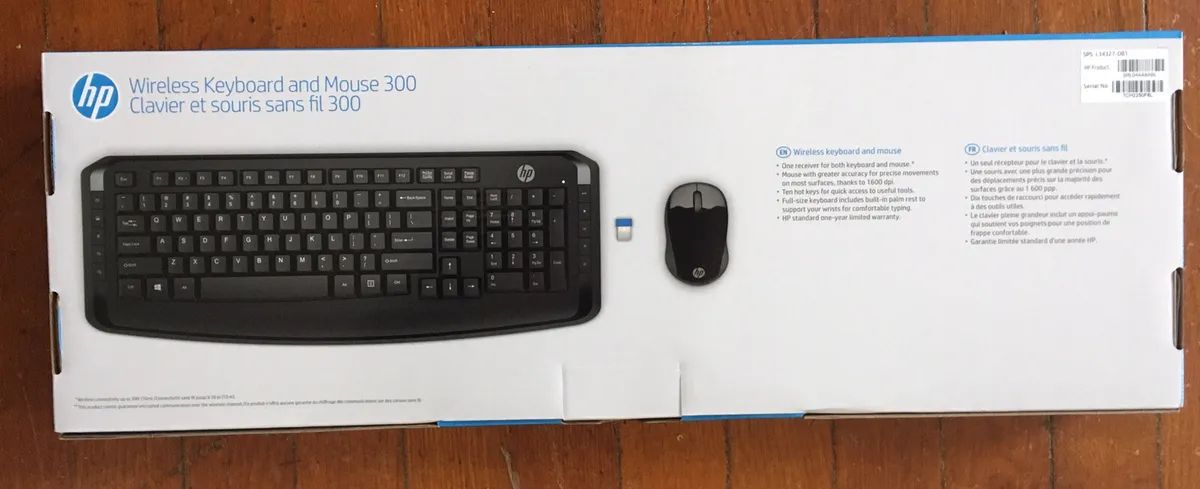
Welcome to this guide on how to connect an HP wireless keyboard. Whether you’ve just purchased a new HP wireless keyboard or you’re troubleshooting connectivity issues, you’ve come to the right place. The wireless keyboard provides a convenient and clutter-free experience, allowing you to work or play without the need for tangled wires.
Before we dive into the step-by-step instructions, it’s important to note that not all HP wireless keyboards are compatible with all systems. Therefore, the first step you should take is to ensure that your keyboard is compatible with your computer or device. Check the keyboard’s compatibility with your operating system, as well as any specific requirements or drivers needed for installation.
In this guide, we will walk you through the process of connecting an HP wireless keyboard in the most straightforward way possible. We’ll cover inserting batteries into the keyboard, turning it on, connecting the wireless receiver, installing any required drivers, pairing the keyboard with the receiver, and finally, testing the keyboard functionality.
By the end of this guide, you’ll be able to enjoy the freedom and ease of using an HP wireless keyboard for your work, gaming, or leisure activities. So let’s get started!
Step 1: Check Compatibility
The first step in connecting an HP wireless keyboard is to ensure it is compatible with your computer or device. Compatibility is crucial to ensure that the keyboard will work seamlessly with your system and provide optimal performance.
Start by checking the compatibility of your operating system with the wireless keyboard. Most HP wireless keyboards are compatible with popular operating systems like Windows, macOS, and Linux. However, it is always a good idea to verify the compatibility specifications outlined by HP for your specific model.
Additionally, check if there are any specific requirements or drivers needed for the keyboard to function properly. Some wireless keyboards may require additional software or drivers to be installed on your system for full functionality. Visit the HP support website or refer to the documentation that came with your keyboard to find any specific requirements.
If you are unsure about the compatibility of your keyboard with your system, there are a few ways to check. Firstly, you can visit the HP website and search for your keyboard model to find detailed compatibility information. Another option is to consult the user manual or documentation that came with your keyboard.
It’s important to note that even if your keyboard is not officially listed as compatible with your operating system, it might still work to some extent. However, for the best user experience, it is recommended to use the keyboard with a compatible operating system.
Ensuring compatibility is a crucial first step before proceeding with the connection process. By doing so, you’ll be able to avoid any potential issues and enjoy a seamless wireless keyboard experience.
Step 2: Insert Batteries into the Keyboard
Now that you’ve confirmed the compatibility of your HP wireless keyboard with your computer or device, the next step is to insert the batteries. Most wireless keyboards require batteries to power them up and maintain a wireless connection.
Begin by locating the battery compartment on your HP wireless keyboard. This is usually located on the back or underside of the keyboard. Look for a latch, button, or sliding mechanism that allows you to open the compartment.
Once the battery compartment is open, identify the correct orientation for the batteries. Most keyboards require AA or AAA batteries, and the positive (+) and negative (-) symbols indicate how to insert them. Align the batteries according to the marked polarity.
Carefully insert the batteries into the compartment, ensuring they fit snugly and make proper contact with the connectors inside. Once the batteries are inserted, close the battery compartment securely.
If your keyboard requires a specific number of batteries, refer to the documentation or labeling on the keyboard to ensure you have the correct quantity. It’s also a good idea to use new or fully charged batteries for optimal performance.
After inserting the batteries, it’s recommended to turn the keyboard off if there is a power switch available. This will prevent any accidental keystrokes while you set up the rest of the connection process.
Inserting the batteries is an essential step to power up your HP wireless keyboard. Once the batteries are properly inserted, you’re ready to move on to the next step of the connection process.
Step 3: Turn On the Keyboard
With the batteries inserted into the HP wireless keyboard, it’s time to turn it on. Turning on the keyboard will activate the wireless connection and prepare it for pairing with the receiver.
Locate the power switch on your keyboard. The position of the power switch may vary depending on the model, but it is typically found either on the side or on the top of the keyboard. Flip the switch to the “On” position to power up the keyboard.
Once the keyboard is turned on, you may notice an indicator light or LED that confirms the keyboard is receiving power. The light may blink or stay steady, depending on the specific keyboard model.
It’s important to note that some keyboards may not have a physical power switch. In this case, the keyboard may automatically power on when it detects movement or when a key is pressed. Refer to the user manual or documentation for your specific keyboard to understand the power-on mechanism.
After turning on the keyboard, it may take a few moments for it to establish a wireless connection with the receiver. During this time, avoid pressing any keys on the keyboard to ensure a smooth connection process.
Turning on the keyboard is a crucial step to activate its functionality and establish a connection with the receiver. Once the keyboard is turned on and ready, you’re ready to proceed with connecting the wireless receiver in the next step.
Step 4: Connect the Wireless Receiver
Now that your HP wireless keyboard is powered on and ready, it’s time to connect the wireless receiver to your computer or device. The wireless receiver is a small device that allows the keyboard to communicate wirelessly with the computer.
Locate the USB port on your computer or device where you will connect the wireless receiver. Most often, this will be a standard USB Type-A port, but some devices may require a different type of port or an adapter.
Take the wireless receiver and insert it into the USB port firmly. Make sure it is inserted all the way in to ensure a secure and stable connection.
Once the receiver is connected, your computer or device may automatically detect and install any necessary drivers for the receiver. In some cases, you may need to manually install the drivers that came with your wireless keyboard. Check the documentation or support website for your specific keyboard model for driver installation instructions if needed.
It’s worth mentioning that some HP wireless keyboards come with a pre-paired receiver. In this case, the receiver may already be connected to the keyboard, and you simply need to plug it into the USB port to establish the wireless connection.
After connecting the wireless receiver, give your computer or device a moment to recognize the keyboard and establish the wireless connection. The indicator light on the receiver or the keyboard may blink or change color to indicate a successful connection.
Connecting the wireless receiver is a crucial step to enable communication between your HP wireless keyboard and your computer or device. Once the receiver is successfully connected, you’re ready to move on to the next step of installing any required drivers.
Step 5: Install Any Required Drivers
After connecting the wireless receiver, it’s time to check if there are any required drivers that need to be installed for your HP wireless keyboard to function properly. Drivers are software components that allow your operating system to communicate with the keyboard and enable all its features.
Start by checking the documentation or support website for your specific keyboard model. Look for any instructions or drivers specifically mentioned for your keyboard. If there are drivers available, download them to your computer.
Once you have the driver file downloaded, locate the file on your computer and double-click on it to start the installation process. Follow the on-screen prompts to complete the driver installation. It’s recommended to close any other programs or applications running during the installation process to avoid any conflicts.
During the driver installation, you may be prompted to restart your computer. If this happens, save any ongoing work and follow the instructions to restart your computer. This ensures that the newly installed drivers are fully integrated into your system.
If your HP wireless keyboard is plug-and-play compatible, it may not require any additional driver installation. In this case, your operating system will automatically detect and configure the keyboard for use. However, it is still recommended to visit the support website to check for any firmware updates or driver enhancements that may improve the performance of your keyboard.
Once the driver installation is complete, your HP wireless keyboard should be ready for normal use. If you encounter any issues or the keyboard doesn’t function as expected, make sure you have installed the latest drivers and firmware updates.
Installing any required drivers is essential to ensure that your HP wireless keyboard functions optimally and offers all the features it is designed to provide. With the drivers in place, you’re ready to move on to the next step of pairing the keyboard with the receiver.
Step 6: Pair the Keyboard with the Receiver
Now that you have installed any required drivers for your HP wireless keyboard, it’s time to pair the keyboard with the wireless receiver. Pairing establishes a secure and encrypted connection between the keyboard and the receiver, allowing them to communicate wirelessly.
To begin the pairing process, ensure that both the keyboard and the receiver are turned on and within close proximity to each other. This will ensure a successful and uninterrupted pairing process.
Look for a button or switch on the wireless receiver. Press and hold this button for a few seconds to initiate the pairing mode. The LED light on the receiver may start flashing, indicating that it is ready to pair with a compatible device.
Next, locate the pairing button on your HP wireless keyboard. This button is typically located on the underside of the keyboard or on the side, depending on the model. Press and hold the pairing button on the keyboard for a few seconds until the LED indicator starts flashing, indicating that it is in pairing mode.
Once both the wireless receiver and the keyboard are in pairing mode, they will attempt to establish a connection. The LED lights on both the receiver and the keyboard should stop flashing and become steady or change color, indicating a successful pairing.
If the pairing is unsuccessful, repeat the steps again, ensuring that both the receiver and the keyboard are in pairing mode and within close proximity to each other. It may take a few attempts to successfully establish the connection, so be patient and persistent.
With the keyboard successfully paired with the receiver, you can now start using your HP wireless keyboard. Test the functionality by typing on the keyboard and verifying that the keystrokes are registered on your computer or device.
If the keyboard is not functioning correctly or there are intermittent connection issues, try repositioning the receiver to a different USB port or keep it away from any obstructions or interference-causing devices. This may help improve the wireless connection and ensure a smoother experience.
Pairing the keyboard with the receiver is a critical step in the setup process. Once the keyboard is successfully paired, you can enjoy the freedom and convenience of using your HP wireless keyboard without the restraint of cables.
Step 7: Test the Keyboard Functionality
Now that your HP wireless keyboard is connected and paired with the receiver, it’s time to test its functionality to ensure that everything is working as expected. Testing the keyboard functionality will help you identify any issues or inconsistencies and allow you to make any necessary adjustments.
Start by opening a text document, a word processor, or any application where you can type and input text. Place your cursor in the text field and begin typing on the wireless keyboard. Verify that each keystroke is registered accurately and that there is no significant delay between your typing and the characters appearing on the screen.
Test all the keys on the keyboard, including special function keys, media controls, and any additional buttons or features specific to your keyboard model. Make sure that all the keys function as expected and that there are no sticky keys or unresponsive buttons.
Check the sensitivity of the keys. Ensure that they are not too stiff or too sensitive for your typing preference. Adjust any settings or parameters related to keyboard sensitivity or key repeating rate through the operating system’s keyboard settings or any accompanying software that came with the keyboard.
If your HP wireless keyboard has backlighting or customizable lighting effects, test them to ensure that they work properly. Adjust the brightness, color, or pattern of the lighting, if applicable, to your preference.
While testing the keyboard, pay attention to any abnormal behavior or inconsistencies. If you encounter any issues, consult the user manual, visit the support website for your keyboard model, or contact HP technical support for further assistance or troubleshooting steps.
It’s also worth mentioning that regular maintenance and care for your wireless keyboard will help prolong its lifespan and ensure continued functionality. Clean the keyboard regularly to remove any dust or debris that may accumulate. Refer to the user manual for specific cleaning instructions to avoid damaging the keyboard.
By thoroughly testing the keyboard functionality, you can make sure that your HP wireless keyboard is working optimally and meets your expectations. With a fully functional keyboard, you can now enjoy the convenience and freedom of wireless typing for your everyday tasks.
Conclusion
Congratulations! You have successfully connected and set up your HP wireless keyboard. Following the steps outlined in this guide, you have ensured compatibility, inserted batteries, turned on the keyboard, connected the wireless receiver, installed any required drivers, paired the keyboard with the receiver, and tested its functionality.
Having a wireless keyboard offers numerous advantages, including freedom from tangled wires and the flexibility to work or play from a comfortable distance. With your HP wireless keyboard, you can enjoy a seamless and convenient typing experience.
Remember to regularly maintain and clean your keyboard to ensure its optimal performance and longevity. Keeping your keyboard free from dust and debris will prevent any buildup that could potentially affect its functionality.
If you encounter any issues with your HP wireless keyboard, be sure to consult the user manual, check the HP support website for troubleshooting resources, or reach out to HP technical support for further assistance. They will be able to help you resolve any concerns or provide additional guidance.
Now that you are familiar with the process of connecting an HP wireless keyboard, you can easily set up your keyboard on any compatible device without any hassle. Enjoy the convenience and freedom of wireless typing in your daily activities, whether it’s for work, gaming, or leisure purposes.
Thank you for following this guide, and we hope you have found it helpful in setting up your HP wireless keyboard. Happy typing!