Introduction
Welcome to this guide on how to clear a queue on Spotify. If you’re an avid Spotify user, you probably know that the queue is a playlist of songs you have selected to play in a particular order. It allows you to curate your music listening experience according to your preferences. However, there might be times when you want to start fresh and clear your queue.
In this article, we will explore the process of clearing the queue on Spotify and discuss the reasons why you might want to do so. Whether you’ve unintentionally added too many songs to the queue, want to change the playlist entirely, or simply want a clean slate, removing all the existing songs can be easily done.
By following the step-by-step instructions provided in this guide, you’ll be able to clear your Spotify queue and start anew. So, let’s dive in and learn how to make a fresh start with your music on Spotify.
What is a Queue on Spotify?
A queue on Spotify refers to a list of songs that you have selected to play in a specific order. It allows you to create a personalized playlist of tracks that will be played one after another. When you add a song to your queue, it gets appended to the end of the existing list.
The queue feature is incredibly useful for tailoring your music listening experience. It allows you to plan ahead and control the sequence of songs you want to enjoy without creating an entirely new playlist. You can add songs to the queue from your own library, Spotify’s vast catalog, or even from curated playlists.
The queue on Spotify is dynamic, meaning you can modify it on the go. You have the freedom to rearrange the order of songs, remove specific tracks, or add new ones. Additionally, you can access and manage your queue across various devices, including smartphones, tablets, and computers, as long as you are logged into your Spotify account.
Spotify’s queue feature makes it convenient to build a custom playlist for any occasion or mood. Whether you’re hosting a party, studying, exercising, or simply relaxing, having control over the songs that play in the order you desire enhances your listening experience.
Now that we understand what a queue is on Spotify, let’s explore the reasons why you might want to clear your queue.
Why would you want to clear your Queue?
There are several reasons why you might want to clear your queue on Spotify. Let’s take a look at some scenarios where clearing the queue can be beneficial:
- Starting fresh: Sometimes, you may want to clear the queue to start with a clean slate. Whether you’ve finished listening to your previous queue or simply want to change things up, clearing the queue allows you to create a new playlist without any pre-existing songs.
- Removing unwanted songs: If you unintentionally added too many songs to the queue or included tracks that no longer match your current mood or vibe, clearing the queue enables you to remove them all in one go. This way, you can ensure that only the songs you truly want to listen to are in your queue.
- Switching playlists: If you were listening to a curated playlist or an album and want to switch to a different one, clearing the queue is a quick way to transition between playlists without interrupting your music flow. It allows you to seamlessly move on to the next set of songs without any unwanted tracks from the previous playlist.
- Organizing your listening experience: Clearing the queue gives you the opportunity to organize your music listening experience according to your preferences. By removing all the existing songs, you can plan and curate a new queue that aligns with your current mood, activity, or atmosphere.
- Simplifying navigation: If your queue has become too long or complicated to navigate, clearing it can provide relief. Starting with a fresh queue allows for easier navigation and management, especially if you have a specific order or sequence in mind for your next set of songs.
No matter the reason, clearing your queue on Spotify is a simple and effective way to create a customized and tailored music listening experience. Now that we understand the importance of clearing the queue, let’s move on to the step-by-step process of how to do it.
Clearing the Queue on Spotify
Now that you’ve decided to clear your Spotify queue, let’s dive into the step-by-step process of how to do it:
- Step 1: Open Spotify on your device
- Step 2: Navigate to the Queue
- Step 3: Clear the Queue
- Step 4: Start fresh
Launch the Spotify application on your preferred device. This could be your smartphone, tablet, or computer. Make sure you are logged into your Spotify account to access your queue.
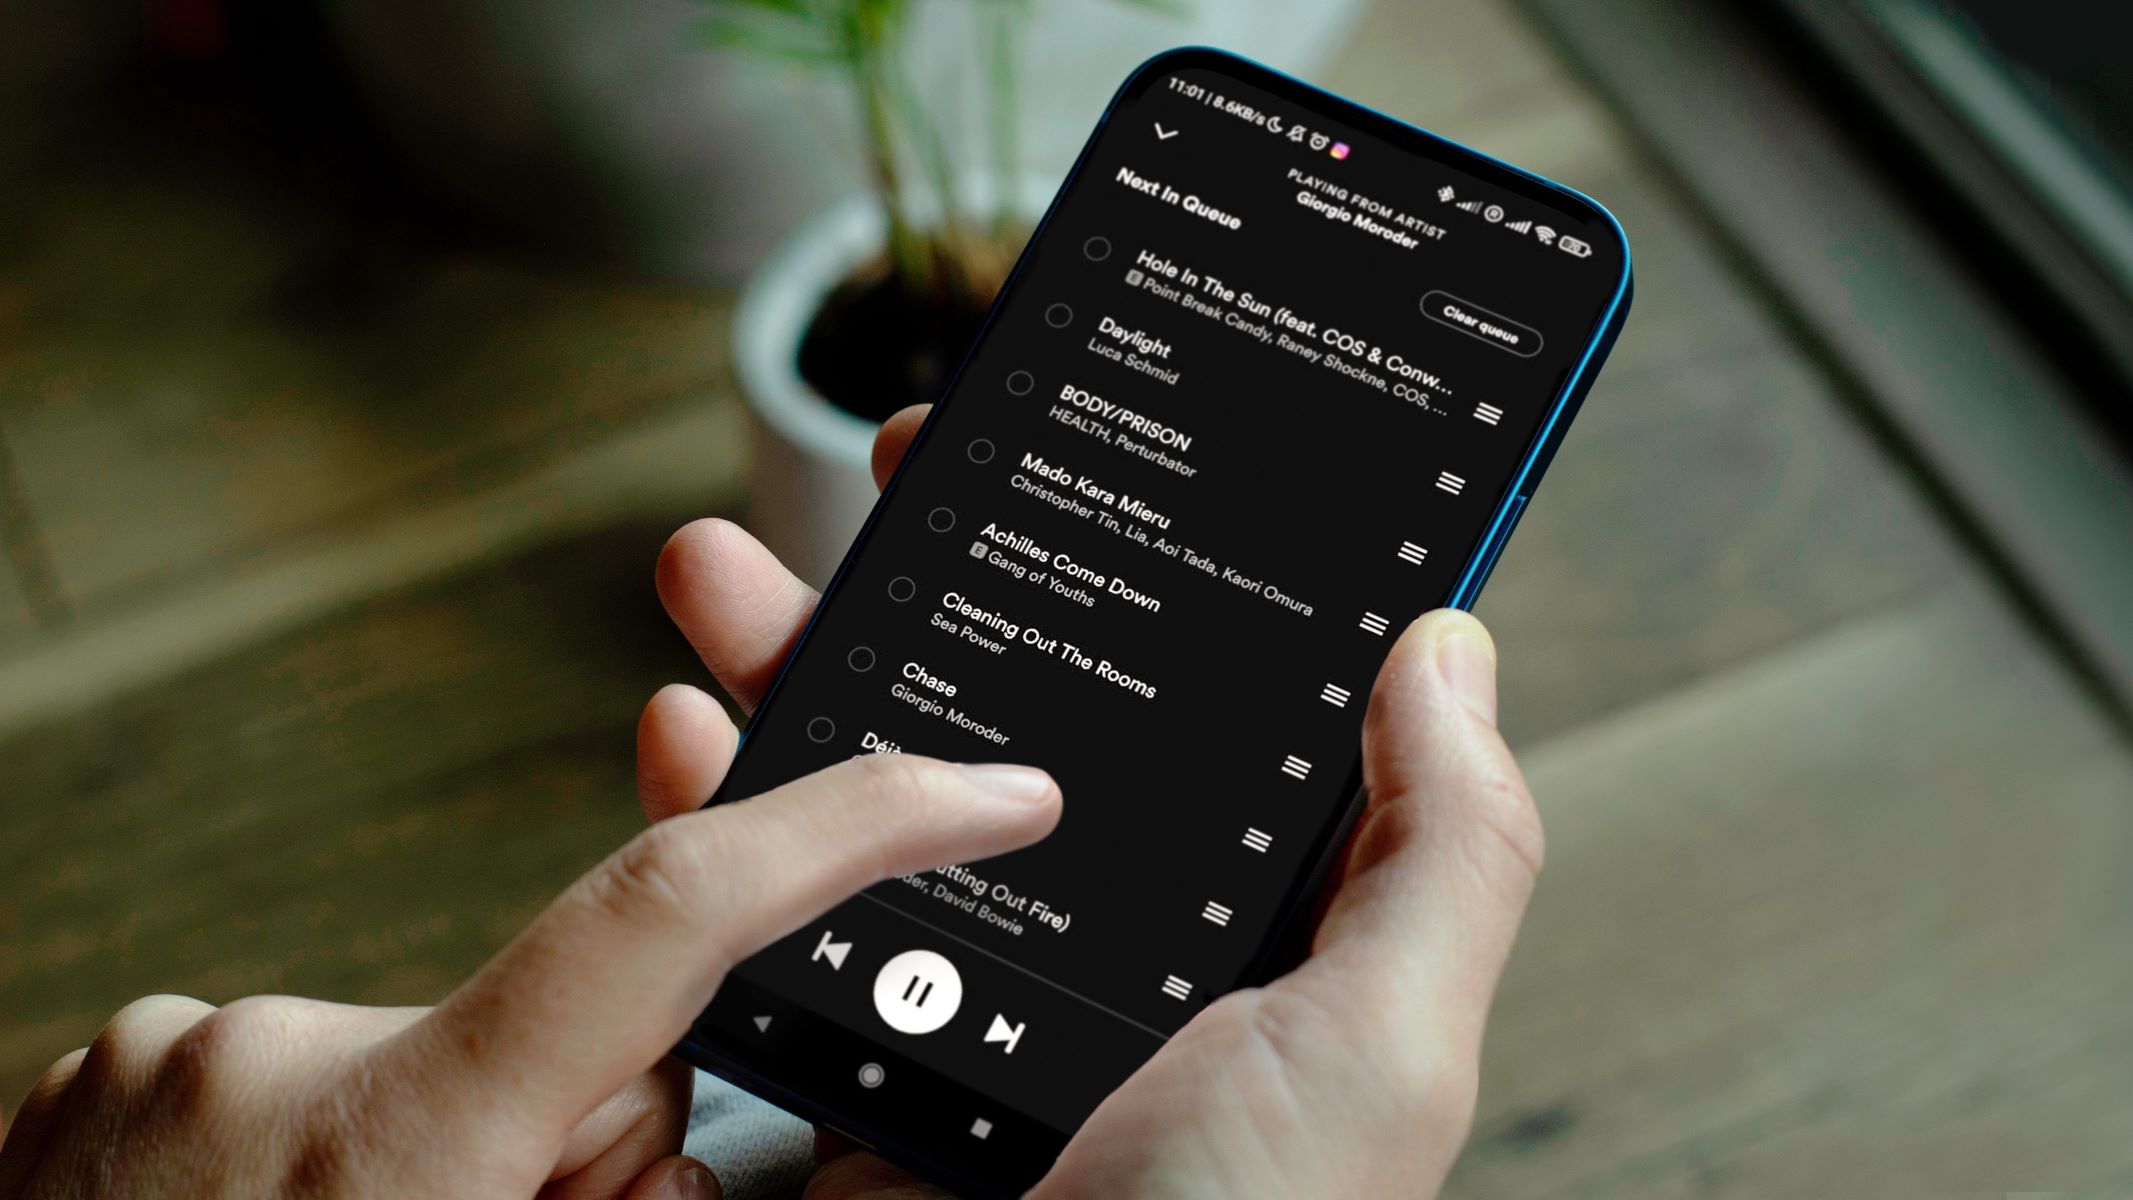
Once you’re inside the Spotify app, locate the “Now Playing” bar at the bottom of the screen. Tap or click on it to expand the player interface. You should now see the cover art of the currently playing song, along with playback controls.
Look for the three-dot menu icon (typically represented by horizontal dots) located near the bottom-right corner of the screen. Tap or click on it to open the options menu.
From the options menu, select “Queue” or “Up Next” to access your current queue.
Once you’re in the queue view, you’ll see a list of all the songs currently in your queue. To clear the queue, look for the “Clear” or “Remove all” option. This option may be represented by a trash can or a similar symbol.
Tap or click on the “Clear” or “Remove all” option to remove all the songs from your queue.
Note: Be careful when clearing the queue, as this action cannot be undone. Make sure you truly want to delete all the songs before proceeding.
After successfully clearing the queue, you’ll have a fresh slate to start building your new playlist. You can now add new songs to the queue, rearrange them, or simply let Spotify’s algorithms create a personalized queue based on your listening habits.
That’s it! You have now cleared your queue on Spotify and are ready to create a new music listening experience. Enjoy exploring new songs, albums, and playlists!
Step 1: Open Spotify on your device
Before you can clear your queue on Spotify, you need to open the Spotify application on your preferred device. Whether you’re using a smartphone, tablet, or computer, follow the steps below to get started:
- Smartphone or tablet:
- Unlock your device and navigate to the home screen.
- Look for the Spotify app icon, which is typically a green circle with three curved lines inside.
- Tap on the Spotify app to open it. If prompted, enter your login credentials to access your account.
- Computer:
- Power on your computer and ensure it is connected to the internet.
- Locate the Spotify application in your list of installed programs or on your desktop.
- Double-click on the Spotify icon to launch the application.
- If prompted, enter your login details to log into your Spotify account.
Once you have successfully opened Spotify on your device and logged into your account, you are ready to proceed to the next step of clearing your queue.
Note: The steps above may vary slightly depending on the device and operating system you are using. However, the general process of opening the Spotify app remains the same.
Now that you have opened Spotify, let’s move on to the next step of clearing your queue.
Step 2: Navigate to the Queue
Once you have opened the Spotify application on your device, the next step is to navigate to the queue. Follow the instructions below based on the device you are using:
- Smartphone or tablet:
- Tap on the “Now Playing” bar, which is usually located at the bottom of the screen. This will expand the player interface, displaying the currently playing song’s cover art and playback controls.
- Look for the three-dot menu icon, which is typically located in the lower-right corner of the screen. Tap on it to open the options menu.
- From the options menu, select “Queue” or “Up Next” to access your current queue.
- Computer:
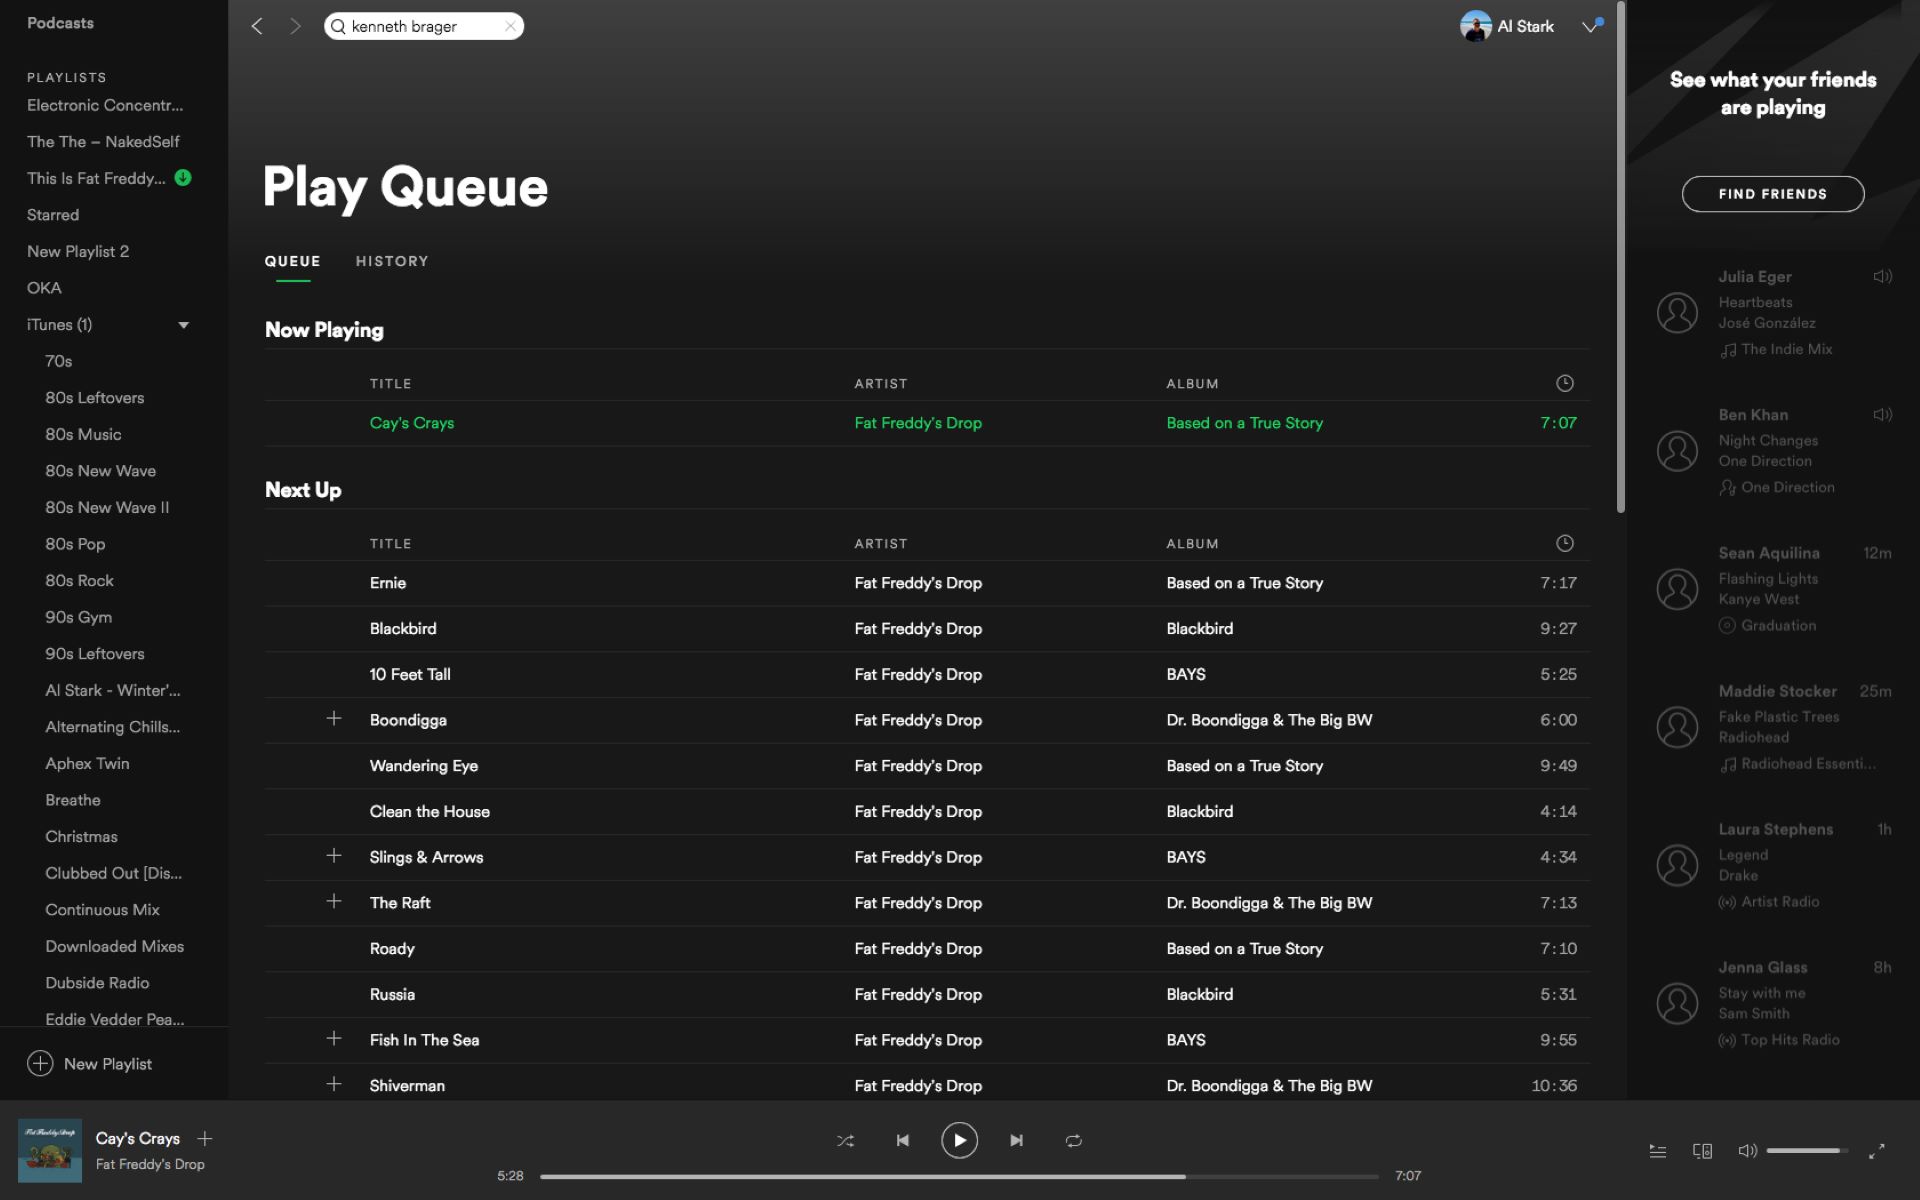
- Locate the “Now Playing” bar at the bottom of the Spotify window. This bar displays the cover art and playback controls of the currently playing song.
- Click on the three-dot menu icon, usually located near the bottom-right corner of the screen. This will open the options menu.
- From the options menu, click on “Queue” or “Up Next” to view your current queue.
By following these steps, you will be able to access the queue view in Spotify, where you can see the list of songs currently in the queue.
Remember that the exact labels for the queue option may vary slightly depending on the version of Spotify you are using and the device you are on. However, the general process of navigating to the queue remains the same.
Now that you have successfully navigated to the queue, let’s move on to the next step of clearing your queue.
Step 3: Clear the Queue
Now that you have accessed the queue view in Spotify, it’s time to clear the queue and remove all the songs that are currently listed. Follow the steps below to clear your queue:
- Look for the “Clear” or “Remove all” option within the queue view. This option is usually represented by a trash can or a similar symbol.
- Click on the “Clear” or “Remove all” option to remove all the songs from your queue.
By selecting the “Clear” or “Remove all” option, Spotify will delete all the songs from your queue, leaving it empty and ready for a fresh start.
It’s important to note that clearing the queue is a irreversible action. Once you have cleared the queue, the songs cannot be restored. Therefore, ensure that you truly want to remove all the songs before proceeding.
If you have accidentally cleared the queue or want to recover some of the songs, you will need to manually add them to the queue again.
Now that you have successfully cleared your queue, you are ready to curate a new playlist and enjoy your favorite songs on Spotify.
Conclusion
Clearing the queue on Spotify allows you to start fresh with your music listening experience. Whether you want to remove unwanted songs, switch playlists, or simply organize your queue, following the steps outlined in this guide will help you achieve a clean slate.
We began by understanding the concept of a queue on Spotify and why it is an essential feature for personalizing your music playlist. Then, we explored the reasons why you might want to clear your queue, including starting fresh, removing unwanted songs, switching playlists, organizing your listening experience, and simplifying navigation.
Next, we provided a step-by-step guide on how to clear the queue on Spotify. We walked you through the process of opening the Spotify app on your device, navigating to the queue, and finally, clearing the queue itself. It’s crucial to remember that clearing the queue is irreversible, so make sure you truly want to remove all the songs before proceeding.
By clearing the queue, you can create a customized and tailored music listening experience that perfectly aligns with your mood, activity, and preferences. Whether you’re looking to discover new songs, create a specific ambiance, or enjoy your favorite tracks in a specific order, clearing the queue provides the freedom and flexibility to curate your ideal playlist.
Now that you have the knowledge and the tools to clear your queue on Spotify, go ahead and give it a try. Enjoy the process of creating a fresh and personalized music queue that enhances your listening pleasure!