Prepare
Before diving into the process of cleaning your gaming laptop, it’s important to prepare yourself and gather the necessary supplies. This will ensure that the cleaning process goes smoothly and effectively. Here are the steps to take:
- Find a Clean and Well-Lit Area: Choose a location where you can comfortably clean your laptop without any distractions. A clutter-free workspace with ample lighting will make the process easier and reduce the chances of losing any small screws or components.
- Gather the Necessary Supplies: Make sure you have all the required cleaning supplies at hand. You may need a microfiber cloth, lint-free wipes, isopropyl alcohol, compressed air canister, cotton swabs, and a small soft-bristled brush. It’s crucial to use the right cleaning materials to avoid damaging the delicate components of your laptop.
- Shut Down and Unplug: Before you start cleaning, shut down your gaming laptop completely and unplug it from the power source. This will ensure your safety and prevent any accidental damage that could occur if the laptop was powered on during the cleaning process.
- Read the Laptop Manual: Take a few moments to review the manufacturer’s manual or online documentation specific to your gaming laptop model. Understanding any specific cleaning instructions or precautions recommended by the manufacturer can help you avoid any mishaps. It also provides valuable insights into the disassembly and cleaning process.
By following these preparation steps, you will set yourself up for a successful cleaning session. Taking the time to gather the necessary supplies and understanding the guidelines specific to your laptop model will ensure a thorough and safe cleaning process. Now that you’re ready, let’s move on to the next step: gathering the supplies.
Gather Supplies
Now that you’ve prepared yourself and your workspace, it’s time to gather the necessary supplies for cleaning your gaming laptop. Having the right tools and materials on hand will ensure that you can properly and effectively clean your laptop. Here are the supplies you’ll need:
- Microfiber Cloth: A microfiber cloth is essential for wiping down the exterior of your laptop without leaving scratches or lint behind. It is soft and gentle, making it perfect for removing dust and fingerprints.
- Lint-Free Wipes: Lint-free wipes can be used to clean sensitive areas of your laptop, such as the screen and keyboard. They are designed to effectively remove smudges and stains without leaving any residue behind.
- Isopropyl Alcohol: Isopropyl alcohol is a handy cleaning agent that can help remove stubborn stains and grime from your laptop. You should dilute it with water before use to avoid damaging the laptop’s surface. It’s important to note that isopropyl alcohol should never be used on the screen, as it can damage the anti-glare coating.
- Compressed Air Canister: Dust can accumulate in the small crevices and vents of your laptop, impacting its performance. A compressed air canister is an excellent tool for blowing out the dust and debris from these hard-to-reach areas.
- Cotton Swabs: Cotton swabs are perfect for cleaning hard-to-reach places that the cloth or wipes can’t access. They allow for precise cleaning around ports, buttons, and other intricate parts of your laptop.
- Small Soft-Bristled Brush: A small soft-bristled brush can be used to gently brush away dust and debris from the keyboard, ports, and vents. Make sure to choose a brush with soft bristles to avoid scratching the surfaces.
By gathering these supplies, you’ll be well-equipped to clean your gaming laptop thoroughly and safely. Remember to always use the recommended cleaning materials and techniques to avoid causing any damage. Now, let’s proceed to the next step: shutting down and disconnecting your laptop.
Shutting Down and Disconnecting
Before you begin the cleaning process, it’s essential to shut down your gaming laptop and disconnect it from any power sources. This will ensure your safety and prevent any potential damage to your laptop. Follow these steps to shut down and disconnect your laptop:
- Save your work and close all applications: Before shutting down your laptop, make sure to save any open documents or files and close all your running applications. This will prevent any data loss or corruption.
- Shut down your laptop: Once you’ve closed all your applications, navigate to the Start menu or power options on your laptop and select the “Shut Down” option. Wait for the laptop to completely shut down before proceeding to the next step.
- Unplug the power cord: After your gaming laptop has shut down, unplug the power cord from the wall outlet or power strip. This will disconnect the laptop from the main power source and reduce any risk of electrical shock.
- Remove any external devices: If you have any peripheral devices connected to your laptop, such as USB drives, external hard drives, or headphones, disconnect them from the laptop. This ensures that you have a clear workspace and prevents any accidental damage to these devices during the cleaning process.
By shutting down your laptop and disconnecting it from power sources, you eliminate the risk of electric shock and ensure a safe cleaning process. Removing external devices also gives you more space to navigate and clean your laptop thoroughly. Now that your laptop is safely disconnected, let’s move on to the next step: removing loose debris.
Removing Loose Debris
Before you start cleaning specific components of your gaming laptop, it’s essential to remove any loose debris that may have accumulated on its surface. Dust, crumbs, and other small particles can obstruct ventilation and affect the performance of your laptop. Follow these steps to effectively remove loose debris:
- Use compressed air: Begin by using a compressed air canister to blow out any loose debris from the keyboard, ports, and vents of your laptop. Hold the canister in an upright position and use short bursts of air to dislodge the debris. Ensure that you hold the canister at a safe distance to prevent any damage to the components.
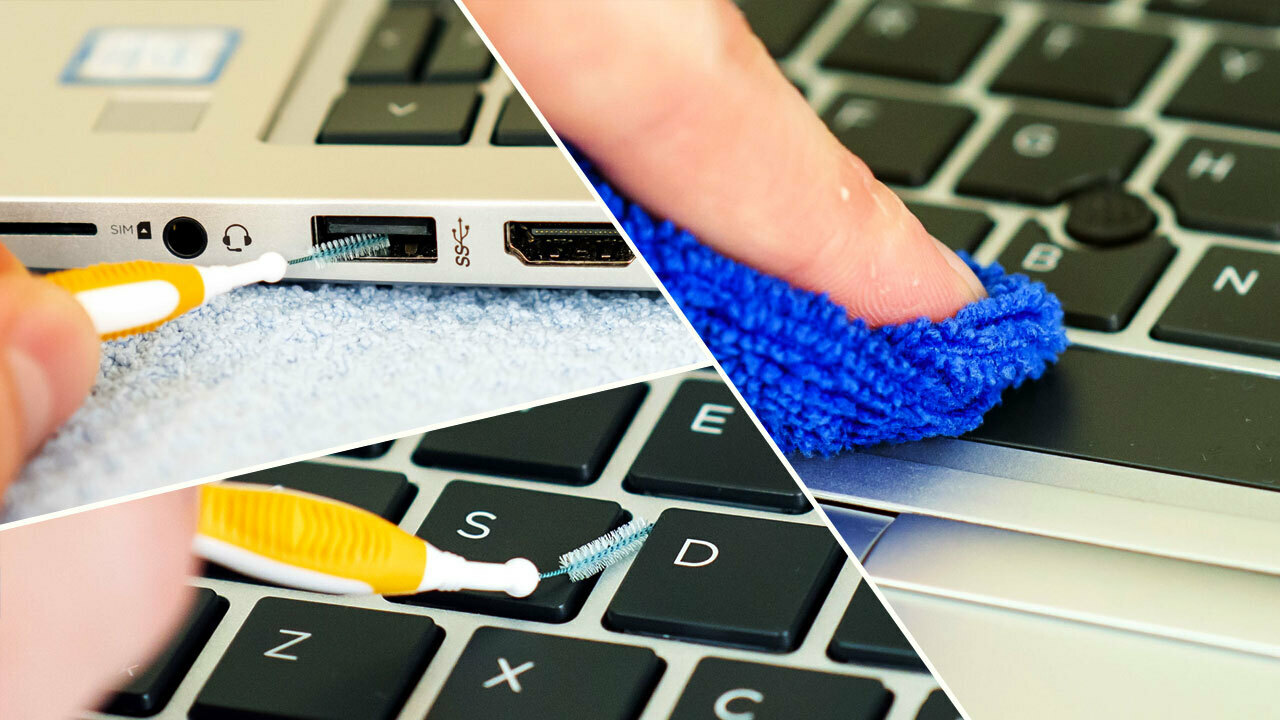
- Brush the keyboard: With a soft-bristled brush, gently brush the keyboard to remove any remaining loose debris. Pay attention to the spaces between the keys where dust and crumbs tend to accumulate. Use gentle circular motions to dislodge and lift off the debris.
- Wipe the surface: Take a microfiber cloth or lint-free wipe and lightly dampen it with isopropyl alcohol diluted in water. Gently wipe the surface of your laptop, including the keyboard, trackpad, and palm rest, to remove any remaining dirt or smudges. Be cautious when using isopropyl alcohol, especially on sensitive surfaces, and ensure it’s diluted to avoid any damage.
- Clean the display bezel: Use a microfiber cloth to clean the display bezel and remove any fingerprints or smudges. Start from the top and work your way down, applying gentle pressure to avoid scratching the screen.
Removing loose debris is an important step in cleaning your gaming laptop as it improves ventilation and prevents the accumulation of dirt in the components. By using compressed air, brushing the keyboard, and wiping the surface, you effectively eliminate the majority of loose debris. Now that the surface is clean, let’s move on to the next step: cleaning the exterior of your laptop.
Cleaning the Exterior
The exterior of your gaming laptop is prone to fingerprints, smudges, and general dirt buildup. Cleaning the exterior not only keeps your laptop looking fresh but also helps maintain its performance and longevity. Follow these steps to clean the exterior of your laptop:
- Wipe with a microfiber cloth: Start by wiping the entire exterior of your laptop with a dry microfiber cloth. This will help remove any surface dust or loose particles.
- Dampen the cloth: Next, dampen the microfiber cloth with a mild cleaning solution or a little bit of water. Make sure the cloth is not dripping wet, as excess moisture can damage your laptop. If using a cleaning solution, ensure it is safe for use on laptop surfaces.
- Gently wipe the surfaces: Use the damp microfiber cloth to wipe the surfaces of your laptop, including the top cover, bottom panel, and sides. Apply gentle pressure and use circular motions to remove any dirt or grime. Pay special attention to areas that may have more visible stains or smudges.
- Clean the touchpad: If your laptop has a touchpad, use a lint-free wipe or a cotton swab slightly dampened with water to clean it. Gently wipe the touchpad in circular motions to remove any smudges or fingerprints. Avoid using excessive moisture, as it can interfere with the touchpad’s functionality.
- Dry the surfaces: Finally, use a dry microfiber cloth to completely dry the surfaces of your laptop. Make sure there is no moisture left behind to prevent any potential damage.
Cleaning the exterior of your gaming laptop not only enhances its appearance but also helps in maintaining its overall cleanliness and functionality. By regularly removing dust, dirt, and smudges, you can ensure that your laptop remains in optimal condition. Now that the exterior is clean, let’s move on to the next step: cleaning the laptop keyboard.
Cleaning the Keyboard
The keyboard of your gaming laptop is one of the most frequently used components and is prone to collecting dirt, crumbs, and debris. Regularly cleaning your keyboard not only improves its appearance but also ensures smooth and accurate typing. Follow these steps to effectively clean the keyboard of your laptop:
- Shake out loose debris: Turn the laptop upside down and gently shake it to dislodge any loose debris that may have accumulated between the keys. This will help remove larger particles that can hinder the cleaning process.
- Use compressed air: Next, use a compressed air canister to blow out any remaining debris or dust from the keyboard. Hold the canister at a safe distance and use short bursts of air to avoid damaging the keys or any other components.
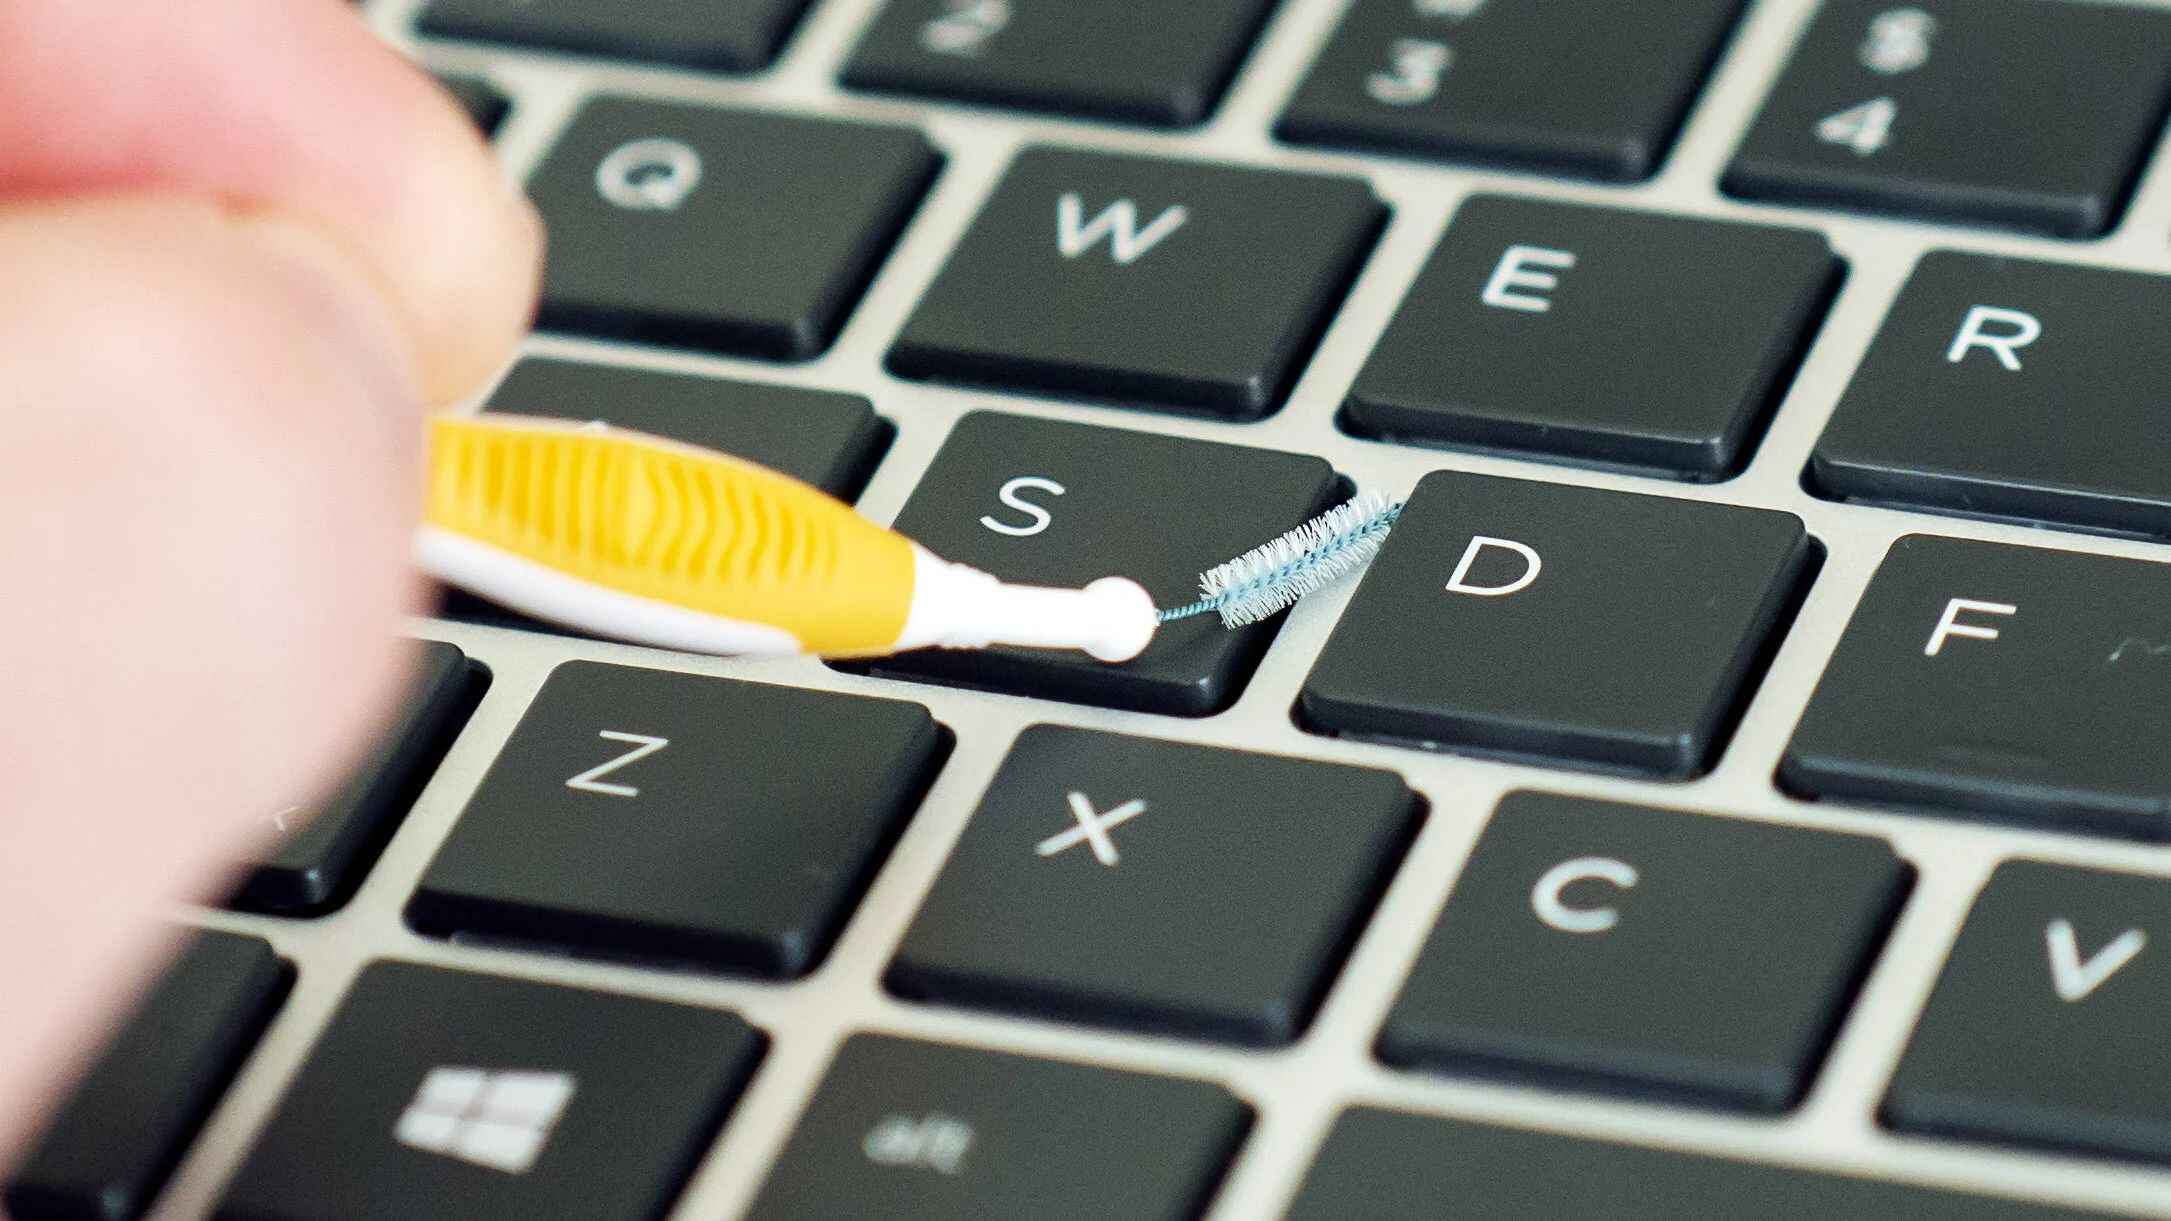
- Brush between the keys: Take a small soft-bristled brush or a clean toothbrush and gently brush between the keys to remove any stubborn dirt or crumbs. Pay attention to the spaces where debris tends to get trapped.
- Wipe the keys: Dampen a lint-free cloth or use a cotton swab slightly moistened with isopropyl alcohol (diluted with water) to wipe the keys. Start from one side of the keyboard and work your way to the other, ensuring that all keys are thoroughly cleaned. Remember to be gentle to avoid damaging the keys or causing any malfunction.
- Dry the keys: After wiping, use a dry cloth or allow the keyboard to air dry completely. Make sure there is no moisture left on the keys before using your laptop again.
By regularly cleaning your laptop’s keyboard, you can maintain its functionality and prevent buildup that may affect your typing experience. Removing debris and ensuring a clean surface will enhance the overall performance and longevity of your keyboard. With the keyboard now clean, let’s proceed to the next step: cleaning the laptop screen.
Cleaning the Screen
The screen of your gaming laptop is the main interface through which you experience your games and other content. Keeping it clean and free from dust, smudges, and fingerprints is crucial for optimal visual quality. Follow these steps to effectively clean the screen of your laptop:
- Turn off the laptop: Before cleaning the screen, make sure your laptop is turned off to avoid any accidental inputs or damage to the display.
- Choose a suitable cleaning solution: Carefully select a cleaning solution that is specifically designed for screens or use a mixture of water and isopropyl alcohol. Avoid using harsh chemicals or strong solvents as they can damage the screen coating.
- Dampen a lint-free cloth: Dampen a lint-free cloth with the cleaning solution. Ensure the cloth is not dripping wet, as excess moisture can seep into the screen edges and cause damage.
- Gently wipe the screen: Starting from one corner of the screen, gently wipe the surface using the damp cloth. Use smooth and even motions, applying light pressure to remove any smudges, fingerprints, or dirt. Avoid pushing too hard, as it can damage or scratch the screen.
- Focus on stubborn stains: For stubborn stains or dried-on marks, apply a bit more pressure or use a specialized screen cleaning solution. Be gentle and avoid using excessive force to prevent screen damage.
- Dry the screen: After cleaning, use a dry lint-free cloth to gently dry the screen. Ensure that no moisture is left behind as it can cause streaks or damage the screen.
By regularly cleaning the screen of your gaming laptop, you can enjoy an immersive and clear gaming experience. Removing smudges and fingerprints enhances visual clarity and prolongs the life of your screen. Now that the screen is clean, let’s move on to the next step: cleaning the ports and vents of your laptop.
Cleaning the Ports and Vents
The ports and vents of your gaming laptop are crucial for proper airflow and connectivity. Over time, dust and debris can accumulate in these areas, leading to overheating and connectivity issues. Follow these steps to effectively clean the ports and vents of your laptop:
- Inspect the ports and vents: Take a close look at the ports and vents on your laptop. Identify any visible dust, lint, or debris that may be blocking them.
- Use a can of compressed air: Holding the canister upright, use short bursts of air to blow out the dust and debris from the ports and vents. Ensure that you hold the canister at a safe distance to prevent causing damage to the ports or components.
- Brush the ports: Take a small soft-bristled brush or a clean toothbrush and gently brush the ports to remove any remaining dust or dirt. Use gentle circular motions to dislodge and lift off the debris. Pay attention to any stubborn areas.
- Check the vents: Examine the vents to make sure they are clear of any obstructions. If needed, use the brush or compressed air to remove any accumulated dust or debris from the vent openings.
- Repeat as necessary: If you notice significant buildup or stubborn debris, repeat the steps of using compressed air and brushing until the ports and vents are clean and clear. Take your time to ensure a thorough cleaning.
By cleaning the ports and vents of your gaming laptop, you can prevent overheating issues and ensure optimal performance. Removing dust and debris from these areas allows for better airflow and helps maintain stable connectivity. With the ports and vents now cleaned, let’s move on to the next step: cleaning the interior of your laptop.
Cleaning the Interior
Cleaning the interior of your gaming laptop is an important step to ensure its optimal performance and longevity. Over time, dust and debris can accumulate inside the laptop, affecting its cooling system and overall functionality. Follow these steps to effectively clean the interior of your laptop:
- Disassemble with caution: Before you begin cleaning the interior, refer to your laptop’s manual or online documentation to understand the proper disassembly process. Take note of any precautions and steps specific to your laptop model. If you are not confident in disassembling your laptop, it is recommended to seek professional assistance.
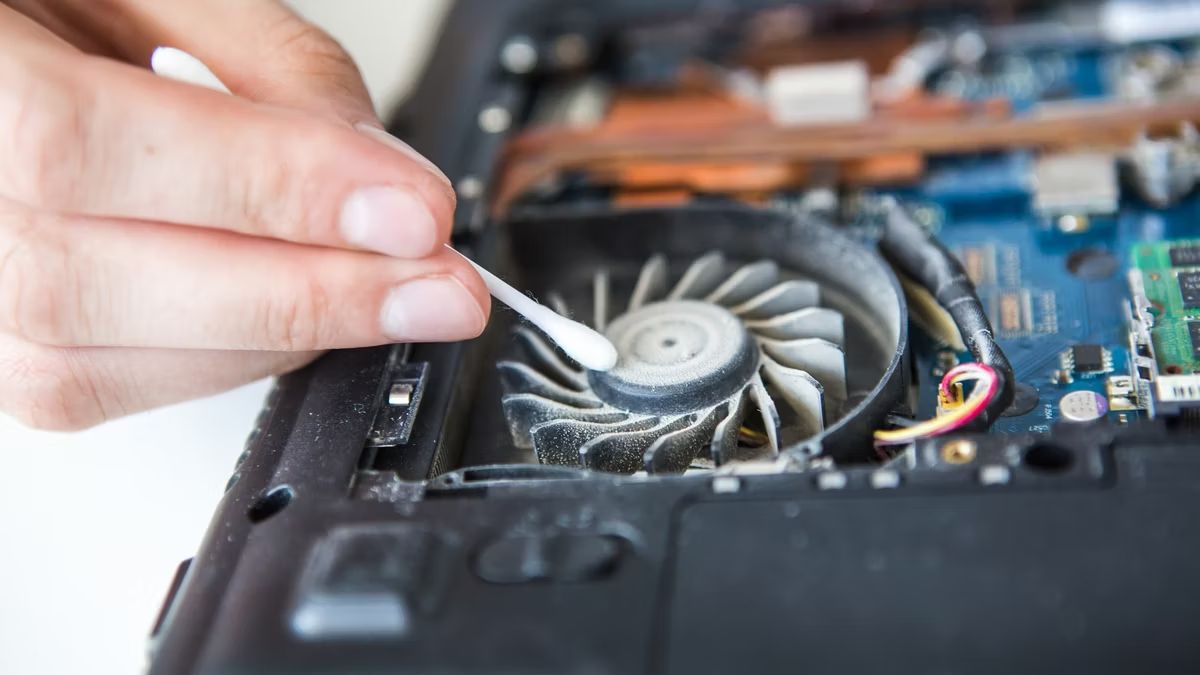
- Use compressed air: Once you have access to the interior components, use a can of compressed air to blow out dust and debris. Start from the top and work your way down, paying attention to areas such as the fans, heat sinks, and other cooling components. Ensure that you hold the canister at a safe distance to avoid damaging any delicate parts.
- Brush away stubborn debris: For any areas with stubborn debris or dust buildup, use a small soft-bristled brush or a clean toothbrush to gently brush it away. Be careful not to apply excessive force or damage any components.
- Inspect for damage: Take the opportunity to inspect the interior components for any signs of damage or loose connections. If you notice anything concerning, it is recommended to consult a professional for further assistance.
- Reassemble with care: Once you have finished cleaning the interior, carefully reassemble your laptop, making sure all components are properly secured and connected. Refer to your laptop’s manual or online documentation for the correct assembly procedure.
Cleaning the interior of your gaming laptop helps maintain its thermal efficiency and ensures that the internal components function optimally. Regular cleaning of the interior can prevent overheating and prolong the lifespan of your laptop. Now that the interior is clean, let’s move on to the next step: reassembling and powering on your laptop.
Reassembling and Powering On
After cleaning the interior components of your gaming laptop, it’s time to reassemble the laptop and power it on. Follow these steps to ensure a proper reassembly and safe powering on of your laptop:
- Refer to the manual: Consult your laptop’s manual or online documentation to ensure you follow the correct reassembly steps. Each laptop model may have specific instructions for reassembling the components properly.
- Secure components: Carefully reattach any removed components, making sure they are properly secured. Check for any loose screws or connections and tighten them as needed. Ensure that all cables are correctly plugged in and seated securely.
- Replace and secure the cover: Place the laptop cover back on and secure it with the necessary screws or latches. Ensure that the cover is aligned properly and fits securely to protect the internal components.
- Connect the power source: Plug your laptop’s power cord back into the wall outlet or power strip. Ensure that the connection is secure and that the power cord is not damaged or frayed.
- Power on the laptop: Press the power button to turn on your gaming laptop. Wait for it to boot up and go through its startup process. Pay attention to any error messages or unusual behavior that may indicate a component was not reassembled correctly.
Once you have successfully reassembled your gaming laptop and powered it on, take a moment to make sure everything is functioning correctly. Check for any issues such as abnormal noises, overheating, or display problems. If you encounter any problems, refer to your laptop’s manual or consider seeking professional assistance. Now that your laptop is powered on, let’s move on to the final steps and some maintenance tips.
Final Steps and Maintenance Tips
Congratulations on successfully cleaning your gaming laptop! To ensure it stays in optimal condition, here are some final steps to take and maintenance tips to keep in mind:
- Dispose of cleaning materials: Properly dispose of any used cleaning materials, such as microfiber cloths or wipes. Follow local disposal guidelines and avoid throwing them in regular trash if they have come into contact with cleaning solutions.
- Regularly clean and maintain: Make it a habit to clean your gaming laptop regularly, ideally every few months or as needed. Regular cleaning prevents the buildup of dust and debris, ensuring optimal performance and longevity.
- Be cautious with liquids: When cleaning your laptop, be cautious with liquids. Take care not to spill any cleaning solutions on the laptop or near the ports. This can cause damage to internal components or affect the functionality of the laptop.
- Avoid abrasive materials: When cleaning the exterior or screen, avoid using abrasive materials such as paper towels or rough cloths. These can scratch or damage the surfaces. Stick to using soft microfiber cloths and lint-free wipes for best results.
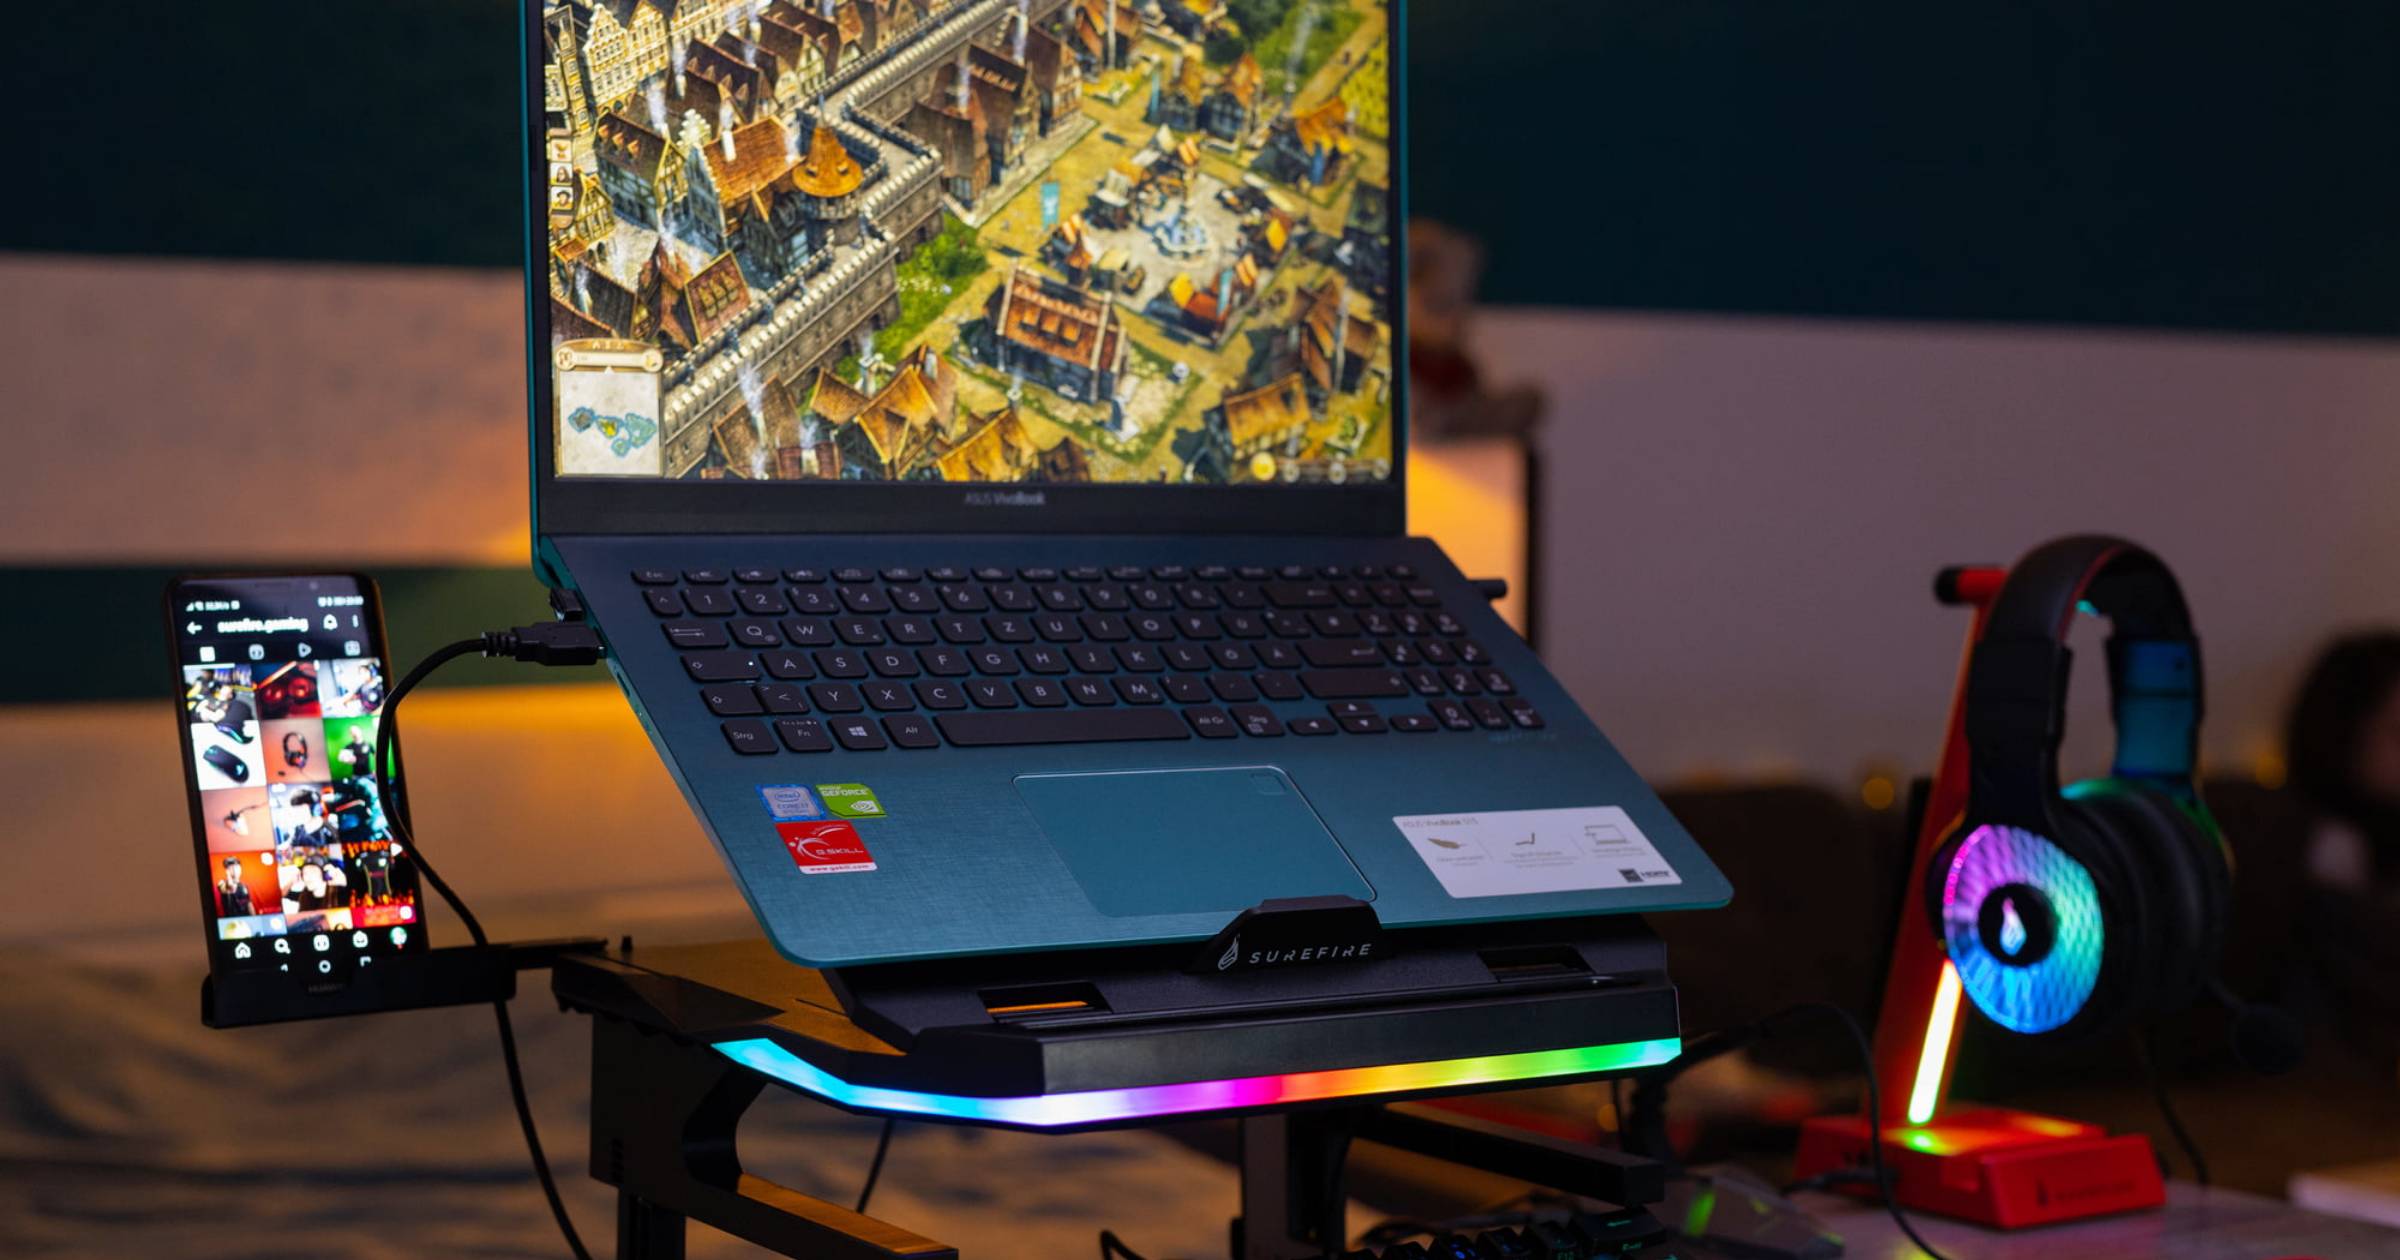
- Keep your laptop cool: Ensure proper ventilation for your laptop. Avoid using it on soft surfaces that can block the vents and hinder airflow. Consider investing in a laptop cooling pad to assist with heat dissipation during intense gaming sessions.
- Update software and security: Regularly update your laptop’s software and security applications to ensure optimal performance and protection against threats. Keeping your operating system and antivirus software up to date is essential for a smooth and secure gaming experience.
By following these final steps and maintenance tips, you can prolong the life of your gaming laptop and ensure its reliable performance. Regular cleaning and upkeep will keep your laptop in top condition, allowing you to enjoy your gaming sessions to the fullest. Remember to consult your laptop’s manual or seek professional assistance if you have any concerns or encounter any issues. Happy gaming!