Introduction
Welcome to this guide on how to check what kind of RAM you have on Windows 7. RAM, or Random Access Memory, is a crucial component of your computer’s hardware that plays a vital role in its performance. By understanding the type and specifications of your RAM, you can better optimize your computer and ensure compatibility when upgrading or replacing it.
While there are various methods to check the type of RAM on different operating systems, this guide focuses specifically on Windows 7. Windows 7 is a popular operating system that is still used by many individuals and businesses. Whether you are a casual user or a tech enthusiast, having knowledge about your computer’s RAM can be helpful in troubleshooting issues, expanding memory capacity, or simply satisfying your curiosity.
In the following sections, we will explore four different methods to determine the type of RAM installed on your Windows 7 computer. These methods range from using built-in system tools to utilizing command prompt commands and checking physical memory properties in the Control Panel. With these methods, you will be able to access accurate information about your computer’s RAM without the need for any third-party software.
Now, let’s dive into the different methods to check what kind of RAM you have on Windows 7 and gain a better understanding of your computer’s memory configuration.
Method 1: Using the System Information Tool
The first method we’ll cover is using the built-in System Information tool in Windows 7. This tool provides detailed information about your computer’s hardware, including the RAM type and specifications.
To access the System Information tool, follow these steps:
- Click on the “Start” button in your taskbar.
- Type “System Information” in the search bar and press Enter.
- Once the System Information window opens, navigate to the “System Summary” section.
- Look for the “Installed Physical Memory (RAM)” field. Here you will find information about the total installed RAM, as well as the RAM type.
The RAM type will be mentioned next to “System Type” and will typically be listed as DDR (Double Data Rate) followed by a number, such as DDR3 or DDR4. This indicates the generation of the RAM module installed in your computer.
In addition to the RAM type, the System Information tool provides other valuable details such as the total physical memory, available memory, and more. This information can be useful for troubleshooting purposes or when considering an upgrade to your RAM.
By utilizing the System Information tool, you can quickly and easily determine the type of RAM installed on your Windows 7 computer, helping you make informed decisions regarding your memory configuration.
Method 2: Using Command Prompt
Another method to check the type of RAM on your Windows 7 computer is by utilizing the Command Prompt. The Command Prompt allows you to interact with the operating system through text-based commands, enabling you to access various system information, including RAM details.
Follow these steps to check the RAM type using Command Prompt:
- Open the Command Prompt by clicking on the “Start” button, typing “cmd” in the search bar, and pressing Enter.
- Once the Command Prompt window opens, type the command “wmic memorychip get memorytype” (without the quotes) and hit Enter.
- The Command Prompt will display the memory type of each installed RAM module.
- Look for the “DDR” followed by a number, indicating the generation of the RAM module.
By executing this command, you can quickly retrieve the RAM type information directly from the Command Prompt. It provides a convenient and efficient way to access this information without the need for additional tools or software.
Do keep in mind that the Command Prompt is a powerful tool, and it’s important to type the commands accurately to avoid any errors. Take note of the RAM type mentioned after executing the command, as this will determine the generation of your installed RAM.
Using the Command Prompt helps you gather the necessary information about your RAM type, allowing you to make informed decisions regarding upgrades, compatibility, and troubleshooting.
Method 3: Using Task Manager
If you prefer a more user-friendly approach, you can check the type of RAM on your Windows 7 computer using the Task Manager. The Task Manager is a built-in utility that provides real-time information about your computer’s performance, processes, and resource usage, including information about your RAM.
Follow these steps to check the RAM type using Task Manager:
- Right-click on the taskbar and select “Task Manager” from the context menu. Alternatively, you can press “Ctrl + Shift + Esc” on your keyboard to open Task Manager directly.
- Once the Task Manager window opens, click on the “Performance” tab.
- In the left-hand sidebar, click on “Memory”.
- Look for the “Speed” field in the Memory section. This will display the speed or generation of your RAM, such as DDR3 or DDR4.
By checking the Task Manager, you can easily determine the type and speed of your installed RAM. This information is valuable when considering upgrades, troubleshooting memory-related issues, or ensuring compatibility with other hardware.
The Task Manager provides a visual representation of your computer’s performance, making it easy to access RAM information and other key system data. It offers a convenient alternative to command-line tools or other complex methods, particularly for users who prefer a more intuitive interface.
Now that you know how to check the RAM type using Task Manager, you can confidently make decisions regarding your memory configuration and optimize your computer’s performance.
Method 4: Checking Physical Memory Properties in Control Panel
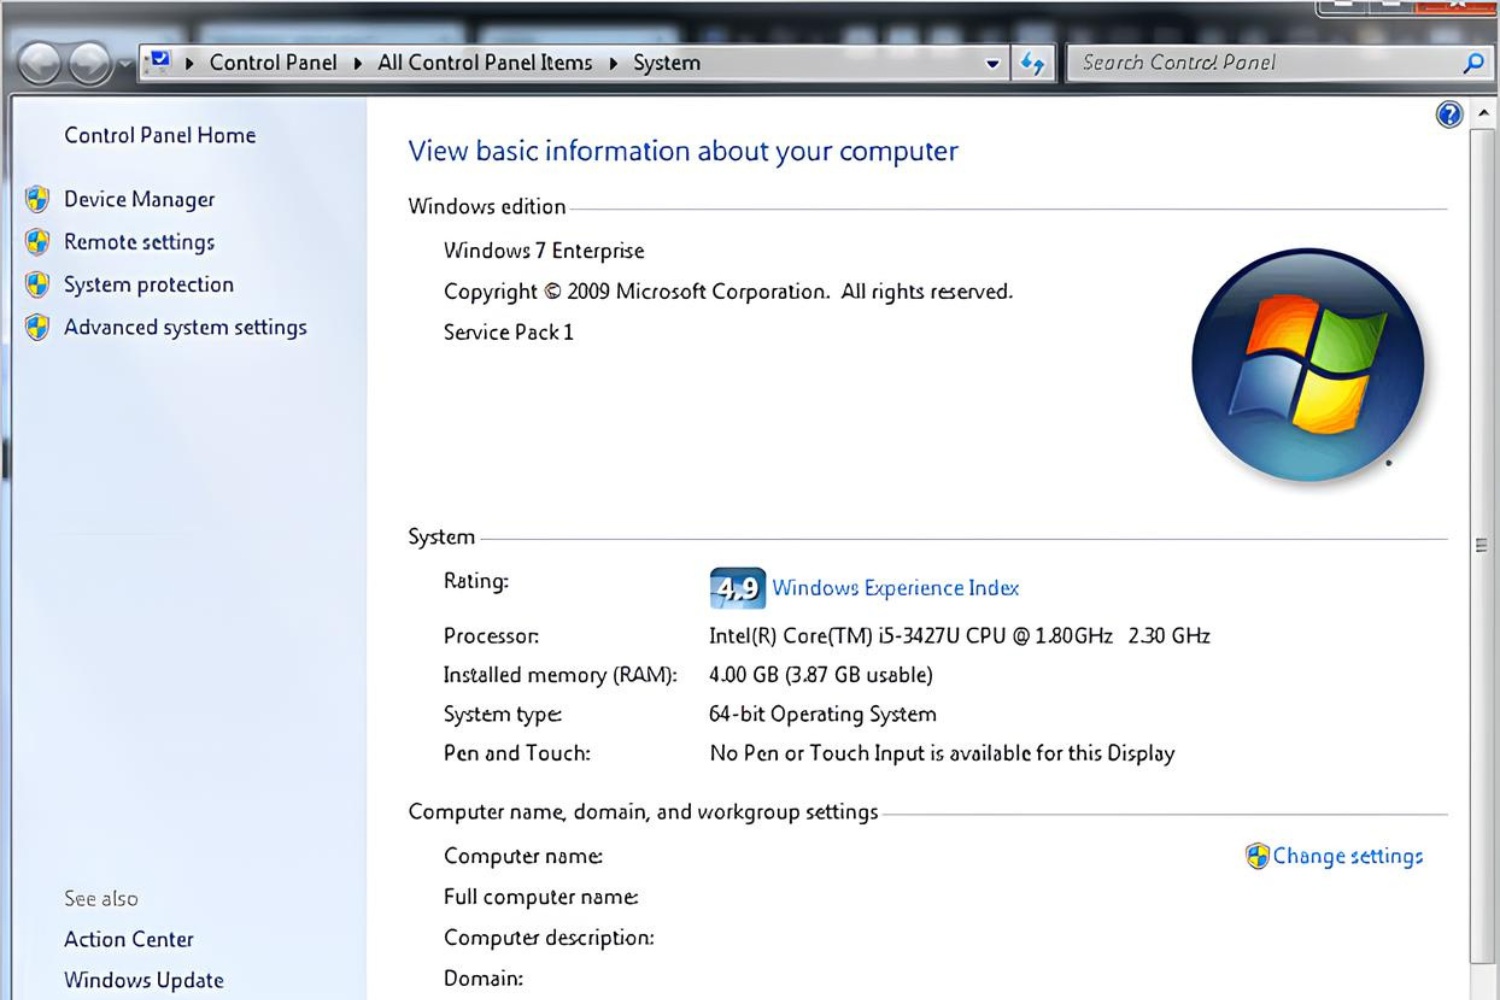
One more method to determine the type of RAM on your Windows 7 computer is by checking the physical memory properties in the Control Panel. This method provides a straightforward way to access the RAM details through the Windows settings.
To check the RAM type using the Control Panel, follow these steps:
- Click on the “Start” button and open the Control Panel.
- In the Control Panel window, select “System and Security”.
- Under the “System” section, click on “View amount of RAM and processor speed”.
- Within the System window, locate the “Installed memory (RAM)” section. Here you will find information about the total installed RAM.
- To view the RAM type, click on the “Device Specifications” link. This will open a new window displaying detailed information about your computer’s hardware.
- In the new window, scroll down to the “Device Specifications” section and look for the “System memory” field. The RAM type will be mentioned here, such as DDR3 or DDR4.
By following these steps, you can easily access the RAM type details using the Control Panel. This method provides a user-friendly way to gather the necessary information without the need for additional software or technical knowledge.
Checking the physical memory properties in the Control Panel allows you to verify the RAM type, ensuring accurate information for upgrades, troubleshooting, or compatibility checks. It provides a convenient option for users who prefer using the built-in Windows settings to access hardware details.
With this method, you have another reliable way to identify the type of RAM installed on your Windows 7 computer.
Conclusion
Checking the type of RAM on your Windows 7 computer is essential for understanding your system’s memory configuration and making informed decisions about upgrades, troubleshooting, and compatibility with other hardware components.
In this guide, we covered four methods to determine the RAM type:
- Using the System Information tool: This built-in tool provides detailed information about the RAM type and specifications, accessible through the System Summary section.
- Using Command Prompt: By executing a specific command in the Command Prompt, you can retrieve the memory type information directly.
- Using Task Manager: The Task Manager displays real-time performance data, including the memory speed or generation under the Performance tab’s Memory section.
- Checking Physical Memory Properties in Control Panel: The Windows Control Panel allows you to view the RAM type and other hardware details through the System window and Device Specifications section.
Each method offers a convenient and reliable way to access the RAM type on your Windows 7 computer. By using these methods, you can gather accurate information about your RAM, enabling you to optimize system performance, troubleshoot issues, and plan future upgrades.
Remember to choose the method that best suits your preference and comfort level. Whether you prefer using system tools, command-line utilities, or user-friendly interfaces, these methods are designed to accommodate different user preferences.
With the knowledge of your RAM type, you can ensure compatibility when upgrading or replacing your memory modules. Additionally, it allows you to identify potential issues that might be caused by incompatible or faulty RAM.
Thank you for reading this guide, and we hope it has provided you with valuable insights into checking the RAM type on your Windows 7 computer. By understanding and managing your computer’s RAM effectively, you can enhance its overall performance and productivity.


