Introduction
When it comes to computer hardware, the power supply unit (PSU) is a critical component that ensures the reliable delivery of power to all other parts of the system. However, even the most reputable PSUs can experience issues with their power rails over time. This is why it is essential for PC users to periodically check the voltage output of their PSU rails to ensure they are functioning within the designated parameters.
In this guide, we will walk you through the process of checking PSU rails and understanding the importance of doing so. We will also provide you with the necessary tools and step-by-step instructions to help you navigate this task with ease. By the end of this guide, you will have a clear understanding of how to assess the health of your PSU rails and troubleshoot any potential issues that may arise.
Whether you are a seasoned computer enthusiast or a casual user, knowing how to check PSU rails can save you from potential system failures and minimize the risk of component damage. After all, unstable or inadequately supplied power can lead to system instability, crashes, and even permanent damage to your hardware. By taking the time to regularly monitor your PSU rails, you can ensure the longevity and optimal performance of your computer system.
So, let’s dive in and learn how to check PSU rails effectively and with confidence!
What Is a PSU Rail?
A PSU rail refers to a specific output voltage provided by the power supply unit (PSU) to the components within your computer system. The power supply unit receives electricity from your electrical outlet and converts it into the appropriate voltage levels required by your computer’s components.
Modern power supplies typically consist of multiple rails, each providing a different voltage level. The most common rails include the +12V, +5V, and +3.3V rails. These rails deliver power to different components within your system, such as the processor, graphics card, motherboard, and peripherals.
Each rail has its own maximum power rating, which determines the amount of power it can safely deliver to the connected components. It is important to note that these ratings are not surpassed, as doing so can result in instability, component damage, or even system failure.
When checking PSU rails, you are essentially measuring the voltage output of each rail to ensure it falls within acceptable limits. This is crucial because if a rail’s voltage is significantly higher or lower than the specified range, it can lead to issues like overheating, system crashes, and potential damage to your hardware.
Monitoring PSU rails also plays a vital role in diagnosing hardware problems. If you are experiencing system instability or intermittent crashes, an unstable PSU rail could be the culprit. By checking the voltage output, you can identify any abnormalities and take appropriate action to rectify the issue.
Understanding what PSU rails are and their significance in maintaining a stable and reliable computer system is essential for both novice and advanced users. With this knowledge, you can effectively troubleshoot and address any power-related issues for optimal performance and longevity of your hardware.
Why Checking PSU Rails is Important
Checking PSU rails is of utmost importance for several reasons. Let’s explore the key reasons why regularly assessing the voltage output of your power supply unit is critical:
- Maintaining System Stability: The stability of your computer system relies heavily on the consistent and accurate delivery of power to its components. Any fluctuations in voltage can cause system instability, leading to crashes, freezes, and even data loss. By checking PSU rails, you can identify any irregularities in the voltage output and take necessary actions to ensure the stability of your system.
- Preventing Component Damage: Overvoltages or undervoltages can have detrimental effects on your computer’s components. Exposing hardware to excessive voltage can lead to premature failure, permanent damage, or even complete destruction. By monitoring PSU rails, you can spot any voltage anomalies and prevent potential damage to your valuable components, saving you from costly replacements.
- Ensuring System Compatibility: Different components within your computer have specific power requirements. The PSU must provide adequate power to these components to ensure they function optimally. By checking PSU rails, you can verify if the power supply unit is compatible with your system’s demands and avoid potential incompatibility issues that could compromise performance or even result in hardware malfunctions.
- Diagnosing Hardware Issues: Unstable or fluctuating PSU rails can often be the underlying cause of various hardware problems. If you are experiencing random system crashes, BSODs (Blue Screen of Death), or strange behavior from your components, checking PSU rails can help pinpoint if inconsistent power delivery is the root cause. This information can then guide you in troubleshooting and fixing the actual hardware issue.
- Optimizing Performance: When components receive the proper amount of power, they operate at their best potential. By ensuring that PSU rails are within the specified voltage ranges, you can optimize the overall performance of your system. This can result in smoother operation, improved responsiveness, and enhanced gaming or multimedia experiences.
By recognizing the importance of checking PSU rails, you can take proactive measures to maintain the health and efficiency of your computer system. Regular monitoring of PSU voltage outputs ensures system stability, prevents component damage, confirms compatibility, aids in diagnosing hardware issues, and optimizes overall performance. Embracing this vital practice is an investment in the longevity, reliability, and optimal functioning of your computer system.
Tools Needed for Checking PSU Rails
Before you begin the process of checking PSU rails, it is important to gather the necessary tools. These tools will enable you to measure the voltage output of each rail accurately. Here are the essential tools you will need:
- PSU Voltage Tester: A PSU voltage tester is a device specifically designed to measure the voltage levels of the PSU rails. It typically consists of a small LCD screen and a set of connectors that plug into the PSU’s peripheral connectors. This tool provides real-time voltage readings, allowing you to assess the health of each rail effectively.
- Multimeter: A multimeter is a versatile tool that can be used for various electrical measurements. It can measure voltage, current, and resistance. If you do not have access to a PSU voltage tester, a multimeter can serve as an alternative for checking PSU rails. Ensure that it is capable of measuring DC voltage and set it to the appropriate range for accurate readings.
- Grounding Strap (Optional): While not mandatory, wearing a grounding strap can minimize the risk of electrostatic discharge (ESD) when working with sensitive computer components. It helps prevent damage to your hardware caused by static electricity that builds up in the body. If you do not have a grounding strap, make sure to touch a metal part of the computer case regularly to discharge any static electricity.
- Screwdriver: Depending on the computer case, you may require a screwdriver to remove the side panel or any necessary components to access the PSU. Ensure you have the appropriate screwdriver type (such as Phillips or flathead) to carry out the required tasks.
Having these tools ready before you begin the process of checking PSU rails will ensure that you can effectively measure and assess the voltage output. Whether you opt for a dedicated PSU voltage tester or a multimeter, these tools will provide you with the necessary information to make informed decisions about the health and performance of your power supply unit.
Step 1: Power Down and Unplug Your System
Before you start checking the PSU rails, it is crucial to power down your computer and unplug it from the electrical outlet. This step ensures your safety and prevents any potential damage to your hardware during the process. Here’s what you need to do:
- Save and close all your applications: Before shutting down your system, make sure to save any unsaved work and close all running applications. This step prevents data loss and ensures a clean shutdown.
- Shut down your computer: Click on the “Start” button in your operating system and select the “Shut down” option. Allow your computer enough time to complete the shutdown process.
- Unplug your computer from the electrical outlet: Once your computer is completely powered down, locate the power cable connected to the back of your computer case. Gently unplug it from the electrical outlet to ensure that there is no power flowing to your system.
- Press the power button: To discharge any remaining electrical charge, press and hold the power button on your computer for a few seconds. This step helps remove any residual power and ensures that your system is completely powered off.
By following these steps, you guarantee that your computer is safely powered down, eliminating the risk of electric shock or damaging your hardware while working with the power supply unit. Always prioritize your safety and take the necessary precautions before proceeding to the next steps of checking the PSU rails.
Step 2: Open Your Computer Case
Once you have powered down and unplugged your system, the next step in checking PSU rails is to open your computer case. Opening the case will provide you access to the internal components, including the power supply unit (PSU). Follow these steps to safely open your computer case:
- Place your computer on a suitable workspace: Find a flat and sturdy surface to work on. Make sure there is enough clearance around the computer case to comfortably maneuver and access the internal components.
- Locate and remove the side panel: Most computer cases have a removable side panel that allows easy access to the internal components. Identify the screws securing the side panel to the case. Use a suitable screwdriver to loosen and remove these screws. Set them aside in a safe place as you will need them later to reassemble the case.
- Slide off or lift the side panel: With the screws removed, carefully slide off or lift the side panel away from the computer case. Pay attention to any cables that may be connected to the panel, such as the front panel connectors or fan cables, and gently detach them if necessary.
- Set the side panel aside: Once the side panel is removed, set it aside in a secure location where it will not get damaged. This will give you unobstructed access to the internal components, including the PSU.
Opening your computer case requires caution and attention to detail. Make sure to handle the side panel and any connected cables with care to avoid any accidental damage. Additionally, be mindful of any sharp edges inside the case and handle the hardware components with care to prevent any injuries.
By following these steps, you will be able to safely open your computer case and gain access to the internal components, allowing you to proceed with the next stages of checking PSU rails confidently.
Step 3: Locate the PSU
After opening your computer case, the next step in checking PSU rails is to locate the power supply unit (PSU). The PSU is typically a box-shaped component located at the back of the computer case. Follow these steps to easily locate the PSU:
- Identify the largest rectangular component: Look for a large rectangular box inside your computer case. It is usually positioned at the top or bottom of the case, towards the back. The PSU is the component responsible for converting the AC power from the electrical outlet into the DC power that your computer’s components can use.
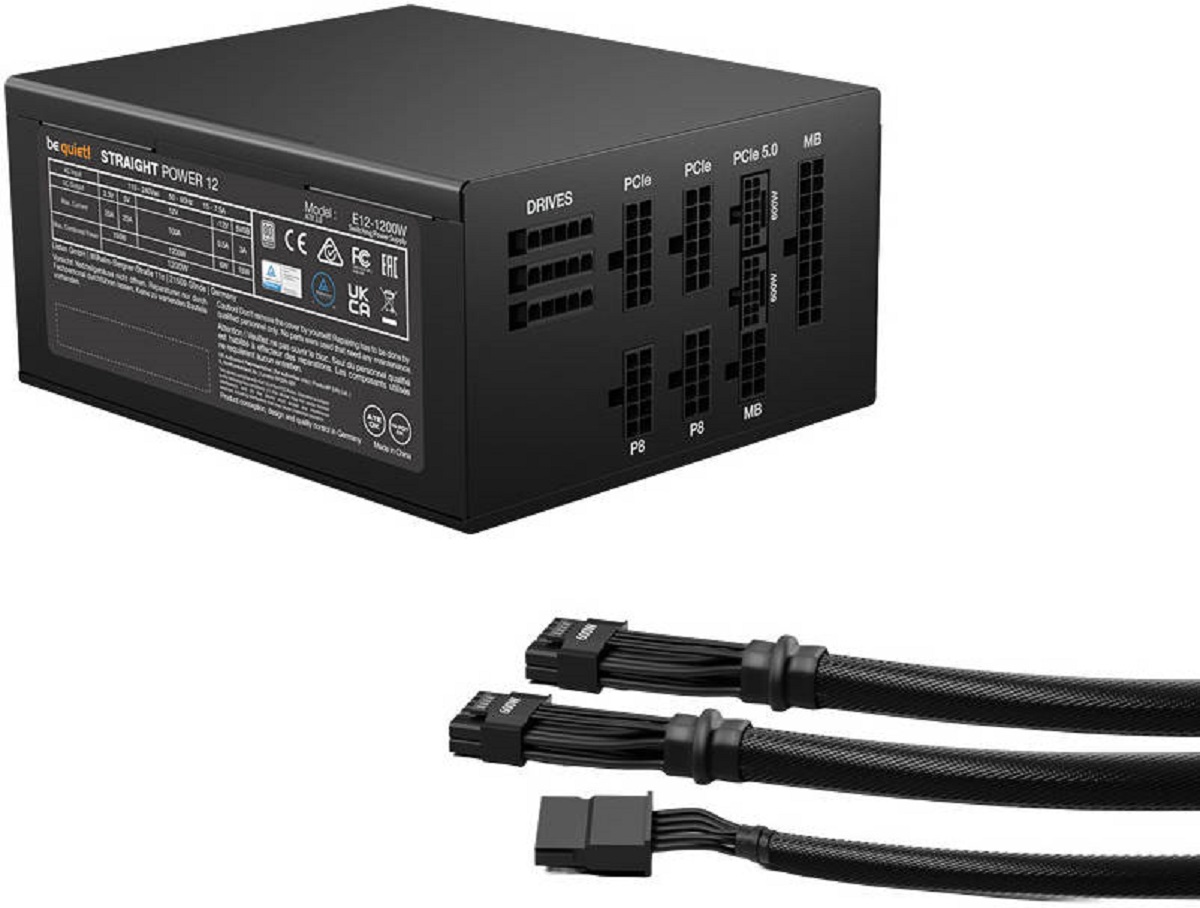
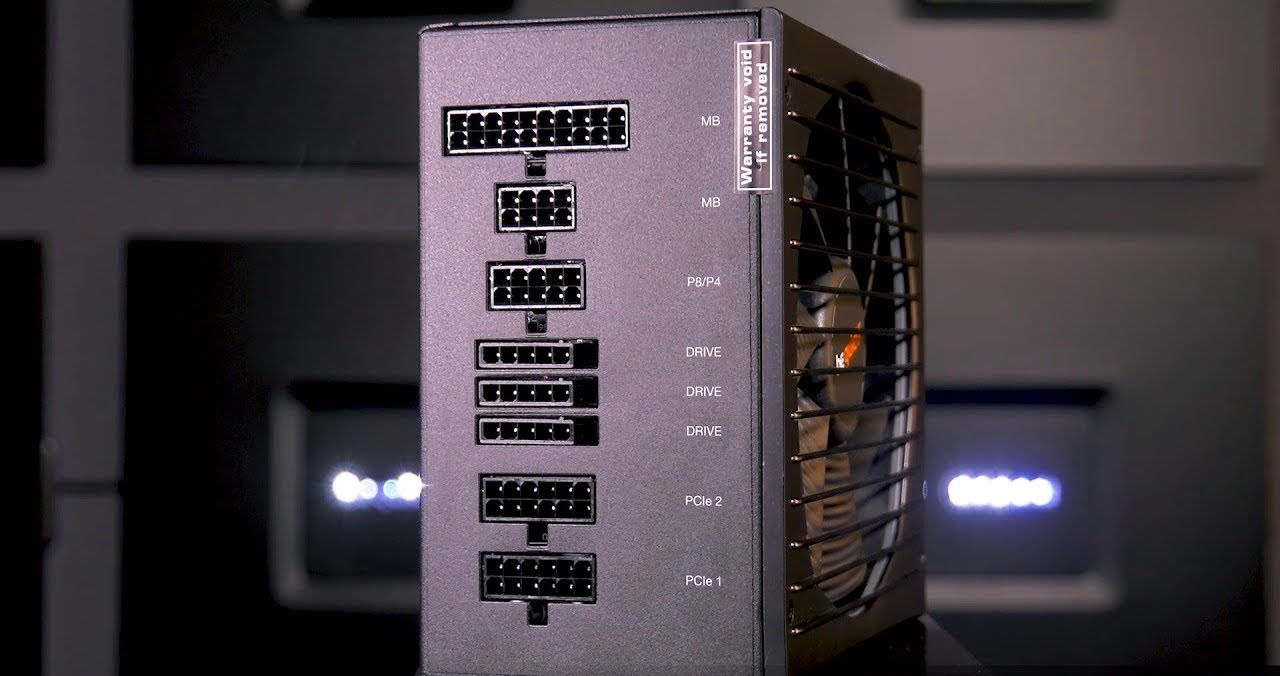
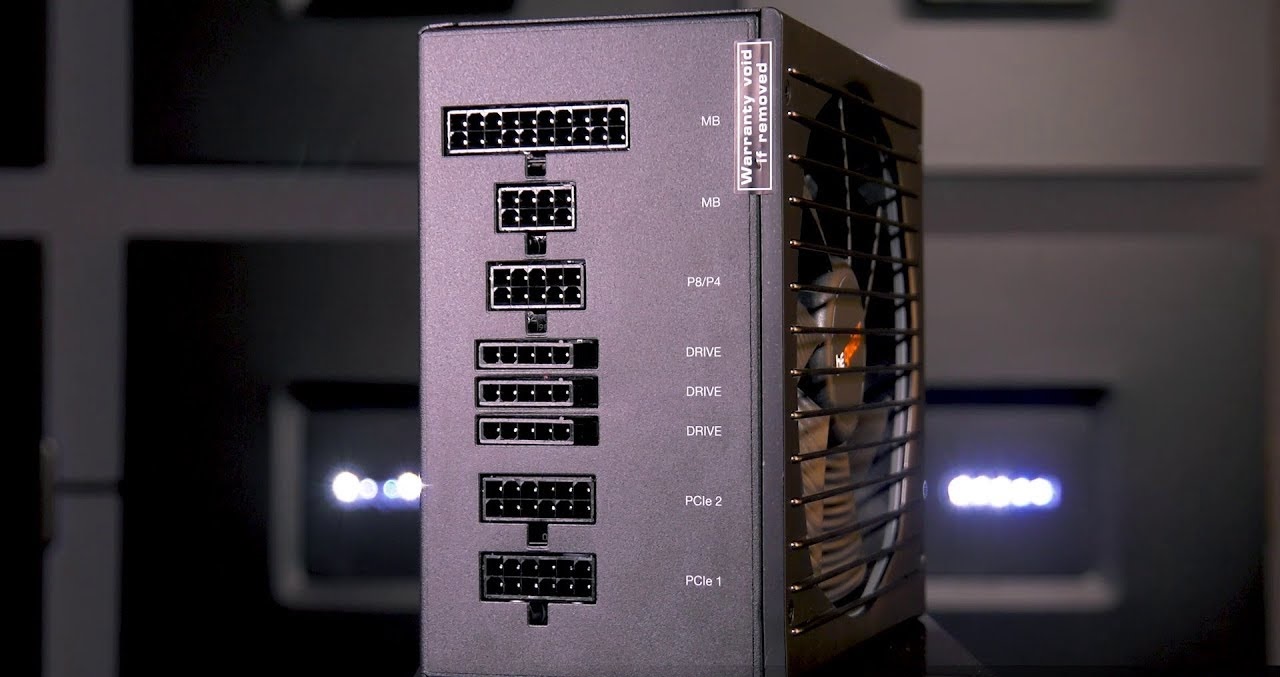
- Observe the cables connected to the PSU: Take note of the cables connected to the PSU. These cables provide power to various components of your computer, such as the motherboard, graphics card, storage drives, and peripherals. The cables may include a large 24-pin connector, PCIe connectors for graphics cards, SATA power connectors for storage drives, and peripheral connectors for devices like fans and optical drives.
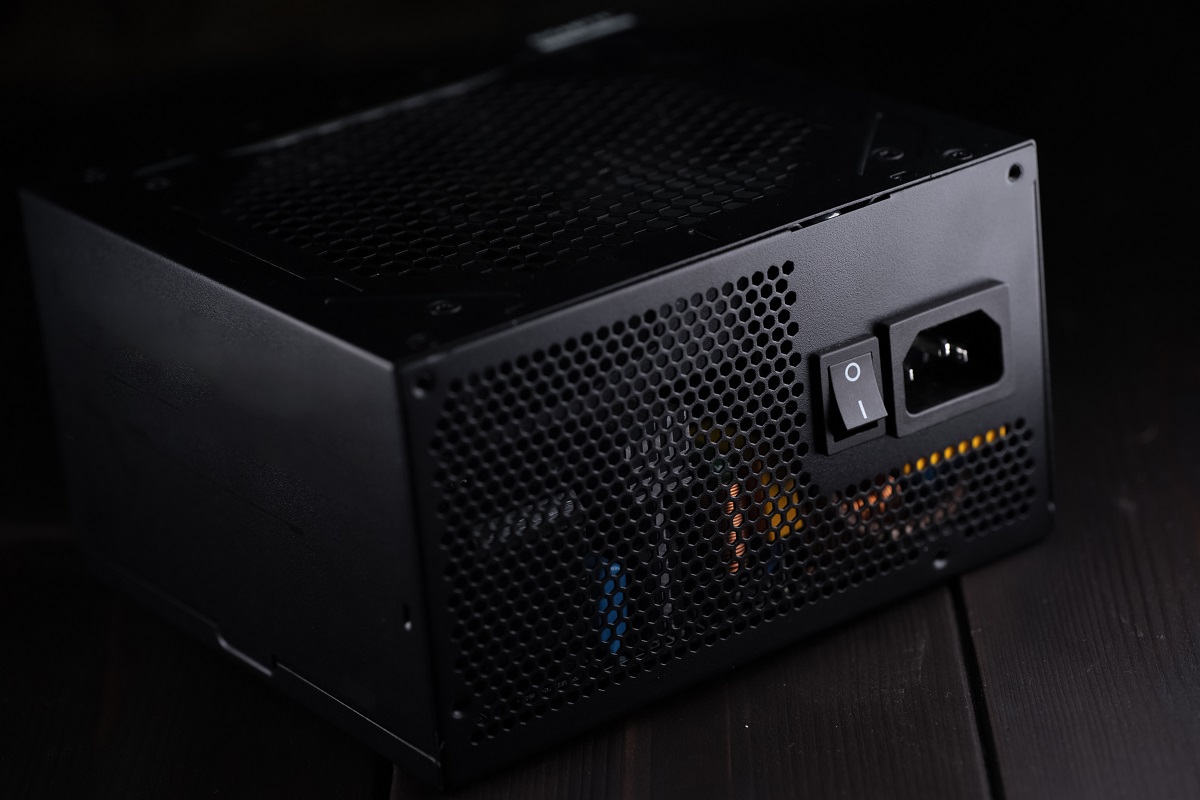
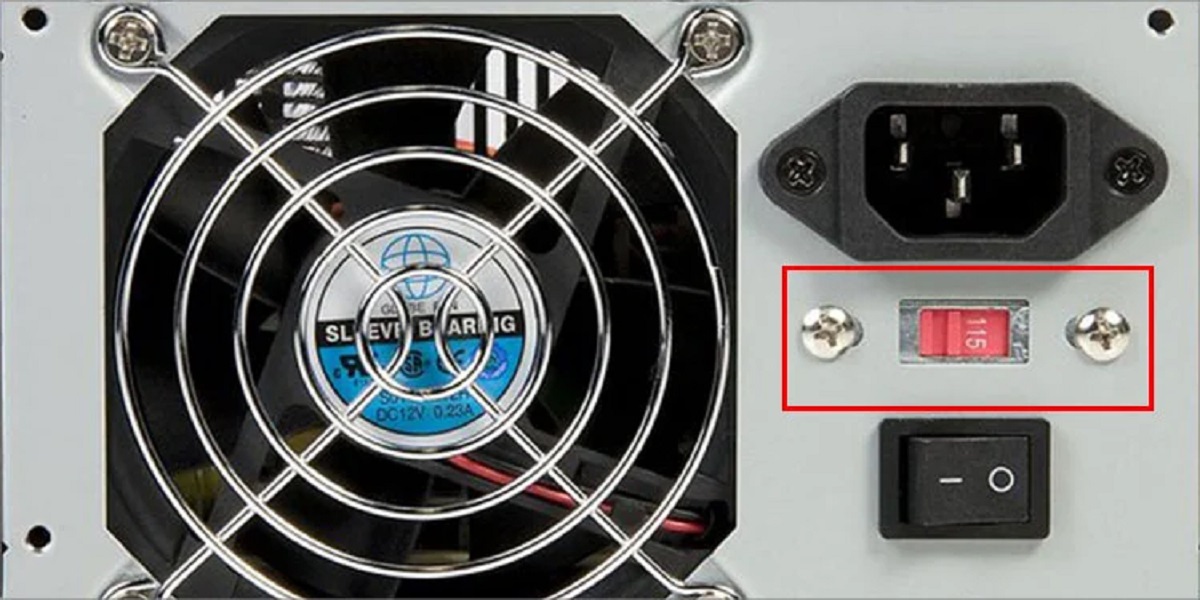
- Check for the power switch: Locate the power switch on the back of the PSU. This switch allows you to turn the PSU on or off. Ensure the switch is in the off position before proceeding with the next steps.
It is important to exercise caution while locating the PSU. Handle the cables and components gently to avoid any accidental disconnections or damage. Take note of the cable connections, as you will need to reconnect them correctly after completing the PSU rail check.
By following these steps, you will easily locate the power supply unit (PSU) within your computer case. Familiarizing yourself with the PSU’s position and cable connections will facilitate the next steps in checking PSU rails and ensure a smooth and efficient process.
Step 4: Identify the PSU Rails
Once you have located the power supply unit (PSU), the next step in checking PSU rails is to identify the different rails. PSU rails refer to the specific voltage outputs provided by the power supply to your computer’s components. Follow these steps to identify the PSU rails:
- Refer to the PSU label: Look for a label on the side of the PSU that provides information about its specifications. This label typically includes details about the different voltage rails and their maximum power ratings. Common PSU rails include the +12V, +5V, and +3.3V rails.
- Identify the PSU connectors: Examine the connectors coming from the PSU. Each connector typically corresponds to a specific rail. For example, the 24-pin motherboard connector provides power to the +3.3V, +5V, and +12V rails, while PCIe connectors are dedicated to powering the graphics card with the +12V rail.
- Follow color-coded cables: Some PSUs use color-coded cables to indicate the rail they belong to. For example, yellow cables are often associated with the +12V rail, red cables with the +5V rail, and orange cables with the +3.3V rail. Consult the PSU documentation or refer to the manufacturer’s website for accurate information on cable color-coding.
- Consult the motherboard manual: If you are unsure which connectors correspond to which rails, consult your motherboard’s manual. The manual typically includes a diagram or chart indicating the appropriate PSU connectors and the rails they connect to on the motherboard.
Identifying the PSU rails is crucial for accurately checking their voltage outputs. Understanding the different rails and their associated connectors will allow you to measure the voltage of each rail effectively and ensure they are within acceptable limits.
By following these steps, you will be able to easily identify the different PSU rails and their corresponding connectors. Taking the time to familiarize yourself with the PSU rails will enable you to proceed to the next steps confidently and perform an accurate assessment of your power supply unit.
Step 5: Check the Voltage Output
Once you have identified the PSU rails, it’s time to check the voltage output of each rail. This step is crucial in assessing the health and stability of your power supply unit (PSU). Here’s how you can check the voltage output:
- Prepare your PSU voltage tester or multimeter: If you are using a dedicated PSU voltage tester, ensure it is properly connected to the PSU’s peripheral connectors. If you are using a multimeter, set it to measure DC voltage and choose an appropriate range based on the expected voltage output of the rail you are testing.
- Connect the probes to the appropriate connectors: Take the probes of your PSU voltage tester or multimeter and connect them to the appropriate connectors, corresponding to the rail you are measuring. For example, if you are measuring the +12V rail, connect the probes to the appropriate +12V connector.
- Power on your PSU: Switch on the PSU using the power switch at the back. This will provide power to the components without turning on your entire computer system. If you are using a multimeter, ensure it is set to the correct range before powering on the PSU.
- Read and record the voltage: Look at the readings provided by your PSU voltage tester or multimeter. Take note of the voltage output for each rail you are testing. Ensure that the readings fall within the acceptable range specified by the PSU manufacturer or relevant standards.
It is important to check the voltage output of each rail accurately to identify any potential issues or abnormalities. Consistently high or low voltages can indicate a problem with the PSU, which may require further investigation or replacement.
By following these steps, you will be able to check the voltage output of each PSU rail effectively. Recording the voltages will enable you to compare them to the acceptable ranges in the next step and determine if any adjustments or troubleshooting are necessary.
Step 6: Recording the Results
After checking the voltage output of each PSU rail, it’s important to record the results. Keeping a record allows you to track any changes over time and compare them to the acceptable voltage ranges specified by the PSU manufacturer or industry standards. Here’s how you can effectively record the results:
- Create a table or spreadsheet: Open a new document or spreadsheet on your computer, or grab a pen and paper to create a table. This will serve as your record-keeping tool for the PSU rail voltage readings.
- Note down the rail names: In the first column of your table, list the names or labels of the PSU rails you have checked. For example, +12V, +5V, and +3.3V.
- Enter the measured voltages: In the adjacent column(s), enter the voltage readings you obtained for each rail. Be sure to clearly label which readings correspond to which rail.
- Include the acceptable voltage ranges: Research the acceptable voltage ranges for each rail, either from the PSU manufacturer’s specifications or industry standards. Add another column to your table to note down these ranges for future reference.
- Document the date and time: Include a column in your record to indicate the date and time of when you performed the voltage measurements. This information is useful for tracking any changes or trends over time.
Recording the results of your PSU rail voltage measurements allows you to easily compare the readings to the acceptable ranges and identify any deviations or inconsistencies. It serves as a reference point for future checks and helps you track the health and stability of your power supply unit.
By following these steps and maintaining a well-organized record, you will have an accurate and accessible reference of the PSU rail voltage measurements, which can be useful for troubleshooting or monitoring the performance of your power supply unit.
Step 7: Interpreting the Results
After recording the voltage measurements of each PSU rail, it’s time to interpret the results. Analyzing the readings will help you determine if the voltage output is within acceptable limits and if any further actions need to be taken. Here’s how you can effectively interpret the results:
- Compare readings to acceptable ranges: Refer to the acceptable voltage ranges for each PSU rail as specified by the manufacturer or industry standards. Compare your recorded voltage measurements to these ranges.
- Check for consistency: Look for consistency among the readings of each rail. Ideally, the voltage outputs should be stable and consistent with minimal variations. Significant fluctuations or inconsistencies may indicate a problem with the PSU.
- Identify potential issues: If any rail’s voltage output falls outside the acceptable range or exhibits large deviations, it can indicate a potential issue. High voltage readings can lead to component damage, while low voltage readings can cause instability or malfunctions.
- Consider the impact on your system: Evaluate the impact of the voltage measurements on your computer system. Voltage outputs too close to the upper or lower limits may affect system stability, performance, and the longevity of your hardware.
- Decide on the next steps: Based on your interpretation of the results, determine what actions are necessary. If the voltage outputs are within acceptable ranges, no immediate action may be needed. However, if there are significant deviations, it may be necessary to address the issue by troubleshooting or replacing the PSU.
Interpreting the results of your PSU rail voltage measurements is crucial in assessing the overall health and stability of your power supply unit. It allows you to identify any potential issues and take appropriate actions to ensure the optimum functioning of your computer system.
By following these steps and analyzing the results in a systematic and thorough manner, you will be able to make informed decisions about the next steps to take, whether it involves addressing any deviations, seeking further assistance, or maintaining your PSU’s performance.
Step 8: Troubleshooting PSU Rail Problems
If you have identified issues with the voltage output of your PSU rails during the previous steps, it’s essential to troubleshoot and address the problems. Here’s a step-by-step guide to help you troubleshoot PSU rail problems:
- Double-check connections: Ensure that all PSU cables are securely connected to their respective components. Loose connections can lead to voltage fluctuations.
- Try a different power outlet: Plug your computer into a different electrical outlet to rule out any issues with the outlet itself. Sometimes, power fluctuations or instability in the outlet can affect the PSU’s performance.
- Replace cables or connectors: If you suspect a faulty cable or connector, try replacing them with known working ones. Damaged or malfunctioning cables can impact the voltage delivery.
- Consider PSU load: If your computer system is heavily loaded with power-demanding components, it may be exceeding the capabilities of your PSU. Consider upgrading to a higher wattage PSU to ensure sufficient power delivery.
- Inspect for physical damage: Check the PSU for any signs of physical damage, such as bulging capacitors or burnt components. If you notice any damage, it may be indicative of a faulty PSU that requires replacement.
- Seek professional help: If you are unable to resolve the PSU rail problems on your own or if you are uncomfortable working with hardware, it is advisable to seek assistance from a professional computer technician. They can further diagnose the issue and provide expert solutions.
- Consider replacing the PSU: If all troubleshooting steps fail or if the PSU is old and showing signs of failure, it may be necessary to replace it with a new, reliable PSU. Make sure to choose a PSU with appropriate wattage and ensure compatibility with your system.
Troubleshooting PSU rail problems can be a complex task, and it often requires a methodical approach. By following these steps and taking the necessary precautions, you can identify and resolve issues with your PSU, ensuring stable power delivery and the overall health of your computer system.
Remember, if you are unsure or uncomfortable with performing any of the troubleshooting steps, it is best to seek professional assistance to avoid causing further damage to your hardware.
Conclusion
Checking PSU rails is a crucial task for maintaining a stable and reliable computer system. By monitoring the voltage output of each rail, you can identify any potential issues, ensure compatibility, prevent component damage, and optimize system performance. Here’s a summary of the key takeaways from this guide:
- Regularly checking PSU rails is essential for maintaining system stability and preventing hardware failures.
- Understanding what PSU rails are and their significance helps you troubleshoot hardware issues effectively.
- The tools needed for checking PSU rails include a PSU voltage tester or multimeter, a grounding strap (optional), and a screwdriver.
- Following the step-by-step process, you can power down and unplug your system, open the computer case, locate the PSU, identify the PSU rails, check the voltage output, record the results, and interpret them accordingly.
- If you encounter PSU rail problems, troubleshooting steps such as cable checks, power outlet changes, and cable replacements can help resolve the issues.
- Consider seeking professional help or replacing the PSU if troubleshooting does not resolve the problems.
Remember, always prioritize your safety and take necessary precautions when working with computer hardware. If you are uncertain or uncomfortable with any steps of the process, consult a professional technician.
By regularly checking PSU rails and taking appropriate actions, you can ensure the optimal performance, stability, and longevity of your computer system, providing you with a reliable and efficient computing experience.