Introduction
Welcome to the age of advanced technology, where televisions offer stunning visuals and immersive entertainment experiences. LG OLED TVs are renowned for their exceptional picture quality, vibrant colors, and sleek designs. However, even the best TVs occasionally encounter a “no signal” situation when they are not receiving any input source. In such instances, a default image is displayed on the screen, indicating that there is no signal being transmitted.
While the no signal image served its purpose as a basic placeholder in the past, LG understands that customization is key to enhancing user experience. Why settle for a generic image when you can personalize the no signal screen with your own preferred image? This article will guide you through the process of changing the no signal image on your LG OLED TV.
With just a few simple steps, you can transform the no signal image into something that truly reflects your style and personality. Whether you choose a stunning landscape, a memorable photo, or an eye-catching design, customizing the no signal image allows you to add a personal touch to your TV viewing experience.
So, if you’re ready to make your LG OLED TV even more unique and visually appealing, let’s dive into the step-by-step process of changing the no signal image. Get ready to showcase your creativity and set the stage for an even more enjoyable entertainment experience!
What is the no signal image?
The no signal image is a default image that is displayed on your LG OLED TV when there is no recognized input source. It serves as a visual indicator that there is no signal being transmitted from your cable box, gaming console, or other devices connected to your TV.
This default image is designed to be simple and unobtrusive, typically consisting of a solid color or a basic pattern. Its purpose is to notify you that your TV is not currently receiving any input, preventing you from staring at a blank screen and wondering why there is no picture.
The no signal image also helps to protect your TV’s screen from potential burn-in or image retention when there is no active content being displayed. By default, the image will appear on the screen after a certain period of inactivity or when you switch inputs without a connected device.
While the default no signal image serves its purpose of indicating a lack of input signal, its generic nature can be uninspiring and lack personalization. That’s why LG has provided a feature that allows you to customize the no signal image with an image of your own choosing. By replacing the default no signal image, you can add a touch of creativity and individuality to your TV’s interface.
This customization feature not only allows you to showcase your favorite photos or artwork, but it also lets you coordinate the TV’s appearance with your overall home decor and style. It’s a small detail that can make a big difference in personalizing your entertainment setup and creating a more immersive viewing experience.
Now that you understand what the no signal image is and why customizing it is important, let’s explore the step-by-step process of changing the default image on your LG OLED TV. Get ready to infuse your personal flair and creativity into your television’s interface!
The importance of customizing the no signal image
Why should you bother customizing the no signal image on your LG OLED TV? Isn’t it just a minor detail that doesn’t really affect your viewing experience? Well, think again. Customizing the no signal image can actually have several benefits that contribute to a more personalized and enjoyable TV experience.
Firstly, customizing the no signal image allows you to infuse your unique personality and style into your TV interface. Instead of being greeted by a generic image, you can choose an image that resonates with you, whether it’s a breathtaking landscape, a cherished family photo, or a piece of art that inspires you. This small customization can make a big difference in how your TV feels like a reflection of your taste and individuality.
Secondly, the no signal image often appears when you switch inputs or during moments of inactivity. Instead of staring at a blank screen or a monotonous pattern, having a customized image can provide a visually pleasing and engaging backdrop. It adds a touch of visual interest and keeps your TV interface lively even when no content is being displayed.
In addition to personalization and aesthetics, customizing the no signal image can also be a practical choice. It can help prevent screen burn-in or image retention that may occur when static images are displayed on your TV for extended periods. By changing the default image to one that varies over time, you reduce the risk of potential screen damage and prolong the lifespan of your OLED TV.
Lastly, customizing the no signal image is simply fun! It allows you to experiment with different images, themes, and moods to create a unique atmosphere in your entertainment space. Whether you want to convey a calm and serene vibe or convey your love for a particular hobby or fandom, the customization options are endless.
Now that you understand the benefits and importance of customizing the no signal image, let’s dive into the step-by-step process of changing the default image on your LG OLED TV. Get ready to unleash your creativity and make your TV interface truly your own!
Step 1: Prepare the image you want to use
Before you can change the default no signal image on your LG OLED TV, you need to have the image you want to use ready. This image will replace the generic default image and showcase your personal style and preferences. Here’s how you can prepare the image:
1. Choose an image: Start by selecting an image that you would like to appear as the no signal image on your TV. It can be a photograph, a digital artwork, or any other image that you find visually appealing and representative of your taste.
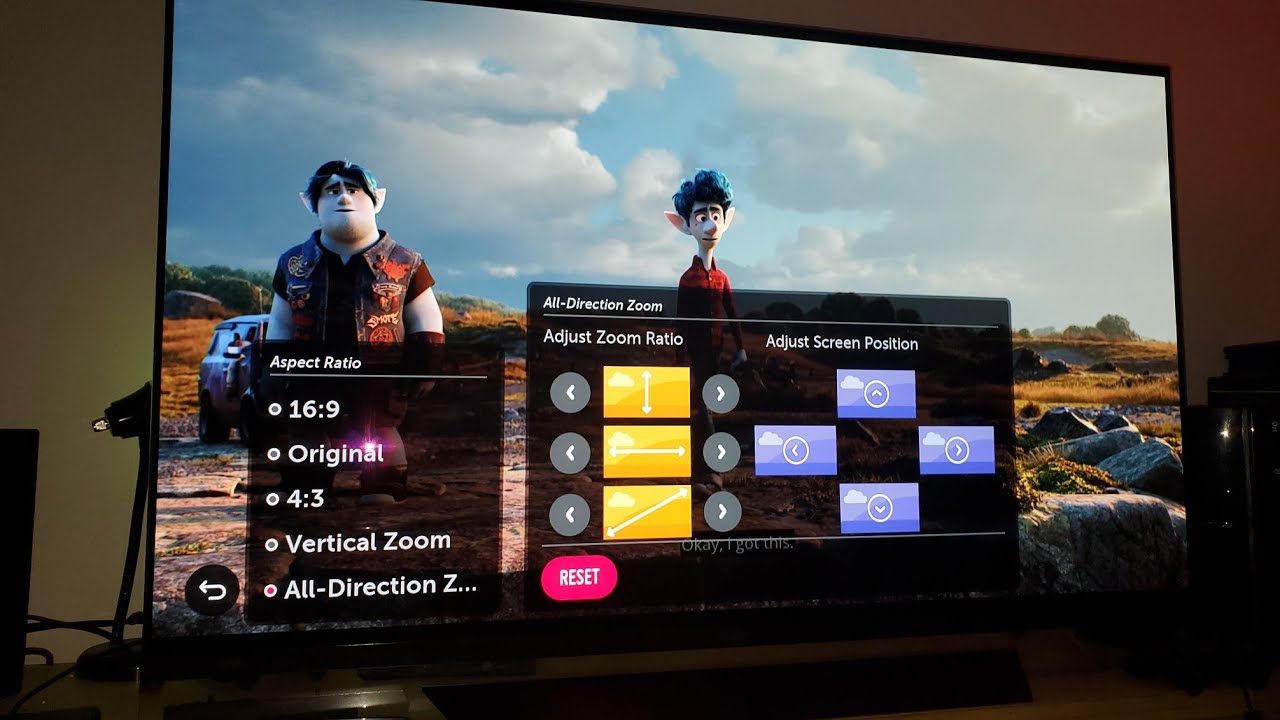
2. Consider aspect ratio: Pay attention to the aspect ratio of the image. LG OLED TVs typically have a widescreen aspect ratio of 16:9, so it’s advisable to choose an image that matches this aspect ratio. This will ensure that the image fits perfectly on the screen without any cropping or distortion.
3. Resolution and quality: Aim for an image with a high resolution and good quality. This will ensure that the image appears sharp and clear on your TV screen. Avoid using low-resolution or pixelated images as they may not display well.
4. File format: Save the image in a compatible format, such as JPEG or PNG. These are the common file formats supported by LG OLED TVs. If your chosen image is in a different format, you can use image editing software to convert it to the desired format.
5. Adjust brightness and colors (optional): If you want to further enhance the appearance of the image on your TV screen, you can make adjustments to the brightness, contrast, and colors using image editing software. This will ensure optimal visibility and vibrancy when the image is displayed as the no signal image.
Once you have prepared the image following these steps, you are ready to proceed to the next step of changing the no signal image on your LG OLED TV. Get your chosen image ready on your computer or a USB drive, as we will be using it in the upcoming steps.
Step 2: Connect a USB drive to your LG OLED TV
In order to change the no signal image on your LG OLED TV, you will need to connect a USB drive to your TV. This will allow you to transfer the image you have prepared and use it as the new custom image. Here’s how you can connect the USB drive:
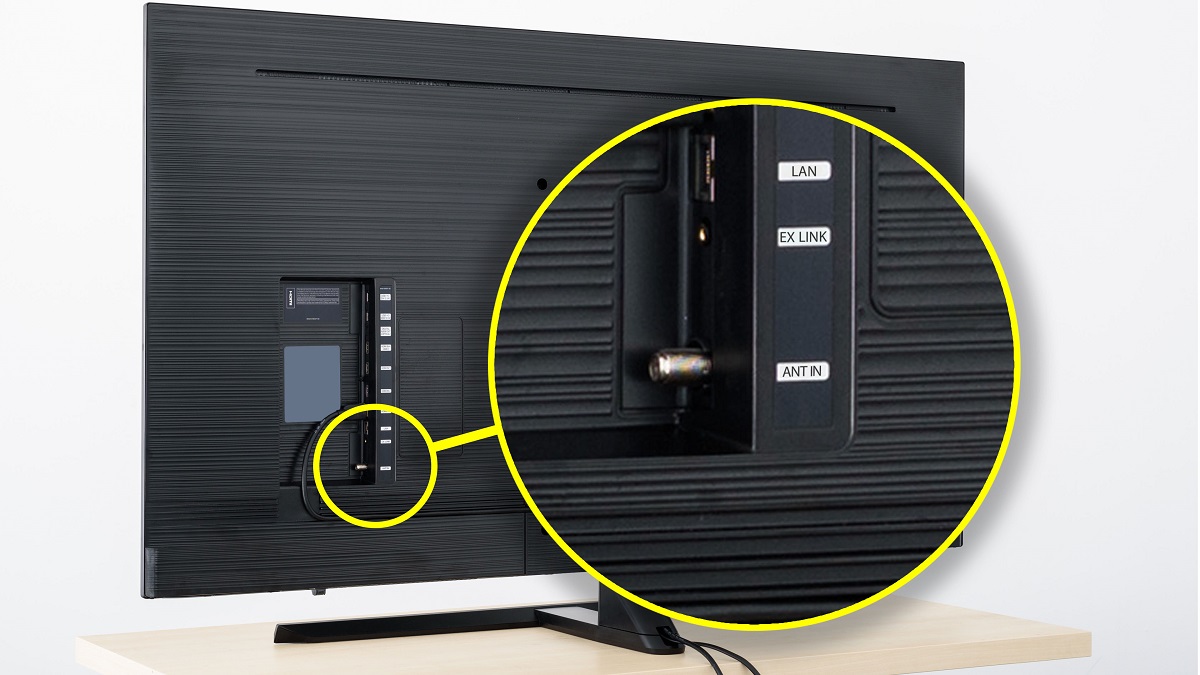
1. Find the USB port: Locate the USB port on your LG OLED TV. It is usually located on the side or back of the TV. It may be labeled as “USB” or have the USB symbol next to it.
2. Insert the USB drive: Take your USB drive and insert it into the USB port on your TV. Ensure that the USB drive is securely connected to the port.
3. Wait for recognition: Once the USB drive is inserted, your TV will recognize it. It may take a few moments for the TV to detect the USB drive and make it available for use. You may see a notification on the screen indicating that a USB device has been connected.
4. Verify USB drive compatibility: It is important to note that not all USB drives may be compatible with your LG OLED TV. Make sure that the USB drive you are using is compatible with your TV model. Refer to the TV’s user manual or specifications for information on compatible USB drives.
5. Format the USB drive (if necessary): If your USB drive is not recognized or if you receive a prompt to format it, you may need to format the USB drive to a compatible file system. Keep in mind that formatting a USB drive will erase all its contents, so make sure to backup any important files before proceeding.
Once the USB drive is connected and recognized by your LG OLED TV, you are ready to proceed to the next step of accessing the TV settings menu to change the no signal image. Ensure that the USB drive remains connected throughout the following steps so that you can easily access the image you want to use.
Step 3: Access the TV settings menu
Now that you have your USB drive connected to your LG OLED TV, it’s time to access the TV settings menu. This is where you will find the options to change the no signal image. Follow these steps to access the settings menu:
1. Turn on your LG OLED TV: Ensure that your TV is turned on and displaying a live signal. If your TV is currently displaying the no signal image, press the power button on your remote control to turn it on.
2. Navigate to the settings menu: Using your TV remote control, locate and press the “Settings” button. This button is typically represented by a gear or a cog icon. Pressing this button will open the settings menu on your TV.
3. Select “All Settings”: In the settings menu, you will see various options. Use the arrow keys on your remote control to navigate through the menu. Look for the option labeled “All Settings” or something similar. This option will allow you to access the complete range of settings and customization options for your TV.
4. Press the OK or Enter button: Once you have highlighted the “All Settings” option, press the OK or Enter button on your TV remote control to enter the settings menu.
5. Explore the settings menu: You are now in the TV settings menu. Take a moment to explore the different settings available. You may see options for picture, sound, network, and more, depending on your TV model.
Now that you have successfully accessed the TV settings menu, you are ready to proceed to the next step of locating the specific option to change the no signal image. In the following step, we will guide you through finding this option and making the necessary customization.
Step 4: Locate the no signal image settings
Now that you are in the TV settings menu, the next step is to locate the specific option where you can change the no signal image. Follow these steps to find the no signal image settings on your LG OLED TV:
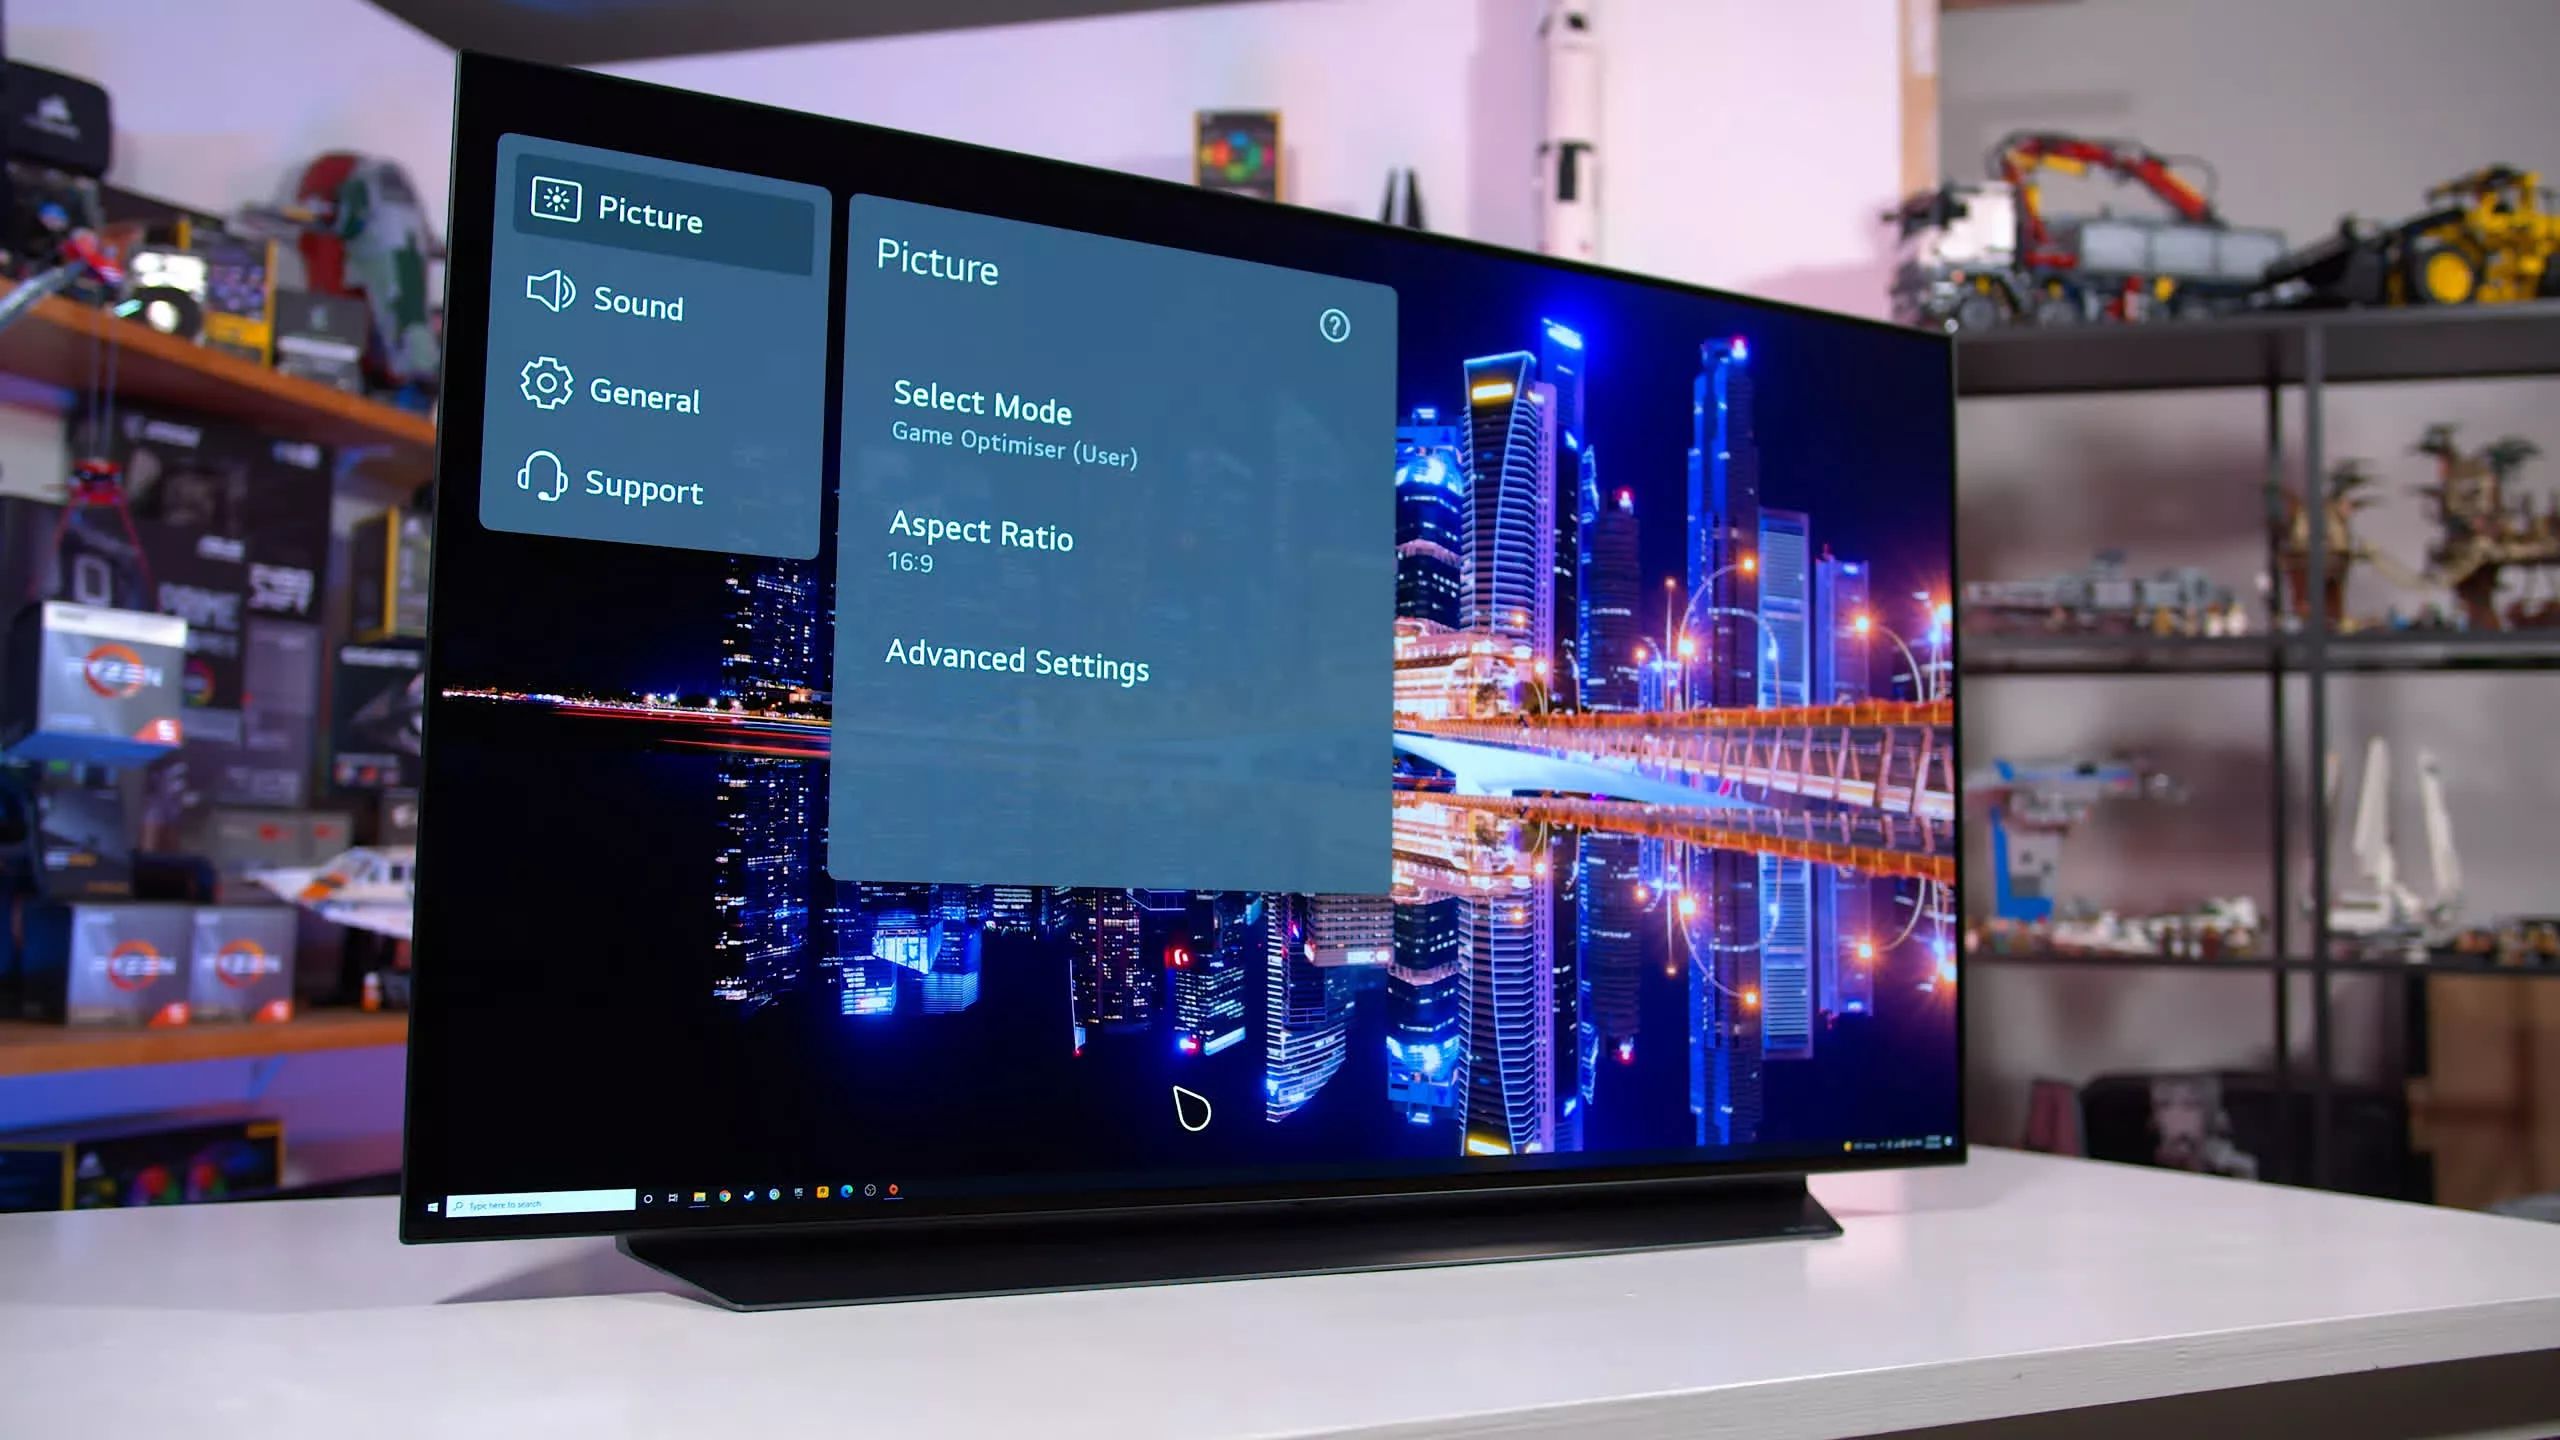
1. Navigate to the Picture settings: Use the arrow keys on your TV remote control to navigate through the settings menu. Look for the “Picture” or “Display” settings option and highlight it.
2. Enter the Picture settings: Once you have highlighted the Picture settings option, press the OK or Enter button on your remote control to enter the Picture settings menu. This menu allows you to customize various aspects of your TV’s display.
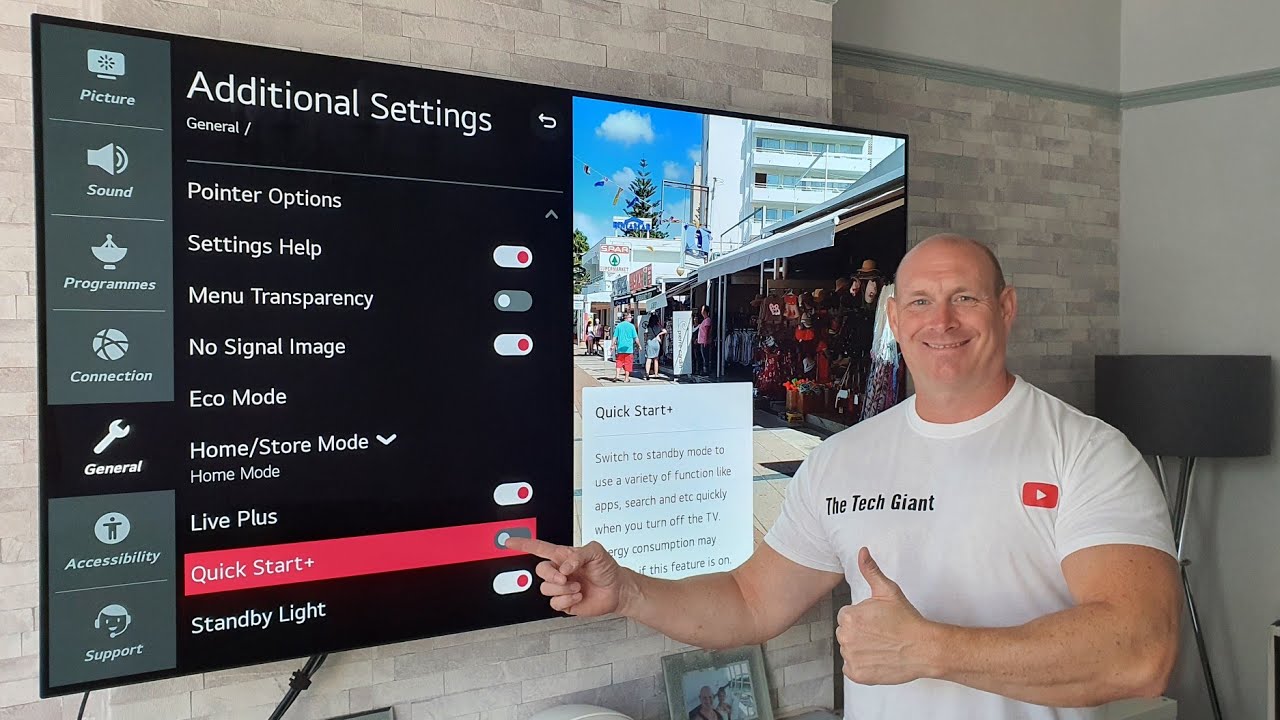
3. Look for “No Signal Image” or similar option: Within the Picture settings menu, look for an option that is related to the no signal image. It may be labeled as “No Signal Image,” “Screen Saver,” or something similar. The exact wording may vary depending on your TV model and firmware version.
4. Highlight the no signal image option: Once you have found the relevant option, highlight it using the arrow keys on your remote control. This will allow you to access and modify the settings related to the no signal image.
5. Press the OK or Enter button: After selecting the no signal image option, press the OK or Enter button on your remote control to enter the specific settings for the no signal image.
By following these steps, you should have successfully located the no signal image settings within the Picture settings menu on your LG OLED TV. With the settings accessed, you are now ready to proceed to the next step of selecting a custom image to replace the default no signal image.
Step 5: Select the custom image option
Now that you have located the no signal image settings on your LG OLED TV, it’s time to select the option to use a custom image. Follow these steps to choose the custom image option:
1. Highlight the custom image option: Within the no signal image settings menu, look for an option that allows you to select a custom image. It may be labeled as “Custom Image,” “User Image,” or something similar. Using the arrow keys on your remote control, highlight this option.
2. Press the OK or Enter button: Once you have highlighted the custom image option, press the OK or Enter button on your remote control to enter the selection screen for the custom image.
3. Select the USB drive as the image source: On the custom image selection screen, you will be presented with different image sources. Choose the option that corresponds to the USB drive that you connected earlier. This will allow you to browse the contents of the USB drive and select the image you want to use.
4. Navigate through the USB drive: Using the arrow keys on your remote control, navigate through the files and folders on the USB drive. Look for the image file that you prepared in Step 1. You may need to open folders or navigate to the appropriate directory to find the image file.
5. Highlight and select the image file: Once you have located the image file on your USB drive, highlight it using the arrow keys on your remote control. This will allow you to select the image file as the custom image.
6. Press the OK or Enter button to confirm: After selecting the desired image file, press the OK or Enter button on your remote control to confirm your choice. The TV will now set the selected image as the new custom no signal image.
By following these steps, you have successfully selected the custom image option and chosen the image file from your USB drive to replace the default no signal image on your LG OLED TV. Next, we will proceed to the next step of adjusting the image settings if necessary.
Step 6: Choose the image from your USB drive
Now that you have selected the custom image option in the no signal image settings menu of your LG OLED TV, it’s time to choose the specific image you want to use. Follow these steps to select the image from your USB drive:
1. Browse the USB drive: Using the arrow keys on your TV remote control, browse through the files and folders on the USB drive. Look for the location where you stored the image you want to use as the custom no signal image.
2. Locate the image file: Once you have found the appropriate folder or directory, locate the image file that you want to use. It should have a file extension such as .JPEG, .PNG, or .BMP. The file icon may also resemble an image or a photograph.
3. Highlight the image file: Using the arrow keys, highlight the image file you want to select as the custom no signal image on your TV. This will display a preview of the image, allowing you to confirm that it’s the correct one.
4. Press the OK or Enter button: After selecting the image file, press the OK or Enter button on your remote control to confirm your choice. The TV will now set the selected image as the new custom no signal image, replacing the default one.
5. Review the image settings (optional): Depending on your TV model and firmware version, there may be additional image settings available for customization. These settings can include options to adjust brightness, contrast, or aspect ratio for the custom image. If desired, navigate through these settings using your TV remote and make any adjustments you prefer.
6. Save the changes: Once you have selected and adjusted the image settings, navigate to the “Save” or “Apply” option within the no signal image settings menu. Press the OK or Enter button to save your changes and exit the settings menu.
By following these steps, you have successfully chosen the desired image from your USB drive to be displayed as the custom no signal image on your LG OLED TV. In the next step, we will explore how to adjust the image settings if needed for optimal display.
Step 7: Adjust the image settings if needed
After selecting the image from your USB drive as the custom no signal image on your LG OLED TV, you may want to make some adjustments to ensure optimal display. Depending on your TV model and firmware version, there may be various image settings available for customization. Follow these steps to adjust the image settings if needed:
1. Access the image settings: Navigate back to the no signal image settings menu on your TV. This can typically be found within the Picture or Display settings menu.
2. Explore the available options: Using the arrow keys on your remote control, navigate through the image settings. Look for options such as brightness, contrast, picture mode, color, and aspect ratio. These settings may allow you to fine-tune the appearance of the custom no signal image.
3. Make adjustments: Highlight the desired setting and use the arrow keys or numerical buttons on your remote control to adjust the value. For example, you can increase the brightness or contrast to make the image more vivid, or adjust the color settings to enhance the image’s hue and saturation.
4. Preview the changes: As you make adjustments, take advantage of the TV’s preview feature to see the immediate impact of the changes on the displayed image. This allows you to fine-tune the settings to your preferences.
5. Experiment and find the optimal settings: Play around with the different image settings to find the combination that suits your preferences and the image itself. Remember, individual preferences can vary, so adjust the settings according to your own taste and the unique characteristics of the image you have chosen.
6. Save the changes: Once you are satisfied with your adjustments, navigate to the “Save” or “Apply” option within the settings menu. Press the OK or Enter button on your remote control to save the changes and exit the image settings menu.
By following these steps, you can fine-tune the image settings to your liking and ensure that the custom no signal image is displayed optimally on your LG OLED TV. In the next step, we will cover how to save and apply the changes you have made.
Step 8: Save and apply the changes
After making any desired adjustments to the image settings for the custom no signal image on your LG OLED TV, it’s time to save and apply the changes. Follow these steps to complete the customization process:
1. Navigate to the “Save” option: Within the no signal image settings menu, look for the “Save,” “Apply,” or “Confirm” option. This option allows you to permanently save the changes you have made to the image settings.
2. Press the OK or Enter button: Once you have located the save option, highlight it using the arrow keys on your remote control. Press the OK or Enter button to confirm your selection and save the changes.
3. Exit the settings menu: After saving the changes, navigate to the “Exit” or “Back” option within the settings menu. Press the OK or Enter button to exit the menu and return to your TV’s regular display.
4. Test the custom no signal image: Switch to a different input or disconnect your current input source to trigger the no signal image. You should now see your selected image displayed as the custom no signal image on your LG OLED TV. Enjoy the personalized touch this brings to your TV viewing experience!
5. Make further adjustments if needed: If you find that the custom no signal image requires further adjustments, you can always revisit the image settings menu and make the necessary changes following the previous steps.
By saving and applying the changes, you have successfully completed the process of changing the default no signal image on your LG OLED TV. Now, whenever there is no input signal, your personalized image will be displayed, adding a unique touch to your TV’s interface.
Congratulations on customizing the no signal image on your LG OLED TV! Your TV now reflects your personal style and adds an extra level of enjoyment to your entertainment experience.
Conclusion
Customizing the no signal image on your LG OLED TV offers a simple yet effective way to personalize your TV-viewing experience. By replacing the default image with a custom one, you can showcase your unique style and preferences, transforming the no signal screen into a reflection of your creativity. Through the step-by-step process outlined in this guide, you have learned how to change the no signal image on your LG OLED TV with ease.
From preparing the image you want to use, connecting a USB drive to your TV, accessing the settings menu, and locating the no signal image settings, to selecting and adjusting the custom image, saving and applying the changes, you have navigated through each crucial step in the customization process.
By choosing an image that resonates with you and adjusting the settings to your liking, you have created an immersive and personalized TV interface that better matches your style and enhances your overall entertainment experience. With a custom no signal image, you no longer have to settle for a generic placeholder but instead have the opportunity to showcase your favorite photos, artwork, or designs.
Remember, if at any point you want to change the custom no signal image or make further adjustments, you can always revisit the settings menu and modify the image or settings as desired.
Now that you have successfully customized the no signal image on your LG OLED TV, sit back, relax, and enjoy your personalized viewing experience. From the moment you switch inputs or encounter a moment of inactivity, your chosen image will captivate your attention and add a touch of your own personality to your entertainment space.
So go ahead, let your creativity shine and make the most out of your LG OLED TV by customizing its no signal image!