Introduction
Are you looking to cancel your PlayStation subscription? Whether you’re taking a break from gaming or switching to a different platform, cancelling your PlayStation subscription is a simple process that can be done in just a few steps. In this guide, we will walk you through the process of cancelling your PlayStation subscription, ensuring a hassle-free experience.
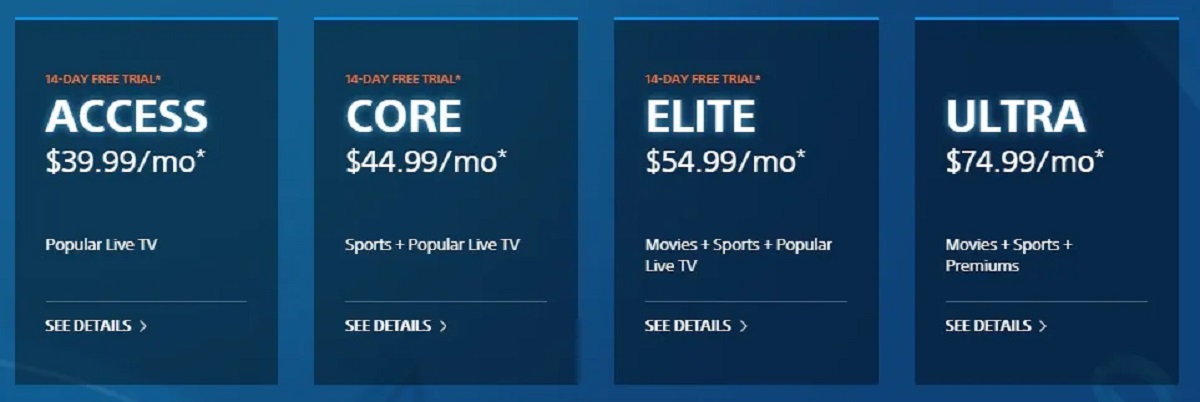
PlayStation offers various subscription services, such as PlayStation Plus and PlayStation Now, which provide access to a plethora of games, discounts, and online multiplayer features. While these subscriptions offer great value to gamers, it’s understandable that circumstances may arise where you need to cancel your subscription.
Perhaps you no longer have the time to fully enjoy the benefits of your subscription, or maybe you’ve decided to explore other gaming options. Whatever the reason, cancelling your PlayStation subscription is a straightforward process that can be completed via the PlayStation website.
In the following steps, we will guide you through the process of cancelling your PlayStation subscription, ensuring that you can make the most of your gaming experience and take control of your subscription. So, let’s dive into the steps required to cancel your PlayStation subscription.
Step 1: Go to the PlayStation website
The first step in cancelling your PlayStation subscription is to visit the official PlayStation website. Open your preferred web browser and navigate to www.playstation.com. Ensure that you are accessing the website from a device with an internet connection.
Once you have reached the homepage of the PlayStation website, you’ll find a navigation bar at the top of the page. Look for the “Sign In” option and click on it. If you don’t already have an account, you’ll need to sign up for one to proceed with the cancellation process. Simply follow the prompts to create your account.
For existing PlayStation users, enter your login credentials – your email address and password – in the appropriate fields and click on the “Sign In” button. This will take you to your PlayStation account, where you can manage your subscriptions.
Note: It’s important to ensure that you are signed in to the correct PlayStation account associated with the subscription you wish to cancel. Double-check that you have signed in with the correct email address and account details before proceeding to the next step.
Once you are signed in, you are ready to move on to the next step of the cancellation process. Remember to keep your login credentials handy throughout the process to avoid any errors or delays.
Step 2: Log into your account
Now that you have reached the PlayStation website, the next step is to log into your account. This will give you access to your account settings, including the option to manage your subscriptions.
To log into your PlayStation account, locate the “Sign In” button on the top right corner of the website’s navigation bar. Click on it to open the login page. If you are already logged in, you may be redirected to your account dashboard.
Enter the email address and password associated with your PlayStation account in the provided fields. Double-check for any typos or incorrect information to ensure a successful login. Once you have entered your login details, click on the “Sign In” button to proceed.
If you have forgotten your password, you can click on the “Forgot your password?” link below the login fields. Follow the instructions provided to reset your password and regain access to your account.
For added security, PlayStation may prompt you to complete a verification process. This could involve entering a verification code sent to your registered email address or mobile number, or answering security questions. Follow the prompts and provide the necessary information to complete the verification process and gain access to your account.
Once you have successfully logged into your account, you can move on to the next step of the cancellation process. Keep your account login information secure and avoid sharing it with others to prevent unauthorized access to your PlayStation account.
Step 3: Navigate to Account Settings
After logging into your PlayStation account, it’s time to navigate to the Account Settings section. This is where you can manage various aspects of your account, including subscriptions and payment information.
To access the Account Settings, look for your profile icon or picture, typically located at the top right corner of the PlayStation website. Click on it to open a dropdown menu. From the menu, select the option that says “Account Settings” or something similar.
Alternatively, you may find a “Settings” or “Profile” option in the navigation menu, which will lead you to the Account Settings page. Take a moment to familiarize yourself with the menu options and layout of the page.
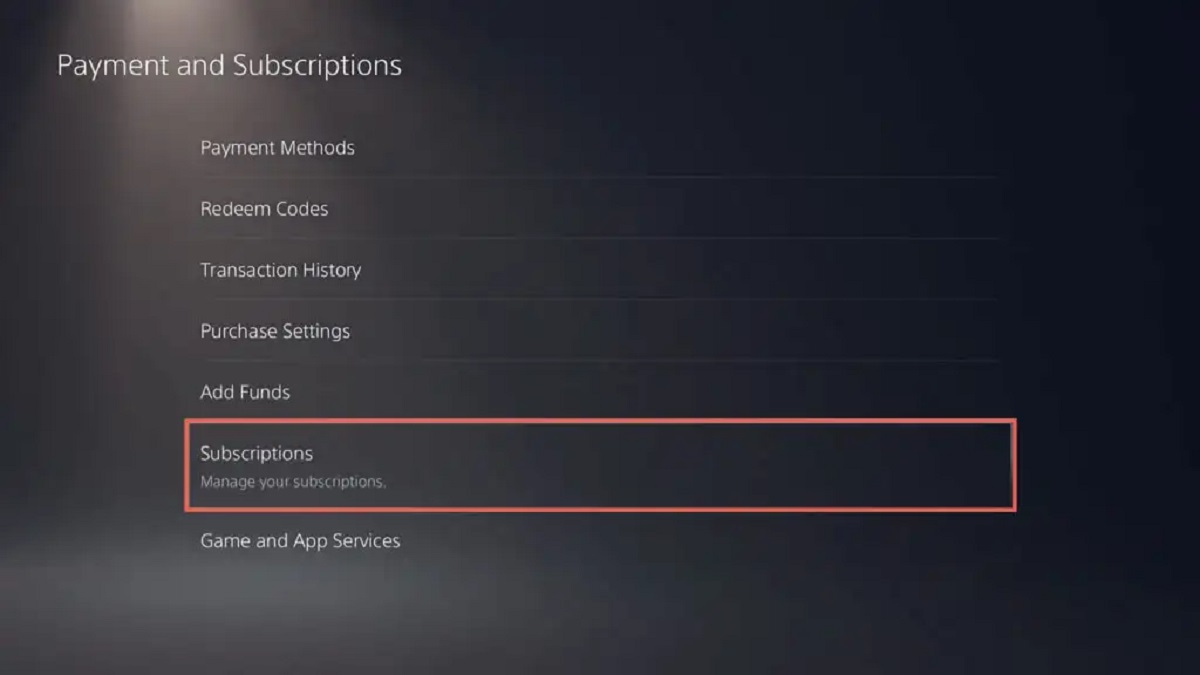
Once you are on the Account Settings page, you will see various sections and options related to your PlayStation account. These may include Personal Information, Payment Methods, Security, and more. We are interested in finding the section related to your subscriptions.
Scroll through the page or look for a sidebar menu to find the specific section related to subscriptions. The name of this section may vary, but it is typically labeled as “Subscriptions,” “Services,” or “Membership.” Click on the appropriate option to access the subscription management page.
Double-check that you are on the correct page by verifying that it displays a list of the subscriptions associated with your account. This is where you will find the PlayStation subscription that you wish to cancel.
With the Account Settings page open and the subscription section located, you are now ready to proceed to the next step of the cancellation process. Take a moment to ensure that you have chosen the correct subscription section before moving forward.
Step 4: Select Subscriptions
Once you have accessed the Account Settings page, it’s time to select the Subscriptions section. This is where you will find the specific PlayStation subscription that you want to cancel.
Look for a subsection or tab within the Account Settings page that is labeled as “Subscriptions,” “Services,” or “Membership.” Click on this option to access the area where your subscriptions are listed.
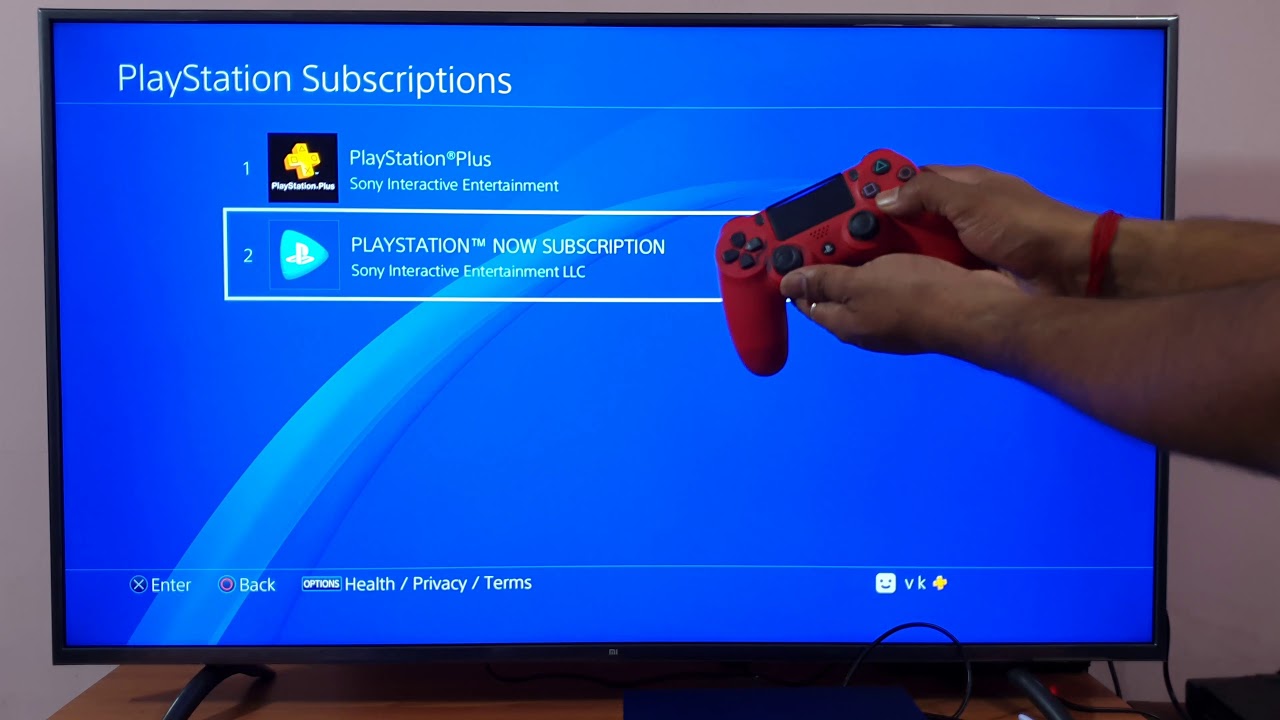
Upon entering the Subscriptions section, you should see a list of the active subscriptions associated with your PlayStation account. Take a moment to review the list and locate the specific subscription that you wish to cancel.
If you have multiple subscriptions, such as PlayStation Plus, PlayStation Now, or other services, it’s important to identify the correct one before proceeding. Ensure that you select the subscription you want to cancel by double-checking the name and details provided in the list.
It’s also worth mentioning that the Subscriptions section may provide additional information about each subscription, such as the billing cycle, expiration date, and renewal status. This can help you confirm that you are selecting the right subscription for cancellation.
Once you have identified the correct subscription, you are now ready to move on to the next step of the cancellation process. Proceed to the following step to initiate the cancellation of your PlayStation subscription.
Step 5: Identify the PlayStation subscription you want to cancel
Now that you have accessed the Subscriptions section, it’s time to identify the specific PlayStation subscription that you want to cancel. This step is crucial to ensure that you cancel the correct subscription and avoid any unintended cancellations.
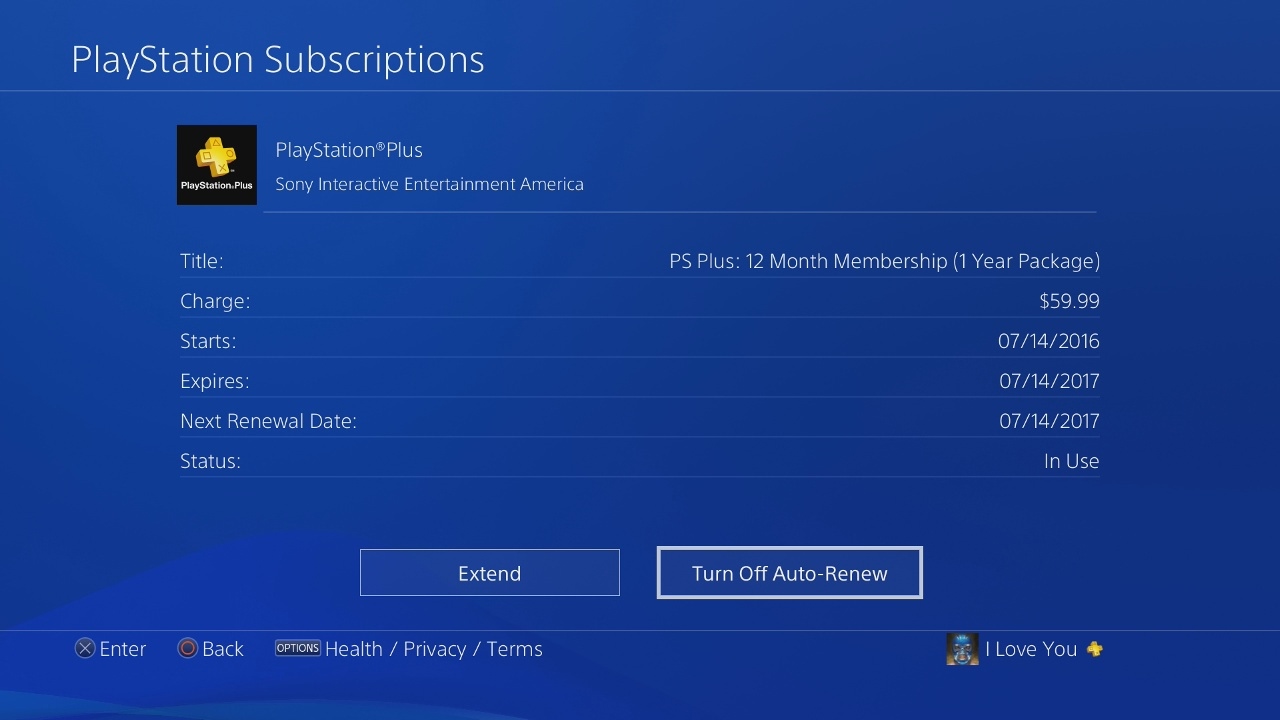
Take a moment to review the list of active subscriptions that is displayed. Each subscription should be accompanied by details such as the name, billing cycle, and expiration date.
Read through the information provided for each subscription to identify the one you wish to cancel. Pay attention to the subscription names and make sure they align with the service you want to terminate.
If you are uncertain about which subscription to cancel, you can cross-reference the subscription details with your billing statements or confirmation emails from PlayStation. This will help you confirm the name of the subscription you want to cancel.
Additionally, you may want to consider the renewal status of each subscription. If the subscription is set to auto-renew, it means that it will be automatically charged and renewed when the billing cycle ends. If you do not want to incur any further charges, make sure to identify and cancel the subscription with this setting.
Once you have identified the correct PlayStation subscription, you are ready to proceed to the next step and initiate the cancellation process. Double-check your choice to ensure that you are cancelling the intended subscription.
Step 6: Click on Cancel Subscription
After identifying the PlayStation subscription you want to cancel, it’s now time to initiate the cancellation process by clicking on the appropriate option.
Within the Subscriptions section, locate the subscription you wish to cancel. Depending on the PlayStation website’s layout and design, you may find a “Cancel” or “Cancel Subscription” button next to the subscription details. Click on this button to proceed with the cancellation.
Depending on your subscription and the PlayStation website’s interface, you may need to click on a dropdown arrow or an ellipsis (…) menu to access the cancellation option. Look for any visual cues or prompts that indicate the cancellation process.
Be cautious when clicking on the cancellation button, as this action will immediately initiate the cancellation process for the selected subscription. Double-check that you have selected the correct subscription before proceeding.
Upon clicking the cancel button, you may be directed to a confirmation page or prompted with further instructions. Follow the on-screen prompts and provide any required information to confirm the cancellation of the subscription.
Keep in mind that the cancellation process may vary depending on your specific subscription and the PlayStation website’s design. Be sure to carefully read and follow the instructions provided to ensure a successful cancellation.
Once you have clicked on the cancellation button and confirmed the cancellation, you are almost done with the process. However, it is important to verify that the cancellation was successful, which will be covered in the next step.
Step 7: Confirm the cancellation
After initiating the cancellation process for your PlayStation subscription, it is essential to confirm that the cancellation has been successfully processed. This step will help ensure that you won’t be billed for the subscription in the future.
Once you have completed the cancellation process, you may be directed to a confirmation page or receive a confirmation email from PlayStation. This confirmation message will typically include details about the cancelled subscription, such as the name, cancellation date, and any remaining active period.
Take a moment to carefully review the confirmation information to ensure that the correct subscription has been cancelled. Double-check that the details align with your intentions to avoid any confusion or misunderstandings.
If you haven’t received a confirmation message or are unsure about the status of your cancellation, you can verify the cancellation by visiting your Account Settings page once again.
Return to the Subscriptions section within your Account Settings and locate the subscription that you intended to cancel. Check if the status has changed to “Cancelled” or if there are any indications that the subscription is no longer active.
If you see that the status of the subscription has been updated to “Cancelled” or similar terminology, you can be confident that the cancellation process was successful. You will no longer be billed for or have access to the cancelled subscription.
However, if you encounter any issues or have concerns about the cancellation, it is advised to reach out to PlayStation customer support for further assistance. They will be able to verify the status of your subscription and address any queries or complications you may have encountered.
By confirming the cancellation of your PlayStation subscription, you can have peace of mind knowing that you have taken the necessary steps to stop future billing and access to the service.
Step 8: Verify the cancellation was successful
After confirming the cancellation of your PlayStation subscription, it’s important to verify that the cancellation was successfully processed. This final step will help ensure that you won’t encounter any unexpected charges or continue to have access to the subscription.
To verify the cancellation, revisit your Account Settings page and navigate to the Subscriptions section. Locate the subscription you cancelled and check its status. It should now be displayed as “Cancelled” or something similar.
If you see the cancelled status for your subscription, you can be confident that the cancellation was successful. This means that you will no longer be billed for the subscription, and your access to the service will be terminated at the end of the current billing period or immediately, depending on the terms of your subscription.
Additionally, you might receive a confirmation email from PlayStation stating the successful cancellation of your subscription. Make sure to check your email inbox, including your spam or junk folder.
If you encounter any issues or notice that the subscription status has not been updated to “Cancelled,” it is recommended to reach out to PlayStation customer support for further assistance. They will be able to investigate the issue and help ensure that the cancellation is processed correctly.
Take note of the cancellation date and any remaining active period mentioned in the confirmation email or on the Account Settings page. This information will help you keep track of when your access to the subscription will expire.
By verifying the successful cancellation of your PlayStation subscription, you can have peace of mind knowing that you have effectively ended your subscription and will no longer be charged for the service.
Conclusion
Cancelling your PlayStation subscription is a straightforward process that can be completed through the PlayStation website. By following the step-by-step guide outlined in this article, you can easily navigate the necessary menus and options to cancel your subscription.
Remember, it’s essential to double-check the subscription you want to cancel and verify the cancellation was successful. This will ensure that you won’t be billed for the subscription in the future and that your access to the service has been terminated.
If you encounter any issues during the cancellation process or have concerns about your subscription, don’t hesitate to reach out to PlayStation customer support. They are equipped to provide further assistance and address any questions or complications you may have.
Whether you’re taking a break from gaming, exploring different platforms, or simply no longer have the need for a PlayStation subscription, being able to cancel it with ease is crucial. By following the steps outlined in this guide, you can confidently cancel your PlayStation subscription and take control of your gaming experience.
Remember to stay informed about subscription renewal dates and actively manage your subscriptions to avoid any unwanted charges. Regularly reviewing your account settings and subscriptions will help you maintain control over your gaming expenses and ensure that you are only paying for the services that you truly want and enjoy.
So, go ahead and cancel your PlayStation subscription with the knowledge that you have the power to make choices that align with your gaming needs and preferences.

![How To Cancel PlayStation Plus Membership? [GUIDE]](https://robots.net/wp-content/uploads/2022/07/how-to-cancel-playstation-plus-featured-300x175.jpg)