Introduction
Welcome to our step-by-step guide on how to add a window to your PC case. Adding a window to your case can not only enhance the aesthetic appeal of your computer but also allow you to showcase your hardware and customizations. Whether you’re a gaming enthusiast looking to show off your powerful components or simply want to give your workstation a unique touch, this DIY project is a perfect way to personalize your PC.
In this guide, we will walk you through the process of adding a window to your PC case, from measuring and marking the panel to attaching the window and adding optional LED lighting. Don’t worry if you’re not familiar with DIY projects or have limited experience working with PC hardware – our detailed instructions will make it easy for you to achieve professional-looking results.
Before we begin, it’s crucial to mention that modifying your PC case may void any existing warranties. Therefore, it’s essential to proceed with caution and ensure you have the necessary tools and materials to complete the project. Additionally, keep in mind that this guide is general in nature and may not apply to all PC case models. Always refer to your case manufacturer’s instructions and guidelines for specific details.
Now, let’s gather our tools and materials and dive into the process of adding a window to your PC case. Follow each step carefully, and before you know it, you’ll have a sleek and personalized PC setup that will make heads turn.
Tools and Materials Needed
Before getting started, it’s important to gather the necessary tools and materials to ensure a smooth and successful project. Here are the key items you will need:
- PC case: Make sure you have a compatible case that allows for the addition of a window. Check the manufacturer’s specifications or manual for confirmation.
- Marker or pencil: You’ll need a marker or pencil to measure and mark the area where the window will be placed.
- Measuring tape or ruler: To accurately measure the dimensions of the window opening and ensure a precise fit.
- Acrylic or tempered glass sheet: This will serve as the window panel. Acrylic is recommended for its durability and ease of cutting, while tempered glass provides a more premium look.
- Protective gloves and goggles: To ensure your safety while cutting and handling the materials.
- Computer case screws: Some cases may require additional screws to secure the window panel in place. Check your case manual for the specific screw type and size.
- Cutting tools: Depending on the material you choose for the window panel, you’ll need appropriate cutting tools. A Dremel rotary tool or jigsaw is typically used for acrylic, while a glass cutter or specialized glass cutting tool is needed for tempered glass.
- Sandpaper or file: To smooth and sand the edges of the cut window opening.
- Adhesive or double-sided tape: Necessary for attaching the window panel to the case. Choose a strong adhesive or double-sided tape designed for use on PC cases.
- Optional: LED lighting kit: If you want to further enhance the aesthetics of your PC, consider adding LED lighting inside the case. You will need an LED lighting kit with appropriate connectors and adhesive or mounting brackets.
Once you have all the tools and materials ready, you’re now prepared to move on to the next step: measuring and marking the window opening on your PC case.
Step 1: Measure and Mark
The first step in adding a window to your PC case is to measure and mark the area where the window will be placed. This ensures that the window is positioned correctly and fits snugly within the case. Follow these steps:
- Prepare your PC case by removing any components or cables that might obstruct your access to the side panel.
- Take your measuring tape or ruler and measure the dimensions of the side panel where you want the window to be located. Typically, the window is placed towards the center of the panel.
- Use a marker or pencil to mark the outline of the window on the side panel. Ensure that the marking is accurate and symmetrical.
- Consider any additional design elements you want to incorporate, such as rounded corners or notches. Adjust the markings accordingly to achieve your desired design.
- Double-check your measurements and markings to ensure they are correct. This will help you avoid any mistakes during the cutting process.
Accuracy is crucial in this step, so take your time and measure twice to ensure your markings are precise. It’s also a good idea to visualize how the window will look on your case before proceeding to the next step. This will allow you to make any necessary adjustments and ensure you’re satisfied with the placement and size of the window.
Once you have measured and marked the window opening on your PC case, you’re ready to move on to the next step: selecting a window design that suits your style and preferences.
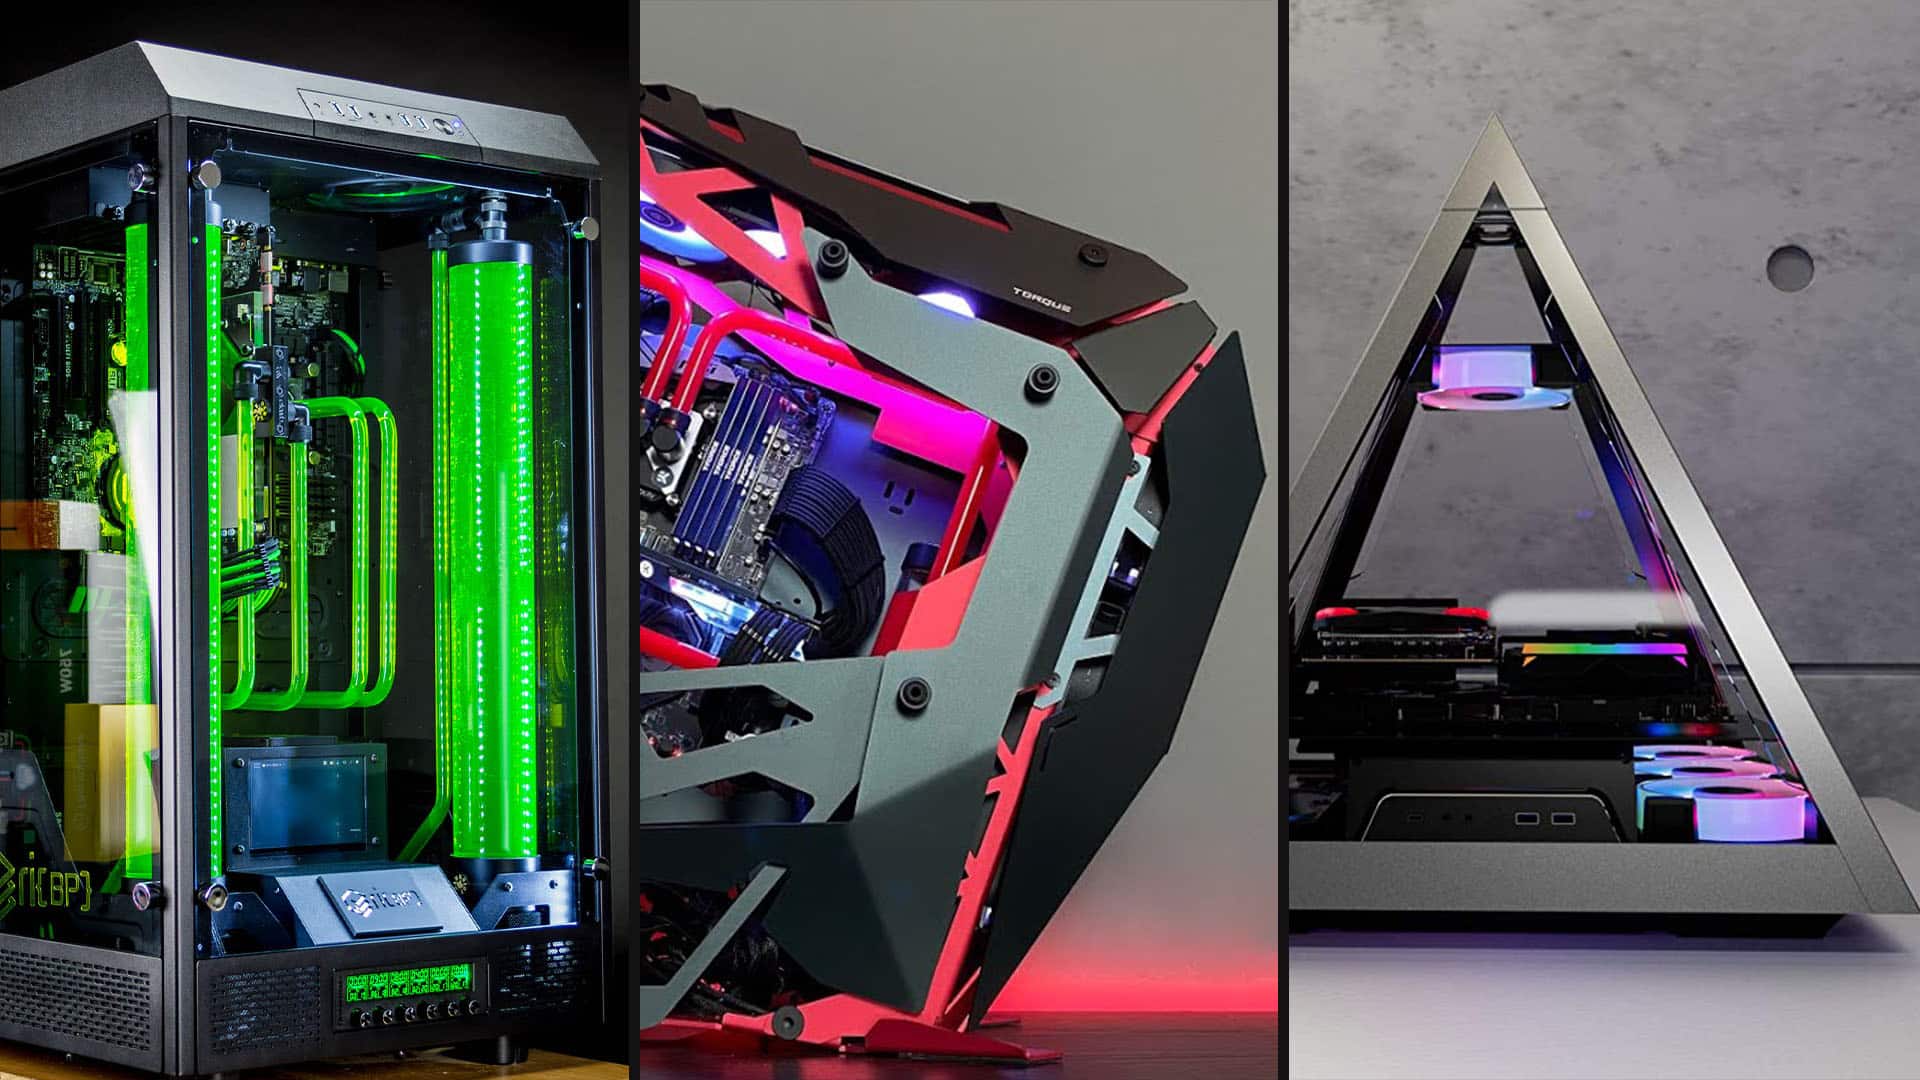
Step 2: Choose a Window Design
Now that you have the window opening marked on your PC case, it’s time to decide on the design of the window itself. The design you choose will determine the shape and style of the window, adding a unique touch to your PC. Here are a few popular window design options to consider:
- Rectangular: This is the most common window shape, providing a clean and straightforward look. It’s a classic choice that complements a range of case styles.
- Circular: If you prefer a more unconventional look, a circular window adds a touch of modernity and can highlight certain components, such as CPU coolers or fan setups.
- Square or Rounded Corners: These designs offer a balance between the clean lines of the rectangular shape and the softer look of the circular shape. Square windows with rounded corners can add a touch of elegance to your PC.
- Custom Shapes: If you have specific design preferences or want to showcase a unique logo or symbol, you can opt for a customized window shape. This allows for more personalization and creativity.
Consider the overall aesthetics of your PC case and your personal style when selecting a window design. Think about how the window will complement or accentuate the hardware and any other customizations you have in mind. Don’t be afraid to get creative and think outside the box!
Once you have chosen your window design, it’s time to move on to the next step: removing the side panel of your PC case. This will allow you to work on the panel more easily and safely.
Step 3: Remove the Side Panel
Before you can begin working on adding the window to your PC case, you’ll need to remove the side panel. This step will give you better access to the panel and make it easier to work on. Follow these instructions to safely remove the side panel:
- Before starting, ensure that your PC is powered off and unplugged. This will prevent any accidental damage or injury.
- Locate the screws or fasteners that hold the side panel in place. These are typically located at the back of the case.
- Use a screwdriver or the appropriate tool to unscrew and remove the screws.
- If there are any additional latches or clips securing the panel, release them by pressing or sliding them to unlock the side panel.
- Gently pull or slide the side panel away from the case, taking care not to damage any internal components.
It’s important to handle the side panel with care to avoid any accidental scratches or damage. Place the panel on a soft, clean surface to keep it protected during the next steps of the process.
Remember to keep track of the screws or fasteners that were used to secure the side panel. This will make it easier to reattach the panel later on. It’s a good idea to keep them in a safe place, such as a small container or bag.
Once the side panel has been safely removed, you’re now ready to prepare it for the window installation. Proceed to the next step to learn how to properly prepare the panel.
Step 4: Prepare the Side Panel
After removing the side panel from your PC case, it’s time to prepare it for the installation of the window. This step involves cleaning the panel and ensuring that it’s ready to accommodate the window securely. Follow these steps to properly prepare the side panel:
- Inspect the side panel for any dust, debris, or smudges. Wipe it down with a soft, lint-free cloth or microfiber cloth to remove any dirt or fingerprints.
- If there are stubborn stains or marks on the panel, you can use a mild detergent diluted in water to clean it. Be sure to dry the panel thoroughly before proceeding.
- Take a close look at the area where the window will be installed. Check for any sharp edges, screws, or other obstructions that may interfere with the window fitting properly.
- If there are any sharp edges, use sandpaper or a file to carefully smooth them down. This will ensure a clean and safe installation.
- If necessary, remove any screws or components that may obstruct the window installation. Keep them safely aside for reattachment later.
It’s important to have a clean and smooth surface for the window to be attached securely. By properly preparing the side panel, you’re ensuring that the window will fit neatly without any hindrances.
Once you have cleaned and prepared the side panel, it’s time to move on to the next step: cutting out the window. In the following step, we’ll guide you through the process of creating the opening for the window in the side panel.
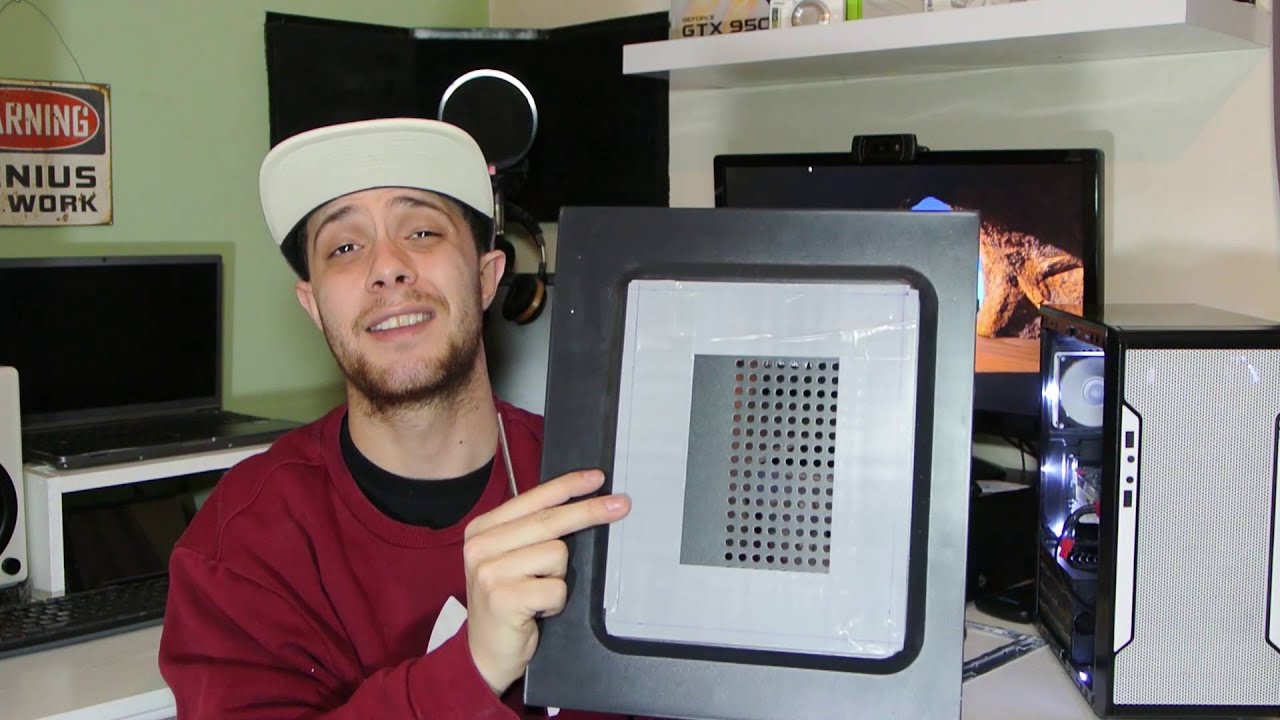
Step 5: Cut Out the Window
Now that the side panel of your PC case is prepared, it’s time to cut out the window. This step requires precision and careful handling of the cutting tools. Follow these instructions to create the opening for the window:
- Put on your protective gloves and goggles to ensure your safety during the cutting process.
- If you’re working with an acrylic panel, use a Dremel rotary tool or jigsaw with an appropriate cutting blade. For tempered glass, a glass cutter or specialized glass cutting tool is required.
- Start cutting along the marked outline of the window. Take your time and proceed slowly to maintain accuracy.
- For acrylic panels, apply gentle pressure and follow the marked outline. Make sure to keep the cutting tool steady and straight for clean cuts.
- If working with tempered glass, score the glass along the marked outline with the glass cutter. Apply firm and even pressure, ensuring the score line is deep enough.
- After scoring, place the glass on the edge of a solid surface with the scored line hanging over the edge. Apply pressure downwards to break along the scored line.
- Once the window opening is cut, remove any debris or excess material carefully.
While cutting, be cautious not to apply excessive force or rush the process. Take breaks if needed to maintain focus and prevent any accidents. It’s always better to proceed slowly and make precise cuts rather than rushing and making mistakes.
After cutting the window opening, inspect the edges to ensure they are smooth and free from any roughness. If needed, use sandpaper or a file to carefully smooth down any sharp or uneven edges.
Now that the window opening is cut and prepared, you’re ready to move on to the next step: smoothing and sanding the edges for a professional finish.
Step 6: Smooth and Sand the Edges
After cutting out the window on your PC case’s side panel, it’s important to smooth and sand the edges to achieve a professional and refined finish. This step will not only enhance the appearance of the window but also ensure safety by eliminating any sharp or rough edges. Follow these steps to smooth and sand the edges:
- Put on your protective gloves and goggles to protect yourself during this process.
- Using sandpaper or a file, gently smooth the edges of the cut window opening. Start with a coarse grit sandpaper (around 120 or 150) and gradually progress to a finer grit (around 220 or 320).
- Hold the sandpaper firmly and work in a circular or back-and-forth motion along the edges. Take care to maintain an even pressure and keep the sanding motion steady.
- Continue sanding until the edges feel smooth and there are no noticeable bumps or sharp points.
- Once you have smoothed the edges, use a damp cloth to wipe away any dust or debris from the sanding process.
- Inspect the edges carefully to ensure they are smooth and free from any roughness. If needed, repeat the sanding process on any areas that still feel rough or uneven.
Take your time during this step to ensure that the edges are properly smoothed. A neat and polished window opening not only enhances the overall look of your PC case but also prevents any accidental cuts or injuries.
Once you are satisfied with the smoothness of the edges, you can proceed to the next step: attaching the window panel to the side panel of the case.
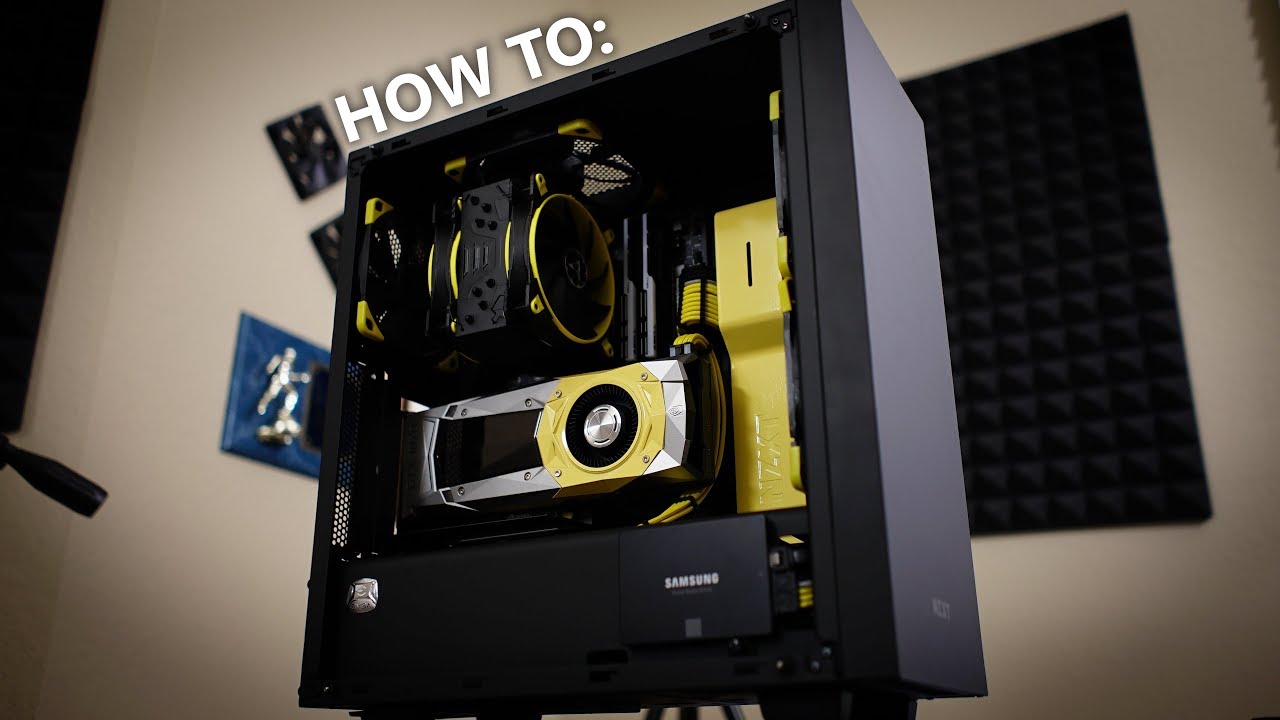
Step 7: Attach the Window
With the window opening cut and the edges smoothed, it’s time to attach the window panel to the side panel of your PC case. This step will secure the window in place and give your case a sleek and professional appearance. Follow these steps to properly attach the window:
- Place the window panel over the cut window opening on the side panel. Ensure that it aligns with the marked outline and sits flush against the panel.
- Depending on your PC case model, you may need to use additional screws or fasteners to securely attach the window. Refer to your case manufacturer’s instructions for specific details.
- Insert the screws or fasteners through the pre-drilled holes on the window panel and into the corresponding holes on the side panel.
- Tighten the screws or fasteners gently, ensuring that the window remains aligned and securely fastened to the side panel. Avoid over-tightening, as it may damage the window or side panel.
- If your case utilizes adhesive or double-sided tape to attach the window, carefully apply the adhesive or tape along the edges of the cut window opening.
- Press the window firmly against the adhesive or tape, ensuring that it adheres evenly and securely to the side panel.
Make sure to follow the specific instructions provided by your PC case manufacturer for attaching the window. Some cases may require additional steps or have specialized mechanisms for securing the window panel.
Once the window is attached securely, take a moment to inspect the installation and ensure that it looks clean and professional. Check that the window is aligned properly and that there are no gaps or loose edges.
With the window now attached, your PC case is one step closer to its final transformation. In the next step, we’ll cover an optional enhancement you can consider: adding LED lighting for an eye-catching effect.
Step 8: Optional: Add LED Lighting
If you want to take your PC case customization to the next level, consider adding LED lighting to enhance the overall aesthetic appeal. LED lighting can create an eye-catching effect and highlight the components within your case. Follow these steps to add LED lighting:
- Choose an LED lighting kit that suits your preferences and case design. There are various options available, such as RGB lighting strips, LED fans, or individual LED modules.
- Plan the placement of the LED lighting within your case. Consider highlighting specific components, creating an ambient glow, or illuminating the interior with vibrant colors.
- Ensure that the LED lighting kit comes with the necessary connectors and mounting brackets for easy installation.
- Follow the manufacturer’s instructions to connect and mount the LED lighting components. This may involve connecting the LEDs to a controller, securing the lighting strips or modules with adhesive or mounting brackets, and routing the wiring discreetly within the case.
- Test the LED lighting to ensure it is functioning correctly and adjust the settings or colors as desired.
- Once you are satisfied with the placement and effects of the LED lighting, tidy up any loose wires and secure them neatly using cable ties or clips.
Remember to take caution when working with electrical components and ensure that your PC case is powered off and unplugged during the installation process. If you are unsure about handling the wiring or electrical connections, consult the instructions provided with the LED lighting kit or seek assistance from a professional if needed.
LED lighting can add a dynamic and visually appealing element to your PC case, elevating its overall appearance. Experiment with different lighting effects to create a customized look that suits your style and preferences.
In the final steps, we’ll guide you through reattaching the side panel and adding some finishing touches and safety precautions to complete the process.
Step 9: Reattach the Side Panel
Now that you have successfully added the window and any optional LED lighting to your PC case, it’s time to reattach the side panel. Reattaching the side panel will secure the components inside the case and provide a clean and finished look. Follow these steps to reattach the side panel:
- Ensure that all cables and components inside the case are properly organized and secured.
- Position the side panel carefully, aligning it with the case’s frame.
- Gently slide or push the panel back into place, ensuring that it fits snugly and flush with the rest of the case.
- If your case uses screws to secure the side panel, locate the screw holes and insert the screws accordingly. Use the appropriate tool to tighten the screws, applying gentle pressure to avoid over-tightening.
- If your case uses latches or clips, engage them to securely lock the side panel in place.
- Double-check that the side panel is properly attached and there are no gaps or misalignments.
It’s important to ensure that the side panel is securely reattached to prevent any dust or debris from entering the case and to maintain proper airflow for cooling.
Once the side panel is in place, take a moment to admire your work and the transformation of your PC case. The added window and any LED lighting bring a personalized and visually appealing touch to your setup.
In the final step, we’ll cover some essential final touches and safety precautions to complete the process and ensure the longevity and safety of your modified PC case.
Step 10: Final Touches and Safety Precautions
After completing the installation of the window and any optional LED lighting, there are a few final touches and safety precautions to consider to ensure the longevity and safety of your modified PC case. Follow these steps to wrap up the process:
- Inspect the window and the overall appearance of your PC case. Check for any loose screws, wires, or components that may require adjustment.
- Clean your PC case, including the window panel, using a soft, lint-free cloth. Keep the case free from dust and debris to maintain optimal cooling performance.
- Regularly monitor the temperature of your hardware to ensure proper cooling. If necessary, adjust the fan speeds or consider additional cooling solutions.
- Ensure that all cables inside the case are neatly routed and secured. Use cable ties or clips to keep the cables organized and prevent them from obstructing airflow or tangling.
- Consider adding dust filters to the intake areas of your case to minimize the accumulation of dust and extend the lifespan of your components.
- Periodically inspect the window panel and LED lighting for any signs of wear or damage. Replace any worn-out components to maintain optimal performance and safety.
- Adhere to the safety instructions provided by the manufacturer for any LED lighting or electrical components. Be cautious when handling or modifying any electrical connections.
- Remember that modifying your PC case may void any existing warranties. Take necessary precautions and follow manufacturer guidelines to ensure this does not impact your warranty.
By following these final touches and safety precautions, you can ensure that your modified PC case remains in excellent condition and provides a visually appealing and safe environment for your hardware.
Congratulations! You have successfully added a window to your PC case, giving it a unique and personalized look. Enjoy showcasing your hardware and customizations, and impress others with your attention to detail and creativity. Now, it’s time to power on your PC and enjoy the sleek and eye-catching design you’ve achieved.
Conclusion
Adding a window to your PC case is a fantastic way to showcase your hardware and express your personal style. Throughout this step-by-step guide, we have walked you through the process of adding a window to your PC case, from measuring and marking the panel to attaching the window and adding optional LED lighting. By following these instructions and taking necessary precautions, you can achieve professional-looking results and create a visually appealing PC setup.
Remember to gather all the necessary tools and materials before starting the project and refer to your case manufacturer’s instructions for any specific details. Take your time during each step, ensuring accuracy and precision in measurements and cuts. Smooth and sand the edges to achieve a polished finish, and secure the window panel properly to the side panel. If you choose to add LED lighting, follow the manufacturer’s instructions for installation and enjoy the enhanced visual effects.
As you complete the process, don’t forget about the final touches and safety precautions. Regularly maintain and inspect your PC case, keeping it clean and free from dust. Monitor the temperature and airflow to ensure optimal cooling for your hardware. Adhere to safety guidelines and be cautious when handling electrical components. Remember, modifying your PC case may impact warranties, so take necessary precautions and follow manufacturer guidelines.
With the window added to your PC case, you’ve transformed its appearance and created a stunning centerpiece for your setup. Embrace the personalized touch and enjoy proudly showcasing your hardware while enjoying a unique and visually captivating PC experience.