Introduction
Welcome to the world of Kahoot, where learning and fun go hand in hand! If you’ve ever wanted to create your own interactive game or quiz for educational or entertainment purposes, then Kahoot is the perfect platform for you. Whether you’re a teacher, a student, or just someone who loves games, Kahoot provides an engaging and interactive way to share knowledge and have a great time. In this article, we’ll guide you through the process of making your own Kahoot game from start to finish.
Kahoot is a game-based learning platform that allows users to create and play quizzes, discussions, surveys, and more. With its easy-to-use interface and customizable features, Kahoot enables users to design interactive games that cater to their specific learning objectives. Whether you’re looking to reinforce concepts in the classroom, assess knowledge, or simply have some quality entertainment, Kahoot has got you covered.
Creating your own Kahoot game is a straightforward process that can be done by anyone, regardless of technical expertise. By following a few simple steps, you’ll be able to design a game that is tailored to your needs and preferences. So, let’s dive into the world of Kahoot and explore how you can make your own game that will captivate and engage your audience.
To get started, the first thing you’ll need to do is sign up for a Kahoot account. This will grant you access to all the features and functionality needed to create and host your own games. Once you have your account set up, you can proceed to the next step of choosing a game template that suits your needs. Are you ready to unleash your creativity? Let’s begin!
Step 1: Sign up for Kahoot
The first step in creating your own Kahoot game is to sign up for a Kahoot account. Signing up is simple and only takes a few moments. Here’s how you can do it:
- Go to the Kahoot website (www.kahoot.com) and click on the “Sign up” button located at the top right corner of the page.
- You will be presented with two options: “For work” and “For school.” Choose the option that best suits your needs.
- If you choose “For work,” you’ll be prompted to enter your email address and create a password. Fill in the required information and click on the “Get started” button.
- If you choose “For school,” you’ll need to provide your school email address and create a password. Complete the necessary information and click on the “Get started” button.
- Once you’ve completed the sign-up process, you’ll receive a confirmation email. Open the email and click on the confirmation link to verify your account.
That’s it! You’re now ready to start creating your own Kahoot game. With a Kahoot account, you’ll have access to a wide range of features, such as customizable game templates, the ability to add your own questions and answers, multimedia integration, and much more.
Signing up for Kahoot not only allows you to create games but also gives you the opportunity to join games created by others. You can explore a vast library of educational games and quizzes created by teachers, students, and educators worldwide. So, whether you’re an educator looking to engage your students with interactive learning or someone who enjoys challenging quizzes, Kahoot has something for everyone.
Now that you have successfully signed up for Kahoot, let’s move on to the next step: choosing a game template. Ready to dive deeper into the world of Kahoot? Let’s continue!
Step 2: Choose a game template
Now that you have signed up for Kahoot, it’s time to choose a game template that will serve as the foundation for your own custom game. Kahoot offers a variety of pre-designed game templates that make it easy to create engaging and interactive quizzes or surveys. Here’s how you can choose a game template:
- Log in to your Kahoot account and click on the “Create” button located at the top right corner of the page.
- You will be taken to the game creation screen, where you have a couple of options. You can either choose a pre-made template from the collection of Kahoot templates or start from scratch by selecting the “Blank Kahoot” option.
- If you choose to start from a template, browse through the available options and select the one that matches your desired theme or topic. Kahoot provides templates for multiple choice quizzes, surveys, discussions, and even puzzles.
- Once you’ve chosen a template, click on it to start customizing the game to your preferences. You can edit the title, description, and even add an image to personalize your game.
Choosing the right game template is crucial as it sets the tone and structure for your game. Whether you’re creating a game for educational purposes or simply for fun, selecting a template that aligns with your objectives will enhance the player’s experience and engagement.
Don’t worry if you can’t find a perfect template that fits your needs. With Kahoot’s intuitive interface, you can always modify and customize the template to your liking. You can add or remove questions, change the order, adjust the time limits, and so much more. The flexibility offered by Kahoot ensures that your game will be unique and tailored to your specific requirements.
Now that you have chosen a game template, it’s time to move on to the next step: adding questions and answers. Get ready to create a captivating game that will challenge and entertain your players. Let’s explore!
Step 3: Add questions and answers
With your game template selected, it’s time to add questions and answers to make your Kahoot game engaging and interactive. The questions you create will be the heart of your game, so it’s important to put thought and effort into crafting them. Here’s how you can add questions and answers:
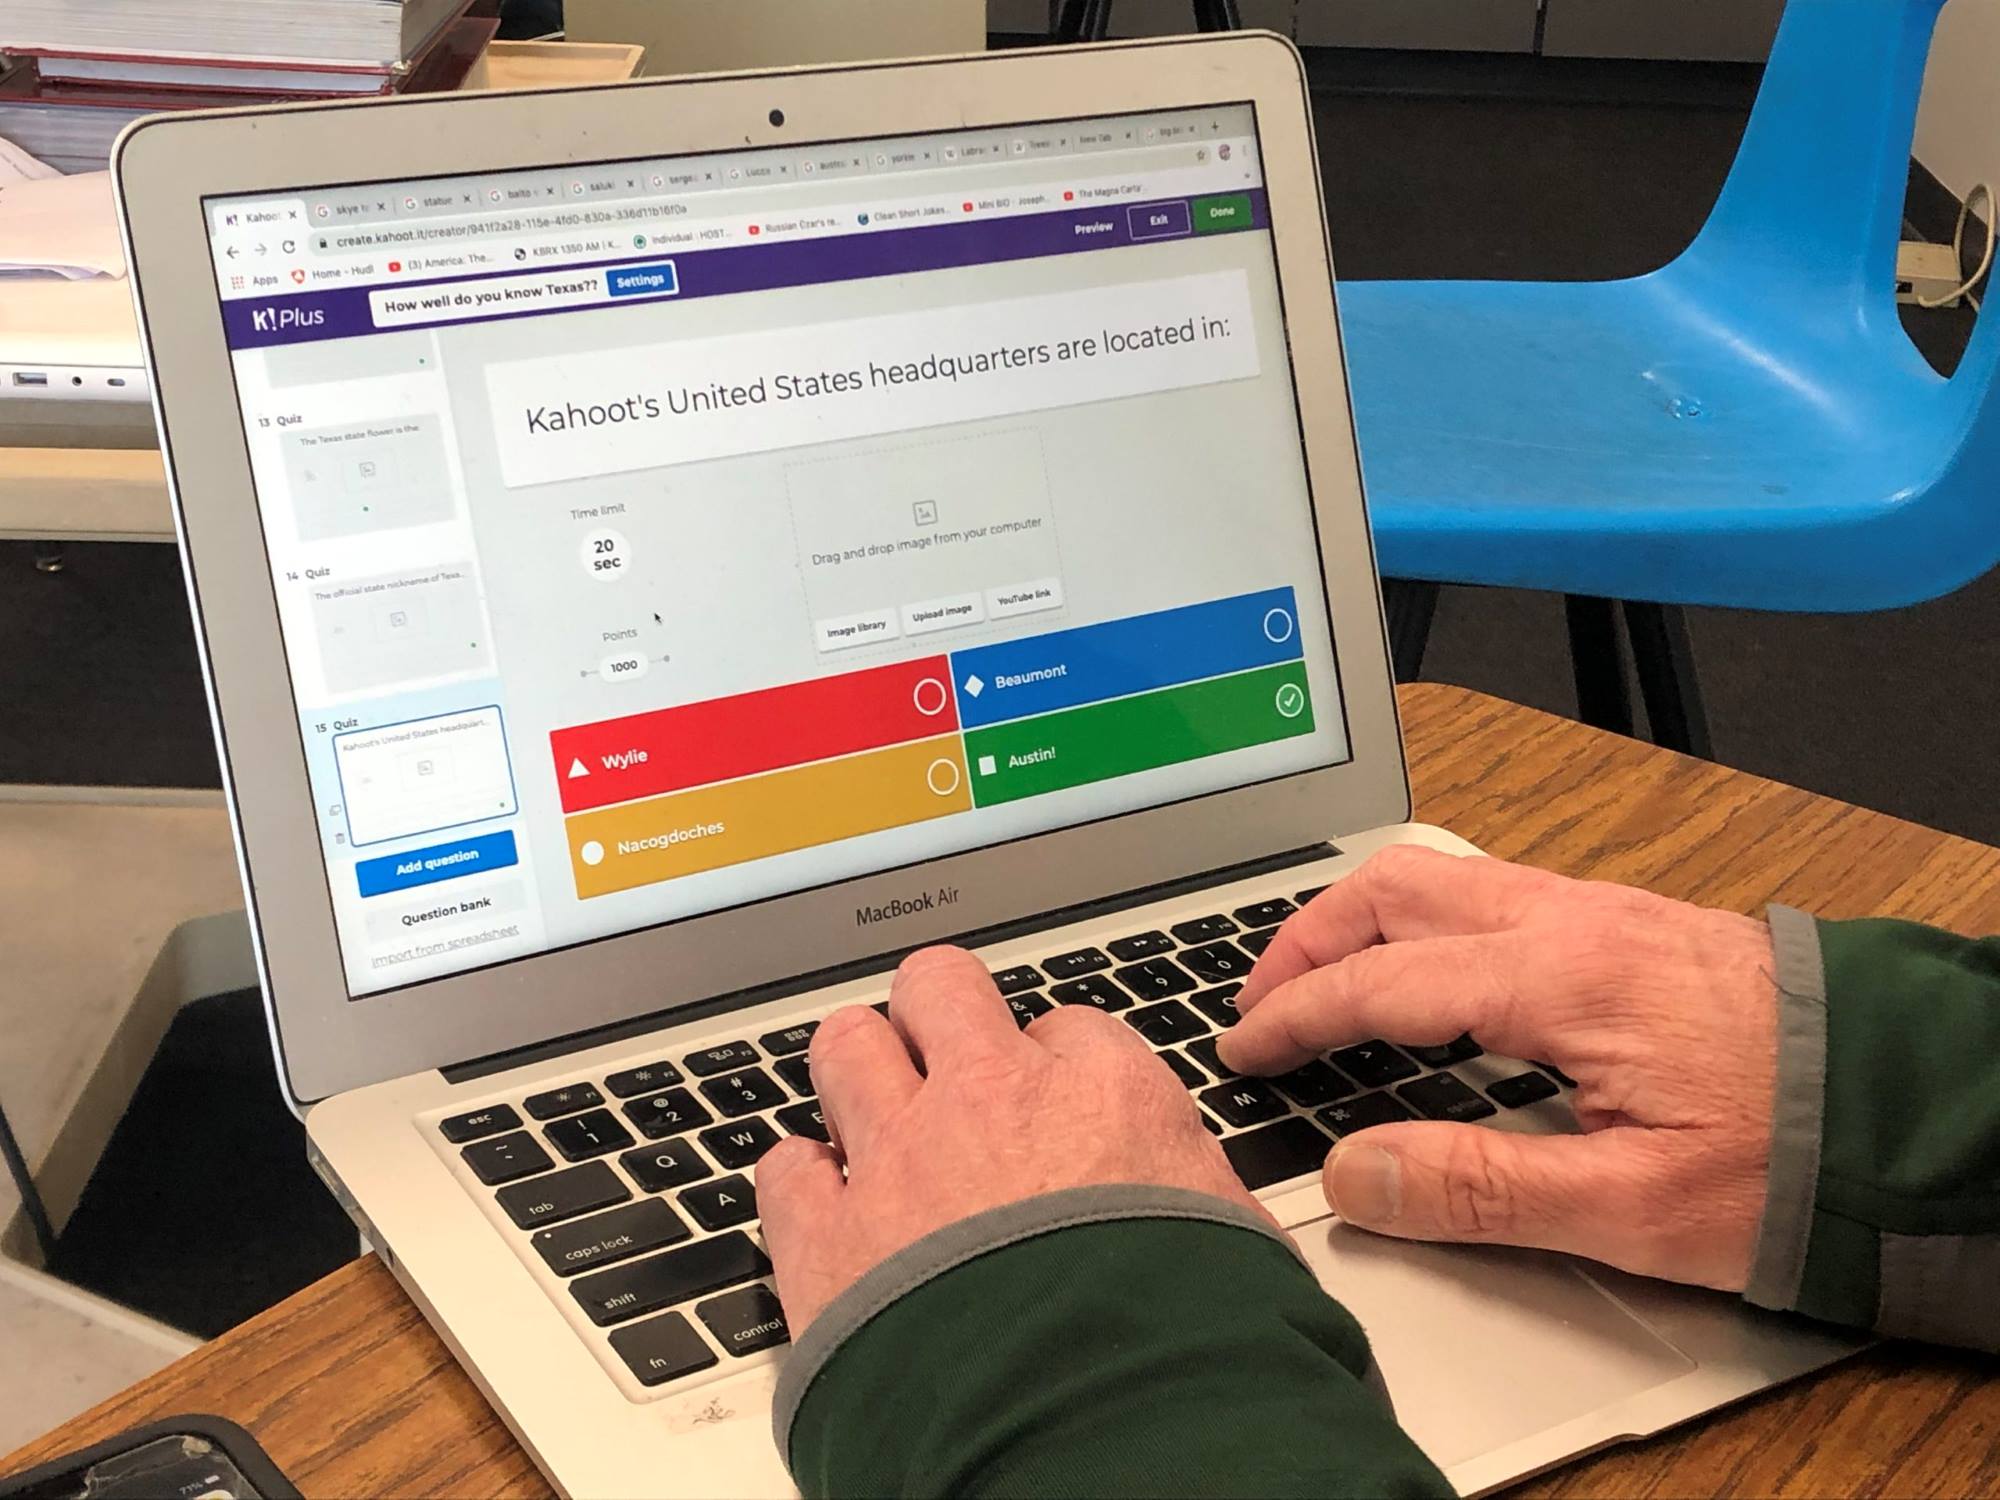
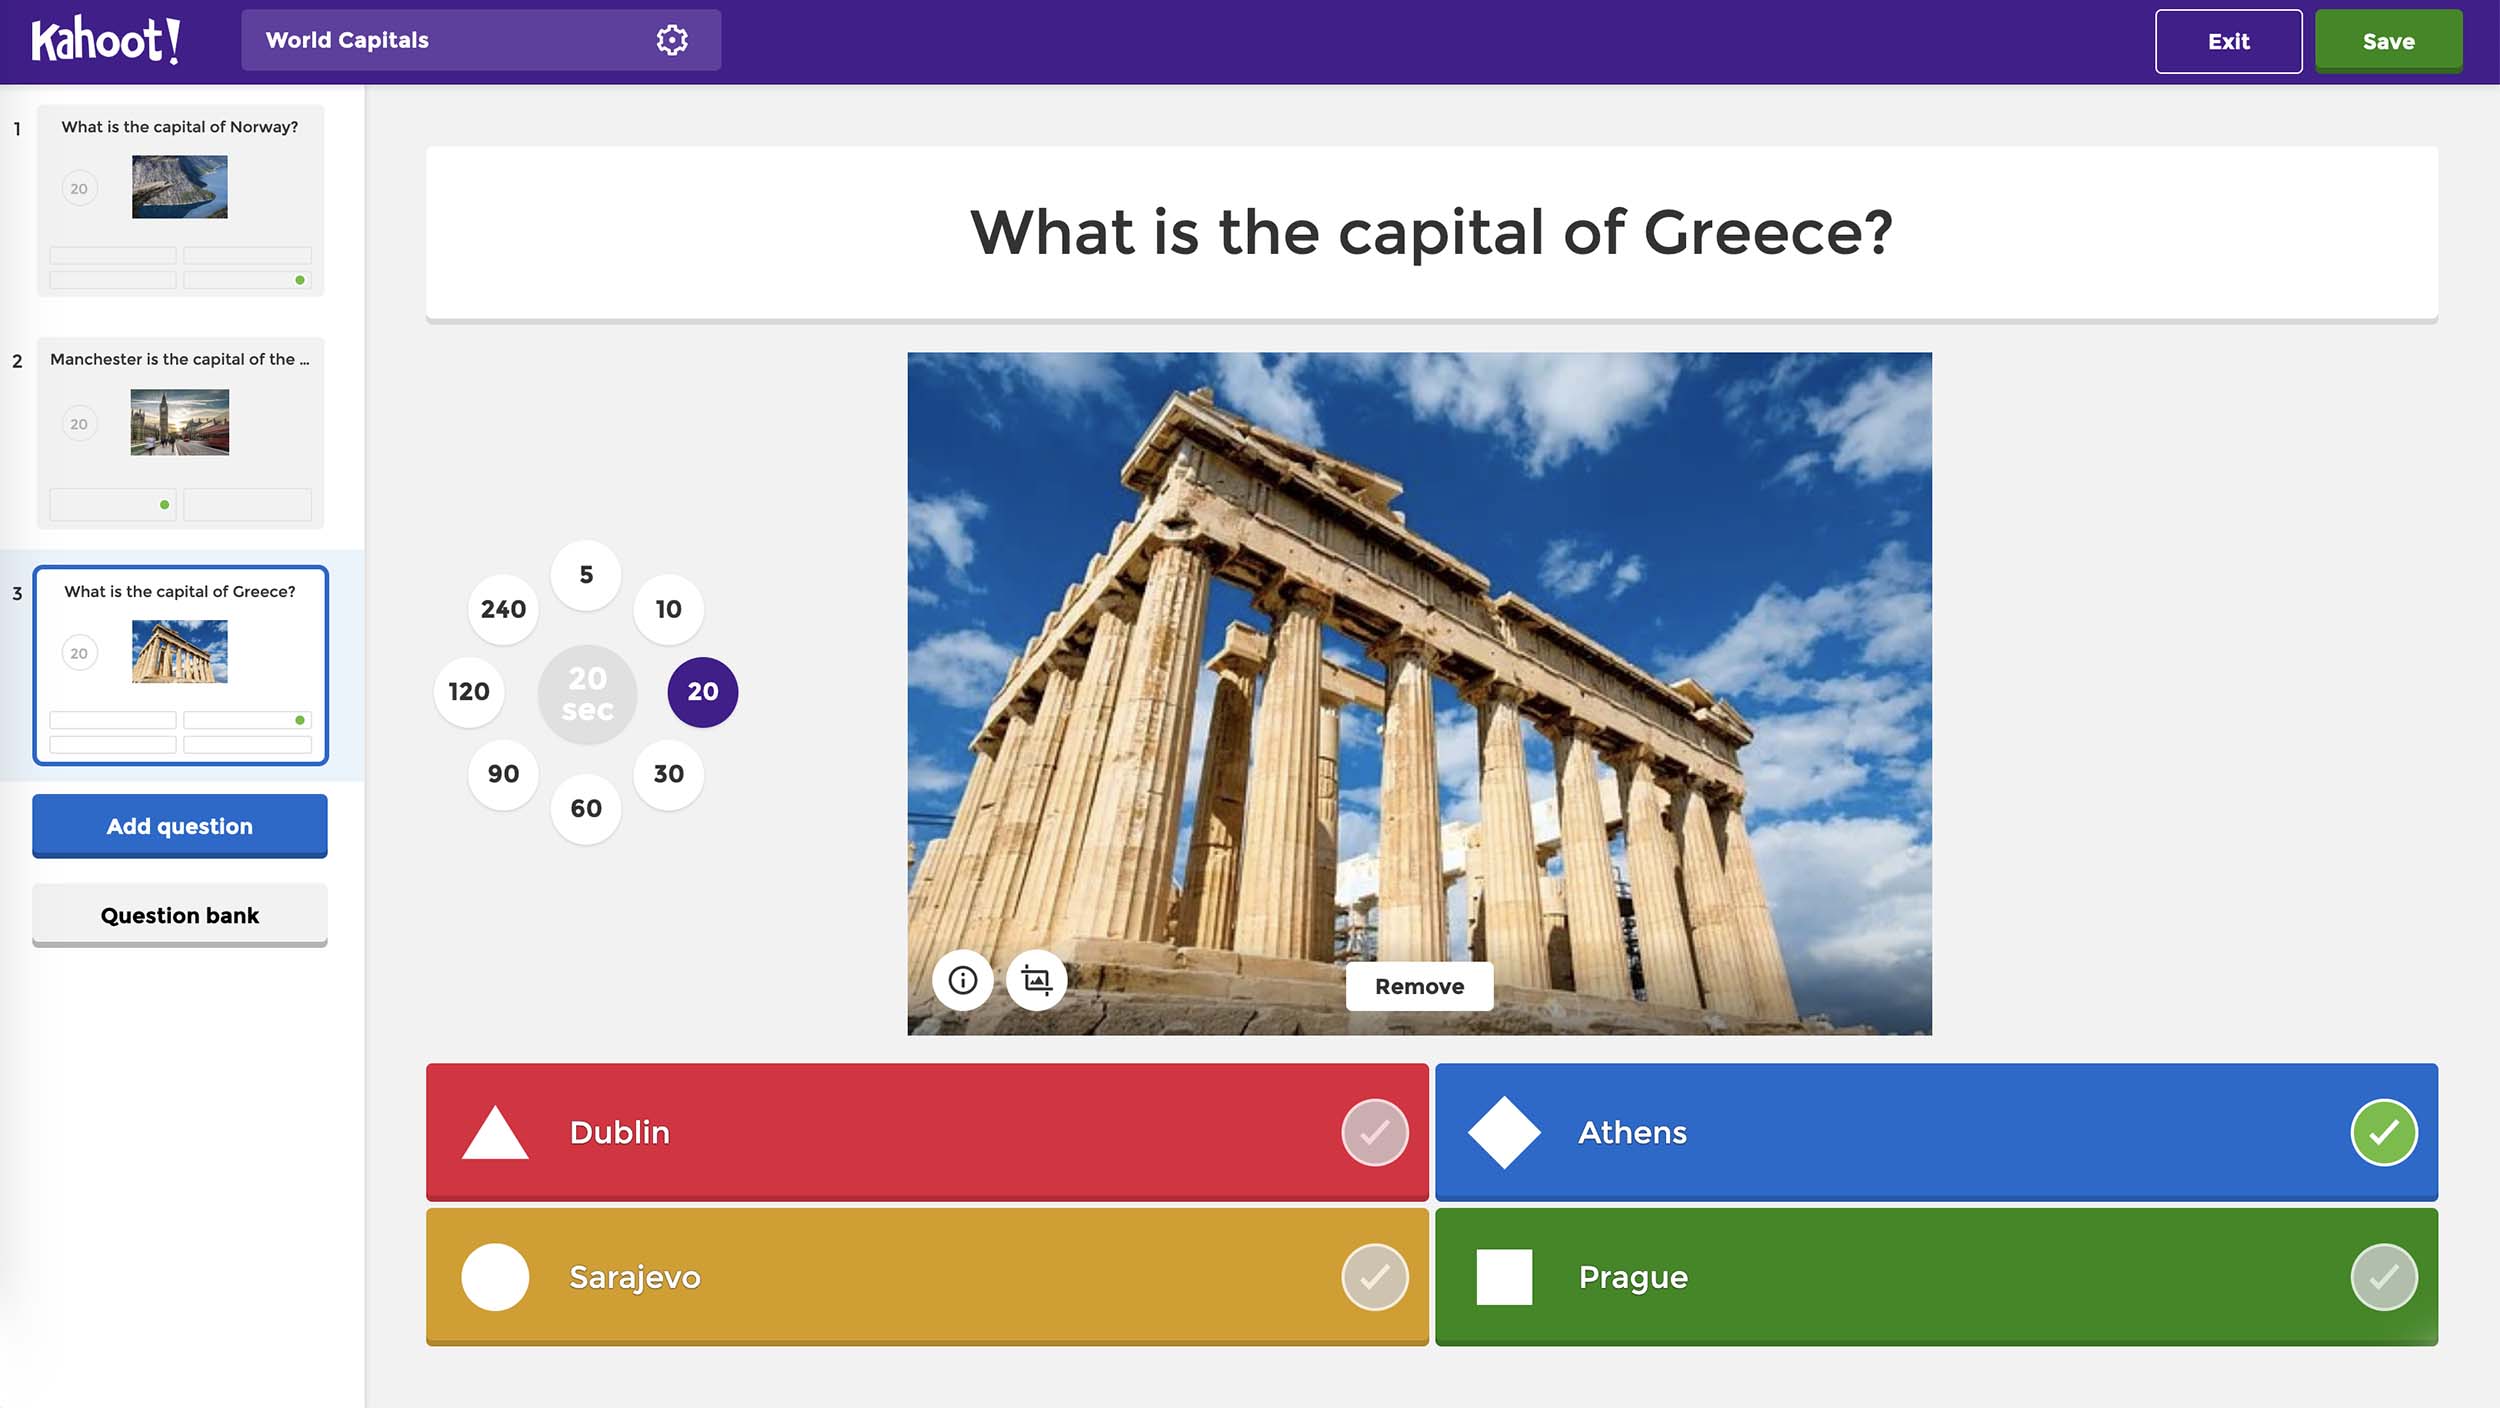
- Once you’re in the game creation screen, you’ll see an option to “Add question” or “Edit question”. Click on it to add your first question.
- In the question editor, you can enter the text of your question in the provided field. Kahoot supports various question types, including multiple choice, true or false, and open-ended.
- After entering the question, you can proceed to add the answer choices. For multiple-choice questions, Kahoot allows you to add up to four answer options. Make sure to provide both correct and incorrect choices to challenge your players.
- If you want to add more questions to your game, simply click on the “Add question” button and repeat the process. You can add as many questions as you like.
When adding questions and answers, keep in mind the objectives of your game. Are you aiming to educate, entertain, or both? Tailor your questions and answer choices accordingly, ensuring that they align with the information or knowledge you want to convey.
Additionally, you can leverage Kahoot’s power by incorporating multimedia elements into your questions. You can insert images or videos that provide visual cues or additional information to support your questions. This can enhance the overall engagement and make your game more appealing to players.
Remember, the key to a successful Kahoot game is to strike a balance between challenging and entertaining your audience. Come up with intriguing questions that encourage critical thinking and spark interest. Don’t be afraid to get creative and inject some fun into your game.
Now that you’ve added questions and answers to your game, it’s time to move on to the next step: customizing your game to make it even more exciting. Let’s dive in!
Step 4: Customize your game
Now that you have added questions and answers to your Kahoot game, it’s time to customize it and make it stand out. Kahoot offers various customization options that allow you to personalize your game and create a unique experience for your players. Here’s how you can customize your game:
- On the game creation screen, you’ll find several customization options on the right-hand side of the page. You can change the theme of your game by selecting a different color scheme, background, or layout.
- In addition to changing the visual aspects, you can also customize the game settings. You can adjust the time limits for answering questions, enable or disable the leaderboard, and even set a specific number of points for correct answers.
- If you want to add an extra layer of challenge, consider enabling the “Randomize questions” option. This will shuffle the order of the questions each time the game is played, keeping players on their toes.
- Furthermore, you can customize the player experience by deciding whether to show the correct answers after each question, displaying the player’s ranking, or allowing them to leave feedback after completing the game.
Customizing your game allows you to add your unique touch and align it with your specific goals. Whether you want to create a visually stunning game or adjust the difficulty level to cater to different audiences, the customization options provided by Kahoot empower you to create an engaging and immersive experience.
Remember, while customization is important, it’s essential to strike a balance between visual appeal and usability. Make sure that any changes you make to the game do not hinder the player’s ability to play and enjoy the experience. Keep the user experience in mind as you customize your game to ensure a seamless and enjoyable gameplay.
Now that you have customized your game, it’s time to add some visual elements to make it even more exciting. In the next step, we’ll explore how you can incorporate images and videos into your Kahoot game. Let’s continue!
Step 5: Add images and videos
Incorporating images and videos into your Kahoot game adds an extra layer of engagement and visual appeal. It allows you to create a dynamic and interactive experience for your players. Here’s how you can add images and videos to your game:
- While in the game creation screen, click on the question you want to add an image or video to.
- In the question editor, you’ll find an option to add media. Click on it to upload an image or video from your computer or choose one from the Kahoot media library.
- If you’re adding an image, make sure it is relevant to the question and enhances the understanding or appeal of the content.
- If you’re adding a video, you can provide context, demonstrate a concept, or engage players with an informative or entertaining clip.
- Repeat this process for each question where you want to include images or videos.
Adding visual elements to your Kahoot game not only makes it visually appealing but also enhances the players’ understanding and retention of the content. Visual cues can help reinforce concepts, provide context, and make the learning experience more engaging and memorable.
When adding images and videos, remember to keep them relevant and appropriate for the content of your game. Avoid using overly complex visuals that may distract or confuse the players. Keep in mind that the primary focus should be on the questions and answers, and the visual elements should supplement and enhance the learning or entertainment experience.
Kahoot provides a vast library of images and videos that you can use during the game creation process. This makes it easier to find suitable media to enhance your questions. However, if you have your own images or videos, feel free to upload and utilize them to add a personal touch to your game.
Now that you’ve added images and videos to your Kahoot game, it’s time to fine-tune the game options and details. In the next step, we’ll explore how you can set up the game to your desired specifications. Let’s continue!
Step 6: Set game options and details
Now that you have added images and videos to your Kahoot game, it’s time to set up the game options and details to create the optimal playing experience for your audience. Here’s how you can customize the game options and details:
- On the game creation screen, you’ll find a menu on the right-hand side that allows you to set various game options.
- Start by giving your game a convincing title and description. These details will give players an idea of what to expect and generate excitement.
- Next, you can modify the game’s language. You can choose from a variety of languages to accommodate different players or target specific demographics.
- Another important option is to decide how players join the game. You can allow players to join the game using a unique game PIN or enable “Ghost mode,” which keeps scores private.
- If you want to encourage collaboration and teamwork, consider enabling the “Enable Team Mode” option. This allows players to join forces and work in teams.
- Additionally, you can set a time limit for each question to create a sense of urgency and keep the gameplay fast-paced and exciting.
- One of the unique features of Kahoot is the ability to add audience participation. You can enable the “Enable Audience Participation” option, which allows players to answer questions using their own devices.
- Finally, double-check all your game settings and details to ensure everything is set up according to your preferences.
Setting up the game options and details is a crucial step in creating a smooth and enjoyable experience for your players. It allows you to customize the game based on the audience, learning objectives, and overall gameplay style you have in mind.
Take some time to consider the settings that best align with your game concept and goals. Whether you want a competitive environment, a collaborative experience, or a mix of both, Kahoot provides the flexibility to create the game you envision.
Now that you have fine-tuned the game options and details, it’s time to preview and test your game before sharing it with others. In the next step, we’ll explore how you can ensure your game is error-free and ready to be played. Let’s proceed!
Step 7: Preview and test your game
Before sharing your Kahoot game with others, it’s important to take the time to preview and test it to ensure everything is functioning as intended. Here’s how you can preview and test your game:
- On the game creation screen, click on the “Preview” button located at the top right corner of the page.
- This will launch a preview of your game, allowing you to see how it will appear to players.
- Go through each question, answer, and media element to make sure they are displayed correctly and are easily understandable.
- Test out the game options and features to ensure they are working as expected. For example, check if the time limits for each question are appropriate and the audience participation option is functioning properly.
- If you come across any errors or issues, go back to the game editor and make the necessary adjustments.
- Once you are satisfied with the preview and have resolved any issues, it’s time to test the game with a few players. Invite a small group of friends, students, or colleagues to play through your game and gather feedback.
- Pay attention to any feedback, suggestions, or concerns raised by the players. Use this opportunity to fine-tune your game and make any final adjustments before sharing it with a wider audience.
Previewing and testing your Kahoot game is a crucial step in ensuring a smooth and enjoyable experience for your players. By taking the time to identify and address any issues or improvements, you can enhance the overall quality and engagement of your game.
Consider the feedback received during the testing phase and make any necessary refinements. This iterative process will help you create a game that is polished, error-free, and ready to be shared with others.
Now that you have previewed and tested your game, it’s time for the final step: sharing your game with others. In the next section, we’ll explore how you can make your game accessible and reach a wider audience. Let’s move forward!
Step 8: Share your game with others
After creating and fine-tuning your Kahoot game, it’s time to share it with others and let them experience the excitement and learning it offers. Here’s how you can share your game:
- On the game creation screen, click on the “Share” button located at the top right corner of the page.
- You’ll have several sharing options to choose from. If you want to share the game with a specific group or class, you can generate a game PIN that players can enter to join.
- You can share the game PIN with your students, colleagues, or friends via email or your preferred communication platform.
- If you want to make your game accessible to a wider audience, you can share it on social media platforms such as Facebook, Twitter, or Instagram. Kahoot also provides embeddable game options for websites or blogs.
- Encourage others to play your game and provide feedback. Consider sharing the link to your game on education forums, community groups, or with fellow teachers to extend its reach.
- Track the engagement of your game using Kahoot’s analytics and insights. This will help you understand how well your game is received and how it can be further improved.
Sharing your Kahoot game allows others to benefit from your creativity and knowledge. Whether you’re a teacher sharing a game with your students or an individual sharing a fun quiz with friends, spreading the joy of learning and interactive gameplay is an exciting experience.
Don’t forget to encourage players to provide feedback on your game. They may have suggestions for improvement or share their positive experiences, which can motivate you to create more engaging games in the future.
Now that you have shared your Kahoot game, it’s time to sit back and enjoy as others engage with and benefit from your creation. Well done on completing all the steps to make your own game!
Conclusion
Congratulations on completing the journey of creating your own Kahoot game! By following the steps outlined in this guide, you have learned how to sign up for a Kahoot account, choose a game template, add questions and answers, customize your game, incorporate images and videos, set game options and details, preview and test your game, and finally, share it with others.
Kahoot offers an interactive and engaging platform for learning and entertainment. Whether you’re an educator, student, or enthusiast, creating your own Kahoot game opens up a world of possibilities. You can use it to reinforce educational concepts, challenge your friends with trivia quizzes, or simply have fun while learning something new.
Throughout this process, remember to personalize your game to cater to your audience and objectives. Be creative with your questions, select a template that aligns with your theme, and incorporate visuals to enhance the learning experience. Don’t forget to preview, test, and gather feedback to ensure your game is error-free and enjoyable.
Sharing your game with others allows you to spread the joy of learning and engage with a wider audience. Whether it’s in the classroom, amongst friends, or on social media, sharing your Kahoot game can spark excitement and foster a collaborative learning environment.
As you continue your journey with Kahoot, don’t be afraid to explore new features, experiment with different templates, and continue refining your game creation skills. The possibilities are endless, and with each game you create, you’ll gain more confidence and expertise in designing interactive and engaging experiences.
Now that you have the knowledge and tools to create your own Kahoot game, get ready to captivate and educate your players. So, go ahead, unleash your creativity, and start creating your very own Kahoot game today!