Introduction
Welcome to the world of electronics where the old meets the new! If you’re wondering how to hook up a VCR to a smart TV, you’ve come to the right place. While VCRs may seem like relics from the past, they can still be used to play those old VHS tapes that hold treasured memories.
Smart TVs, on the other hand, offer a plethora of modern features, such as internet connectivity, streaming services, and high-definition displays. By combining the two, you can enjoy the best of both worlds – relive your favorite VHS tapes on a cutting-edge smart TV.
However, the process of connecting a VCR to a smart TV can be a bit confusing, given the differing technologies involved. Don’t worry, though! In this guide, we will walk you through the steps required to make the connection and start watching those nostalgic tapes on your smart TV.
Before we dive into the steps, it’s important to note that there are several types of connections available, depending on the inputs and outputs of your devices. The most common types include HDMI, composite, and component connections. The specific connection method will depend on the available ports on both your VCR and smart TV.
Whether you’re attempting this for the first time or just need a refresher, fear not! We will provide you with comprehensive instructions and suggestions for troubleshooting common issues that may arise. By the end of this guide, you’ll be well-equipped to connect your VCR to your smart TV and relive those cherished memories in no time.
Step 1: Determine the type of connection
Before you can start hooking up your VCR to your smart TV, you need to determine the type of connection that is suitable for your devices. This step involves identifying the available ports on both your VCR and smart TV and understanding which cables and adapters are needed.
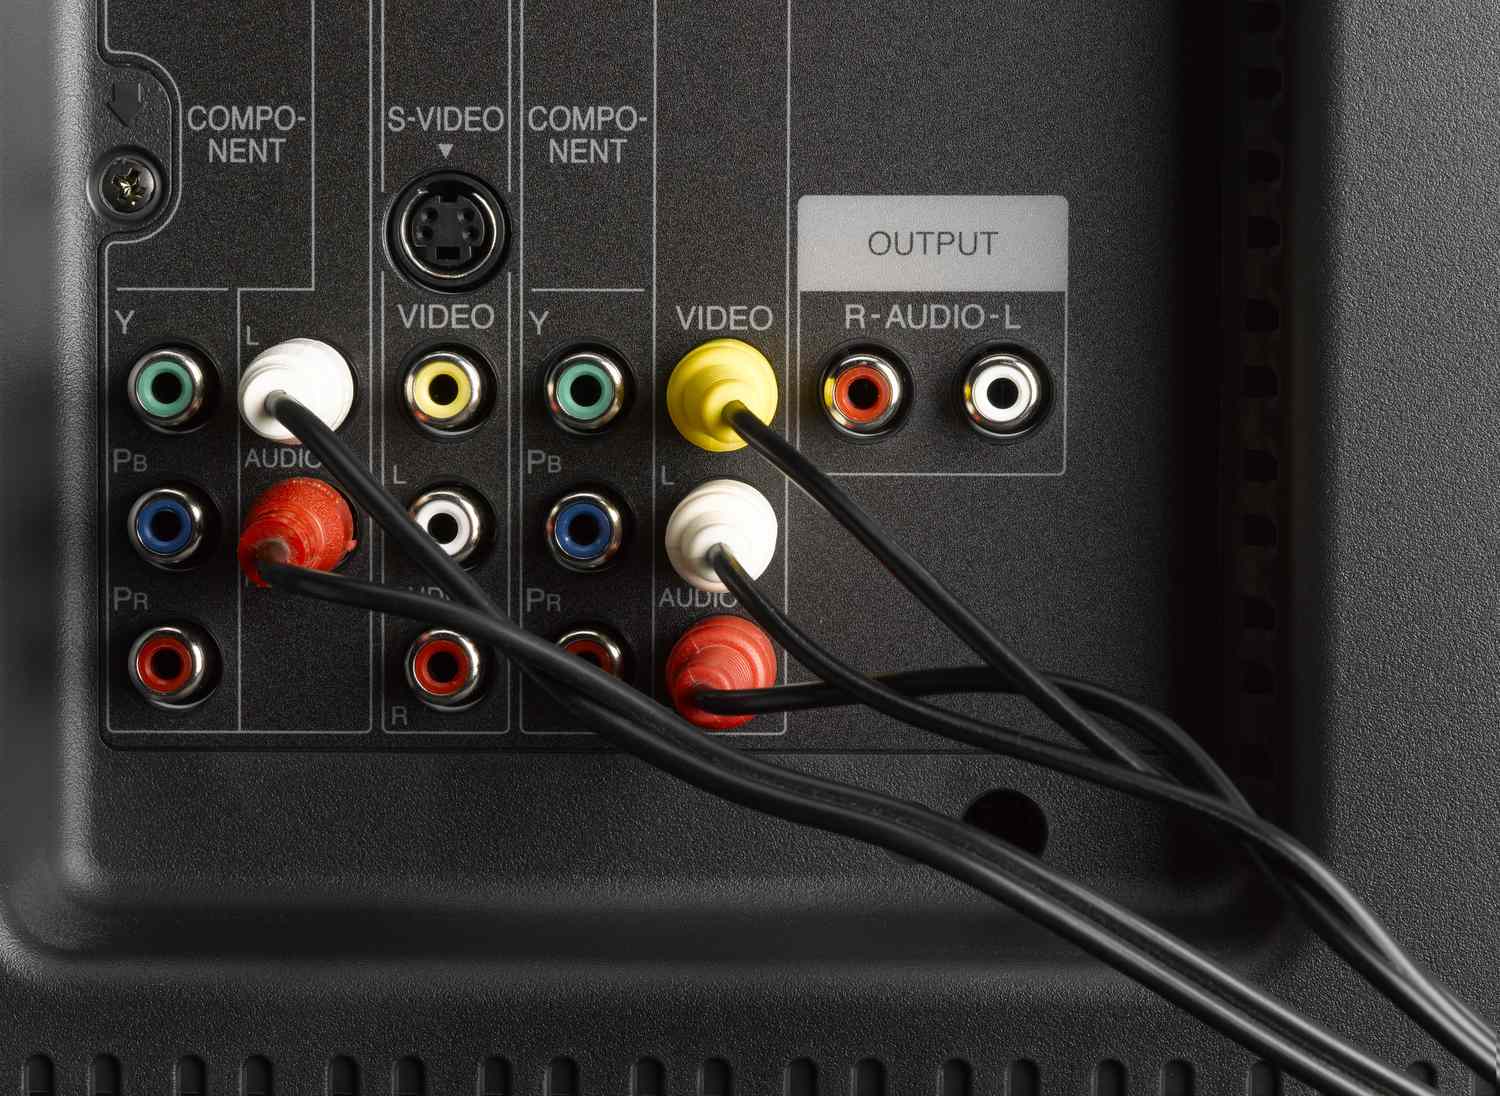
Take a look at the back or side panels of your VCR and smart TV. You will typically find a variety of input and output ports, such as HDMI, RCA (composite), or component ports. The type of ports available will depend on the make and model of your devices.
If your VCR and smart TV both have HDMI ports, this is the most straightforward connection option to choose. HDMI provides high-definition video and audio transmission in a single cable. Simply connect one end of an HDMI cable to the HDMI output port on your VCR and the other end to an available HDMI input port on your smart TV.
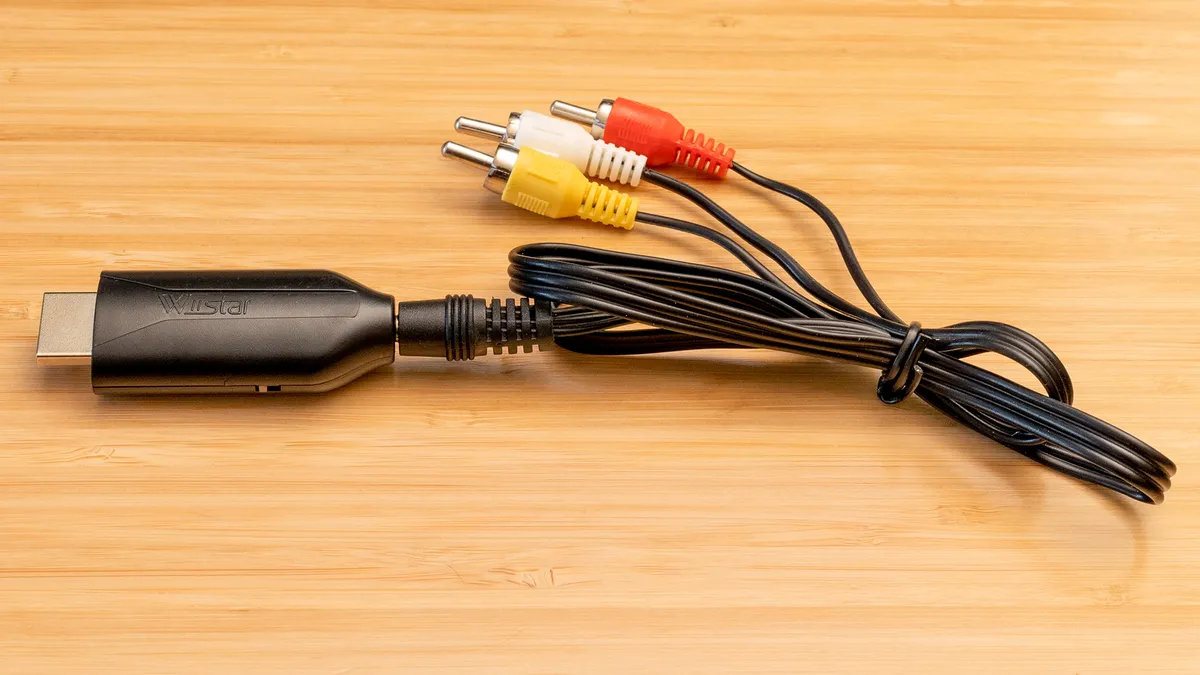
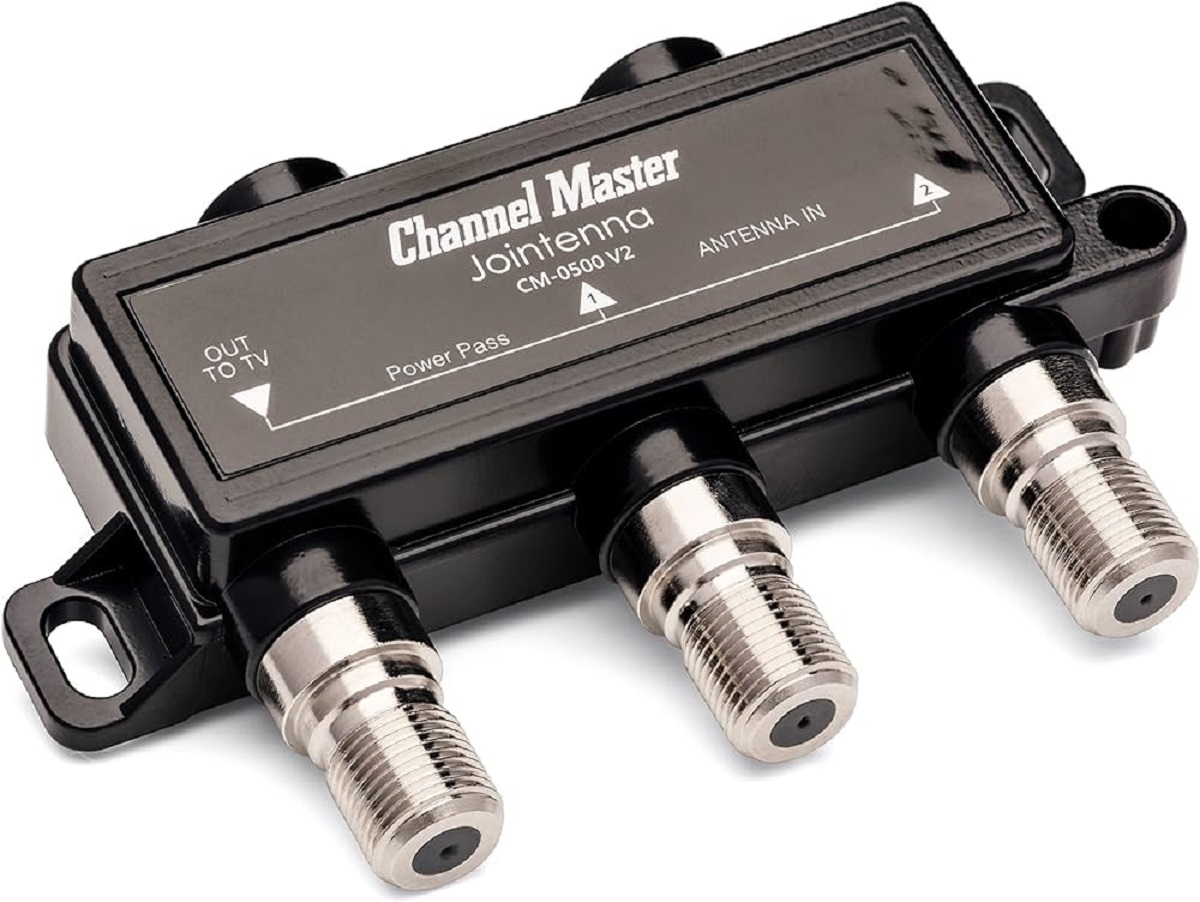
However, if your VCR only has RCA (composite) or component ports, and your smart TV does not have corresponding input options, don’t worry! You can still make the connection by using the appropriate adapters and cables. RCA/Composite ports use the familiar red, white, and yellow cables, while component ports use red, green, and blue video cables, accompanied by red and white audio cables.
Once you have identified the necessary connection type, make a list of the required cables and adapters. HDMI cables are readily available and can be purchased at most electronic stores. If you need RCA or component cables, ensure you have the correct length to reach between your VCR and smart TV.
Remember, it’s helpful to double-check the user manuals of your VCR and smart TV for specific information about the ports and compatible connection types. These manuals can often be found online if you no longer have the physical copies.
With the type of connection determined and the required cables and adapters in hand, you’re now ready to move on to the next step: connecting your VCR to your smart TV!
Step 2: Gather the required cables and adapters
Now that you know the type of connection you need, it’s time to collect the necessary cables and adapters to hook up your VCR to your smart TV. Having the right equipment on hand ensures a smooth and successful connection.
For an HDMI connection, you will need an HDMI cable. These cables can be found at most electronics stores or online retailers. Make sure to choose a cable that is long enough to reach comfortably between your VCR and smart TV but not excessively long to avoid signal degradation.
If you’re using RCA (composite) cables, you will need a set of three cables with red, white, and yellow connectors. Component connections, on the other hand, require five cables: red, green, and blue for video, and red and white for audio.
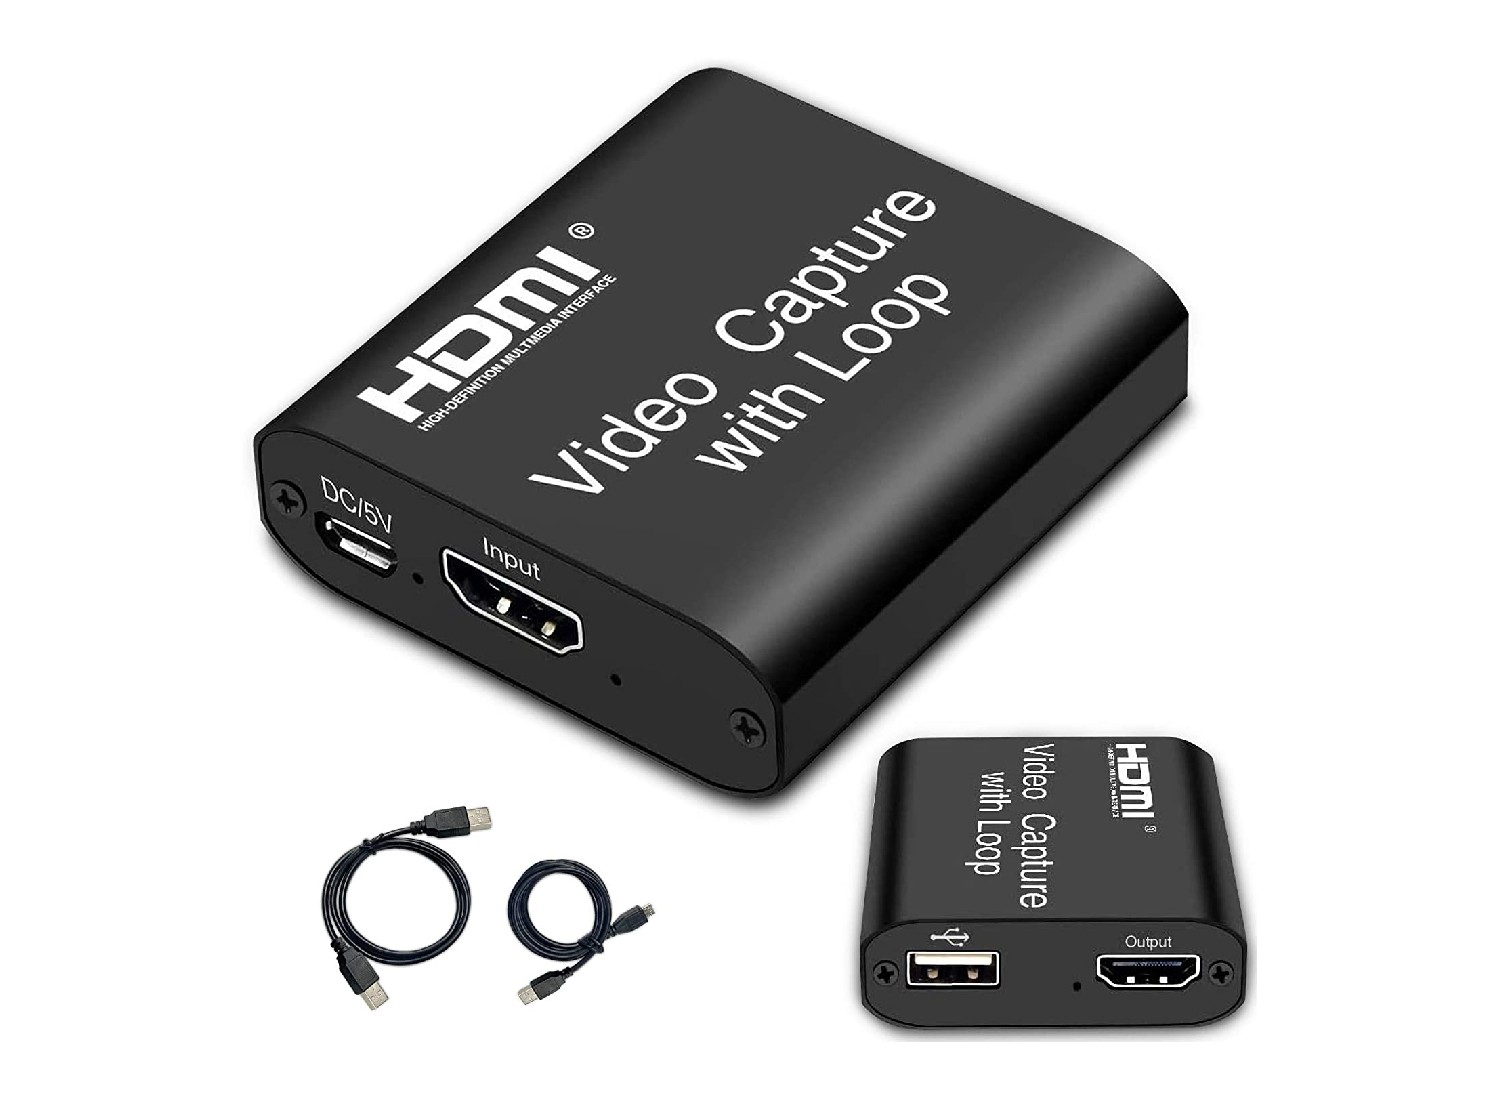
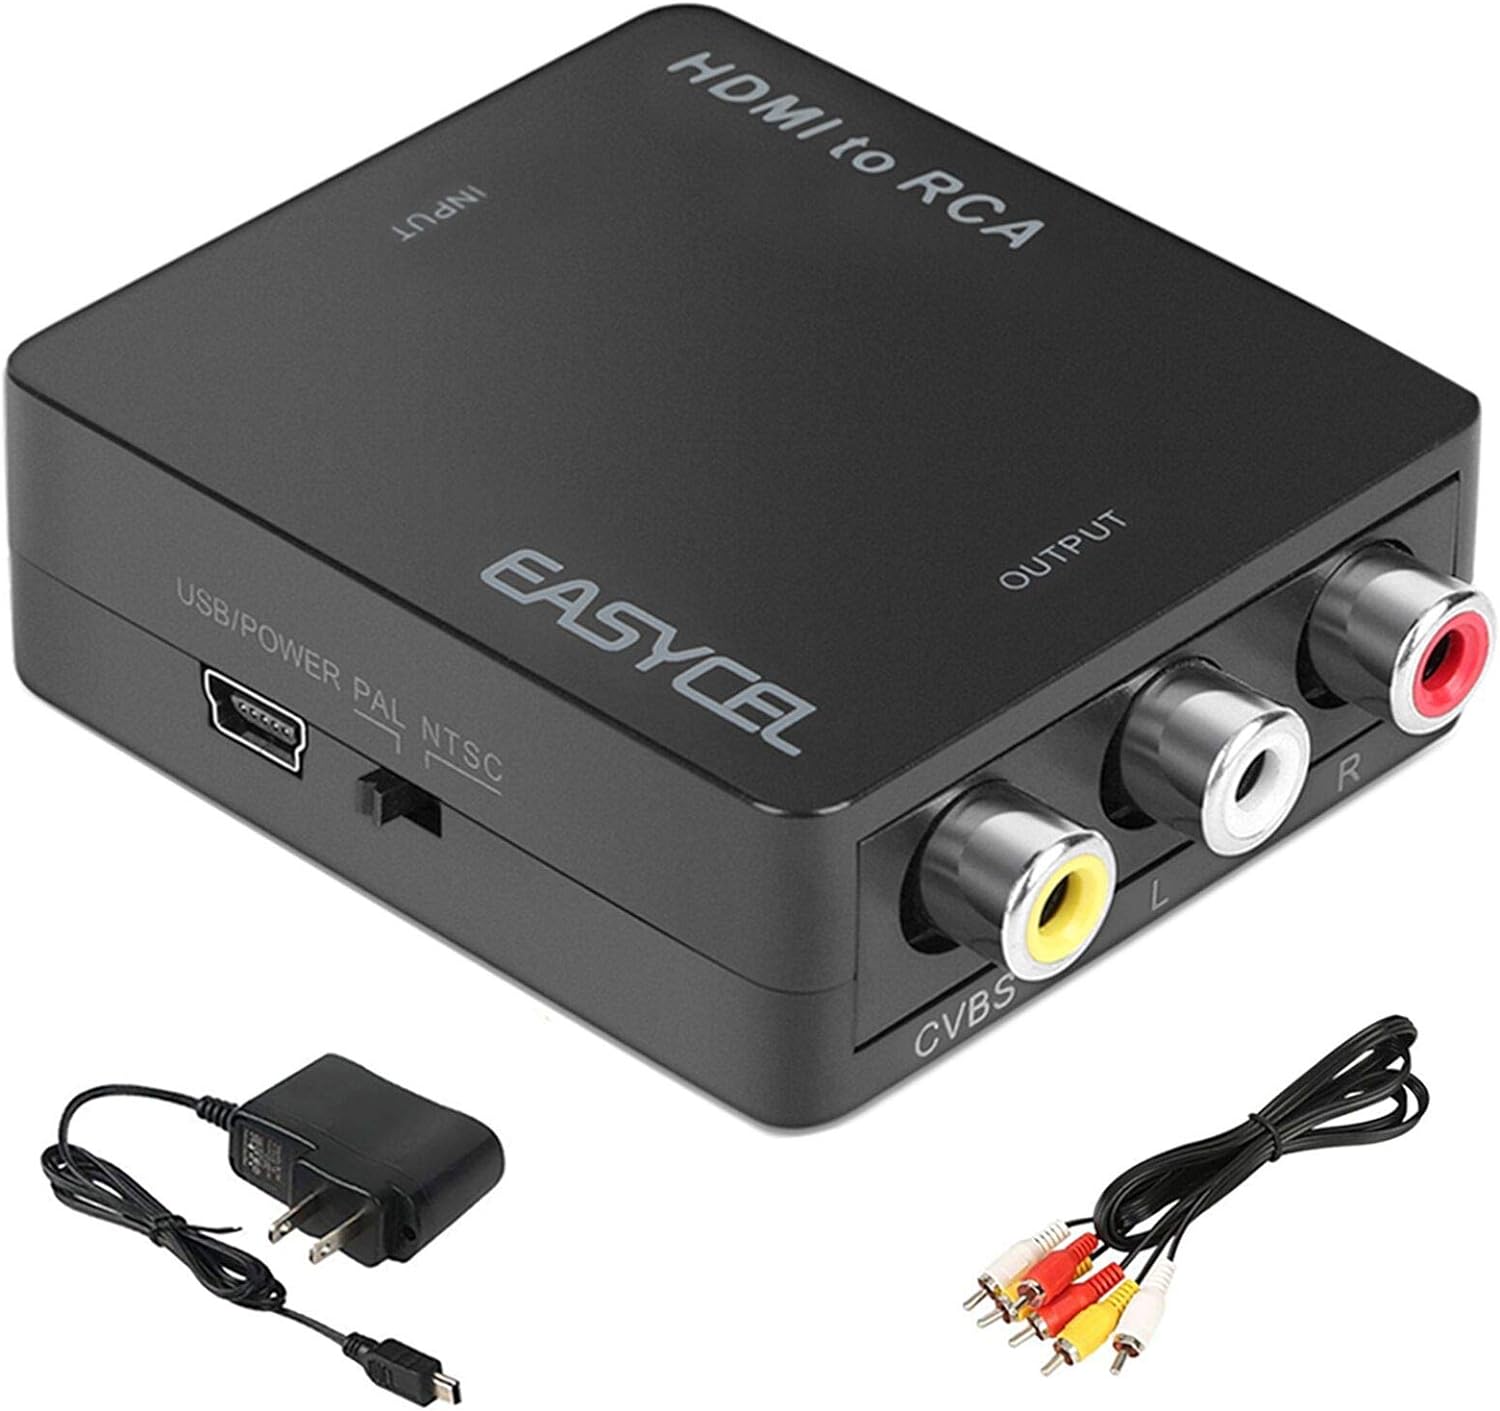
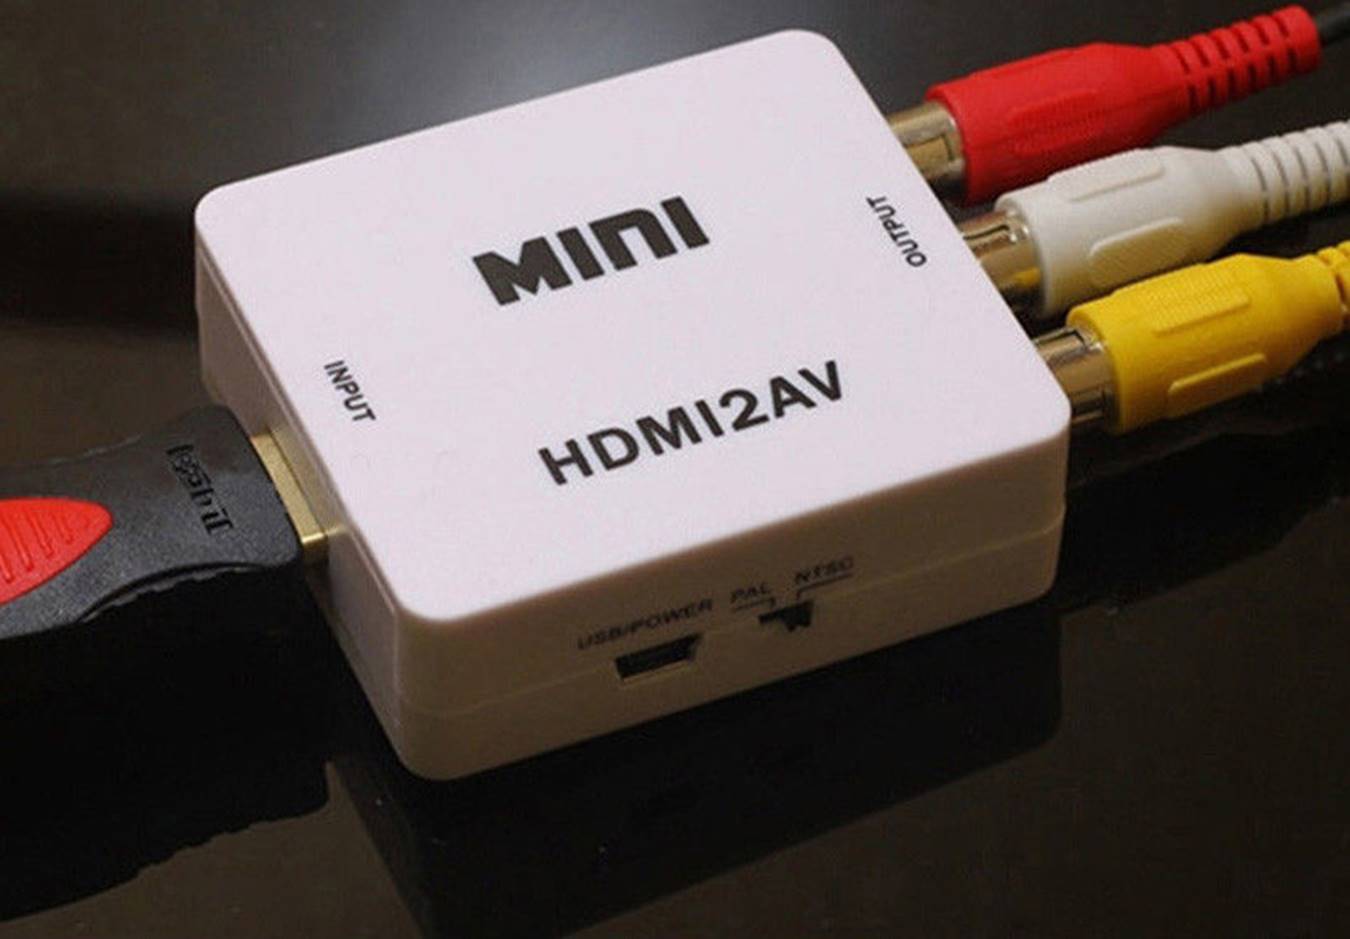
In some cases, you may require adapters to connect your VCR to your smart TV. For example, if your VCR only has RCA ports and your smart TV only has HDMI ports, you will need an HDMI to RCA converter. These converters can be found online or at specialty electronics stores.
If your smart TV doesn’t have the necessary RCA or component ports, but it does have a USB port, you might consider using a USB to RCA or USB to component adapter. These adapters can provide alternate connection options and are relatively easy to find.
It’s important to ensure that the cables and adapters you select are of good quality. High-quality cables and adapters help maintain signal integrity and reduce the chance of signal loss or interference. Look for cables and adapters that are well-rated and have positive customer reviews to ensure a reliable connection.
Before moving on to the next step, double-check that you have all the required cables and adapters in your possession. This will save you from any last-minute runs to the store and allow for a seamless connection process.
Once you have gathered the necessary cables and adapters, you’re ready to move on to connecting your VCR to your smart TV in the next step. Get ready to bring your old VHS tapes into the digital age!
Step 3: Connect the VCR to the Smart TV
With all the required cables and adapters in hand, it’s time to connect your VCR to your smart TV. Follow these step-by-step instructions to ensure a successful connection:
- Locate the appropriate ports on your VCR and smart TV. If using an HDMI connection, identify the HDMI output port on your VCR and an available HDMI input port on your smart TV. For RCA (composite) or component connections, find the corresponding ports on both devices.
- Connect one end of the HDMI cable to the HDMI output port on your VCR or use the RCA/component cables by plugging the corresponding color-coded connectors into their respective ports on both devices.
- If you’re using an HDMI to RCA or component adapter, connect the HDMI end to the VCR output port, and use the RCA/component cables to connect the other end of the adapter to the respective ports on your smart TV. Be sure to follow the adapter’s instructions for proper connection.
- Make sure all connections are secure and tight, ensuring a stable connection between your VCR and smart TV.
- Power on both your VCR and smart TV and set your TV input to the appropriate source. Use your smart TV remote to navigate to the input selection and choose the corresponding HDMI or AV/Component input option.
Once you have completed these steps, your VCR should be successfully connected to your smart TV. The video and audio from your VCR should now appear on your smart TV screen.
Keep in mind that some smart TVs may require additional configuration settings to optimize the display and audio output when using external devices. Consult your smart TV’s user manual or navigate through the settings menu to adjust any necessary options.
If you encounter any issues with the connection or experience poor video or audio quality, double-check that the cables are securely connected and properly seated in their respective ports. Also, ensure that both your VCR and smart TV are powered on and set to the correct input source. If problems persist, refer to the troubleshooting section in the user manuals of your devices or seek technical assistance.
Now that you have successfully connected your VCR to your smart TV, it’s time to move on to configuring the TV input settings in the next step. Let’s continue the journey towards rekindling those nostalgic memories!
Step 4: Configure the TV input settings
After connecting your VCR to your smart TV, it’s important to configure the TV input settings to ensure that your VCR’s video and audio are properly displayed on the screen. Follow these steps to configure the TV input settings:
- Using your smart TV remote, navigate to the settings menu. The location of the settings may vary depending on your brand and model of the TV.
- Look for the option that allows you to manage input sources or select the input source specifically for your connected VCR. Common labels for this option include “Input,” “Source,” or “Input Sources.”
- Select the input source corresponding to the HDMI or AV/Component input where you connected your VCR. This will tell your smart TV that you want to display the video and audio from your VCR.
- Once you have selected the input source, save the changes and exit the settings menu.
After configuring the TV input settings, your smart TV should recognize the connected VCR and display the video and audio when you play a VHS tape. If the screen remains blank or you still don’t hear any audio, double-check that the cables are securely connected and that the TV input settings are properly configured.
Keep in mind that some smart TVs offer additional customization options for each input source. For example, you may be able to adjust the picture mode, aspect ratio, or audio settings specifically for the VCR input. Explore the settings menu of your smart TV for any additional options that can enhance your viewing experience.
It’s also worth noting that if you have multiple HDMI or AV/Component inputs on your smart TV, you may need to repeat the configuration steps for each input source that you connect your VCR to.
Now that you have successfully configured the TV input settings, it’s time for the final step: testing the setup and troubleshooting, if necessary. Let’s ensure that everything is working as expected so you can enjoy watching your favorite VHS tapes on your smart TV!
Step 5: Test the setup and troubleshoot if needed
With everything connected and the TV input settings configured, it’s time to test the setup and ensure that your VCR is working properly on your smart TV. Follow these steps to test and troubleshoot if needed:
- Insert a VHS tape into your VCR and press the play button. The video and audio from the VHS tape should now be displayed on your smart TV screen.
- Check the quality of the video and audio. If you notice any issues such as distorted video, black and white image, or no audio, there are a few troubleshooting steps you can take:
- Ensure that the cables are securely connected to both the VCR and the smart TV.
- Check that the VCR and smart TV are both powered on and set to the correct input source.
- Try using a different set of cables or adapters if available, as there may be issues with the ones you are currently using.
- Confirm that the VHS tape itself is in good condition and not damaged or excessively worn. Try playing a different VHS tape to see if the problem persists.
- If you are still experiencing issues after trying the troubleshooting steps above, consult the user manuals for both your VCR and smart TV for additional troubleshooting tips. You may also consider contacting the manufacturers’ support teams for further assistance.
Once you have successfully tested the setup and resolved any issues, you’re all set to enjoy watching your VHS tapes on your smart TV. Sit back, relax, and let the nostalgia wash over you as you relive those cherished memories.
Remember that maintaining your VCR and cables in good condition, keeping them clean and free from dust, can help ensure optimal performance. Regularly clean the VCR heads with a VCR head cleaning cassette to maintain proper playback quality.
Now that you have successfully completed all the steps and tested the setup, you can sit back, relax, and embark on a journey down memory lane with your favorite VHS tapes on your modern smart TV.
Conclusion
Connecting a VCR to a smart TV may seem like a daunting task at first, but with the right guidance and knowledge, it can be a straightforward process. By following the steps outlined in this guide, you can successfully hook up your VCR to your smart TV and enjoy watching those beloved VHS tapes once again.
We started by determining the type of connection needed, whether it’s HDMI, RCA (composite), or component. Next, we gathered the required cables and adapters, ensuring we have everything necessary for a seamless connection. Then, we moved on to connecting the VCR to the smart TV, double-checking that all cables were securely connected.
After the physical connection was established, we configured the TV input settings to recognize the VCR as the source of the video and audio. This step ensured that your smart TV is set up to display the VCR’s content properly.
Finally, we tested the setup and troubleshooted any issues that may have arisen. We checked the video and audio quality, made sure the cables were properly connected, and tried different troubleshooting steps to resolve any issues encountered.
With the setup successfully tested and any issues addressed, you can now sit back, relax, and enjoy the nostalgia of watching your favorite VHS tapes on your modern smart TV. Remember to keep your VCR and cables well-maintained to ensure optimal performance.
We hope that this guide has helped you in successfully connecting your VCR to your smart TV. Technology may have advanced, but that doesn’t mean we have to leave our beloved VHS tapes behind. Embrace the merging of the old and the new and indulge in the memories that these tapes hold.
So, grab some popcorn, dim the lights, and let the magic of your VCR and smart TV transport you back in time as you relive the cherished moments captured on those VHS tapes.