Introduction
Have you ever experienced a strange issue where the keys on your keyboard seem to be behaving differently or not responding at all? It can be frustrating and hinder your productivity, especially if you rely heavily on your keyboard for typing or gaming.
Fortunately, there are several potential solutions to get your keyboard back to normal. In this article, we will explore various troubleshooting steps that you can take to diagnose and resolve common keyboard issues.
From checking your language settings to cleaning your keyboard, we will cover a range of methods that can help you identify and fix the problem. So, let’s dive in and troubleshoot your keyboard-related woes!
Before we begin, please note that these troubleshooting steps are applicable for different types of keyboards, including standard keyboards, laptops, and even external keyboards.
It’s important to note that if you are using a specialized keyboard, such as a gaming keyboard or a keyboard with programmable features, the troubleshooting steps may vary. For such cases, referring to the manufacturer’s instructions or visiting their support website is advisable.
Going through the steps listed below in a systematic manner will help you identify the root cause of the issue and potentially resolve it without any external support. Let’s get started!
Restart Your Computer
One of the simplest and often overlooked solutions to fix keyboard issues is to restart your computer. Restarting can help reset any temporary glitches or software conflicts that might be affecting the keyboard’s normal functioning.
To restart your computer, follow these steps:
- Save any unsaved work or documents.
- Click on the “Start” menu or press the “Windows” key on your keyboard.
- Click on the “Power” button or the power icon.
- Select “Restart” from the drop-down menu.
Wait for your computer to shut down and then start up again. Once your computer has rebooted, test your keyboard to see if the issue has been resolved.
It’s important to note that if you are using a laptop, you may need to shut it down completely and then turn it back on. Simply putting it to sleep or hibernating may not resolve the issue.
If restarting your computer doesn’t solve the problem, don’t worry. There are still more troubleshooting steps to try.
Restarting your computer is often the first step in troubleshooting many hardware or software-related issues. It helps refresh the system and can resolve minor glitches that may have occurred during the computer’s operation.
If the keyboard issue persists after restarting, let’s move on to the next troubleshooting step.
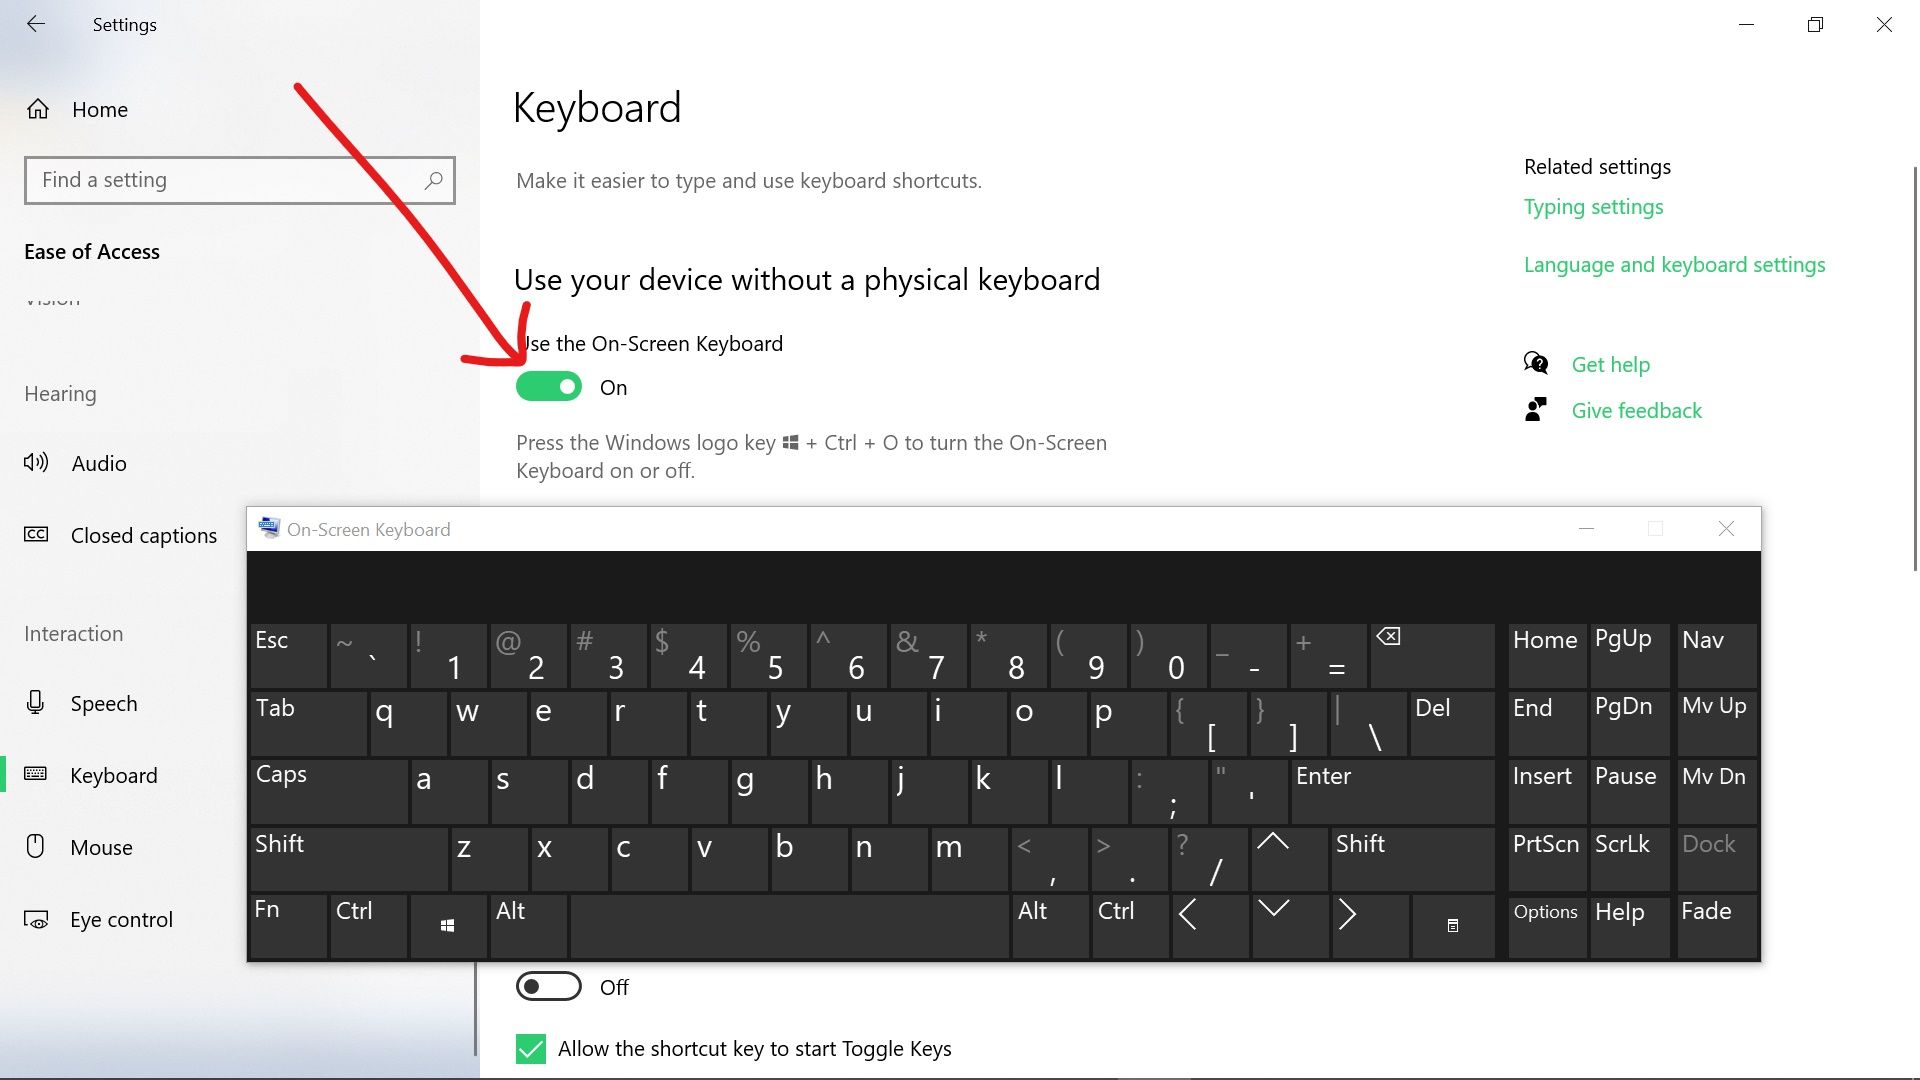
Check Your Language Settings
Another common culprit behind keyboard issues is incorrect language settings. Sometimes, a simple change in the language or input settings can cause keys to behave differently or not work at all.
To check your language settings and make any necessary adjustments, follow these steps:
- Click on the “Start” menu or press the “Windows” key on your keyboard.
- Select “Settings” (represented by a gear icon) to open the Windows Settings menu.
- In the Windows Settings menu, click on “Time & Language”.
- From the left-hand sidebar, select “Language”.
Here, you can view the language currently set as the default input. If it is not the language you normally use for typing, it can cause issues with the keyboard.
If the correct language is not listed, click on the “Add a language” button and select your preferred language from the list. Set it as the default input language.
If the correct language is already listed but not set as the default input, click on the language and click the “Set as default” button.
After making any necessary changes, close the settings window and check if the keyboard is functioning normally.
It’s worth mentioning that some keyboards have specialized layouts for different languages. If you are using a keyboard with a non-standard layout, such as an international or multilingual keyboard, ensure that the correct keyboard layout is selected in the language settings as well.
Checking and adjusting the language settings can resolve keyboard issues related to incorrect input languages or layouts. However, if the problem persists, let’s move on to the next troubleshooting step.
Enable/Disable Sticky Keys
Sticky Keys is a feature in Windows that allows you to use keyboard shortcuts by pressing one key at a time, instead of pressing multiple keys simultaneously. However, sometimes enabling or accidentally enabling Sticky Keys can cause keyboard issues.
To check if Sticky Keys is enabled and disable it if necessary, follow these steps:
- Press the “Shift” key on your keyboard five times in a row.
- A dialog box will appear asking if you want to enable Sticky Keys.
- If Sticky Keys is already enabled and causing issues, click on the “No” button to disable it.
If Sticky Keys is not enabled, you will simply hear a beep sound when you press the “Shift” key five times. In that case, Sticky Keys is not the cause of the issue.
If you have disabled Sticky Keys and the keyboard issue persists, you can also try enabling it and then disabling it again. Sometimes, this can help reset the feature and resolve any related problems.
Sticky Keys can be a useful feature for those with limited dexterity or difficulty pressing multiple keys simultaneously. However, it can interfere with normal keyboard functioning if enabled unintentionally.
After disabling Sticky Keys, test your keyboard to see if the problem has been resolved. If not, let’s move on to the next troubleshooting step.
Update Your Keyboard Drivers
Outdated or corrupt keyboard drivers can often cause issues with keyboard functionality. Therefore, updating your keyboard drivers can be a potential solution to get your keyboard back to normal.
To update your keyboard drivers, follow these steps:
- Open the “Device Manager” by right-clicking on the “Start” menu or pressing the “Windows” key + “X” on your keyboard.
- In the Device Manager window, locate the “Keyboards” category and expand it by clicking on the arrow next to it.
- Right-click on your keyboard driver and select “Update driver”.
- Choose the option to search for updated drivers automatically. Windows will then search for the latest drivers and install them if available.
- Wait for the update process to complete.
If Windows couldn’t find an updated driver automatically, you can visit the website of your keyboard manufacturer and download the latest driver for your specific keyboard model. Then, manually install the driver by following the manufacturer’s instructions.
After updating the keyboard drivers, restart your computer and check if the keyboard is functioning normally. Updating drivers can often fix compatibility issues or bugs that may be causing keyboard problems.
If updating the drivers didn’t resolve the issue, it’s time to explore another troubleshooting step.
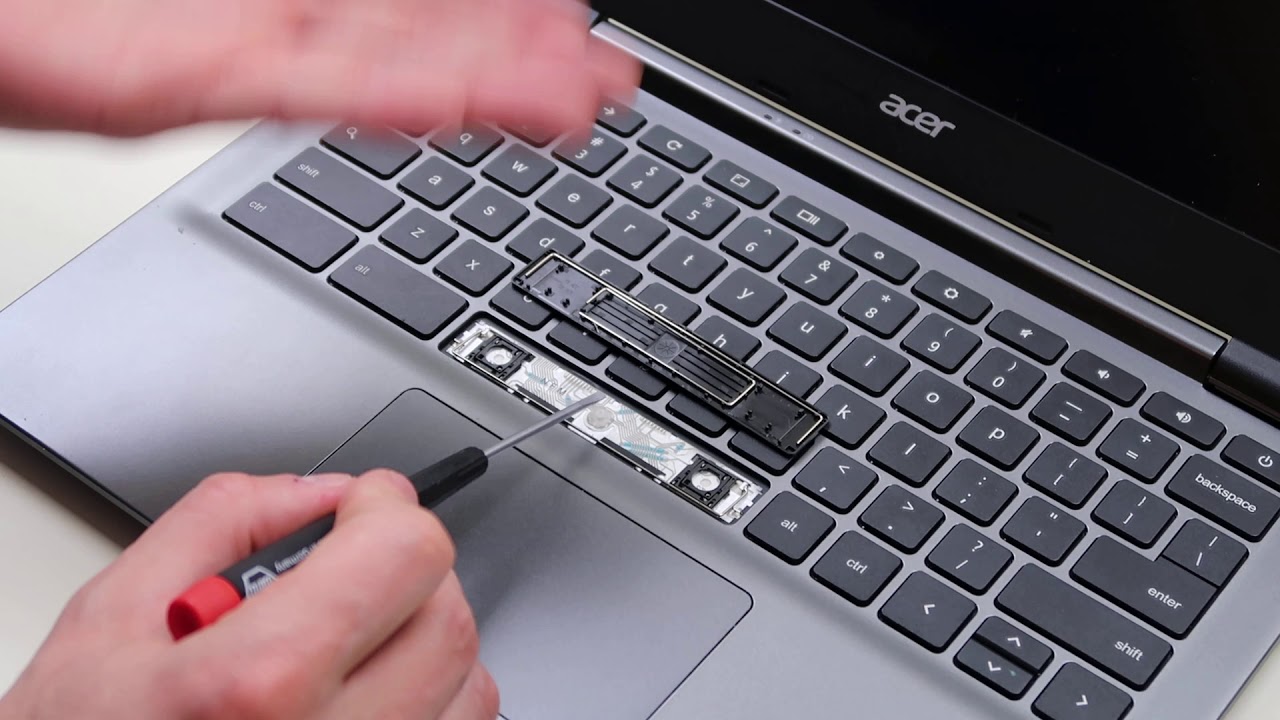
Clean Your Keyboard
Over time, keyboards can accumulate dust, debris, and even spills, which can interfere with the normal functioning of the keys. Cleaning your keyboard can help remove these contaminants and potentially resolve keyboard issues.
Before you begin, it’s important to note that cleaning methods may vary depending on the type of keyboard you have. For standard desktop keyboards, follow these general steps:
- Turn off your computer and unplug the keyboard from the USB port.
- Hold the keyboard upside down and gently tap or shake it to dislodge any loose debris.
- Use a can of compressed air to blow away any remaining dust or particles from the keys. Pay special attention to the areas around the affected keys.
- If there are any stubborn stains or sticky residue, you can dampen a lint-free cloth with a small amount of isopropyl alcohol or a mild cleaning solution. Make sure the cloth is not soaking wet and be careful not to let any liquid seep into the keyboard.
- Gently scrub the keys and the surface of the keyboard with the damp cloth, removing any dirt or grime.
- Once the keyboard is clean, let it air dry completely before plugging it back in and turning on your computer.
For laptops or keyboards with integrated components, refer to the manufacturer’s instructions for the proper cleaning guidelines. Some keyboards may have removable keycaps for easier cleaning, while others may require professional cleaning methods.
Regularly cleaning your keyboard can prevent buildup and maintain its performance. However, if cleaning your keyboard didn’t resolve the issue, let’s move on to the next troubleshooting step.
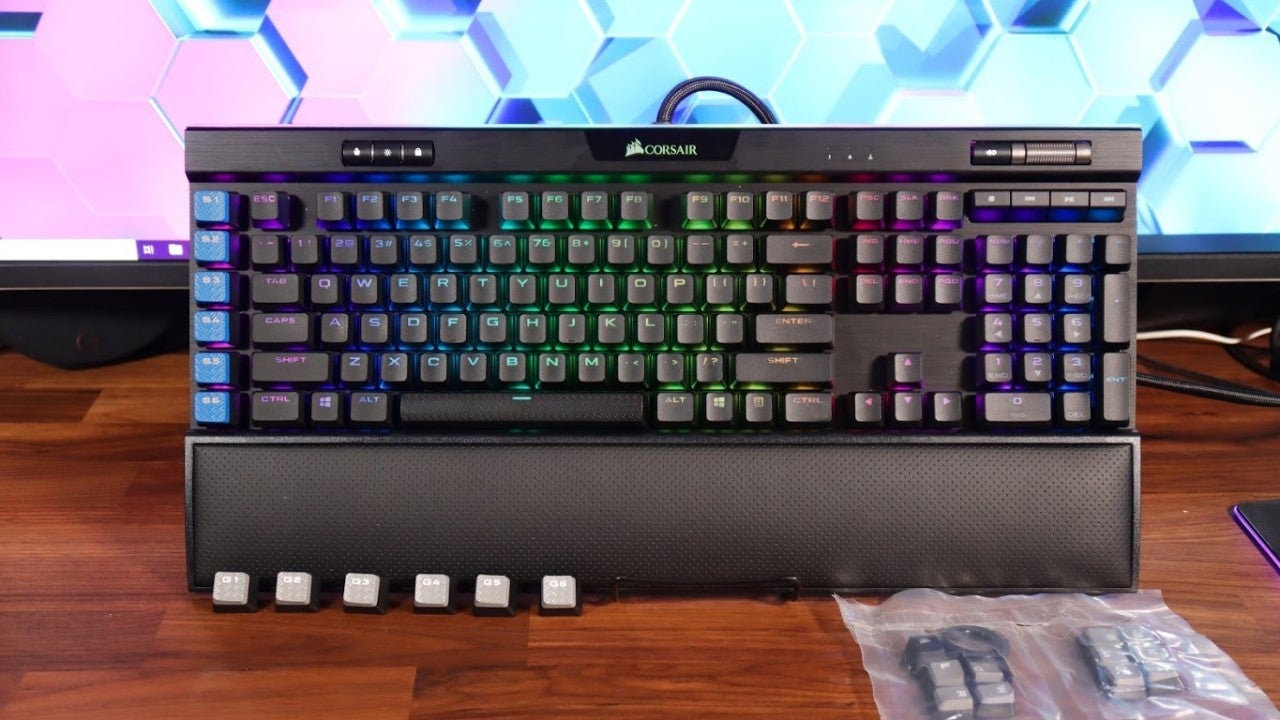
Use a Different Keyboard
If you have access to another keyboard, whether it’s a spare one or borrowed from a friend, using a different keyboard can help determine if the issue is specific to your current keyboard or if it’s a broader system problem.
Here are the steps to try using a different keyboard:
- Turn off your computer and disconnect the current keyboard.
- Connect the different keyboard to the appropriate port, such as USB or PS/2.
- Turn on your computer and wait for it to boot up.
Once the computer is running, test the different keyboard to see if it functions normally. Try typing, using different keys, and navigating through the system. If the different keyboard works without any issues, it suggests that the problem lies with your original keyboard.
In such cases, you may need to replace or repair your keyboard. Consider contacting the manufacturer for support, especially if your keyboard is still under warranty. They can provide specific guidance or initiate a repair or replacement process.
If the different keyboard also experiences the same issues, it indicates that the problem might be related to your computer’s settings or software. In this case, let’s move on to the next troubleshooting step.
Reset Your Keyboard Settings
If you have tried the previous troubleshooting steps and are still experiencing issues with your keyboard, resetting your keyboard settings can help resolve any software-related problems that could be causing the issue.
Here’s how you can reset your keyboard settings:
- Click on the “Start” menu or press the “Windows” key on your keyboard.
- Go to “Settings” (represented by a gear icon).
- Click on “Devices”.
- From the left-hand sidebar, select “Typing”.
Scroll down until you find the “Advanced keyboard settings” section. Click on the “Reset” button.
Resetting the keyboard settings will revert them to their default configuration, eliminating any customized settings or configurations that may be causing conflicts or issues.
After resetting the keyboard settings, test your keyboard to see if it is functioning normally. Try typing, using different keys, and verifying if the previous issues have been resolved. If the problem persists, it’s time to seek technical support.
At this point, if none of the previous troubleshooting steps have resolved the keyboard issues, it is advisable to contact technical support for further assistance. The technical support team can provide specialized advice and guidance based on your specific system and keyboard setup.
Be sure to provide them with details about the steps you have already taken to troubleshoot the issue, as it will help them understand the problem better and offer the most appropriate solutions.
Now that you are familiar with several potential solutions for keyboard issues, you can confidently troubleshoot and resolve common problems related to keyboard functionality.
Contact Technical Support
If you have exhausted all the troubleshooting steps and your keyboard issues still persist, it may be time to seek help from technical support. The support team can provide you with specialized assistance and guidance tailored to your specific keyboard and system setup.
Before reaching out to technical support, make sure to gather relevant information about your keyboard, such as the make and model, and any error messages or specific symptoms you have encountered. This information will help the support team better understand the issue and provide the most relevant solutions.
When contacting technical support, there are a few steps you can follow:
- Visit the support website of your keyboard manufacturer. Many manufacturers offer extensive online resources, including FAQs, troubleshooting guides, and driver downloads.
- Check if there is a dedicated support forum where you can seek help from knowledgeable community members or even official support representatives.
- Look for a support hotline or email address to directly contact the technical support team. Some manufacturers may offer live chat support as well.
- When reaching out to technical support, provide a clear and detailed description of the issue you are experiencing, along with any relevant information you have gathered. This will help them diagnose the problem more effectively.
Once you have contacted technical support, they will guide you through further troubleshooting steps or determine if your keyboard needs to be repaired or replaced. Depending on the warranty status of your keyboard, they may provide instructions on how to proceed for warranty claims.
Remember to remain patient and cooperative during your communication with technical support. They are there to assist you and will do their best to resolve the issue.
By seeking assistance from technical support, you can ensure that you have explored all available options to get your keyboard back to normal functioning.
With the right guidance, your keyboard woes will soon be a thing of the past!