To install an XPI file in Firefox, simply open the browser and drag the downloaded .xpi file directly into any open Firefox window. This is the quickest method, and the installation prompt will appear immediately, allowing you to add the extension with a single click. This is the most common way to install xpi file in Firefox because it bypasses menus entirely, just grab the file and drop it.
How to install an xpi file in Firefox: the quick drag-and-drop method
The drag-and-drop method is the fastest way to get an extension installed. It works for any signed XPI file you've downloaded, whether it's a theme, language pack, or add-on. To start, make sure the .xpi file is saved somewhere you can easily access, like your desktop or Downloads folder. Then, open Firefox and drag the file from its location into the browser window, anywhere on the page will do. Release the mouse button, and Firefox will display a confirmation prompt asking if you want to add the extension. This method is ideal if you want to install xpi file in Firefox without navigating through settings, and it's the approach most users prefer for its speed and simplicity.
Alternative method: install the xpi file from Firefox's add-ons manager
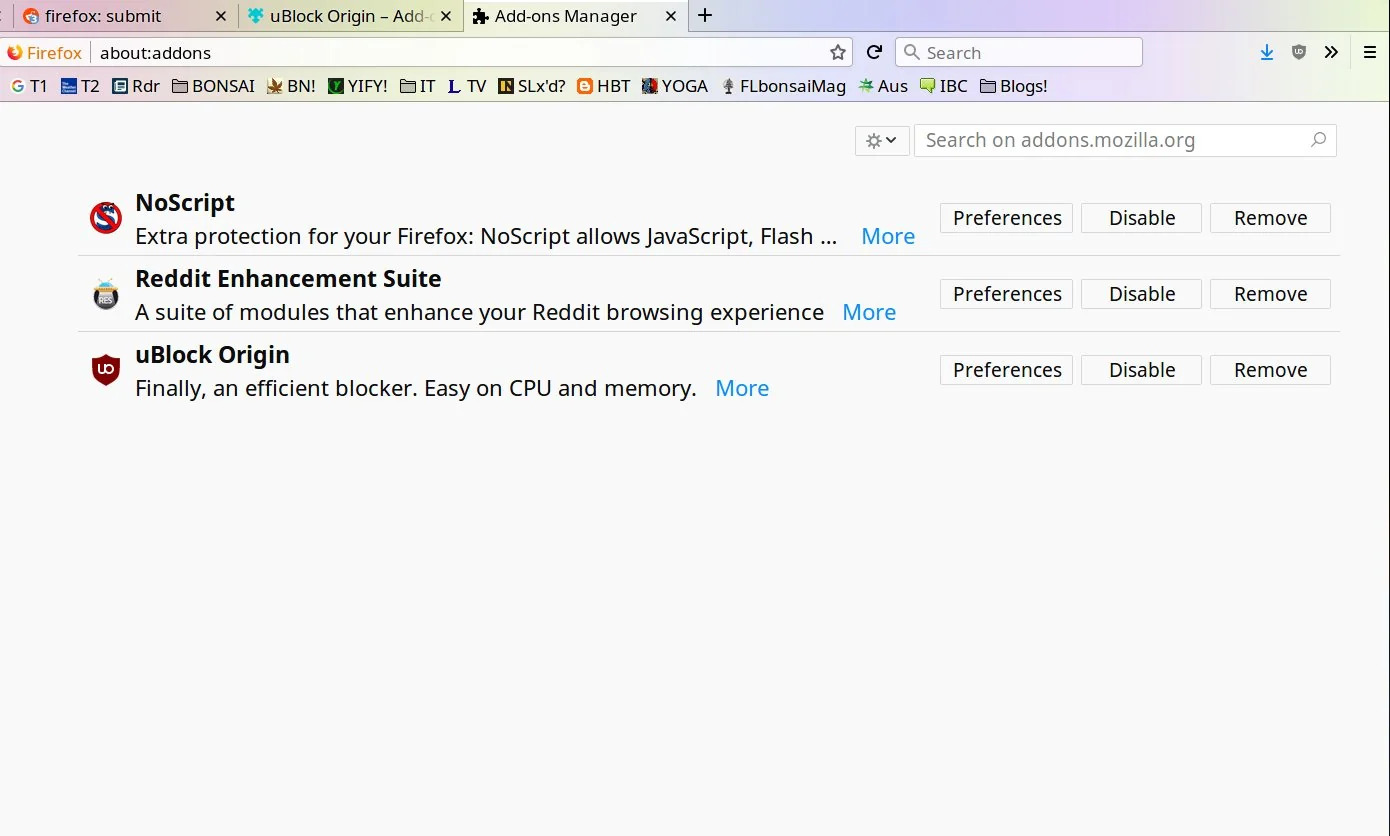
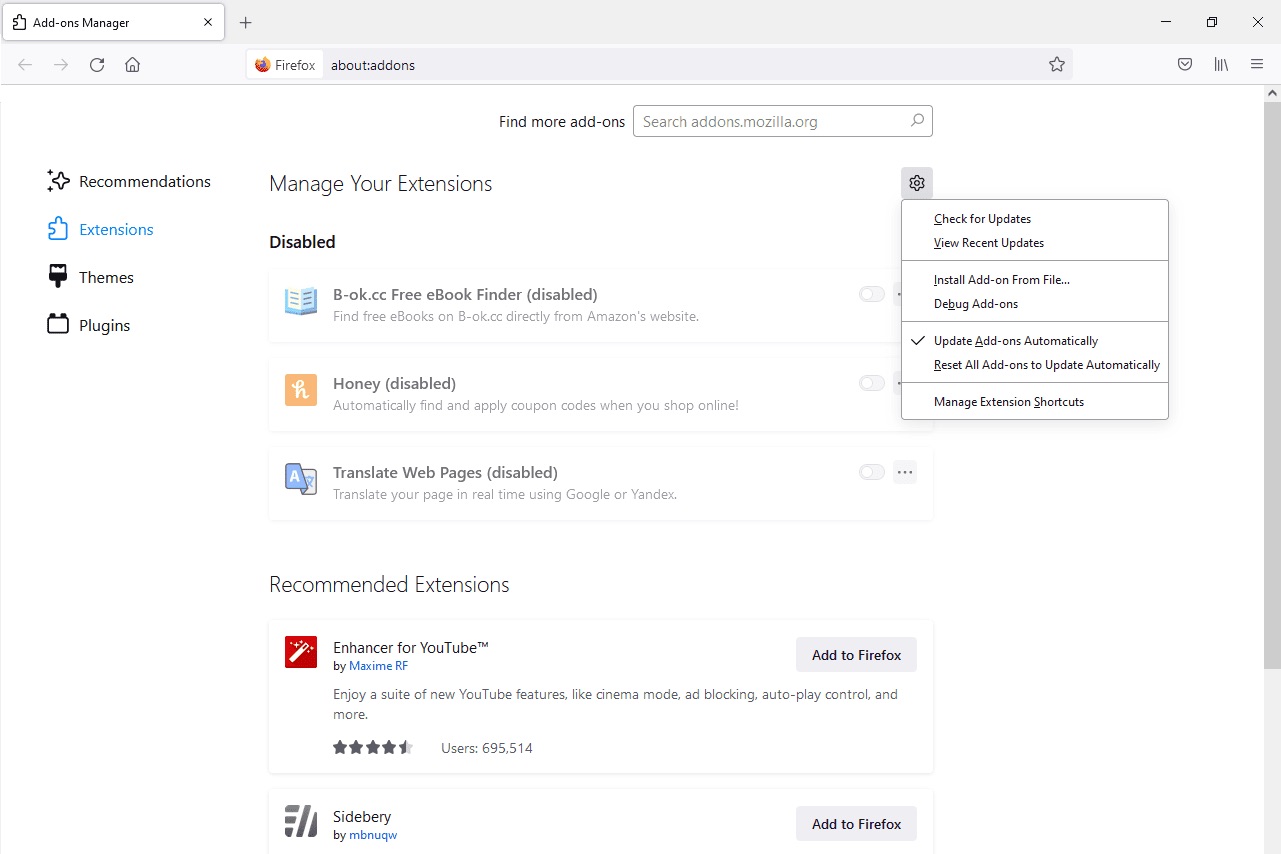
If you prefer using menus or the drag-and-drop isn't working, you can install the file through the Add-ons Manager. This method is just as reliable and gives you a clear view of your installed extensions. Start by clicking the Firefox menu button (three horizontal lines) in the top-right corner, then select "Extensions and Themes." On that page, click the gear icon (⚙️) in the upper-right area of the panel. From the dropdown menu, choose "Install Add-on From File..." and browse to the location of your .xpi file. Select it and click "Open." This opens the same installation prompt as the drag-and-drop method, letting you review the add-on before adding it. This approach is particularly useful if you're already managing your extensions and want to keep everything in one place.
Confirming permissions and completing the installation
Regardless of which method you used, the final step is the same. After you select the file, Firefox will show a pop-up window listing the permissions the add-on requires. These permissions tell you exactly what the extension can access, such as your browsing history, tabs, or data on specific websites. Review them carefully to ensure you're comfortable with the level of access. If everything looks good, click "Add" to finalize the installation. The extension will be installed immediately, and you can start using it right away, no browser restart is needed for most add-ons. Once installed, you'll see it listed in your Extensions section, and you can enable, disable, or remove it at any time. This confirmation step is your chance to verify that the add-on matches your expectations before it becomes active.
What to do if Firefox blocks an unsigned xpi file
Firefox takes security seriously, which is why Release and Beta versions of the browser will block the installation of unsigned XPI files. If you try to install an unsigned add-on, you'll see a warning that Firefox has prevented the installation. This is a protective measure to keep malicious or broken extensions out of your browser. However, if you're using Firefox Developer Edition or Nightly, you have the option to bypass this restriction. To do so, type about:config in the address bar and press Enter. Search for xpinstall.signatures.required and double-click the preference to set its value to false. This disables the signature requirement, allowing you to install the unsigned XPI file. Remember, this workaround only works in Developer Edition or Nightly, it won't work in the standard Release or Beta channels. Use this option with caution, as installing unsigned add-ons carries additional risk. Only do this if you trust the source of the file completely, and consider re-enabling the signature requirement after installation to keep your browser secure.
Related reading: How To Remove Noscript From Firefox, How To Install Firefox On Kindle Fire, and How To Cast From Firefox To Chromecast.