Introduction
In the ever-evolving landscape of web browsing, Google Chrome stands out as a leading choice for users worldwide. Its sleek interface, robust features, and seamless integration with various extensions make it a go-to option for many. However, with the shift towards HTML5 and other modern web technologies, the once-ubiquitous Adobe Flash Player has taken a back seat. Despite this shift, there are still instances where enabling the Flash plugin in Chrome becomes necessary.
Flash content, although less prevalent than in the past, continues to exist on certain websites and applications. Whether it's an interactive multimedia presentation, an online game, or a legacy system, there are times when users encounter the prompt to enable Flash in Chrome to access specific content. Understanding how to navigate this process is crucial for a seamless browsing experience.
In this article, we will delve into the steps to enable the Flash plugin in Chrome, ensuring that users can access Flash-based content without any hassle. From checking if Flash is already enabled to the actual process of enabling it and verifying its activation, we will provide a comprehensive guide to empower users with the necessary knowledge. So, let's embark on this journey to unlock the potential of Flash content within the Chrome browser.
Checking if Flash is Enabled in Chrome
Before diving into the process of enabling the Flash plugin in Chrome, it's essential to first determine whether Flash is already enabled or disabled in the browser. Chrome, in its quest for enhanced security and performance, has gradually phased out support for Flash by default. However, users can still manually enable it when necessary.
To check if Flash is currently enabled in Chrome, follow these simple steps:
-
Accessing Chrome Settings: Launch the Chrome browser on your desktop or laptop. At the top right corner of the browser window, you will find the 'More' icon, represented by three vertical dots. Click on this icon to reveal a dropdown menu.
-
Navigating to Settings: From the dropdown menu, select the 'Settings' option. This will open a new tab displaying the various settings and customization options for Chrome.
-
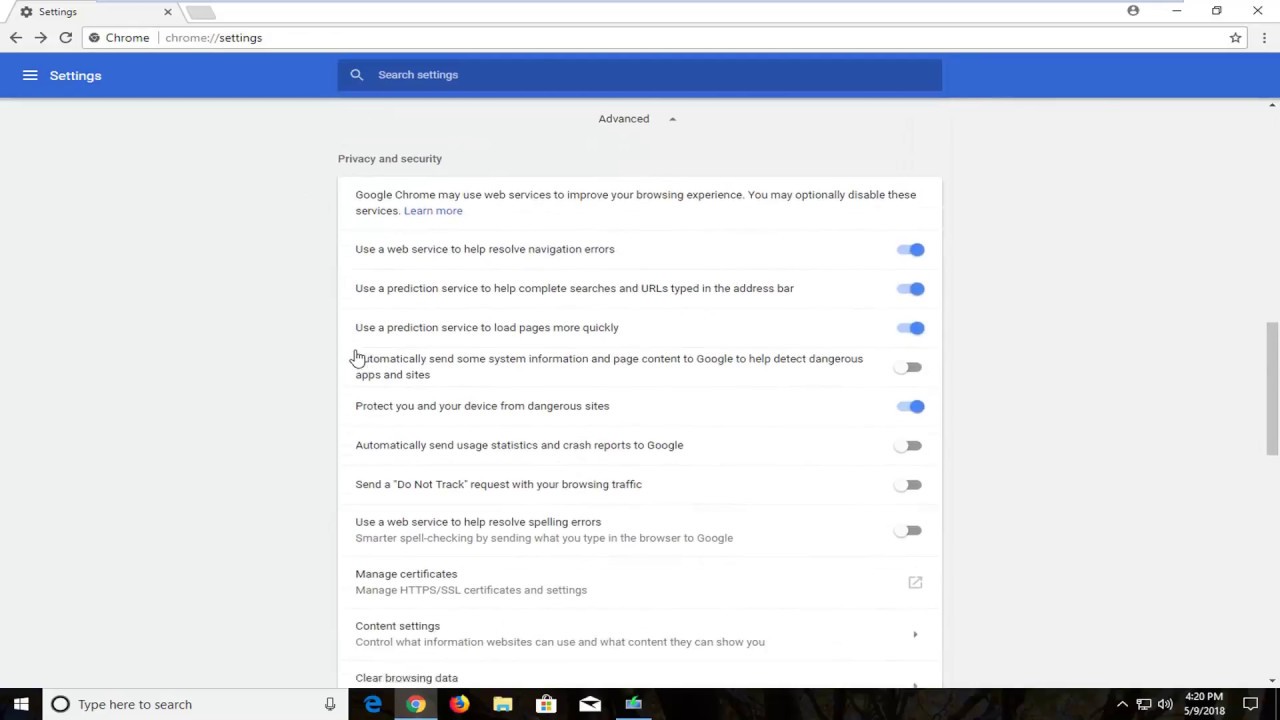
Locating Content Settings: Within the Settings tab, scroll down and click on the 'Privacy and security' section. Here, you will find the 'Site settings' option. Click on this to access a range of site-specific settings.
-
Accessing Flash Settings: Under the 'Permissions' section, locate and click on 'Flash'. This will direct you to the Flash settings page, where you can manage the behavior of Flash content on websites.
-
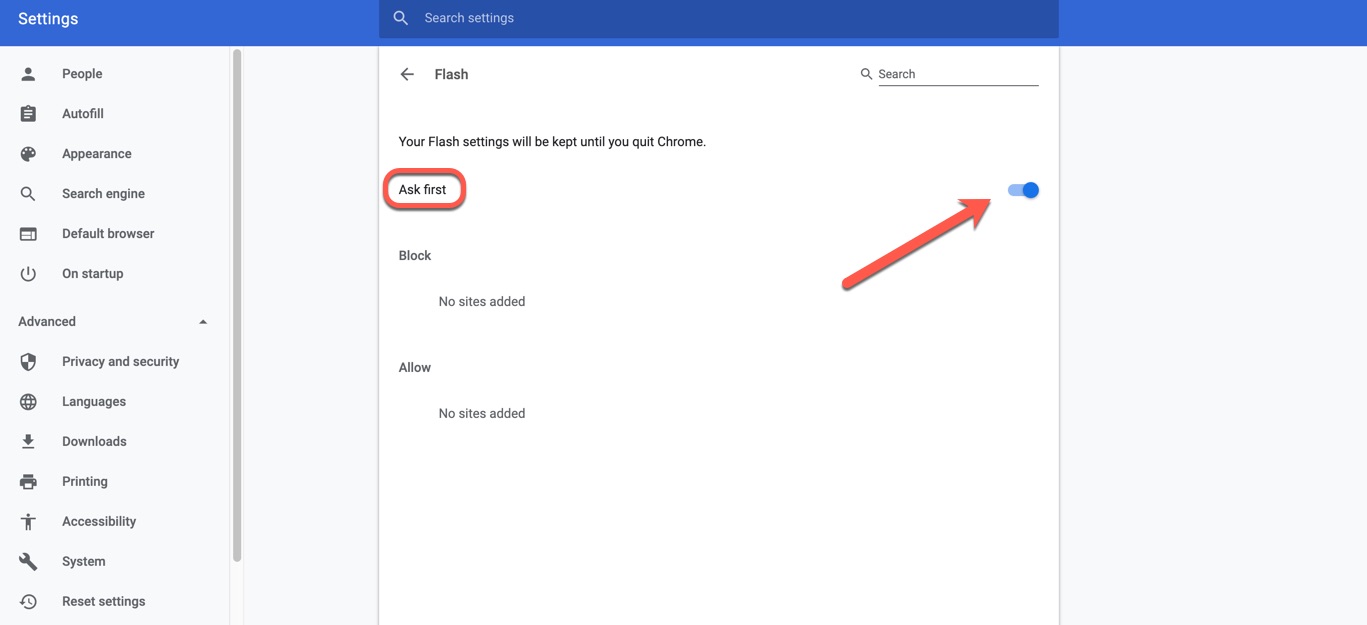
Verifying Flash Status: On the Flash settings page, you will find a toggle switch to enable or disable Flash. If the toggle is in the 'On' position, it indicates that Flash is currently enabled in Chrome. Conversely, if it's in the 'Off' position, Flash is disabled.
By following these steps, you can quickly ascertain whether Flash is enabled in your Chrome browser. This initial check serves as a crucial starting point before proceeding with the actual process of enabling Flash, ensuring that you are well-informed about the current status of this plugin within your browser environment.
Enabling Flash in Chrome
Enabling the Flash plugin in Chrome involves a straightforward process that allows users to activate Flash content when needed. Once you have confirmed that Flash is currently disabled in your Chrome browser, you can proceed with the following steps to enable it:
-
Accessing Chrome Settings: After confirming that Flash is disabled, navigate back to the Chrome browser window. Click on the 'More' icon at the top right corner, represented by three vertical dots, to reveal the dropdown menu.
-
Navigating to Settings: From the dropdown menu, select the 'Settings' option. This will open a new tab displaying the various settings and customization options for Chrome.
-
Locating Content Settings: Within the Settings tab, scroll down and click on the 'Privacy and security' section. Here, you will find the 'Site settings' option. Click on this to access a range of site-specific settings.
-
Accessing Flash Settings: Under the 'Permissions' section, locate and click on 'Flash'. This will direct you to the Flash settings page, where you can manage the behavior of Flash content on websites.
-
Enabling Flash: On the Flash settings page, you will find a toggle switch to enable or disable Flash. If Flash is currently disabled, the toggle will be in the 'Off' position. Simply click on the toggle to switch it to the 'On' position, thereby enabling Flash in Chrome.
Once you have completed these steps, Flash will be successfully enabled in your Chrome browser. This straightforward process ensures that you can access Flash-based content without encountering any restrictions. It's important to note that enabling Flash should be approached with caution, as it can pose security risks due to its outdated nature. Therefore, it's advisable to only enable Flash when accessing trusted websites or applications that specifically require it.
By following these steps, users can seamlessly enable the Flash plugin in Chrome, unlocking the ability to interact with Flash-based content as needed. This process empowers users to take control of their browsing experience, allowing them to leverage the capabilities of Flash while being mindful of its potential security implications.
Verifying Flash is Enabled
After enabling the Flash plugin in Chrome, it's essential to verify that the activation process was successful. This verification step ensures that users can confidently access Flash-based content without any ambiguity. To confirm that Flash is indeed enabled in Chrome, follow these simple steps:
-
Accessing Chrome Settings: Once you have enabled Flash, navigate back to the Chrome browser window. Click on the 'More' icon at the top right corner, represented by three vertical dots, to reveal the dropdown menu.
-
Navigating to Settings: From the dropdown menu, select the 'Settings' option. This will open a new tab displaying the various settings and customization options for Chrome.
-
Locating Content Settings: Within the Settings tab, scroll down and click on the 'Privacy and security' section. Here, you will find the 'Site settings' option. Click on this to access a range of site-specific settings.
-
Accessing Flash Settings: Under the 'Permissions' section, locate and click on 'Flash'. This will direct you to the Flash settings page, where you can manage the behavior of Flash content on websites.
-
Verifying Flash Status: On the Flash settings page, you will find the toggle switch that indicates the status of Flash. If the toggle is in the 'On' position, it confirms that Flash is successfully enabled in Chrome. This visual confirmation provides assurance that the activation process was effective.
In addition to visually confirming the status of Flash in the settings, users can also perform a quick test to ensure that Flash-based content loads and functions as expected. Visiting a website or application known to utilize Flash and interacting with the content serves as a practical way to verify the successful enabling of Flash in Chrome.
By following these steps, users can confidently verify that Flash is indeed enabled in their Chrome browser. This verification process adds an extra layer of assurance, ensuring that users can seamlessly access and engage with Flash content without encountering any unexpected limitations.