Introduction
Adding a bookmark folder in Chrome can significantly enhance your browsing experience by allowing you to organize and access your favorite websites with ease. Whether you're a casual internet user or a seasoned web surfer, having a well-structured collection of bookmarks can save you time and streamline your online activities. In this guide, we'll walk you through the simple steps to create a bookmark folder in Chrome, enabling you to keep your favorite websites neatly categorized and readily accessible.
By creating a bookmark folder, you can efficiently manage your bookmarks, making it effortless to locate specific websites whenever you need them. This feature is particularly beneficial for individuals who frequently visit a variety of websites, such as news sources, social media platforms, educational resources, or entertainment hubs. With a well-organized bookmark folder, you can bid farewell to the hassle of sifting through a cluttered list of bookmarks or struggling to remember the URLs of your go-to websites.
Moreover, the ability to add a bookmark folder in Chrome empowers you to tailor your browsing experience to suit your preferences. Whether you want to create separate folders for work-related websites, leisure activities, or research materials, the flexibility of organizing bookmarks allows you to customize your browsing environment according to your unique needs and interests.
In the following sections, we will guide you through the step-by-step process of adding a bookmark folder in Chrome, providing clear instructions and valuable tips to ensure a seamless experience. By the end of this guide, you'll be equipped with the knowledge and skills to effortlessly create and manage bookmark folders, optimizing your Chrome browser for enhanced productivity and convenience. Let's dive into the simple yet impactful process of organizing your bookmarks with ease.
Step 1: Open Chrome and go to the Bookmarks Manager
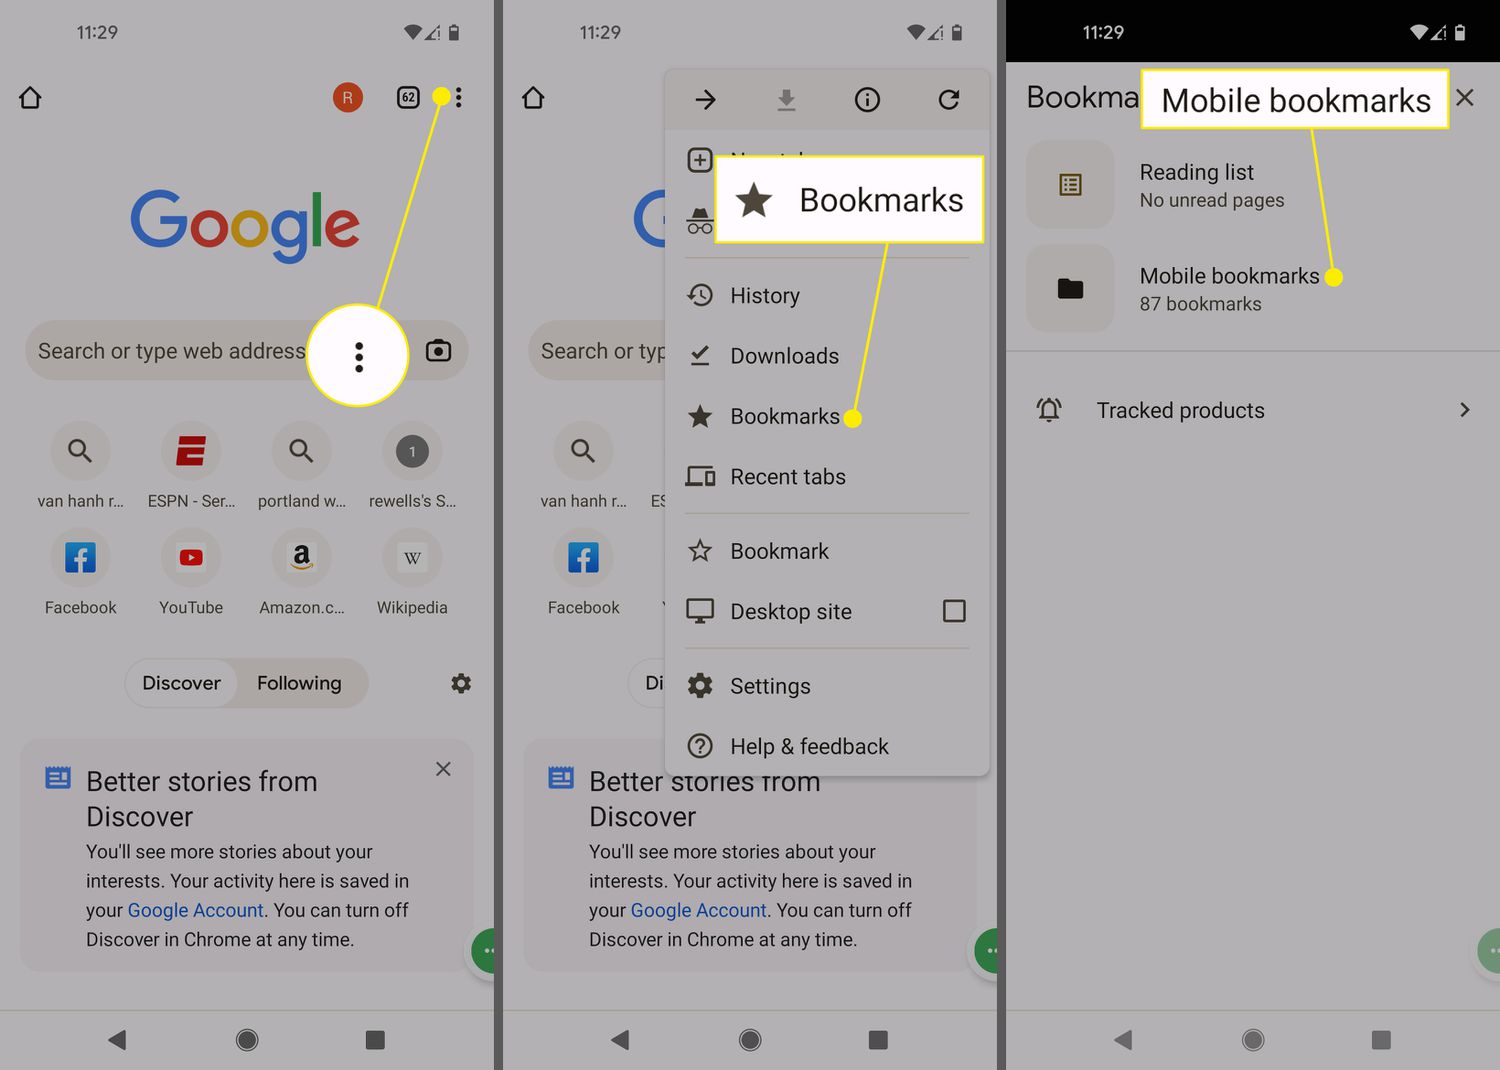
To begin the process of adding a bookmark folder in Chrome, you'll first need to open the Chrome browser on your computer. Once the browser is launched, navigate to the Bookmarks Manager. You can access the Bookmarks Manager by clicking on the three-dot menu icon located in the top-right corner of the Chrome window. Upon clicking the icon, a drop-down menu will appear, presenting a range of options to customize your browsing experience.
From the drop-down menu, locate and select the "Bookmarks" option. This action will reveal a secondary menu, where you can further explore and manage your bookmarks. Within this menu, you'll find the "Bookmark Manager" option, which is the gateway to organizing and customizing your bookmarks in Chrome.
Upon selecting the "Bookmark Manager," a new tab will open within the Chrome browser, displaying a comprehensive overview of your bookmarks. Here, you'll have access to various tools and features that enable you to arrange, edit, and create new bookmarks and bookmark folders. The Bookmarks Manager provides a user-friendly interface, allowing you to effortlessly navigate through your bookmarks and make necessary adjustments to suit your preferences.
Once you've successfully accessed the Bookmarks Manager, you're ready to proceed with the next steps in creating a bookmark folder in Chrome. This initial step sets the stage for efficient bookmark organization, laying the groundwork for a personalized and streamlined browsing experience tailored to your specific interests and needs.
By familiarizing yourself with the Bookmarks Manager and its functionalities, you gain the ability to take full control of your bookmarks, ensuring that your favorite websites are neatly organized and readily accessible whenever you need them. With the first step completed, you're now prepared to delve into the subsequent steps, where you'll further refine your bookmark management skills and enhance your browsing efficiency.
Step 2: Click on the "More" button
After accessing the Bookmarks Manager in Chrome, the next crucial step in creating a bookmark folder is to click on the "More" button, which unlocks additional options for managing your bookmarks. The "More" button is strategically positioned within the Bookmarks Manager interface, offering a gateway to a range of functionalities that enable you to customize and organize your bookmarks with precision and ease.
Upon locating the "More" button within the Bookmarks Manager, you'll notice that clicking on it triggers a dropdown menu, unveiling a host of valuable options designed to streamline your bookmark management process. This menu serves as a centralized hub for accessing essential tools and features that empower you to tailor your bookmark organization according to your specific preferences and browsing habits.
By clicking on the "More" button, you gain access to a diverse array of options, including the ability to create new bookmarks, edit existing bookmarks, and crucially, the option to add a new bookmark folder. This pivotal step marks the transition from merely viewing your bookmarks to actively engaging in the process of customizing and structuring your bookmark collection to suit your unique needs.
The "More" button serves as a catalyst for efficient bookmark management, providing a seamless pathway to the creation of a new bookmark folder. This feature embodies the user-centric design philosophy of Chrome, empowering you to take charge of your browsing experience and curate a personalized collection of bookmarks that aligns with your interests and priorities.
By clicking on the "More" button within the Bookmarks Manager, you embark on a journey of empowerment and customization, where you can harness the full potential of Chrome's bookmark management capabilities. This pivotal action sets the stage for the subsequent steps, where you'll further refine your bookmark organization skills and elevate your browsing efficiency to new heights.
With the "More" button serving as your gateway to enhanced bookmark management, you're poised to seamlessly progress to the next steps, where you'll continue to shape and optimize your bookmark collection, ultimately transforming your browsing experience into a tailored and intuitive journey through the digital landscape.
Step 3: Select "Add folder"
Once you have clicked on the "More" button within the Bookmarks Manager, the next pivotal step in creating a bookmark folder in Chrome is to select the "Add folder" option from the dropdown menu. This action propels you into the heart of the bookmark organization process, empowering you to establish a new folder where you can systematically categorize and store your favorite websites.
Upon selecting the "Add folder" option, a dialog box will appear, prompting you to input the name of your new bookmark folder. This presents a valuable opportunity to personalize your bookmark organization, as you can choose a name that accurately reflects the content or theme of the websites you intend to include in the folder. Whether you're creating a folder for professional resources, leisure activities, educational materials, or any other category of websites, the ability to name your folder according to its contents enhances the clarity and accessibility of your bookmarks.
The process of naming your new bookmark folder is a pivotal aspect of effective bookmark management, as it sets the tone for the organization and accessibility of your favorite websites. By selecting a descriptive and intuitive name for your folder, you streamline the process of locating specific bookmarks, ensuring that your browsing experience remains efficient and tailored to your preferences.
Furthermore, the act of adding a new folder within the Bookmarks Manager signifies a proactive approach to customizing your browsing environment. It empowers you to transcend the limitations of a disorganized list of bookmarks and instead curate a structured and purposeful collection that aligns with your unique interests and activities.
By selecting "Add folder" and naming your new bookmark folder, you embark on a journey of empowerment and efficiency, where you take control of your browsing experience and optimize it to suit your individual needs. This pivotal step paves the way for the subsequent actions, where you'll further refine your bookmark organization skills and elevate your browsing efficiency to new heights.
With the new folder created and named, you're now prepared to proceed to the next steps, where you'll continue to shape and optimize your bookmark collection, ultimately transforming your browsing experience into a tailored and intuitive journey through the digital landscape.
Step 4: Name your new bookmark folder
Naming your new bookmark folder is a crucial step in the process of creating a well-organized and easily accessible collection of bookmarks in Chrome. The name you choose for your folder plays a pivotal role in enhancing the clarity, relevance, and usability of your bookmark organization. It serves as a guiding beacon, enabling you to swiftly identify and access specific websites within the folder, thereby streamlining your browsing experience and saving valuable time.
When naming your new bookmark folder, it's essential to consider the content and purpose of the websites you intend to include. Whether you're creating a folder for professional resources, leisure activities, educational materials, or any other category of websites, the name you select should accurately reflect the theme or content of the websites within the folder. This approach ensures that the folder's name aligns with its intended purpose, making it intuitive and easy to navigate.
Furthermore, the name you choose for your new bookmark folder should be descriptive and memorable. By selecting a name that succinctly encapsulates the essence of the websites it contains, you enhance the folder's usability and accessibility. A well-chosen name eliminates ambiguity and provides clear guidance, enabling you to swiftly locate and access the desired websites without unnecessary effort or confusion.
In addition to being descriptive, the name of your new bookmark folder should be concise and easy to remember. Opting for a succinct and memorable name enhances the practicality of your bookmark organization, ensuring that you can effortlessly recall the folder's contents and purpose whenever you need to access specific websites. This simplicity and memorability contribute to a seamless browsing experience, allowing you to navigate your bookmarks with ease and efficiency.
By naming your new bookmark folder thoughtfully and purposefully, you set the stage for a streamlined and personalized browsing experience. The chosen name becomes a cornerstone of efficient bookmark management, empowering you to curate a collection that resonates with your unique interests and activities. With the folder named, you're now poised to seamlessly progress to the final step, where you'll add bookmarks to the newly created folder, further refining your browsing environment to align with your preferences and priorities.
Step 5: Add bookmarks to the new folder
With your new bookmark folder created and named, the final step in the process of enhancing your bookmark organization is to add specific bookmarks to the newly established folder. This step is pivotal in customizing your browsing experience, as it allows you to systematically categorize and store your favorite websites within a structured framework, ensuring easy access and efficient navigation.
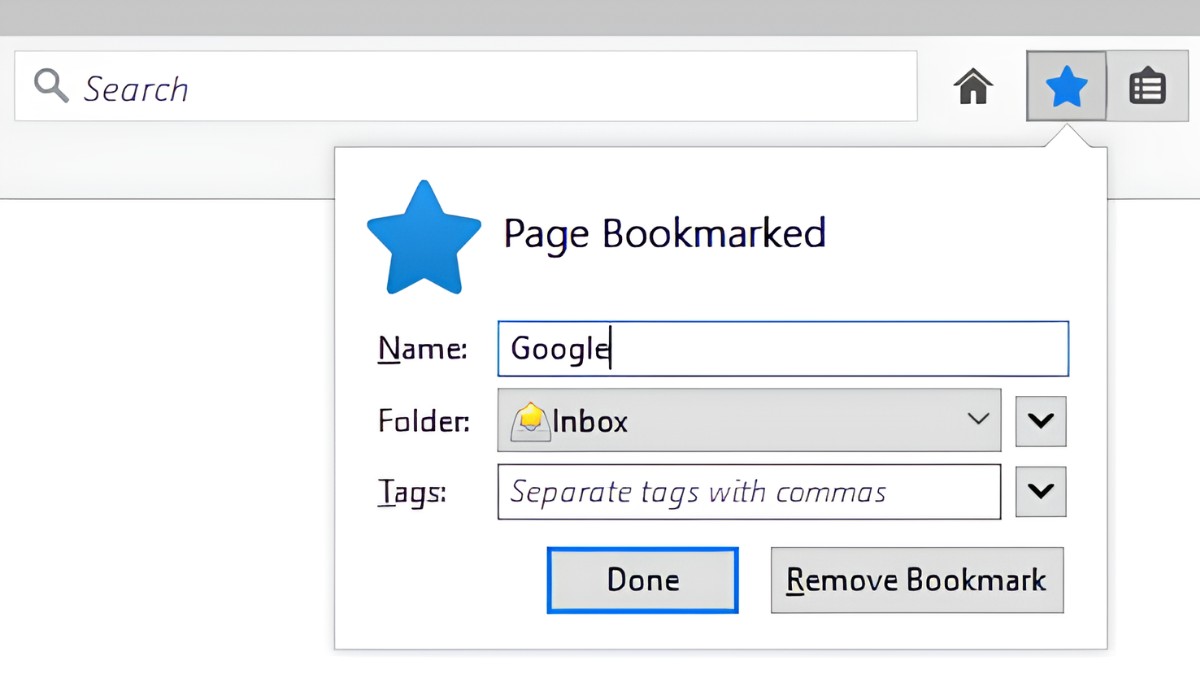
To add bookmarks to the new folder, begin by navigating to the websites you wish to include. Once you're on a webpage that you want to bookmark, simply click on the star icon located in the address bar at the top of the Chrome browser window. This action triggers a dropdown menu, presenting options to customize the bookmark before saving it. From the dropdown menu, ensure that you select the newly created folder as the destination for the bookmark.
By assigning the bookmark to the designated folder, you effectively integrate it into your organized collection, aligning it with the thematic or categorical structure you've established. This process enables you to curate a personalized repository of bookmarks, tailored to your specific interests and activities.
Furthermore, the ability to add bookmarks to the new folder is not limited to individual websites. You can seamlessly incorporate multiple websites into the folder, creating a comprehensive and easily accessible compilation of your preferred online destinations. Whether you're bookmarking news websites, educational resources, entertainment platforms, or professional tools, the flexibility of adding diverse bookmarks to the folder empowers you to create a versatile and purposeful collection.
As you populate the new folder with bookmarks, you're actively shaping your browsing environment to reflect your unique preferences and priorities. This deliberate curation of bookmarks ensures that your favorite websites are readily available whenever you need them, eliminating the inconvenience of searching through an unorganized list of bookmarks or struggling to recall specific URLs.
By adding bookmarks to the new folder, you solidify the foundation of an efficient and tailored browsing experience. The structured organization of your bookmarks enhances your productivity and convenience, allowing you to navigate the digital landscape with ease and precision. With this final step completed, you've successfully optimized your Chrome browser with a well-organized bookmark folder, empowering you to seamlessly access and enjoy your favorite online destinations.
Conclusion
In conclusion, the process of adding a bookmark folder in Chrome is a simple yet impactful endeavor that can significantly enhance your browsing experience. By following the step-by-step guide outlined in this article, you've gained the knowledge and skills to create a well-organized collection of bookmarks, tailored to your specific interests and activities.
The ability to organize your favorite websites into distinct folders empowers you to streamline your browsing experience, saving valuable time and effort when accessing specific online destinations. Whether you're a professional seeking efficient access to work-related resources, a student compiling educational materials, or an avid internet user curating a diverse array of leisure activities, the creation of bookmark folders in Chrome enables you to customize your browsing environment according to your unique needs.
Furthermore, the process of adding a bookmark folder in Chrome embodies the user-centric design philosophy of the browser, placing control and customization directly in your hands. The intuitive interface of the Bookmarks Manager, coupled with the seamless functionality of adding and organizing folders, ensures that you can effortlessly tailor your browsing experience to align with your preferences and priorities.
By naming your new bookmark folder thoughtfully and purposefully, you've set the stage for a streamlined and personalized browsing experience. The chosen name becomes a cornerstone of efficient bookmark management, empowering you to curate a collection that resonates with your unique interests and activities.
With the final step of adding bookmarks to the newly created folder, you've solidified the foundation of an efficient and tailored browsing experience. The structured organization of your bookmarks enhances your productivity and convenience, allowing you to navigate the digital landscape with ease and precision.
In essence, the process of adding a bookmark folder in Chrome transcends mere organization; it represents a journey of empowerment and customization, where you take control of your browsing experience and optimize it to suit your individual needs. By curating a personalized collection of bookmarks, you've transformed your browsing experience into a tailored and intuitive journey through the digital landscape.
With the knowledge and skills acquired from this guide, you're now equipped to effortlessly create and manage bookmark folders in Chrome, ensuring that your favorite websites are neatly organized and readily accessible whenever you need them. Embrace the power of bookmark organization and elevate your browsing experience to new heights.


