Introduction
Wire splicing is a fundamental skill for anyone who uses electronic gadgets, especially when it comes to repairing or customizing headset wires. Whether you're a tech enthusiast, a DIY hobbyist, or simply someone who wants to save money on repairs, knowing how to splice headset wires can be incredibly useful. In this comprehensive guide, we will walk you through the process of wire splicing, providing you with the knowledge and confidence to tackle this task with ease.
Understanding the intricacies of wire splicing not only empowers you to troubleshoot and fix issues with your headset wires but also allows you to personalize your gadgets according to your preferences. With the right tools and a basic understanding of the process, you can breathe new life into your favorite pair of headphones or earbuds, ensuring that they continue to deliver exceptional sound quality for years to come.
By mastering the art of wire splicing, you can bypass the need for costly replacements and take control of the maintenance and customization of your gadgets. This skill opens up a world of possibilities, enabling you to experiment with different wire configurations, colors, and lengths to create a truly unique and personalized audio experience.
Throughout this guide, we will cover everything you need to know about wire splicing, from the essential tools and materials required to the step-by-step process of splicing and insulating the wires. By the end of this guide, you will have the confidence and expertise to tackle wire splicing projects with precision and finesse, ensuring that your headset wires are always in optimal condition.
So, let's dive into the world of wire splicing and unlock the potential to breathe new life into your beloved gadgets!
Tools and Materials Needed
When it comes to wire splicing, having the right tools and materials at your disposal is crucial for achieving a successful and durable splice. Before embarking on any wire splicing project, it's essential to gather the following items to ensure a smooth and efficient process:
Wire Strippers:
A reliable pair of wire strippers is indispensable for removing the insulation from the ends of the wires. Look for a pair that offers precise and adjustable cutting capabilities to accommodate various wire gauges.
Soldering Iron and Solder:
Investing in a quality soldering iron is key to achieving strong and reliable connections. Opt for a soldering iron with adjustable temperature settings and a comfortable grip for extended use. Additionally, high-quality solder with a rosin core is essential for creating durable electrical connections.
Heat Shrink Tubing:
Heat shrink tubing serves as a protective insulator for the spliced wires, safeguarding them against moisture, abrasion, and other potential damage. Ensure that the heat shrink tubing has a shrink ratio compatible with the wire gauge being used.
Helping Hands Tool:
A helping hands tool, equipped with adjustable alligator clips and a stable base, provides the necessary support for securing the wires during the splicing and soldering process. This tool enhances precision and stability, allowing for accurate wire positioning.
Multimeter:
A multimeter is essential for testing the continuity and integrity of the spliced wires. It enables you to verify the conductivity of the connections, ensuring that the splicing process has been executed effectively.
Electrical Tape:
High-quality electrical tape is vital for providing an additional layer of insulation and protection for the spliced wires. Opt for tape that offers excellent adhesion and durability, effectively sealing the splice against external elements.
Wire:
Depending on the specific requirements of your project, you may need additional wire for extending, repairing, or customizing the headset wires. Ensure that the wire gauge and type align with the existing wires to maintain consistent electrical conductivity.
Work Area:
Creating a dedicated work area with ample lighting and ventilation is essential for carrying out wire splicing tasks safely and effectively. A clean and organized workspace minimizes the risk of accidents and facilitates a focused approach to the splicing process.
By ensuring that you have the aforementioned tools and materials on hand, you can approach wire splicing projects with confidence and precision, setting the stage for successful outcomes and long-lasting electrical connections.
Understanding Wire Types
Before delving into the process of wire splicing, it's crucial to understand the different wire types commonly encountered in headset cables. By familiarizing yourself with these wire types, you can effectively identify and work with the wires during the splicing process, ensuring accurate connections and optimal electrical conductivity.
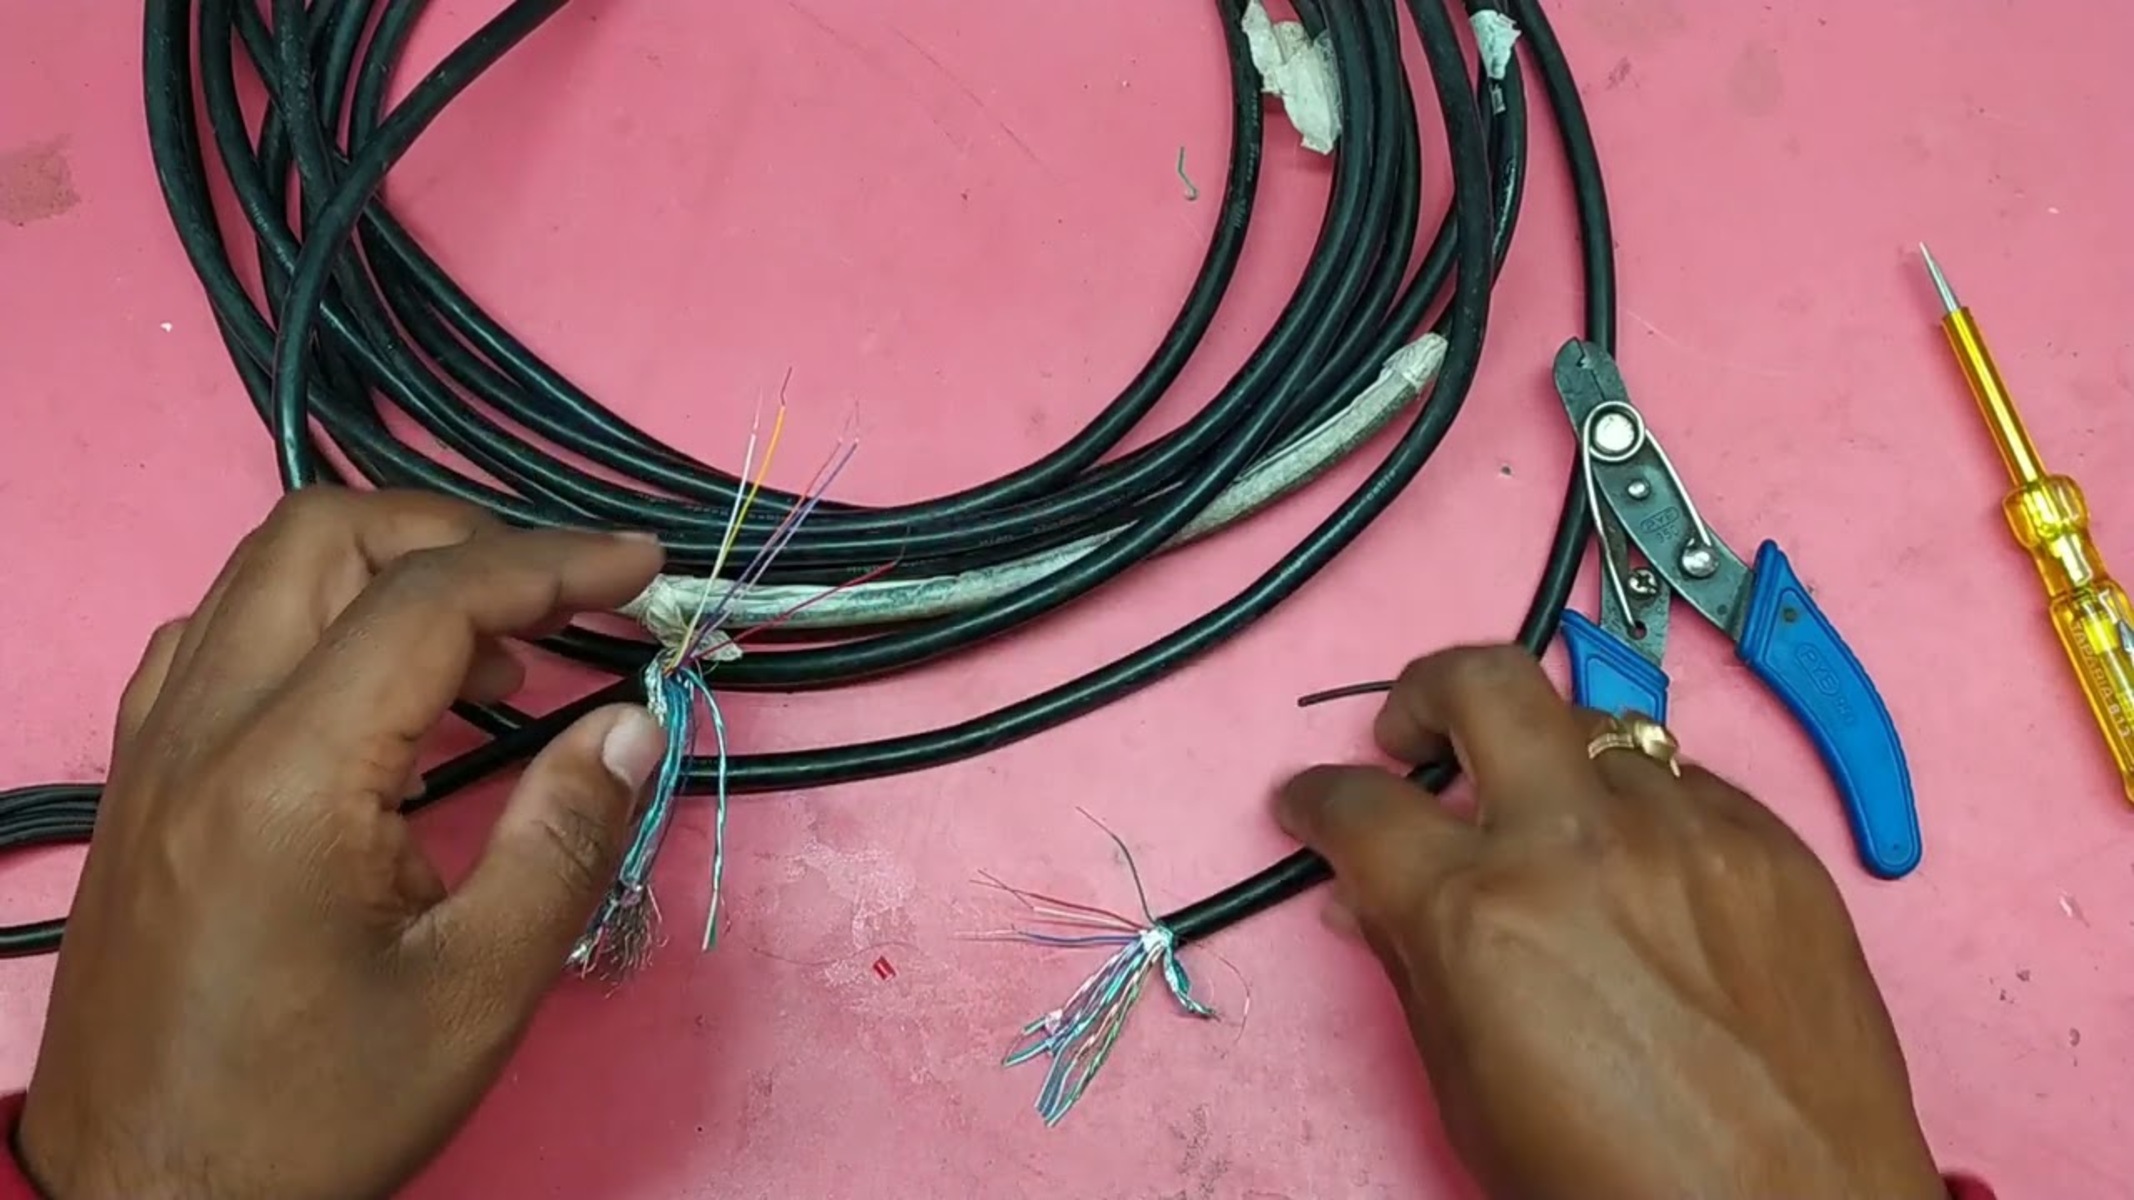
Stranded Wire:
Stranded wire is composed of multiple thin strands of conductive material, such as copper, bundled together to form a single wire. This construction offers flexibility and durability, making it ideal for applications where the wire may be subjected to bending or movement, as is often the case with headset cables. When splicing stranded wires, it's essential to ensure that the individual strands are securely twisted together to maintain the integrity of the electrical connection.
Solid Core Wire:
In contrast to stranded wire, solid core wire consists of a single, continuous strand of conductive material. Solid core wire provides excellent conductivity and is well-suited for fixed installations where minimal flexibility is required. When working with solid core wire during the splicing process, it's important to handle the wire with care to prevent breakage or damage to the conductor.
Shielded Wire:
Shielded wire features an additional layer of insulation, typically made of conductive material, surrounding the inner conductors. This shielding serves to protect the signal-carrying conductors from external electromagnetic interference, ensuring clean and uninterrupted signal transmission. When splicing shielded wires, it's essential to maintain the integrity of the shielding to preserve the wire's noise-rejection capabilities.
Color-Coded Wires:
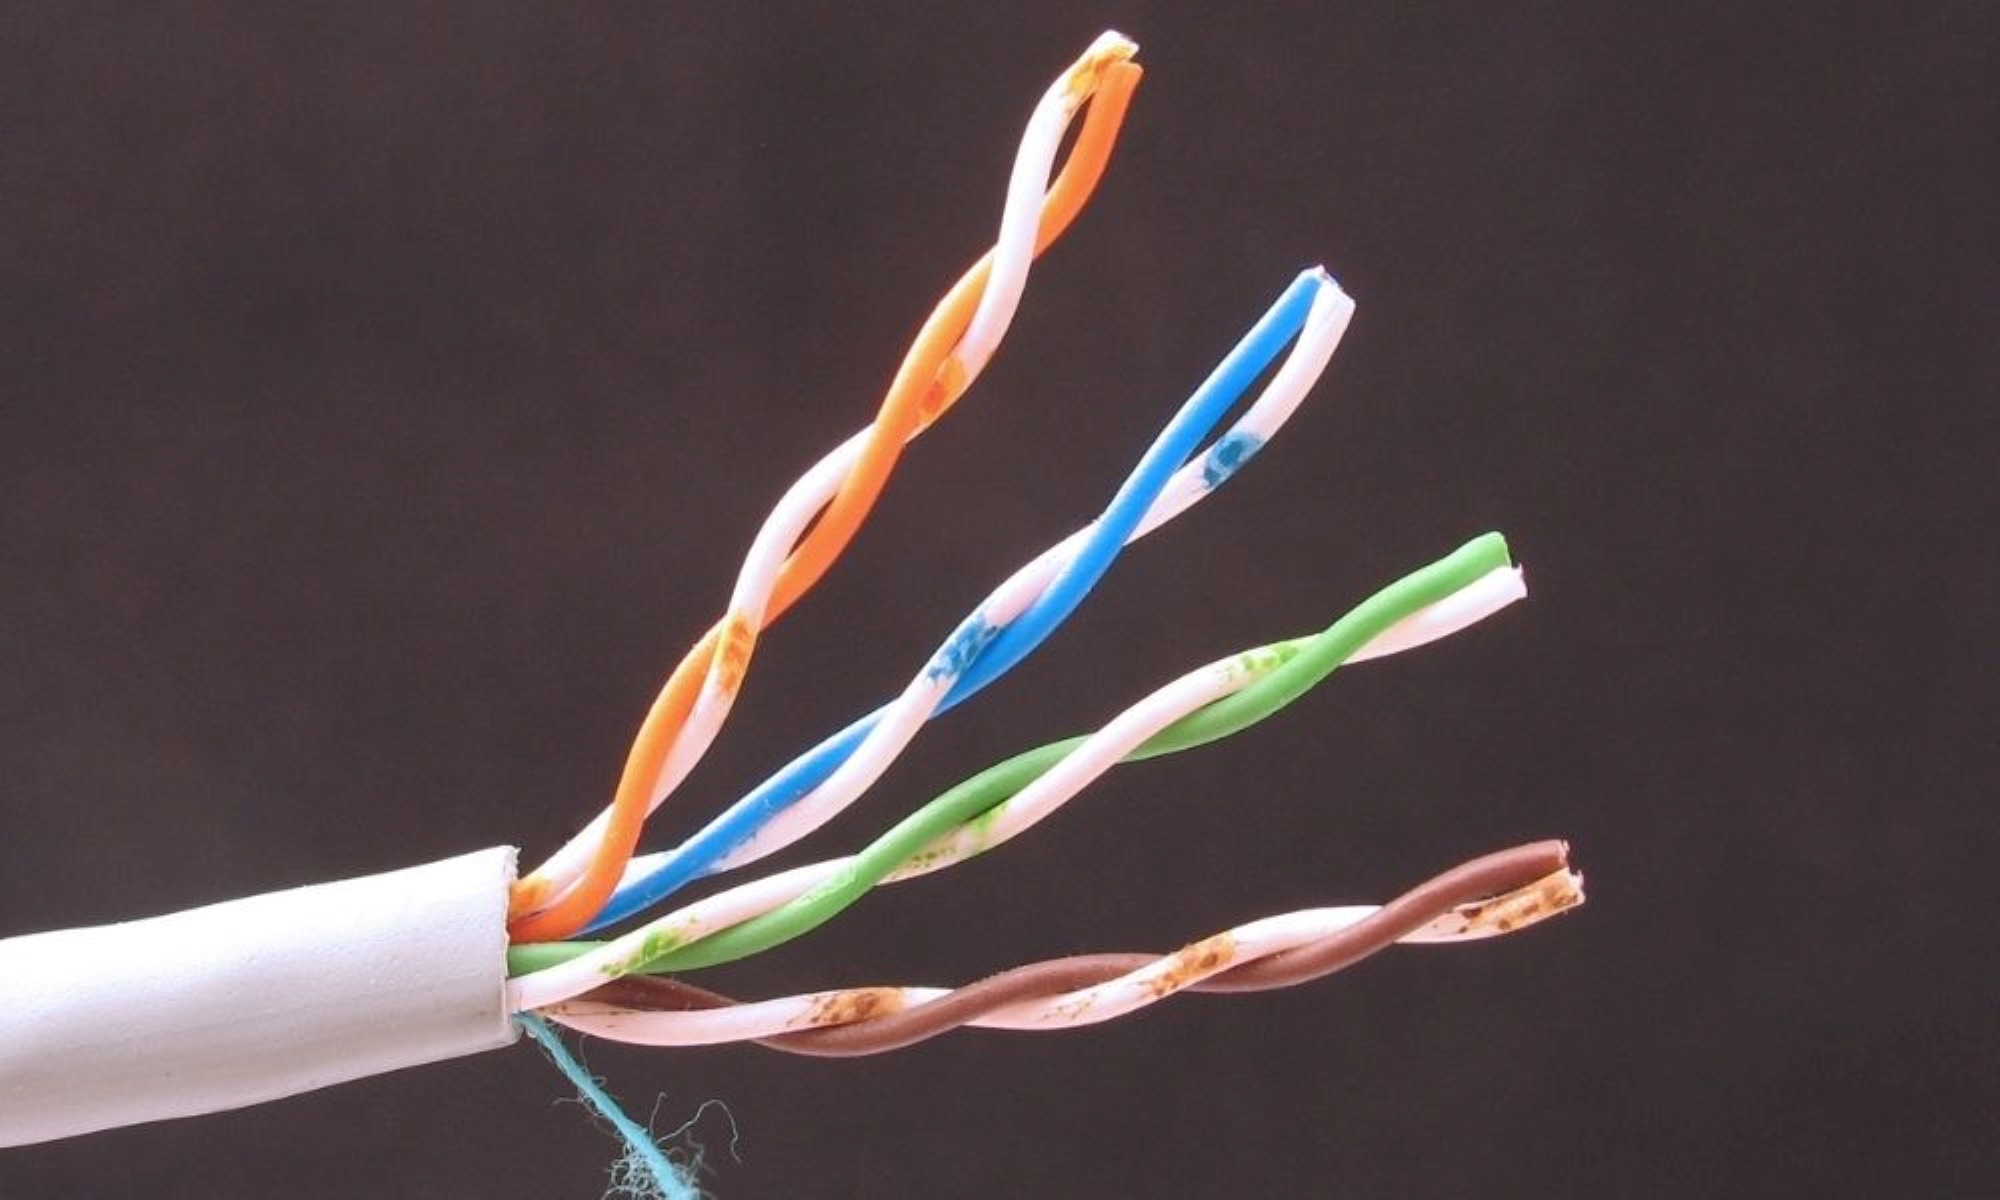
In many headset cables, the individual wires are color-coded to facilitate identification and connection. Common color codes include red for the right audio channel, blue for the left audio channel, and copper or green for the ground connection. Understanding these color codes is essential for accurately splicing the wires to maintain proper audio channel alignment and electrical grounding.
By familiarizing yourself with the characteristics of these wire types, you can approach the wire splicing process with confidence and precision. Whether you're repairing damaged headset wires or customizing cable lengths, a solid understanding of wire types is fundamental to achieving reliable and durable splices. With this knowledge in hand, you are well-equipped to navigate the intricacies of wire splicing and breathe new life into your beloved gadgets.
Stripping the Wires
The process of wire splicing begins with the essential step of stripping the insulation from the ends of the wires. Properly stripping the wires is crucial for creating clean and reliable electrical connections, setting the stage for a successful splicing process. Here's a detailed guide on how to effectively strip the wires for your headset wire splicing project:
-
Selecting the Right Wire Strippers: Begin by choosing the appropriate wire strippers that match the gauge of the wires in your headset cable. Ensure that the wire strippers are adjusted to the correct gauge setting to prevent damage to the conductive strands during the stripping process.
-
Measuring and Marking: Carefully measure and mark the length of insulation to be removed from the ends of the wires. It's essential to exercise precision during this step to avoid stripping off excessive insulation, which could lead to exposed conductors or insufficient insulation for the splice.
-
Gripping and Stripping: With the wire strippers properly adjusted, gently grip the insulated portion of the wire between the cutting blades of the wire strippers. Apply a steady, even pressure while rotating the wire strippers around the circumference of the wire to score the insulation without cutting into the conductive strands.
-
Removing the Insulation: Once the insulation has been scored, carefully pull the wire strippers away from the wire, separating the insulation from the conductive strands. Exercise caution to ensure that the conductive strands remain intact and undamaged during the stripping process.
-
Inspecting the Stripped Wires: After stripping the insulation, visually inspect the exposed conductive strands to ensure that they are free from nicks, cuts, or damage. Any compromised conductive strands should be trimmed back to maintain the integrity of the wire.
By following these steps with precision and care, you can effectively strip the insulation from the wires, preparing them for the subsequent stages of the wire splicing process. Properly stripped wires provide a solid foundation for creating durable and reliable electrical connections, ensuring that your headset wires function optimally.
Remember, attention to detail and precision during the wire stripping process is essential for achieving successful splices. With the wires now stripped and prepared, you are ready to move on to the next crucial steps of wire splicing: twisting and soldering the connections to create strong and durable splices.
Twisting and Soldering
After successfully stripping the wires, the next critical phase in the wire splicing process involves twisting and soldering the exposed conductive strands to create strong and durable electrical connections. This stage is pivotal in ensuring the integrity and longevity of the splices, as well as maintaining optimal electrical conductivity within the headset wires.
Twisting the Wires
With the stripped wires prepared, carefully align the exposed conductive strands of the corresponding wires that require splicing. It's essential to ensure that the conductive strands are neatly aligned and interwoven to facilitate a secure and robust connection. Using a gentle yet firm grip, twist the aligned conductive strands together to create a tight and uniform twist. This process should be executed meticulously, as a well-twisted connection forms the foundation for a reliable electrical splice.
Soldering the Connection
Once the wires are securely twisted together, it's time to apply solder to the splice to create a permanent and conductive bond between the wires. Begin by heating the soldering iron to the appropriate temperature, ensuring that it is adequately hot to facilitate the soldering process. Position the heated soldering iron against the twisted wire splice, allowing it to transfer heat and pre-tin the splice by applying a small amount of solder to the twisted area. This pre-tinning process prepares the splice for the final soldering step, ensuring optimal conductivity and bonding.
Next, apply a small amount of solder to the heated soldering iron, allowing it to melt and flow evenly over the pre-tinned splice. The solder should be applied directly to the splice, evenly coating the twisted area and forming a smooth and uniform connection. It's crucial to avoid applying excessive solder, as this can lead to drips or blobs that may compromise the integrity of the splice.
Throughout the soldering process, ensure that the solder flows evenly and adheres to the twisted wires, creating a solid and conductive bond. Once the solder has been applied, allow it to cool and solidify, forming a durable and reliable connection between the spliced wires.
By executing the twisting and soldering process with precision and care, you can create robust and enduring electrical splices within your headset wires. These meticulously crafted connections are essential for maintaining optimal signal transmission and electrical integrity, ensuring that your spliced headset wires deliver exceptional performance and durability.
With the wires now securely twisted and soldered, the final stages of insulating the splices and testing the connections will complete the wire splicing process, setting the stage for a successful and enduring repair or customization of your headset wires.
Insulating the Splice
Insulating the splice is a crucial step in the wire splicing process, as it serves to protect the soldered connection from external elements and ensure the long-term durability and reliability of the spliced wires. By effectively insulating the splice, you safeguard the electrical connection against potential damage, moisture, and abrasion, thereby prolonging the lifespan of your repaired or customized headset wires.
Heat Shrink Tubing
One of the most effective methods for insulating spliced wires is through the use of heat shrink tubing. This specialized tubing, typically made of polyolefin material, offers exceptional insulation and protection for electrical splices. To begin the insulation process, carefully slide an appropriately sized heat shrink tube over the soldered splice, ensuring that it covers the entire spliced area and extends beyond the soldered connection.
Applying Heat
Once the heat shrink tubing is positioned over the splice, heat must be applied to activate the shrinking process. A heat source, such as a heat gun or a lighter, can be used to evenly apply heat to the heat shrink tubing. As the heat is applied, the tubing shrinks and conforms tightly around the splice, forming a secure and protective barrier. It's essential to maintain consistent heat application to ensure that the tubing shrinks uniformly and adheres firmly to the spliced wires.
Visual Inspection
After the heat shrink tubing has fully contracted around the splice, visually inspect the insulated area to verify that the tubing has formed a tight seal and encapsulated the soldered connection completely. Any exposed areas or gaps in the insulation should be addressed promptly to ensure comprehensive protection for the spliced wires.
Electrical Tape
In addition to heat shrink tubing, electrical tape can be utilized to provide an extra layer of insulation and reinforcement for the spliced wires. Wrapping the insulated splice with high-quality electrical tape further enhances its resistance to moisture, mechanical stress, and environmental factors, fortifying the integrity of the splice.
By insulating the splice with meticulous attention to detail and utilizing reliable insulating materials such as heat shrink tubing and electrical tape, you can safeguard the spliced wires against potential damage and environmental hazards. This comprehensive insulation ensures that your headset wires remain resilient and reliable, allowing you to enjoy uninterrupted audio performance without concerns about the integrity of the spliced connections.
With the splice now effectively insulated, the final step of testing the connection will provide the assurance that the wire splicing process has been executed successfully, setting the stage for the continued functionality and longevity of your repaired or customized headset wires.
Testing the Connection
After completing the intricate process of wire splicing, it is essential to validate the integrity and functionality of the spliced connections through comprehensive testing. This crucial step provides the assurance that the splicing process has been executed effectively, ensuring that the headset wires are capable of delivering optimal audio performance and maintaining reliable electrical conductivity.
Continuity Testing
To begin the testing process, a multimeter set to the continuity or resistance mode is employed to assess the electrical continuity of the spliced wires. This involves touching the multimeter probes to the respective spliced wire ends, verifying that a continuous electrical path is established. A successful continuity test indicates that the spliced wires are securely connected and capable of transmitting electrical signals without interruption.
Tug and Flex Testing
In addition to continuity testing, performing tug and flex tests on the spliced wires is essential for evaluating their mechanical integrity. Gentle tugging on the spliced area and flexing the wires simulate real-world usage scenarios, allowing for the assessment of the splice's resilience to movement and mechanical stress. A reliable splice should withstand these tests without exhibiting signs of detachment or compromised connectivity, affirming its durability and suitability for prolonged use.
Audio Playback Test
Conducting an audio playback test serves as the final confirmation of the spliced wires' functionality, ensuring that the audio signals are transmitted accurately and without distortion. By connecting the spliced headset wires to a compatible audio source and listening for clear and balanced audio output, any irregularities or discrepancies in the audio playback can be identified and addressed. A successful audio playback test validates the effectiveness of the wire splicing process, signifying that the headset wires are fully operational and capable of delivering high-quality audio experiences.
Visual Inspection
Throughout the testing process, visual inspection of the spliced connections is imperative to identify any signs of damage, loose connections, or inadequate insulation. By meticulously examining the spliced area for anomalies and irregularities, any potential issues can be addressed promptly, ensuring that the spliced wires meet the highest standards of quality and reliability.
By subjecting the spliced wires to rigorous testing, encompassing electrical, mechanical, and audio performance evaluations, the integrity and functionality of the wire splicing process are thoroughly validated. Successful testing provides the confidence that the spliced headset wires are primed for extended use, delivering exceptional audio performance and reliability.
With the completion of the testing process, the wire splicing journey culminates in the assurance of a successful and enduring repair or customization of the headset wires, empowering you to enjoy uninterrupted audio experiences and the satisfaction of a job well done.
Conclusion
In conclusion, mastering the art of wire splicing empowers gadget enthusiasts, DIY hobbyists, and tech-savvy individuals to take control of their electronic devices, particularly when it comes to repairing or customizing headset wires. Throughout this comprehensive guide, we've delved into the intricacies of wire splicing, providing a step-by-step journey through the essential processes of stripping, twisting, soldering, insulating, and testing the spliced wires. By acquiring the knowledge and skills necessary for proficient wire splicing, individuals can breathe new life into their beloved gadgets while saving on repair costs and unlocking opportunities for personalization.
The journey of wire splicing begins with the understanding of wire types commonly found in headset cables, including stranded wire, solid core wire, shielded wire, and color-coded wires. This foundational knowledge sets the stage for effectively identifying, handling, and splicing the wires with precision and confidence. Armed with the right tools and materials, including wire strippers, soldering iron, heat shrink tubing, and a multimeter, individuals are equipped to embark on wire splicing projects with the assurance of success.
The meticulous process of wire stripping, twisting, soldering, and insulating the spliced wires ensures the creation of durable and reliable electrical connections, safeguarded against environmental elements and mechanical stress. The final testing phase, encompassing continuity testing, tug and flex tests, and audio playback evaluation, provides the ultimate validation of the spliced wires' integrity and functionality, ensuring that they are primed for prolonged and uninterrupted use.
By mastering the art of wire splicing, individuals gain the ability to troubleshoot and repair damaged headset wires, customize cable lengths to suit their preferences, and enhance the longevity of their gadgets. This fundamental skill opens up a world of possibilities, allowing for the exploration of unique wire configurations, colors, and lengths to create personalized audio experiences.
In essence, wire splicing is not just a technical process; it is a gateway to unlocking the full potential of electronic devices, enabling individuals to maintain, repair, and personalize their gadgets with confidence and finesse. With the knowledge and expertise gained from this guide, individuals are poised to embark on their wire splicing endeavors, breathing new life into their cherished gadgets and embracing the satisfaction of mastering a valuable skill in the realm of electronics.