Introduction
With the increasing need for digital documentation, it is essential to have the ability to convert files into PDF format. PDF files offer the advantage of retaining the original formatting and ensuring compatibility across various platforms. If you own an iPhone and need to convert a document into a PDF, you’re in luck! In this article, we will guide you through the steps to download a document as a PDF on your iPhone.
Whether you need to convert a Word document, an Excel spreadsheet, or a PowerPoint presentation into a PDF, the process is straightforward and can be done using the built-in Files app on your iPhone. By following a few simple steps, you’ll have a PDF version of your document ready to share, print, or store securely on your device.
Converting your documents into PDF format on your iPhone not only makes it easier to view and share them, but it also ensures that the information remains intact and easily accessible across devices and platforms. So, without further ado, let’s dive into the step-by-step process of downloading a document as a PDF on your iPhone.
Step 1: Open the Files App
To begin the process, locate and open the Files app on your iPhone. The Files app allows you to manage and access all your files and documents in one central location. It comes pre-installed on most iPhones and is represented by a blue folder icon.
If you can’t find the Files app on your home screen, you can use the search feature by swiping down from the middle of the screen and typing “Files” in the search bar at the top. Once you see the Files app icon, tap on it to open the application.
Upon opening the Files app, you will be presented with the “Browse” screen. This screen displays various locations where your files might be stored, such as iCloud Drive, On My iPhone, and recently accessed folders. You can also connect cloud storage services like Dropbox or Google Drive, if you have them installed on your device.
Take a moment to familiarize yourself with the different options available on the screen. You will be using this app throughout the process to locate and convert your document into a PDF format.
Step 2: Locate the Document
Once you’ve opened the Files app on your iPhone, it’s time to locate the document that you want to convert into a PDF. The Files app allows you to access files stored on your device, in iCloud Drive, and even in external storage services.
To find your desired document, navigate through the available locations by tapping on the appropriate folder or cloud storage service. If you know the specific folder where the document is located, tap on the folder to access its contents.
If you’re not sure about the exact location of the document, you can use the search bar at the top of the screen to quickly find it. Simply type in the name of the document or a keyword related to it, and the Files app will display relevant results.
Browsing through the folders or using the search feature, locate the document that you want to convert into a PDF. It can be a Word document, an Excel spreadsheet, a PowerPoint presentation, or any other compatible file format.
Once you have found the document, you will see its name, file type, and additional details. Take a moment to double-check that you have selected the correct file before moving on to the next step.
Step 3: Preview the Document
Before converting your document into a PDF format, it is advisable to preview it to ensure that everything appears as expected. The Files app on your iPhone provides a convenient preview feature that allows you to view the contents of your document without opening any additional apps.
To preview the document, simply tap on its icon or name. The Files app will open a preview window, displaying a thumbnail or a preview of the document’s content.
Scroll through the document to ensure that all the pages are included and that the formatting, images, and text are intact. This step is crucial as it allows you to catch any potential issues or discrepancies that might occur during the conversion process.
If you need to zoom in on a particular section or view a specific page, you can use the pinch-to-zoom gesture or the navigation controls provided within the preview window.
Take your time to carefully review the document, paying attention to any headers, footers, or page numbers that might be important. If you’re satisfied with the preview and everything appears as expected, you can proceed to the next step to convert the document into a PDF.
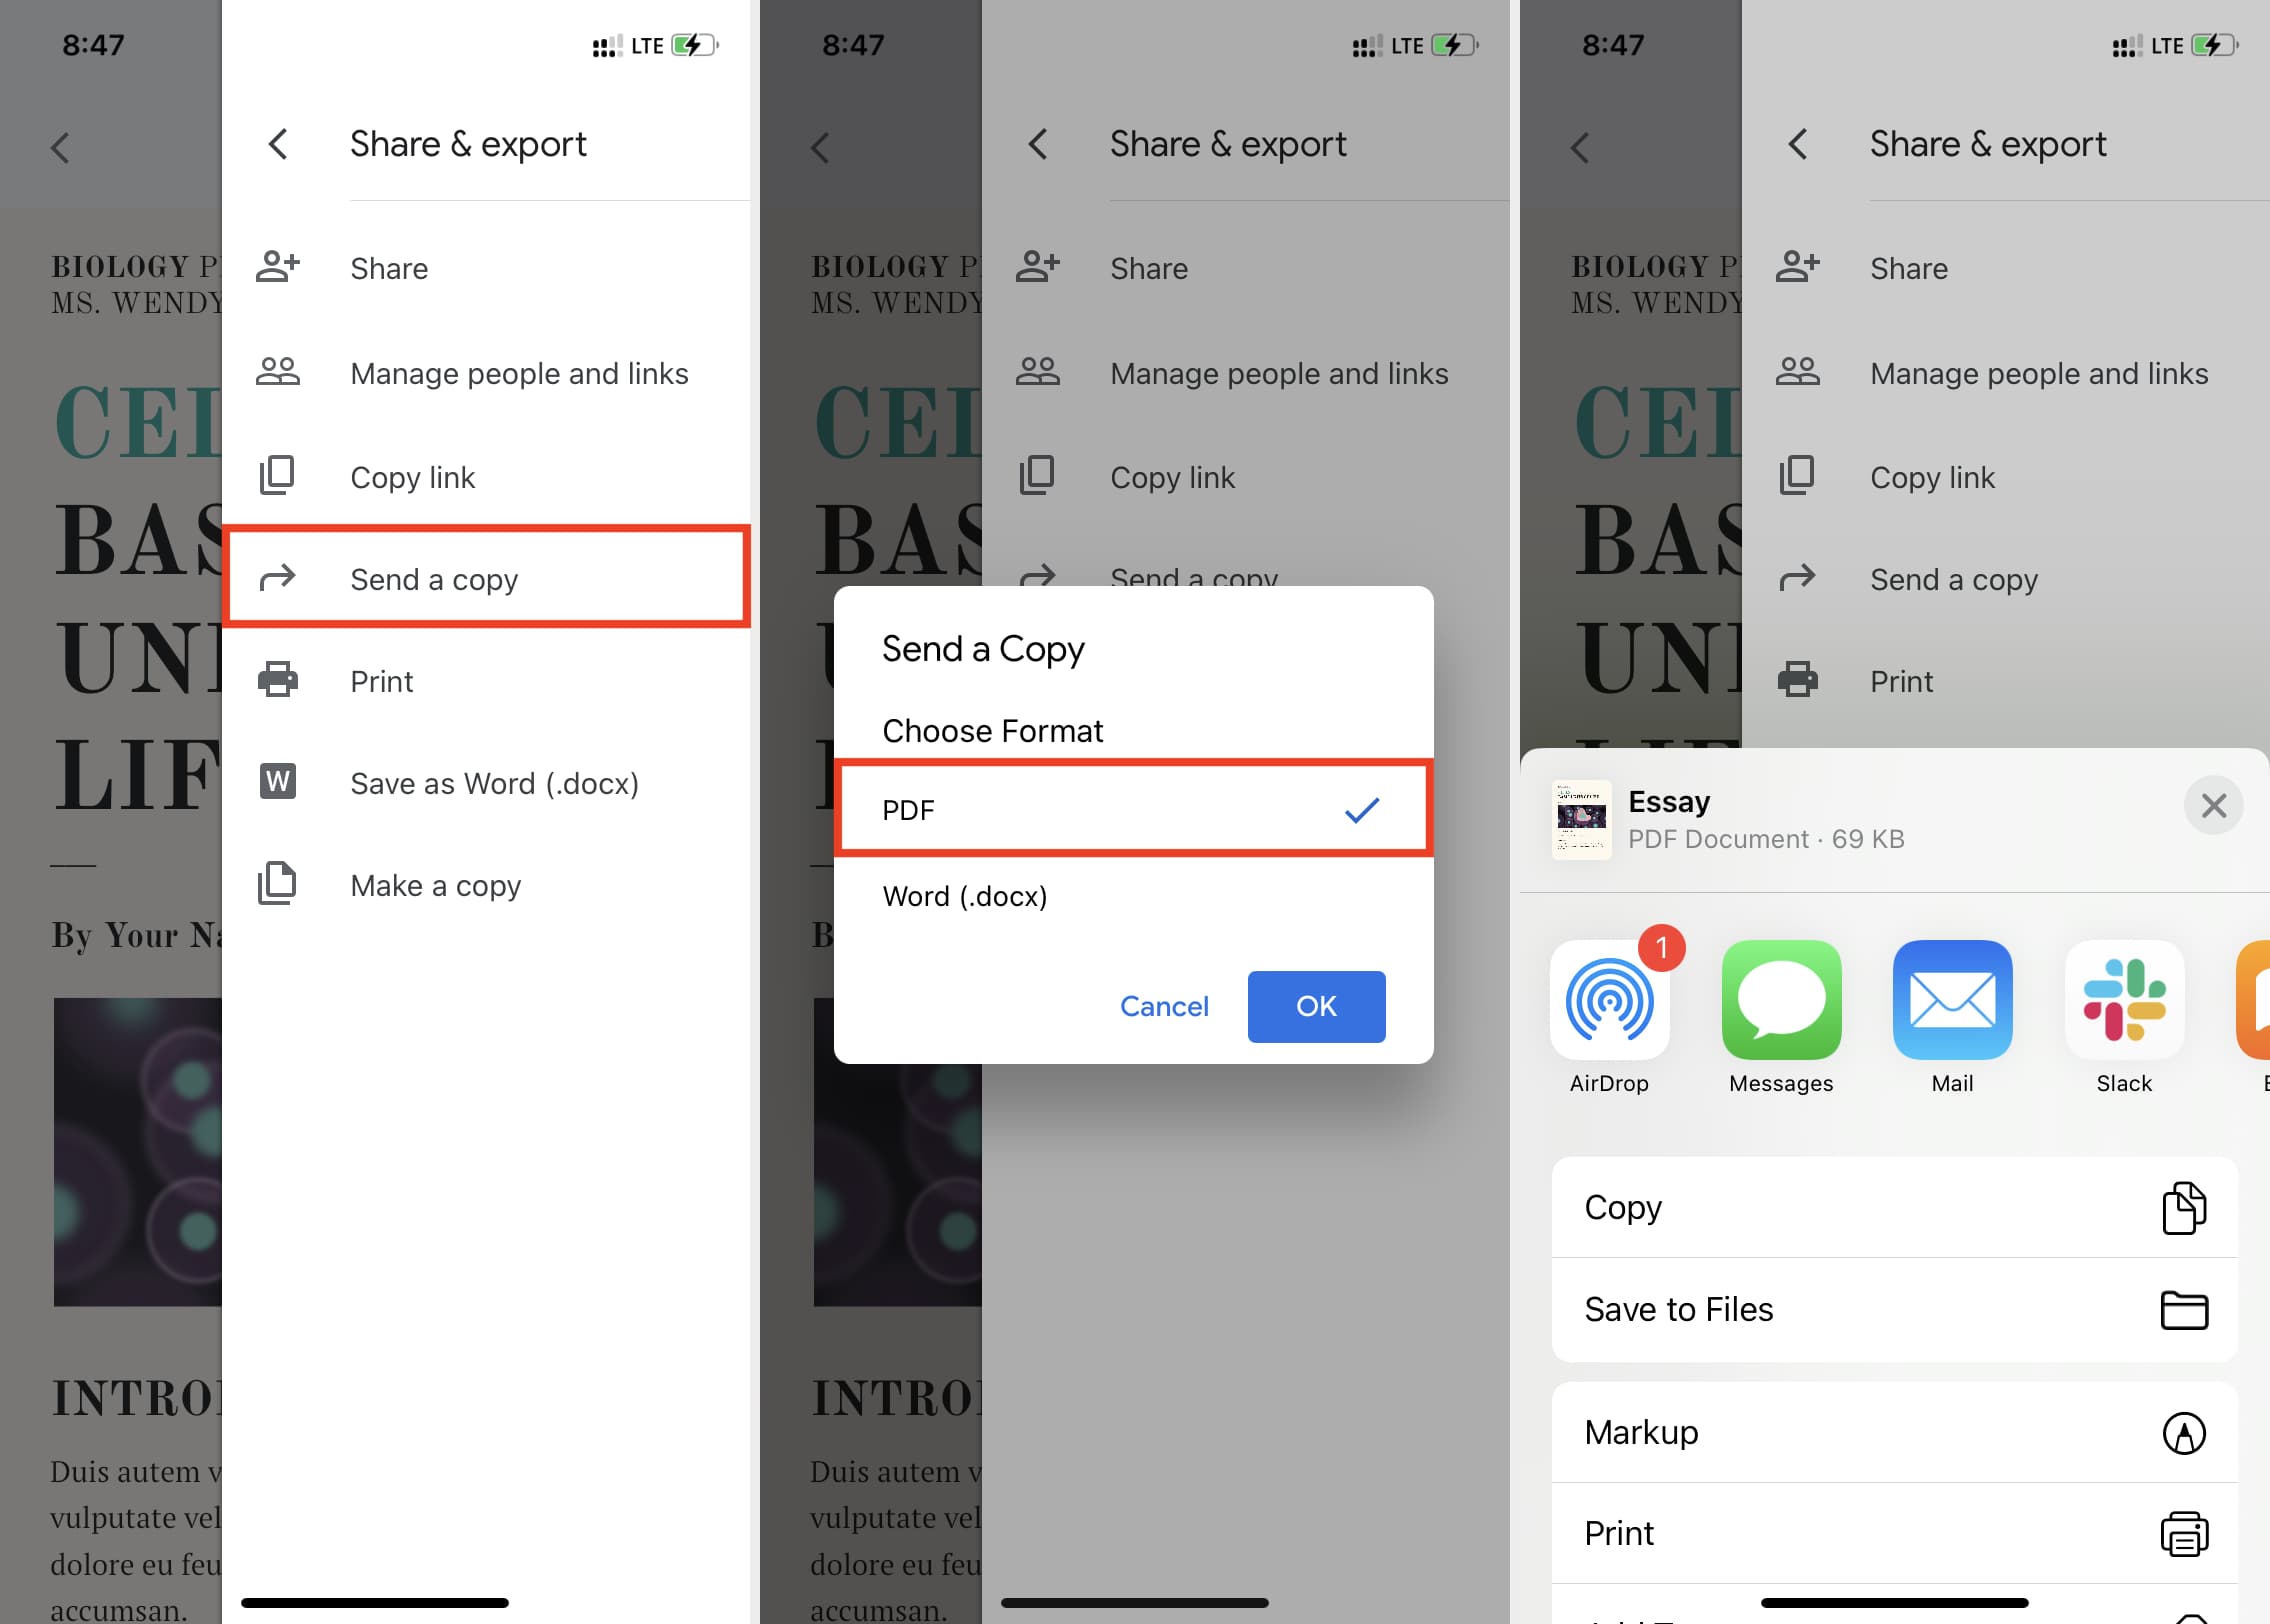
Step 4: Share the Document
Once you have previewed the document and confirmed that everything looks good, it’s time to share it and begin the process of converting it into a PDF format. The Files app on your iPhone provides a simple method to share files with various options.
To share the document, tap on the share icon located at the top right corner of the screen. The share icon is represented by a square with an upward-pointing arrow.
Upon tapping the share icon, a share sheet will appear from the bottom of the screen, displaying a range of sharing options. These options may include apps and services like Mail, Messages, AirDrop, and more, depending on the apps installed on your device.
Scroll through the sharing options to find the one that suits your needs. For example, if you want to send the PDF document via email, select the Mail app from the sharing options. Alternatively, you can choose to save the PDF to a cloud storage service like Dropbox or Google Drive.
Once you have selected your desired sharing option, follow the prompts to complete the action. If using Mail, for instance, enter the recipient’s email address, add any additional details or comments, and tap “Send” to share the document.
Note that the specific steps for sharing the document may vary depending on the app or service you choose. However, the process generally involves selecting the appropriate option, entering any necessary information, and confirming your action.
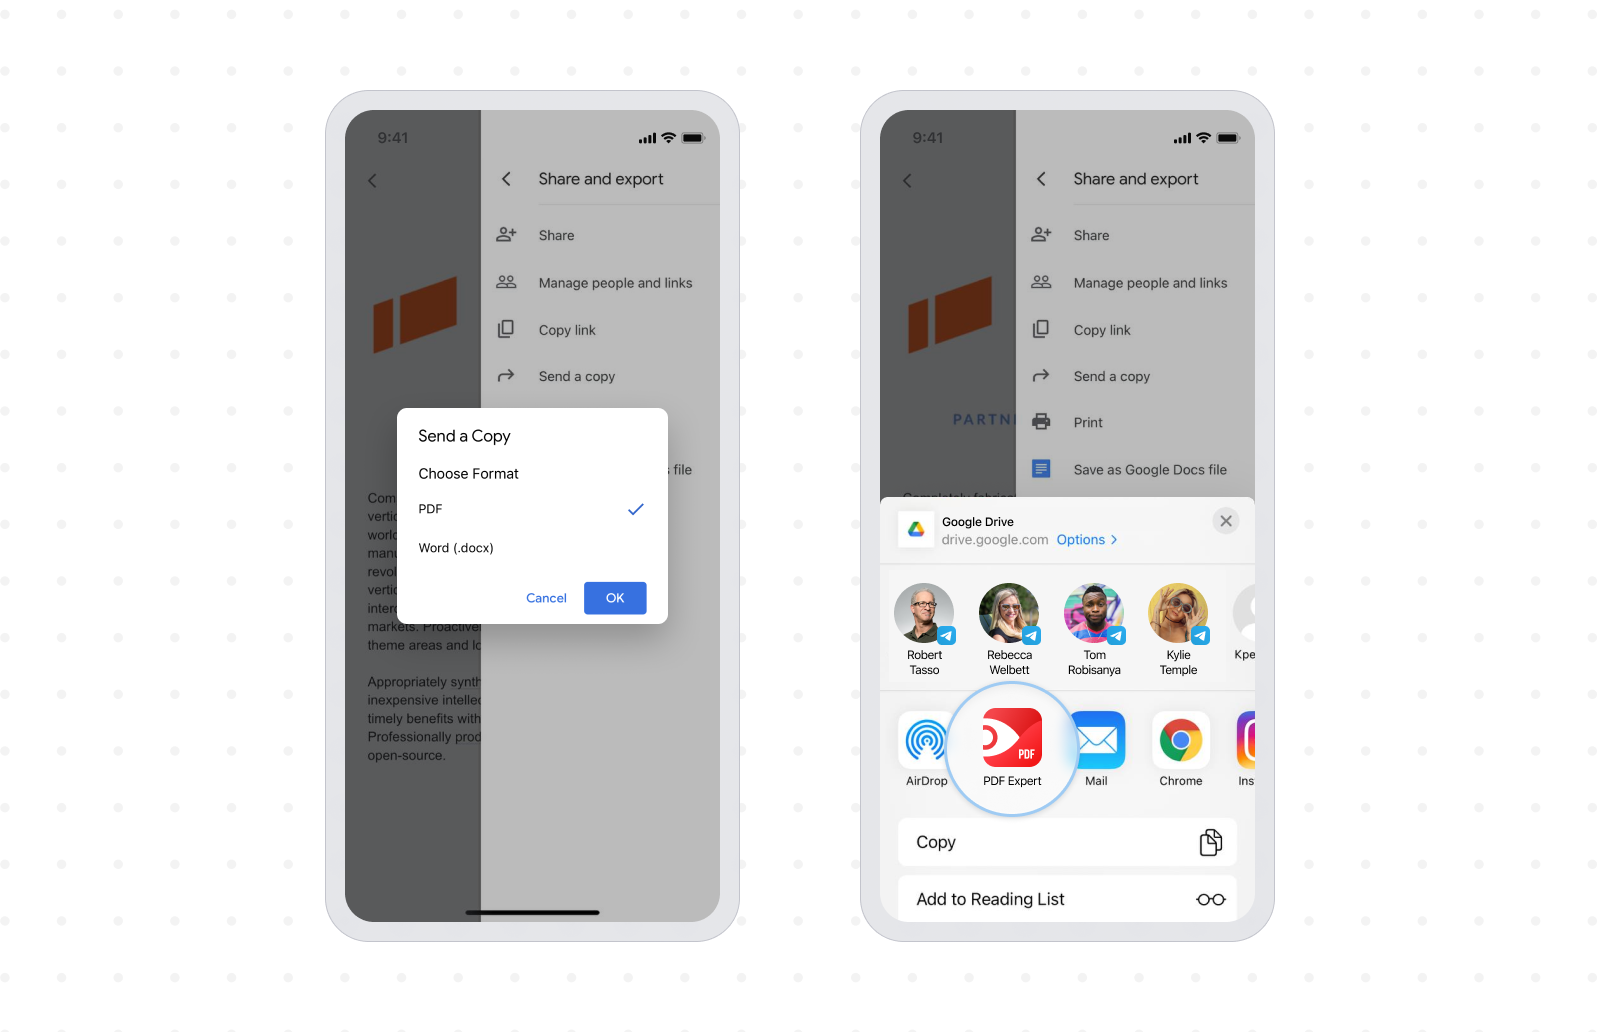
Step 5: Export as PDF
After sharing the document, you will be prompted to select the format in which you want to export it. To convert the document into a PDF format, follow these steps:
- Select the “PDF” option from the available format choices. This will ensure that the document is converted into a PDF file.
- Depending on the sharing option you chose in the previous step, the conversion might happen automatically, or you might be redirected to an additional screen to confirm the conversion. Follow the prompts on your screen accordingly.
- Some sharing options, such as the Mail app, allow you to customize the PDF settings before exporting. This includes options like page size, orientation, and password protection. Adjust these settings according to your preferences.
- Once you have selected the desired PDF settings, proceed with the export process. This might involve tapping a “Save” or “Export” button, depending on the app or service you are using.
As the document is converted into a PDF format, the Files app will initiate the conversion process. This may take a few seconds or longer, depending on the size and complexity of the document.
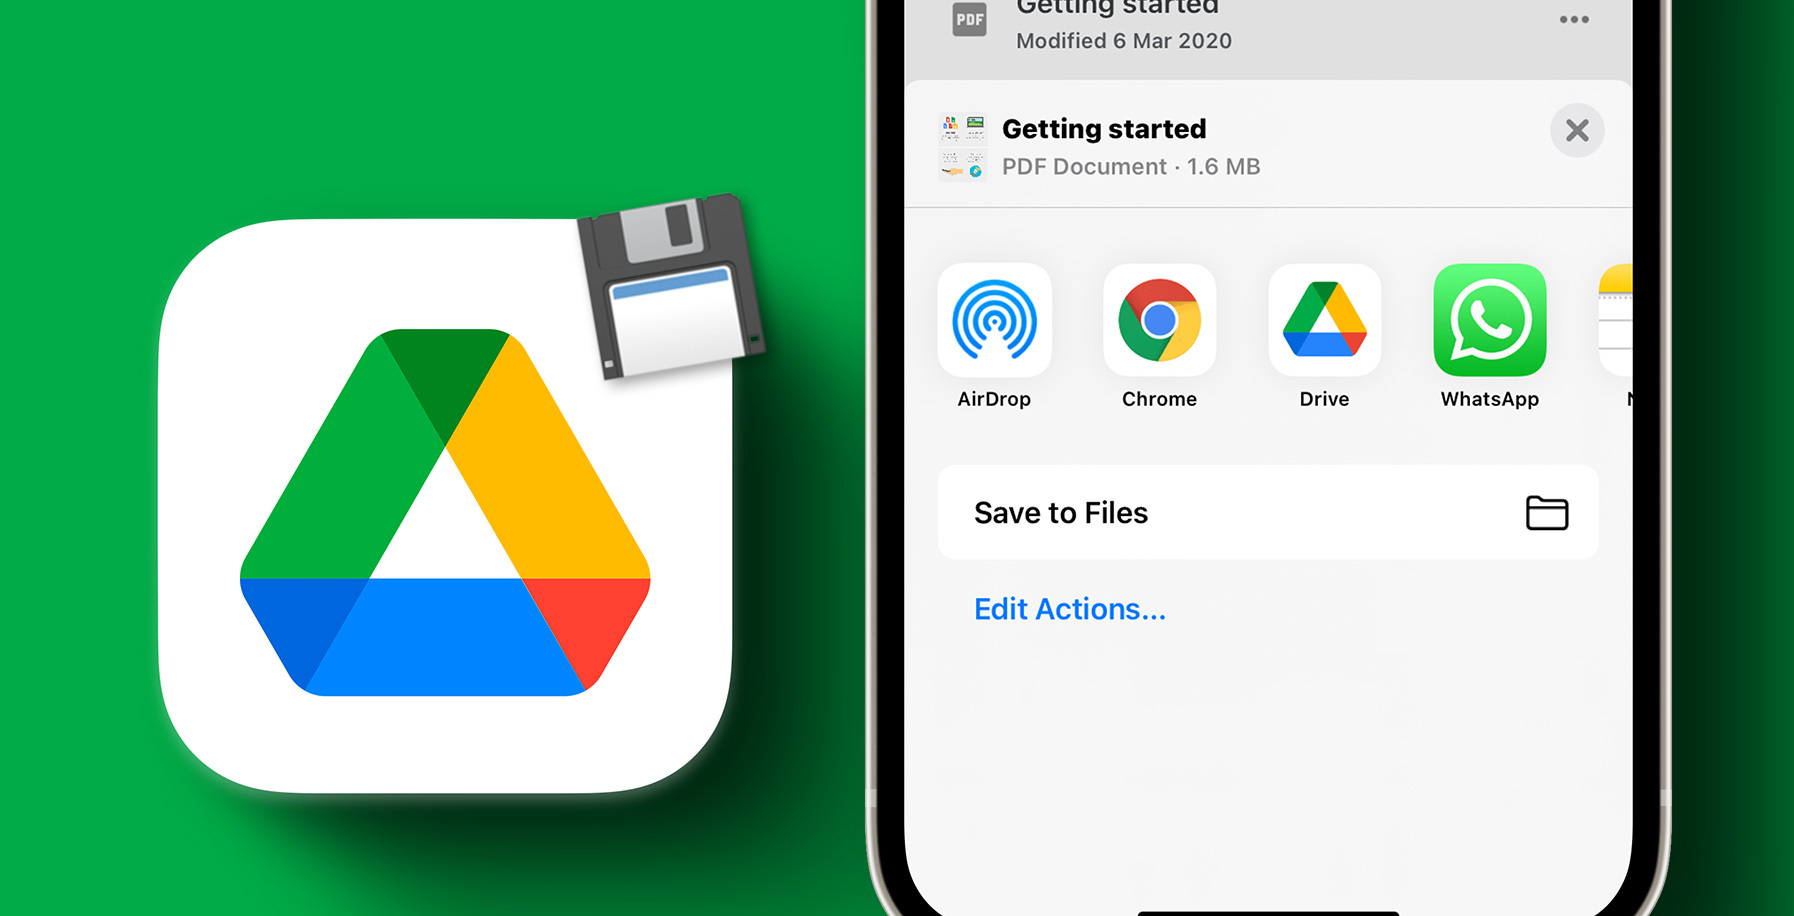
Step 6: Save the PDF to Files
Once the document has been successfully converted into a PDF, the next step is to save the PDF file to a specific location in the Files app on your iPhone. Follow these steps to save the PDF:
- After the conversion process is complete, you will be prompted to choose a location in the Files app where you want to save the PDF. The available options include iCloud Drive, On My iPhone, and any connected cloud storage services.
- Select the desired location by tapping on it. If you want to create a new folder specifically for this PDF, tap on the “New Folder” option, give it a name, and tap “Done.”
- If you have chosen an existing folder, locate it in the Files app and tap on it to open it. This is where the PDF file will be saved.
- Finally, tap on the “Save” or “Done” button to save the PDF file to the selected location. The Files app will complete the saving process, and you will see the PDF file listed in the chosen folder.
Congratulations! The document has now been successfully converted into a PDF and saved to the Files app on your iPhone. You can now access and manage the PDF file just like any other file in the Files app.
Remember that you can easily share the PDF file from the Files app by using the share icon, just like in Step 4. This allows you to send the PDF via email, message, or any other sharing option available on your device.
Conclusion
Converting documents into PDF format on your iPhone is a simple and efficient process that can be done using the built-in Files app. By following the steps outlined in this guide, you can easily download a document as a PDF and share it with others, ensuring compatibility and preserving the original formatting.
The Files app provides a convenient way to manage your files and access them from various locations, including iCloud Drive and connected cloud storage services. With the ability to preview documents before conversion, you can ensure that everything appears as expected and avoid any potential issues.
Whether you need to convert Word documents, Excel spreadsheets, PowerPoint presentations, or any other compatible file formats into PDF, the Files app makes it quick and hassle-free. With just a few taps, you can export the document as a PDF and save it to a specific folder of your choice within the Files app.
Once the document is saved as a PDF, you can easily share it via email, messages, or any other sharing options available on your device. The PDF file can also be stored securely or accessed from other devices, ensuring easy and convenient access to your important documents.
Now that you have learned how to download a document as a PDF on your iPhone, you can make the most of the Files app’s capabilities and efficiently manage your files in a PDF format. Whether it’s for work, school, or personal use, converting documents into PDF format provides compatibility and ease of use in sharing and accessing files.
So, start converting your documents into PDFs on your iPhone and enjoy the convenience and flexibility that this format offers!